Table of Contents
Advertisement
Quick Links
Advertisement
Table of Contents

Subscribe to Our Youtube Channel
Related Manuals for Kummert PushBuddy

Summary of Contents for Kummert PushBuddy
- Page 1 INSTRUCTION MANUAL PushBuddy ®...
- Page 2 English Edition / Version: 1/2019 Creation date: 2018 © Kummert GmbH Albert-Einstein-Str. 8 D - 97447 Gerolzhofen This manual and all information, photos and drawings contained herein are subject to intellectual property rights by Kummert GmbH. Their use is permitted while utilizing the devices. Any use beyond that is prohibited without the manufacturer‘s written...
-
Page 3: Table Of Contents
Installing an extension .......................... 39 Removing an extension ........................40 Connecting PushBuddy with a base unit ..................40 ® Setting the pipe diameter ........................41 Inserting the rod into the PushBuddy .................... 42 ® Removing the rod from the PushBuddy ..................43 ®... -
Page 4: Introduction
INTRODUCTION About the manual The manual ensures the safe operation of the devices and must be kept in the devices‘ close proximity, immediately accessible for any personnel. All personnel are to carefully read and understand this manual before taking up work. As a precondition for safe operation, all safety instructions and operational procedures given in this manual must be observed. - Page 5 Never reach into the area where the components are moving when adjusting the components. NOTE Risk of damage to property! When clamping the PushBuddy®, there will be strong forces applied. • Before use, check that the pipe can withstand these forces.
-
Page 6: Preparation
In addition, make sure that the PushBuddy and its accessories are protected against ® external forces. A carrier can be used to transport the PushBuddy and its accessories to the place of opera- ® tion. See chapter „Transport to place of operation“. -
Page 7: Product Description
DC linear actuator Drive motor 2 EC motors Data transfer Wifi Max. Speed 50 cm/s Light Software compatibility Record, can3D ® Protection class handle (without battery) IP 23 Protection class extension IP 23 Protection class PushBuddy (without handle IP 68 and battery) -
Page 8: Components
Components 1 PushBuddy ® 2 Battery 3 Extension 1,0 m 4 Extension 0,5 m 5 Carrier... -
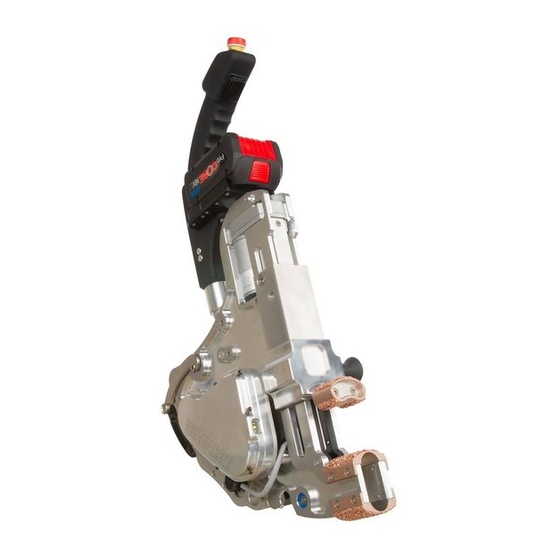
Page 9: Pushbuddy
PushBuddy ® Emergency stop switch Rocker switch Battery Clamping mechanism Rod output Connector Rotary handle Pivot Clamping hook Lever Drive wheel m Transport mounting slots... -
Page 10: Carrier
Extension Lock pin Knob Lock pin slot Anti-twist protection Carrier Base unit recess Carrying handle PushBuddy slot ® Lock pin Axis Standfoot Extension recess Camera tray... -
Page 11: Work Praparation
® of the carrier. Keep holding the handle with one hand. Pull out the lock pin with the other hand and hold it. Then, position the upper part of the PushBuddy into ® the PushBuddy slots of the carrier. ®... -
Page 12: Inserting And Removing The Battery
When inserting the extension, turn it until it engages into the opening and thus has a secure hold. To remove the PushBuddy carrier and the accessories from the base device, grasp with one ® hand the PushBuddy handle and with the other –... -
Page 13: Setting The Handle
To do this, press and hold the button. Grasp the battery and pull it outwards. Setting the handle To facilitate the installation of the PushBuddy , the angle of the handle ® can be changed. Hold the handle with one hand and with the other hand release the rotary handle. -
Page 14: Installing An Extension
Insert the extension. Make sure that the recess of the extension recess fi ts exactly into the indentation of the Pushbuddy. The pin must snap into the extension. Add additional extension if necessary. Attach the handle to the extension. -
Page 15: Removing An Extension
Removing an extension Remove the handle from the PushBuddy . To do this, press the button from bottom to top ® and pull the handle upwards. Remove the extensions one after the other. Press the button from bottom to top and pull the extension upwards. -
Page 16: Setting The Pipe Diameter
Setting the pipe diameter In order for the clamping device to function optimally, it must be adapted to the inspecting pipe diameter. To clamp the PushBuddy to a pipe wall, select the smallest possible setting, ® i.e. 100-150. If the PushBuddy is to be clamped to the inner side of the pipe, adjust the ®... -
Page 17: Inserting The Rod Into The Pushbuddy
Inserting the rod into the PushBuddy ® Push the lever upwards. Make sure that the clamping hooks are no longer engaged with the pivots and unfold the movable part of the PushBuddy ® Unwind some rod from the reel (see reel... -
Page 18: Removing The Rod From The Pushbuddy
PushBuddy®. Take the back part of the rod, push it a little bit forward and then to the side, to take it out of the roll. Pull the rod out of the PushBuddy® and wind it back into the reel (see reel operating instructions). -
Page 19: Clamping Pushbuddy ® At The Beginning Of A Pipe
Make sure that the PushBuddy is connected to the base unit and that the emergency stop ® switch is activated. If you need light to insert the PushBuddy , press the rocker switch briefl y. ® The LEDs will stay on for ten seconds. -
Page 20: Adjusting The Inspection Speed
Before use, check that the pipe can withstand these forces. Adjusting the inspection speed The PushBuddy® pushes or pulls the rod with a maximum of 50cm/s. The speed for pushing, pulling back and inspection can be adjusted separately in can3D. -
Page 21: Working With Pushbuddy
When retracting, the rod must be ma- nually wound into the reel. END OF WORK Make sure that the rod has been completely retracted. Release the PushBuddy from the ® pipe by pressing the rocker switch. Grasp the PushBuddy by the handle and take it out ®... - Page 22 Clean the waterproof part under Splash water protected running water. Clean the splash water protected parts and the accessories with a clean wet tissue. Waterproof If necessary, the drive wheels can be removed. Insert the holding tool into the respective wheel and hold it tight. Open the screw connection with the torque wrench.
-
Page 23: Troubleshooting
TROUBLESHOOTING If errors occur, you can use the following list to narrow down possible causes and, in most cases, solve the problem yourself. MALFUNCTION SOLUTION(S) PushBuddy does not connect to the • Check if the emergency stop switch is ®... -
Page 24: Maintenance
MAINTENANCE For faultless and safe operation, it is necessary to carry out visual inspections and to keep the devices clean. You can use the maintenance plan to look at the tasks that have to be performed at regular intervals. Check if all seals are present and intact Check if all screws are present and tight Make sure that all connectors are clean and dry Check drive wheels for abrasion... -
Page 25: Disposal
DISPOSAL NOTE Danger to environment! Incorrect disposal may cause dangers to the environment. • Electrical waste, electronic components, lubricants and other substances may only be disposed of by certifi ed specialist companies. • When in doubt, ask for information on environmentally safe disposal at your local authorities or specifi... -
Page 26: Notes
NOTES... - Page 27 Albert-Einstein-Str. 8 D - 97447 Gerolzhofen Tel. +49 (0) 9382 9727 - 0 info@kummert.de www.kummert.de Distributor...
Need help?
Do you have a question about the PushBuddy and is the answer not in the manual?
Questions and answers