Table of Contents
Advertisement
Quick Links
Advertisement
Table of Contents

Subscribe to Our Youtube Channel
Related Manuals for Origin Instruments HeadMouse Nano

Summary of Contents for Origin Instruments HeadMouse Nano
- Page 1 HeadMouse Nano installation guide...
- Page 2 HeadMouse Nano ©2016 Copyright by Origin Instruments Corporation. All rights reserved. HeadMouse is a registered trademark of Origin Instruments Corporation. HeadMouse Nano for Grid Pad (Version 1.0) English (UK) Copyright 2018 Smartbox Assistive Technology thinksmartbox.com...
-
Page 3: Table Of Contents
HeadMouse Nano installation guide The HeadMouse Nano mount enables you to access your Grid Pad communication aid with your HeadMouse Nano pointer Contents What is included Getting started The HeadMouse Nano Assembling the Nano enclosure. Mounting the HeadMouse Nano Using your HeadMouse Nano... -
Page 4: What Is Included
What is included Your HeadMouse Nano mount may come by itself, or as part of a bundle with with the HeadMouse Nano camera. The HeadMouse Nano mount is provided with: HeadMouse Nano camera (bundle only) 200 x target dots (bundle only) HeadMouse Nano enclosure Right angle USB 2.0 cable... -
Page 5: Getting Started
Getting started The HeadMouse Nano mount is designed to fit your Grid Pad communication aid. This guide covers Assembling the HeadMouse Nano mount Attaching the mount to your Grid Pad Setting up your HeadMouse Nano Using the HeadMouse Nano with Grid 3 The HeadMouse Nano mount bundle comes with the mounth pre- assembled. -
Page 6: The Headmouse Nano
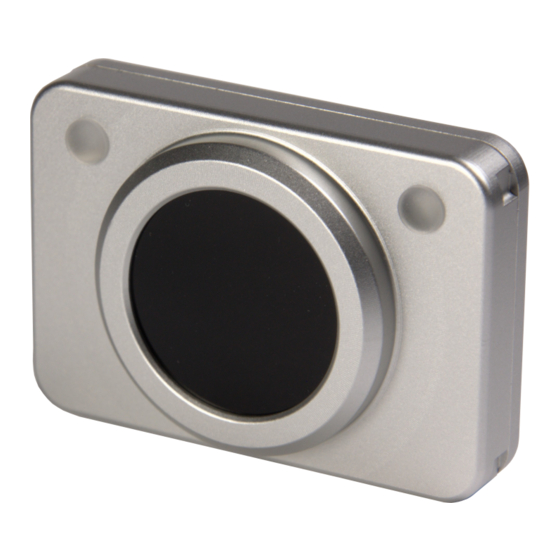
The HeadMouse Nano HeadMouse Nano camera Red and green LED USB 2.0 Micro DIP Switches Switch adapter port Optical window HeadMouse Nano mount... - Page 7 HeadMouse Nano mounted to Grid Pad...
-
Page 8: Assembling The Nano Enclosure
Assembling the Nano enclosure If you already own a HeadMouse Nano, you will need to assemble the enclosure with the camera inside before mounting to your Grid Pad. Remove the four screws using the supplied M3 screwdriver and remove the back of the mount. - Page 9 Place the camera into the mount, ensuring the LEDs are aligned with the holes, and reassemble the enclosure.
-
Page 10: Mounting The Headmouse Nano
Remove the top 2 screws on your Grid Pad mounting plate with the supplied M4 screwdriver. Readapt Daessy Your HeadMouse Nano is supplied with 2 new screws for both Readapt and Daessy mounting plates. Select the appropriate screws for your mounting plate. - Page 11 If you are planning to use the HeadMouse Nano switch ports (see section 9) plug in the 3.5mm adapter. Switch port adapter Micro USB 2.0 Plug the USB 2.0 cable into the HeadMouse Nano.
- Page 12 Line the HeadMouse Nano enclosure up with your mounting plate on the Grid Pad and use the screws provided to attach the enclosure to your Grid Pad. Run the USB 2.0 cable under the leg of the enclosure and plug it into the USB port on the left side of your Grid Pad.
- Page 13 (Optional) Use the cable clips to fix the USB cable to the back of your Grid Pad, to prevent it getting caught when moving the device. We have provided 2 cable clips with sticky adhesive backs. Your Grid Pad is now ready to be used with the HeadMouse Nano.
-
Page 14: Using Your Headmouse Nano
Using your HeadMouse Nano The HeadMouse Nano works by tracking a reflective dot that you place on the user’s head (either directly or on a pair of glasses or a cap). The movement of the dot corresponds to the movement of the pointer on your Grid Pad. - Page 15 Tracking status Once positioned in a comfortable location, you can use the LED on the front of the HeadMouse Nano to check that the camera is tracking. When the LED is green, the camera is tracking. Camera is tracking The LED will be red when the camera is still looking for a target dot.
- Page 16 Pointer settings in Grid 3 You can adjust the settings for your HeadMouse Nano pointer in Grid 3 by going to Settings - Access - Pointer. Here you can choose how your pointer activates in Grid 3: Click to Activate...
-
Page 17: Pointer Settings In Windows
Pointer settings in Windows To get the most out of your HeadMouse Nano you may want to adjust your Windows mouse settings and accessibility settings. These allow for finer control of the pointer, size options and more. The Windows settings for mouse and pointer control can be found by selecting the settings cog in the Start menu. - Page 18 Settings - Ease of Access There are many display and audio options to explore on the left side of the screen, including Cursor & Pointer size. Here you can adjust the size and colour of your cursor and pointer.
-
Page 19: Using Headmouse Nano Switches
Using HeadMouse Nano switches The HeadMouse Nano has an optional switch adapter that enables you to attach one or two switches to the camera. These switches act differently to the switch ports on your Grid Pad. When you connect a switch or switches to the HeadMouse Nano adapter, these are automatically assigned to replicate left and right clicks of the mouse. -
Page 20: Other Features
DIP switches on the HeadMouse Nano to the appropriate setting. You can also use the built in tilt sensor to let the HeadMouse Nano choose its orientation. These settings can assist when using the Grid Pad at an extreme angle. -
Page 21: Dip Switch Settings
Tilt Sensor toggle. The built in tilt sensor can be toggled on and off. Switch 4 When Switch 3 is off, Switch 4 will control which way up the HeadMouse Nano is tracking. ON is the standard rotation and OFF reverses the orientation. -
Page 22: Device Information
The HeadMouse Nano uses infrared light to track a tiny reflective dot that is placed on the user’s forehead or glasses. Switches can be connected directly to HeadMouse Nano through a 3.5 mm stereo jack located next to the USB connector. -
Page 23: Safety
Safety Durability Do not pick up the Grid Pad by the HeadMouse Nano. Water and liquids The HeadMouse Nano is not protected against water ingress. Do not get water or liquids on the device. Transporting your Grid Pad with the HeadMouse Nano The HeadMouse Nano can remain attached to your Grid Pad when travelling. -
Page 24: Warranty Information
In order to obtain service under the foregoing warranties, the Customer must notify Origin Instruments of the defect prior to the expiration of the warranty period. The foregoing warranties will not apply to any defect, failure, or damage caused by improper use, or improper or inadequate maintenance and care. - Page 25 Origin Instruments has advance notice of the possibility of such damage. Products no longer covered by warranty may be suitable for repair. Contact Origin Instruments for an estimated repair fee. Before returning a product for repair, please send an email to: support@orin.com or call 972.606.8740 to request a Return...
-
Page 26: Fcc And Ce Notice
EN 61000-4-2, Electrostatic Discharge Immunity EN 61000-4-3, Radiated Immunity Origin Instruments Corporation has tested the HeadMouse Nano and found that it complies with the limits for a Class B digital device, pursuant to Part 15 of the FCC Rules. These limits are designed to provide reasonable protection against harmful interference in a residential installation. - Page 27 Reorient the equipment cables. Consult the dealer or Origin Instruments for additional suggestions. Information in this document is subject to change without notice and does not represent a commitment on the part of Origin Instruments Corporation.
-
Page 28: Disclaimer
Disclaimer HeadMouse Nano is designed for use by people who have limited or no motor capability enabling USB mouse operations. However, it should not be used in an application where personal injury or property loss could occur if the HeadMouse Nano failed for some reason. -
Page 29: Support
Support Troubleshooting and Customer Support In most cases, restarting your HeadMouse Nano will cure any problems. To restart your HeadMouse Nano, disconnect and reconnect your Eye Gaze Unit USB Cable. If this does not cure the problem restart your device. To restart your device, Select Start and then select Power >... - Page 30 Notes...
- Page 32 thinksmartbox.com DOC-GP12HMN-001...
Need help?
Do you have a question about the HeadMouse Nano and is the answer not in the manual?
Questions and answers