Table of Contents
Advertisement
Quick Links
Advertisement
Table of Contents

Related Manuals for Humboldt HM-2750 Series


Summary of Contents for Humboldt HM-2750 Series
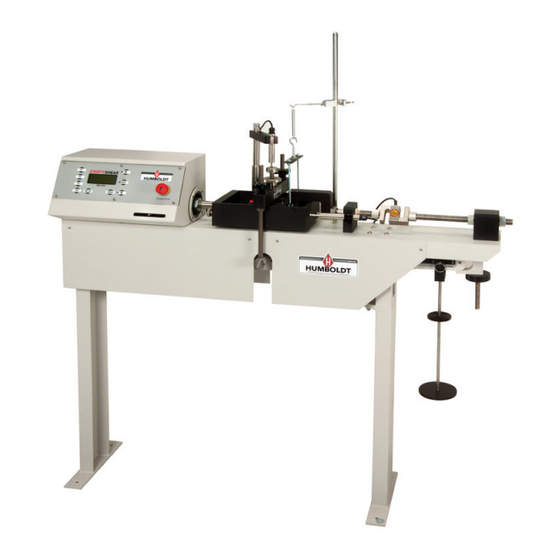
- Page 1 08.13 HM-2750 Series Humboldt ShearTester...
- Page 2 Introduction Applications: Determination of the shear strength of soils by the direct shear method: The direct shear test, specified in ASTM D3080, has been used extensively in soils laboratories since the late 1930s. The test requires that a either a square or circular prism of soil be laterally restrained and subjected to a pressure that is normally applied to that shear plane.
- Page 3 Some of the most important parameters can only be changed under pass code control to protect against operator misuse. • Serial port communications with a remote Humboldt download program.
- Page 4 (force indicators H -4454.XXX are not included and must be selected from the Humboldt Mfg. Co. range). There is a reaction bracket at the rear of the base, against which the load ring or measurement device is pushed.
- Page 5 the shearboxes. The upper half of the specimen is connected to a bracket at the opposite side of the geared jack. This bracket requires a measuring device to provide an opposing force to the upper shearbox half, affixed to the reaction bracket of the base. The standard measuring devices are the load ring and dial gauges.
- Page 6 HUMBOLDT MFG. CO. It is licensed for use by the original purchaser of this equipment for a period of 99 years. Transfer of the license can be obtained by a request, in writing, from HUMBOLDT MFG.
-
Page 7: Important Notice
IMPORTANT NOTICE The information contained herein is supplied without representation or warranty of any kind. Humboldt MFG. CO. therefore assumes no responsibility and shall have no liability, consequential or otherwise, of any kind arising from the use of the described equipment contained in this manual. -
Page 8: Installation And Setup
(approximately 5mm) by the adjusting screws in the proving ring. Electrical Connections Humboldt HM-2750 Series controllers are equipped with an internal, digital, switching power supply, which allows them to be used with most power configurations throughout the world. The units are supplied with an IEC electrical cord with a standard 110V USA plug. - Page 9 Third-party load cells/transducers, which are compatible, can also be used with the HM-2750 Series. Compatible units will have an excitation voltage of 0-10 volts and an output of 0-100 millivolts. Prior to use all third-party instrumentation mush be configured and calibrated for use.
-
Page 10: Computer Connection
(see Figure 5). Analogue Device Connection Humboldt MiniLoggers can be set up to output directly to a chart recorder to provide a hard copy printout of test results. To accomplish this, connect your chart recorder via cable attached to the HM-2750’s analogue port on the back panel of HM-2750 A or D controllers (see figure 7). - Page 11 HM-2750 ANALOG PORT ACCESS Cable configuration for analogue port access. Pins 1, 2, 3 & 4 (Reserved for Humboldt Chart reset sweep Recorder) connected D-SUB, 9-PIN MALE Figure 3. Rear panel of MiniLogger showing Analog Port, RS232 Port, RS-485 Input and Output and the four instrumentation channel inputs.
- Page 12 USB to RS-485 HM-000379 Figure 4. Diagram illustrating computer and multiple device connections.
-
Page 13: Operation
The Power Switch is located in the back panel on the rear of the HM-2750 controller above the electrical cord inlet. Also, located between the electrical cord inlet and the Power Switch is the Fuse Compartment. Humboldt HM-2750s use a 10 amp fuse. To begin operation, press the Power Switch. Fuse Compartment. - Page 14 Key Functions Figure 5. HM-2750 Series Front Control Panel Set Up Key Pushing the Set Up Key brings up the main set up screen from which you can run a test, review your last test, access the engineering set up menus and set the date, time, units, standards criteria.
- Page 15 Function Keys The four function keys are used to navigate through the MiniLoggers’ menu-driven display. The function keys correspond with the command lines on the menu display. F1 corresponds with the first command line; F2, the second, etc. Command lines that are active in any display will be proceeded by an (*).
- Page 16 Set-up Functions (all models) Set Date To set the Date press until you see this screen: * REVIEW LAST TEST * RUN TEST * ENGINEERING SETUP * SET DATE/TIME/UNITS/STND Press (SET DATE/TIME/UNITS/STND). You should see this screen: * SET DATE * SET TIME * UNITS = ENG/METRIC Press...
- Page 17 Press (SET DATE/TIME/UNITS/STND). You should see this screen: * SET DATE * SET TIME * UNITS = ENG/METRIC Press (SET TIME). You should see this screen: TIME = “HH/MM/SS” * INCREASE * DECREASE Press (INCREASE). or Press (DECREASE) to change the appropriate number.
- Page 18 Set Standards To set the Standards the HM-2750 will use, press until you see this screen: * REVIEW LAST TEST * RUN TEST * ENGINEERING SETUP * SET DATE/TIME/UNITS/STND Press (SET DATE/TIME/UNITS/STND). You should see this screen: * SET DATE * SET TIME * UNITS = ENG/METRIC * STANDARD = ASTM/BS...
- Page 19 Channel Configuration (Models A and D only) If you are adding new instrumentation, changing existing instrumentation or reconfiguring the HM-2750’s channel setup, you need to configure the channel for use with the devices you have. To configure a channel, press You should see this screen: * REVIEW LAST TEST * RUN TEST...
- Page 20 PRES3, PRES4, VOLU1, VOLU2, VOLU3 and VOLU4. NOTE: It is important to assign an appropriate name when naming channels because the HM-2750 Series controller will choose a unit of measure based on the name assigned. For example, if you are configuring a load cell, name the channel Load 1, 2, 3 or 4.
- Page 21 (INCREASE) or (DECREASE) to change the number to the desired value. Below is a configuration chart for Humboldt instrumentation. These are the numbers that correspond to each Humboldt device. Load Cell Part#...
- Page 22 Channel Test Configuration (Models A and D only) In order to perform a test, channels must be configured for the specific test you wish to run. To configure a channel for a test, press should see this screen: * REVIEW LAST TEST * RUN TEST * ENGINEERING SETUP * SET DATE/TIME/UNITS/STND...
- Page 23 To assign a test to the selected channel, press the corresponding function key to the test you wish to select. For the HM-2750 Controller you will want to choose DIRECT SHEAR TEST, so press ( DIRECT SHEAR TEST) to assign that test to the channel you have chosen. Pressing a key will toggle between “Y”...
- Page 24 You should see this screen: CALIBRATION SCREEN * SELECT CHANNEL “CH1`” * CALIBRATE CHANNEL * CLEAR CALIBRATION Press (SELECT CHANNEL) to scroll through and choose the channel you wish to calibrate. Once you have chosen the desired channel you wish to calibrate press (CLEAR CALIBRATION).
- Page 25 To return to any prior screen you can always press On the next page is an Instrumentation calibration chart listing max divisions, as well as typical gain factors needed in calibrating each instrument type. Humboldt Calibration Instrumentation Chart Load Cell Part# English...
- Page 26 Standard Direct Shear Test Press You should see this screen: * REVIEW LAST TEST * RUN TEST * ENGINEERING SETUP * SET DATE/TIME/UNITS/STND Press (RUN TEST) You should see this screen: * DIRECT SHEAR TEST Press (NEXT). You should see this screen: MOTOR SPEED ADJUST * SPEED = “X.XXXX”...
- Page 27 Once you have set the speed, press to start the test. You should see this screen: DIRECT SHEAR TEST # of readings LOAD 1 “#” DISP 1 “#” DISP 1 “#” The display will show the current reading of the load. At any time you can press (END TEST) to end the test.
- Page 28 Pressing (PRINT DATA) will print the data either to a printer or a computer. Once you have printed the data you can run another test by just pressing (RUN DIRECT SHEAR TEST). However you need to load another before you press If you don't have a printer or computer connected to the frame, you can press (SCROLL DATA) to scroll the data.
- Page 29 Software Humboldt’s HM-2750 Series Controllers come with Humboldt’s HMTS data collection software. This software can be used to collect data from tests by creating user-defined test parameters (start/stop). The resulting data can then be opened in Microsoft Excel to view the data collected, as well as create a simple table and graph.
-
Page 30: Mechanical Specifications
Specifications Mechanical Specifications Dimensions (l x w x h) 8.3 x 9.5 x 4.7 inch (210 x 240 x 120mm) Shipping Weight 6 lbs. (2.7Kg) Electrical /Electronics Specifications Voltage 110/220 VAC 50/60HZ Data storage 300 Readings/Channel Computer port RS232... -
Page 31: Hidden Functions
Support Phone support is available for general operating questions and trouble shooting problems between 8am and 5pm Eastern Time. Please call: 1.800.537.4183 1.919.832.6509 or fax: 1.919.833.5283 support@humboldtmfg.com For sales and sales-related information, such as available accessories, general sales questions, pricing, please call: 1.800.544.7220 1.708.456.6300 or fax: 1.708.456.0137 hmc@humboldtmfg.com... -
Page 32: Hanger Assembly
Hanger Assembly ADJUST THE HANGER ASSEMBLY AS NECESSARY TO APPLY A COUNTER FORCE FOR THE PURPOSE OF COUNTERACTING THE WEIGHT OF THE SHEAR BOX TOP HALF. ADJUST THE HANGER ASSEMBLY BY THE FOLLOWING: 1. Coarse adjustment is accomplished by raising or lowering the support hook assembly. - Page 33 Humboldt Mfg. Co. U.S.A. Toll Free: 1.800.544.7220 3801 North 25th Avenue Voice: 1.708.456.6300 Schiller Park, Illinois 60176 U.S.A. Fax: 1.708.456.0137 Email: hmc@humboldtmfg.com Testing Equipment for Construction Materials HUMBOLDT www.humboldtmfg.com...
Need help?
Do you have a question about the HM-2750 Series and is the answer not in the manual?
Questions and answers