
Related Manuals for Denkovi smartDEN IP-16R-MT


Summary of Contents for Denkovi smartDEN IP-16R-MT
- Page 1 IP-16R-MT User Manual 7 July 2020 smartDEN IP-16R-MT Web enabled 16 Relay Module with Modbus TCP User Manual Date: 7 July 2020 For firmware version: v1.21 / July 2020...
-
Page 2: Table Of Contents
IP-16R-MT User Manual 7 July 2020 Content Features ......................3 Application examples ..................4 Technical parameters ..................5 Connectors, ports and led indicators ..............6 Installation ......................7 Default Settings ....................14 Web access ...................... 16 HTTP/XML/JSON access ................. 32 Modbus TCP .................... -
Page 3: Features
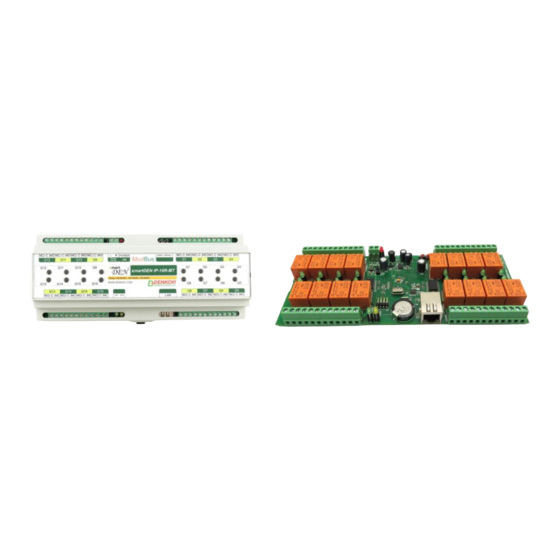
7 July 2020 1. Features smartDEN IP-16R-MT is a LAN relay module with 16 SPDT relays for remote control with integrated web server for set-up, Modbus-TCP protocol and http/xml/json support for embedding in other systems. The built-in real time clock allows organizing schedule stand-alone work without connection to computer. -
Page 4: Application Examples
IP-16R-MT User Manual 7 July 2020 2. Application examples Remote control of electrical appliances Industrial automation Home automation Watchdog monitoring of network equipment and auto-reboot... -
Page 5: Technical Parameters
IP-16R-MT User Manual 7 July 2020 3. Technical parameters Table 1. Technical parameters Parameter Value Box size, mm 210 x 85 x 58 PCB size, mm 203 x 82 Box weight, g PCB weight, g 12 or 24 (depends on the model) ±2... -
Page 6: Connectors, Ports And Led Indicators
IP-16R-MT User Manual 7 July 2020 4. Connectors, ports and led indicators Bellow is shown a picture with the device connectors, ports and led indicators. Figure 1. Device overview... -
Page 7: Installation
Box mounting Figure 2. Mounting the device to DIN rail smartDEN IP-16R-MT can be mounted to a standard (35mm by 7.55mm) DIN rail. Attach the module to the DIN rail by hooking the hook on the back of the enclosure to... - Page 8 Figure 3. smartDEN IP-16R-MT power supply Depending on the selected model during purchase the power supply source for smartDEN IP-16R-MT must be with voltage either 12VDC or 24VDC stabilized and filtered. After power on, the power led must be on and Led1 indicator must start blinking in 5 seconds which means the controller is running normally.
- Page 9 Relay connection Figure 5. Connecting a lamp to relay smartDEN IP-16R-MT has 16 SPDT relays with parameters specified in the technical parameters section. Every relay channel has normally open (NO) and normally closed (NC) contacts connected directly to the terminals.
- Page 10 Network connection smartDEN IP-16R-MT supports AUTO-MDIX so either "crossover" or "straight- through" network cable can be used. Figure 6. Connecting smartDEN IP-16R-MT to a computer directly. This is the recommend initial connection. Figure 7. Connecting smartDEN IP-16R-MT to a wireless router.
- Page 11 IP-16R-MT User Manual 7 July 2020 5.5. Communication setup smartDEN IP-16R-MT is shipped with the following default parameters: IP address: 192.168.1.100 Subnet mask: 255.255.255.0 Gateway: 192.168.1.1 Web password: admin Initially it is recommended to connect the module directly to the computer.
- Page 12 IP-16R-MT User Manual 7 July 2020 The next step is to enter into IPv4 properties. Figure 9. Enter in IPv4 properties section Set the IP address of your PC to be in the same network. Figure 10. Set the IP address...
- Page 13 IP-16R-MT User Manual 7 July 2020 Finally, in order to access smartDEN IP-16R-MT just type in your browser 192.168.1.100 Figure 11. Open the device via browser If the network settings are O‟K, the log-in page should appear: Figure 12. Login page smartDEN IP-16R-MT modules connected locally can be easily scanned and found via the tool Denkovi Finder as well.
-
Page 14: Default Settings
7 July 2020 6. Default Settings 6.1. Table with default settings The smartDEN IP-16R-MT module is shipped with default (factory) settings shown in Table 2. The default settings can be reloaded, if necessary (see point 6.2). Table 2. Default settings Settings group... - Page 15 IP-16R-MT User Manual 7 July 2020 6.2. Steps for loading default settings When necessary, the factory (default settings) may be applied so the module parameters will be returned back as those in point 6.1 from the current document. Figure 14. Loading the default settings 1.
-
Page 16: Web Access
7. Web access Figure 15. Web access To access the setup pages, run a web browser (Internet Explorer, Mozilla Firefox or similar), and enter the smartDEN IP-16R-MT IP address, for example: http://192.168.1.100 Figure 16. Open via browser Note: You will need to have JavaScript enabled in your browser. - Page 17 IP-16R-MT User Manual 7 July 2020 7.1. Login Figure 17. Login page Enter the password and click "Login" button. This will bring you to the smartDEN IP- 16R-MT main configuration page which contains details for the current firmware version and build date and provides buttons and links to obtain further details.
- Page 18 IP-16R-MT User Manual 7 July 2020 7.2. Menu The main menu consists of the following items, located in the left window frame: Figure 18. Navigation menu 7.3. General Settings Figure 19. General settings Device Name: The name of the module (max 15 symbols). Every module can have different name in your network so they can be distinguished;...
- Page 19 "login" onto the device are encrypted and "safe". Save button: Once you have changed the settings as required, click this button. 7.4. Network settings Figure 20. Network settings This menu lets you configure the network settings of smartDEN IP-16R-MT relay module: -19-...
- Page 20 Enabled, the Network page must be saved and smartDEN IP-16R- MT must be rebooted before obtaining an IP address; IP address: This is the IP address of the smartDEN IP-16R-MT. It needs to be manually assigned only if DHCP is disabled. With DHCP enabled, this field displays the currently assigned address;...
- Page 21 IP-16R-MT User Manual 7 July 2020 7.5. Date and Time Settings Figure 21. Date/Time settings This page lets you configure the following parameters related with the real time clock built-in the module: Date (dd/mm/yyyy): Enter the current date here in specified format;...
- Page 22 IP-16R-MT User Manual 7 July 2020 7.6. HTTP/XML/JSON Settings Figure 22. HTTP/XML/JSON Settings These settings let you configure the HTTP, XML and JSON access parameters of smartDEN IP-16R-MT: HTTP Port: Port that the Web server listens for HTTP requests (default port is 80).
- Page 23 IP-16R-MT User Manual 7 July 2020 Note: When Encrypt Password mode is enabled, the Multiple Access option is not taken into account and, at any given moment, only one user can be logged-in. Note: When Multiple Access mode is enabled, any XML/JSON request will always reset the current HTTP session.
- Page 24 IP-16R-MT User Manual 7 July 2020 7.7. Modbus-TCP Settings These settings let you configure the Modbus-TCP parameters of smartDEN IP- 16R-MT (Figure 23). Figure 23. Modbus-TCP Settings page Enable Modbus-TCP - this option enables or disables the Modbus-TCP communication;...
- Page 25 IP-16R-MT User Manual 7 July 2020 7.8. Relays Settings Figure 24. Relays names This page configures the following parameters for the relays: Description: Relay identification string (max 7 chars). Pulse, ms (x100): Determines if the relay works in pulse mode and if so what is the duration of the single pulse (in milliseconds x 100 - for example value of 10 means 1 second).
- Page 26 IP-16R-MT User Manual 7 July 2020 o If the relay is set to high level (ON) via browser manually, Modbus-TCP or HTTP/XML/JSON it will be in high level (ON) for the determined time by this parameter and then set back to low level;...
- Page 27 7.9. Auto-reboot Settings smartDEN IP-16R-MT can be used for Auto-rebooting of IP devices (servers, PC hosts, switches, cameras etc.). In this mode smartDEN IP-16R-MT checks the working state of the device at regular intervals by sending ping requests. After preset number of successive ping failures smartDEN IP-16R-MT performs a predefined reset/reboot sequence of the monitored device connected to one of the 16 relays.
- Page 28 ON via web browser, XML, JSON, Modbus-TCP it will perform the reboot sequence. Power-up Pulse, sec – if checked, the smartDEN IP-16R-MT will generate a pulse at power-up. This, for example can be used to switch on the device. This parameter can be set from 1 to 3600 seconds;...
- Page 29 7.10. Monitoring and control Figure 26. Monitoring and control This page provides monitoring and control of the smartDEN IP-16R-MT relays. From here you can control/monitor the relays. There is also provided information about how many reboots are performed and when was the last reboot and button for immediate reboot.
- Page 30 IP-16R-MT User Manual 7 July 2020 7.11. Week Schedule Figure 27. Week schedule This page configures the Week Schedule table for switching Relays ON or OFF at specific times. You can add up to 30 items to the list. The top table of this page...
- Page 31 IP-16R-MT User Manual 7 July 2020 This feature allows you to turn on/off specific relays upon certain date and time or weekday without the need of LAN connection between the computer and the module. To delete an item, select it in Existing Items table and click on "Delete Selected"...
-
Page 32: Http/Xml/Json Access
MT without using a Web-browser. The custom application acts as a HTTP client, sending HTTP GET requests to the smartDEN IP-16R-MT. To receive the current state of the smartDEN IP-16R-MT, the application requests the page current_state.xml (current_state.json) , for example: http://192.168.1.100/current_state.xml... - Page 33 IP-16R-MT User Manual 7 July 2020 Step 2: Request (password is sent as a parameter) http://192.168.1.100/current_state.xml?pw=28237099263eabfd88626124a822c Reply (password is O’K, login accepted): http://192.168.1.100/current_state.json?pw=28237099263eabfd88626124a822 c64c -33-...
- Page 34 If there is no data traffic between the custom application and the smartDEN IP-16R-MT for time, specified by Session Timeout parameter, the session "times out" and a new login is required.
- Page 35 IP-16R-MT User Manual 7 July 2020 8.3. Getting the current state After a login the custom application can obtain the smartDEN IP-16R-MT current state by a request to the page current_state.xml / current_state.json : http://192.168.1.100/current_state.xml The reply contains page in XML format: http://192.168.1.100/current_state.json...
- Page 36 IP-16R-MT User Manual 7 July 2020 -36-...
- Page 37 8.5. Parameters After a login the custom application can also control the smartDEN IP-16R-MT by sending parameters (name/value pairs) with the HTTP GET request. Valid parameters and values are shown in the bellow table. Table 3. Valid HTTP parameters...
-
Page 38: Modbus Tcp
(when a numerical quantity larger than a single byte is transmitted, the most significant byte is sent first). smartDEN IP-16R-MT acts as a Modbus-TCP slave/server device, while a typical master device is a host computer running appropriate application software (for example a Raspberry Pi board running Home Assistant automation platform). - Page 39 06 (0x06) 16-bit Configuration parameters, Generate pulses, Write Multiple Registers 16 (0x10) 16-bit Configuration parameters smartDEN IP-16R-MT uses the following registers to represent the resources accessed by a Modbus command: Table 5. Modbus registers Start Value Resources Address Address Range Generate Pulses on Relays 1..16 (write only)
- Page 40 IP-16R-MT User Manual 7 July 2020 9.1.1. Read Coil Status This command is used to read the ON/OFF status of the output relays (coils). Request The Read Coil Status request specifies the starting address and quantity of relays to be read: ...
- Page 41 IP-16R-MT User Manual 7 July 2020 Table 8. Read Coils response example 1 Field Length Data Transaction Identifier 2 Bytes 0x0001 Protocol Identifier 2 Bytes 0x0000 Length 2 Bytes 0x0004 Unit Identifier 1 Byte 0x00 Function Code 1 Byte...
- Page 42 IP-16R-MT User Manual 7 July 2020 Error response example: Table 10. Read Coils error response Field Length Data Transaction Identifier 2 Bytes 0x0001 Protocol Identifier 2 Bytes 0x0000 Length 2 Bytes 0x0003 Unit Identifier 1 Byte 0x00 Function Code...
- Page 43 IP-16R-MT User Manual 7 July 2020 Output Address 2 Bytes 0x0001 Output Value 2 Bytes 0xFF00 Error The possible error responses for function code 0x05 are: Function Code (1 byte): 0x85 (0x80 + 0x05) Exception Codes (1 byte): 0x01 –...
- Page 44 IP-16R-MT User Manual 7 July 2020 Function Code 1 Byte 0x0F Start Address 2 Bytes 0x0000 Quantity of Outputs 2 Bytes 0x0003 Byte Count 1 Byte 0x01 Outputs Value 1 Byte 0x05 Request example 2: Set relay 1 to OFF and relays 2..16 to ON: Table 15.
- Page 45 IP-16R-MT User Manual 7 July 2020 Function Code 1 Byte 0x0F Start Address 2 Bytes 0x0000 Quantity of Outputs 2 Bytes 0x0010 Error The possible error responses for function code 0x0F are: Function Code (1 byte): 0x8F (0x80 + 0x0F) ...
- Page 46 IP-16R-MT User Manual 7 July 2020 Response example: Read Week Schedule Start Date fields: Table 20. Read Holding Registers response Field Length Data Transaction Identifier 2 Bytes 0x0004 Protocol Identifier 2 Bytes 0x0000 Length 2 Bytes 0x0009 Unit Identifier...
- Page 47 IP-16R-MT User Manual 7 July 2020 Function Code 1 Byte 0x06 Register Address 2 Bytes 0x0009 Register Value 2 Bytes 0x001E Note: Pulse duration is given in milliseconds x 100. Response The normal response returns the function code, register address, and register value (echo of the query).
- Page 48 IP-16R-MT User Manual 7 July 2020 The Write Multiple Registers request specifies the starting register address, the number of registers, byte count, and the values to be written in ascending order. Values are packed as two bytes per register.
- Page 49 IP-16R-MT User Manual 7 July 2020 Field Length Data Transaction Identifier 2 Bytes 0x0003 Protocol Identifier 2 Bytes 0x0000 Length 2 Bytes 0x0003 Unit Identifier 1 Byte 0x00 Function Code 1 Byte 0x90 Exception Codes 1 Byte 0x01 or 0x02 or 0x03...
-
Page 50: Security Considerations
IP-16R-MT User Manual 7 July 2020 Security considerations smartDEN IP-16R-MT runs a special firmware and do not have a general- purpose operating system. There are no extraneous IP services found on general- purpose operating systems (e.g. fingerd, tcp_wrapper, etc.) that can possibly be exploited by an unauthorized agent. -
Page 51: Pcb Mechanical Drawing
IP-16R-MT User Manual 7 July 2020 PCB mechanical drawing Figure 30. PCB drawings -51-... -
Page 52: Din Rail Box Dimensions
IP-16R-MT User Manual 7 July 2020 DIN Rail BOX dimensions Figure 31. Box dimensions -52-...
Need help?
Do you have a question about the smartDEN IP-16R-MT and is the answer not in the manual?
Questions and answers