
Related Manuals for Camo EDGE PRO


Summary of Contents for Camo EDGE PRO
- Page 1 collated hidden deck fastening system OWNER’S MANUAL MANUAL DEL PROPIETARIO LE MANUEL DU PROPRIÉTAIRE ENGLISH | ESPAÑOL | FRANÇAIS camofasteners.com...
-
Page 2: Table Of Contents
PVC deckboards to the deck substructure. Improper use of the CAMO EDGE PRO SCHEMATIC Edge Pro could result in serious injury or even death. Most accidents occur because CAMO EDGE PRO PARTS LIST of the failure to observe basic safety rules... -
Page 3: Important Information
• Never use the Tool as a hammer or wedging device or drop to the floor from any height. • Use only CAMO Collated Hidden Fasteners with the CAMO Edge Pro. Never use any fasteners that are not specified for use with this Attachment. The Edge Pro holds one (1) strip of 50 CAMO Collated Hidden Fasteners. -
Page 4: Tool Specifications
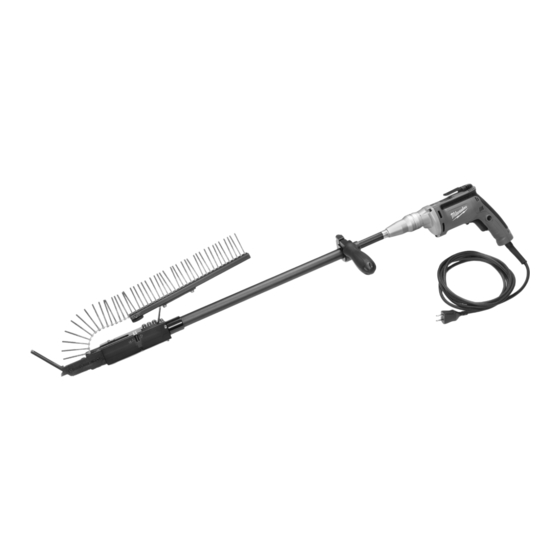
Driver Drill (included). Specifications for the drill are found ® ™ in the Operator’s Manual found in the Driver Drill packaging. CAMO Edge Pro specifications: DRIVER DRILL EXTENSION POLE WITH COUPLER TOOL HANDLE WITH HAND GRIP SCREW FEED ASSEMBLY... -
Page 5: Assembling The Camo Edge Pro
Driver Drill. Tighten the wing nut to secure. The CAMO Edge Pro is now fully assembled. To fit the Edge Pro in the tool bag provided, simply loosen the Tool Handle and rotate to fit. -
Page 6: Loading The Fasteners
LOADING THE FASTENERS FOR USE WITH CAMO COLLATED HIDDEN FASTENERS ONLY. ® Take one 50ct strip of CAMO Collated 4. Plug the Driver Drill into a 120v outlet. Hidden Fasteners and insert strip-side down into the Feeder Rail. 5. Ensure that the Drill is set to Forward. -
Page 7: Installation Instructions
To begin deck installation, lay the first board that abuts the structure into position. Starting with the outside edge of the board, fasten the deck board at each joist using the CAMO Edge Pro as follows: For the outer edge of the deckboard, align the Level Guide with the joist below the deckboard (we recommend a minimum of 1’’from board ends). - Page 8 Make sure that the Level Guide is flat with the surface of the deckboard and the Edge Guide is firmly against the radius of the edge of the deckboard. The Edge Pro should remain tight against the board to avoid tool movement or push back, as this can alter the angle and depth of drive.
-
Page 9: Camo Edge Pro Schematic
SCHEMATIC: PARTS LIST: ITEM NO. REFERENCE NO. DESCRIPTION 0345892 Nose Assembly Level Guide/Edge Guide Screw Guide Cover Nose Piece 0345899 Screw Feed Assembly AL Body Index Module 0345893 Feed Rail 0345898 Extension Pole Assembly Coupler Inner Tube Extension Tube Support Ring Bottom Coupler 0345897 Driver Bit Holder... -
Page 10: Maintenance And Storage
MAINTENANCE AND STORAGE • Keep Screw Feed Assembly clean and free of debris after each use. • Unplug the Tool and store in the CAMO Edge Pro Tool Bag (provided) in a dry environment when not in use. • Never store the tool in cold weather environments for any duration of time as any frost or ice formation in the tool will cause tool failure. -
Page 11: Troubleshooting
• Ensure the Depth of Drive is set correctly (see factory setting in the Loading the Tool section). SERVICE/REPAIR Should your CAMO Edge Pro require service or repair, contact National Nail Customer Service at 800-968-6245. Should your Driver Drill require service or repair, contact the manufacturer at the number provided... -
Page 12: Manual Del Propietario
800-968-6245 to place an order for replacement parts or schedule repair services. VISIT WWW.CAMOFASTENERS.COM TO LEARN MORE ABOUT CAMO FASTENERS PRODUCTS AND SERVICES. 2964 Clydon Ave SW | Grand Rapids MI 49519 | USA P : 800.968.6245 | F : 616.531.5970 | www.nationalnail.com...
Need help?
Do you have a question about the EDGE PRO and is the answer not in the manual?
Questions and answers