
Related Manuals for FujiFilm SP-900


Summary of Contents for FujiFilm SP-900
- Page 1 English Ultrasonic Processor OPERATION MANUAL SP-900 Thank you for purchasing our product. Read this manual carefully before use to avoid unexpected accidents and to take full advantage of the product's capabilities. 897N120838C...
-
Page 2: Important Safety Information
Important Safety Information 1. Intended use This product is intended to be used in combination with a FUJIFILM endoscopic system, a monitor, and other peripheral devices for the visualization of the shapes, properties or dynamics inside a body using ultrasonic waves to provide image information for diagnosis in medical facilities under the management of physicians. - Page 3 “3.1.4 Using Equipment in Combination”. 7. Installation Only FUJIFILM authorized service personnel is allowed to install this system. No one except such personnel should install this system. 8. High Voltage This product contains high-voltage portions.
- Page 4 Important Safety Information 11. If Any Abnormality Occurs During Clinical Procedure If any abnormality occurs with this product during the clinical procedure, refer to “Chapter 10 Troubleshooting”. Especially, if this product is continuously used with an abnormal ultrasonic image displayed, the distal end of the endoscopic ultrasonic probe may generate abnormal heat, causing burn or injury.
-
Page 5: Table Of Contents
2.1 ALARA (As Low As Reasonably Achievable) ......16 2.2 Effects of Ultrasonic Waves on Living Body ......... 17 2.3 Controlling Ultrasonic Output Power ..........18 Chapter 3 SP-900 System Configuration ............... 19 3.1 Components of SP-900 System ........... 19 3.1.1 Components of SP-900 System ........ - Page 6 Contents 6.4 Registration of Patient Data ............57 6.4.1 Details of the “Patient Information Entry” Screen ... 58 6.5 Preparation for Ultrasound Examination ........59 6.6 Acquiring Ultrasonic Image ............61 6.7 Gain Adjustment ................63 6.8 Dynamic Range ................63 6.9 Ending Exam ................
- Page 7 Contents Chapter 9 Storage and Maintenance ..............95 9.1 Maintenance ................. 95 9.2 Maintenance of SP-900, RS-900 and CP-900 ......96 9.3 Method of Storage ................ 97 9.4 Before Bringing This Product for Service ........98 9.5 Replacing Fuse ................99 9.6 Monthly Inspection ..............
-
Page 8: Preface
Preface Preface This manual describes how to use the ultrasonic processor SP-900 as well as how to record images using peripherals. The SP-900 system is composed of the main unit, control pad, endoscopic ultrasonic probe and scanner, and is used in combination with an ultrasonic endoscope, medical endoscopic system, monitor, color printer, etc. - Page 9 Terms used in this manual SP-900 System In narrow definition, includes the ultrasonic processor SP-900, control pad CP-900, scanner RS-900 and endoscopic ultrasonic probe in the P series or PB2020-M. In the broad definition, includes a set of equipment (standard system and expanded system) including various connected peripheral devices in addition to the narrow definition.
- Page 10 Preface B-mode The B-mode screen is displayed. “7.1 B-mode” Measurement menu It indicates the menus displayed when [MEASURE] key is pressed during the freeze mode. “7.9 Measuring Distance” “7.10 Measuring Circumference and Area” Image It indicates an image actually displayed on the screen. Frame It indicates an image obtained when scanned once.
- Page 11 Preface Symbols and marks The meanings of the symbols and marks used in this product are as follows. Rating plate Symbols Symbol Description Symbol Description [Note] Serial number WEEE marking Date of manufacture Humidity limitation Atmospheric pressure Manufacturer limitation Authorised representative in Refer to instructions for use (Blue) the European Community...
-
Page 12: Chapter 1 Safety
Combination”. (5) Maintenance Have this product checked by FUJIFILM authorized service personnel once every six months. This product will wear out and deteriorate after repeated use for a long period. Also have it checked if any defect is found in this product. - Page 13 Chapter 1 Safety (6) Temperature at distal end When ultrasound waves are emitted over an extended time, the temperature of the distal end of ultrasonic endoscope may reach 42.0ºC at maximum. Stop emitting the ultrasound waves and (freeze the ultrasonic image) when the endoscopic ultrasonic probe is not used.
- Page 14 - When the chassis of this product is cracked, split up or broken. - When the performance of the power cord, guide cord and other cords is degraded. 9.5 Replacing Fuse Do not replace the fuse. If the fuse needs to be replaced, contact your local FUJIFILM dealer. 9.8 Moving Cart Move the cart by two people.
- Page 15 Chapter 1 Safety Remove the endoscopic ultrasonic probe before moving the cart. Not doing so may cause damage to the endoscopic ultrasonic probe. Chapter 11 System Installation 11.1.1 Environment Do not use this product in flammable gas atmosphere. Doing so may cause an explosion.
-
Page 16: Chapter 2 Ultrasonic Output Power
Chapter 2 Ultrasonic Output Power Chapter 2 Ultrasonic Output Power Prior to using SP-900, be sure to read the information on the ultrasonic output power mentioned below. ALARA (As Low As Reasonably Achievable) As far as you observe the instructions to use SP-900 correctly, you will not be... -
Page 17: Effects Of Ultrasonic Waves On Living Body
Chapter 2 Ultrasonic Output Power Effects of Ultrasonic Waves on Living Body The following 2 kinds of natures are currently reported on the effects of ultrasonic waves on the living body. One is a thermal index (TI) on the living body by absorption of ultrasonic waves through the tissue, and the other is a mechanical index (MI) on the living body by cavitation (generation and destruction of bubbles). -
Page 18: Controlling Ultrasonic Output Power
Chapter 2 Ultrasonic Output Power Controlling Ultrasonic Output Power SP-900 ensures that TI does not exceed 1.0, and MI does not exceed 1.0, in all of the operation modes. Accordingly, the acoustic output is not described based on EN 60601- 2-37. -
Page 19: Chapter 3 Sp-900 System Configuration
Chapter 3 SP-900 System Configuration Chapter 3 SP-900 System Configuration Components of SP-900 System 3.1.1 Components of SP-900 System The SP-900 system consists of the following components. Figures in parentheses indicate the number of articles. Ultrasonic Processor Control Pad SP-900 (1) -
Page 20: Standard System Configuration (Example)
Examinations (diagnoses) of ultrasonic images on the monitor can be conducted. Endoscopic Ultrasonic Probe P Series PB2020-M Scanner RS-900 Control Pad Ultrasonic Processor [Note] CP-900 SP-900 LCD Monitor CL-22 CL-24 RADIANCE24 CCL220/AR CCL244/AR Scanner Arm Cart [Note] Connect the control pad CP-900 to the ultrasonic processor SP-900 only. 897N120838C... -
Page 21: System Expansion (Example)
Chapter 3 SP-900 System Configuration 3.1.3 System Expansion (Example) The SP-900 system can be expanded by connecting additional devices to its standard composition. When the system is expanded, new functions as exemplified below can be used. * Recording to a still image recorder... -
Page 22: Using Equipment In Combination
Chapter 3 SP-900 System Configuration 3.1.4 Using Equipment in Combination The equipment used in combination with the SP-900 ultrasonic processor is shown in the table blow. Table 3.1 Equipment configuring the system Type Model name Ultrasonic Processor SP-900 Control Pad... -
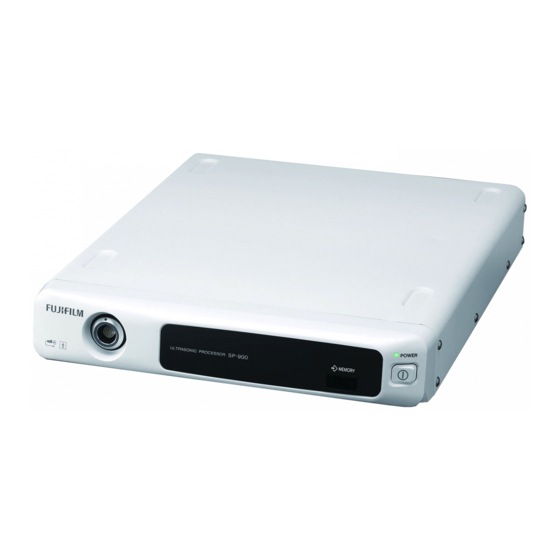
Page 23: Names And Functions Of Parts
Turns the power ON and OFF. Power switch The lamp lights up when the power is ON. Indication mark on front panel of SP-900 Symbol Meaning Type BF applied part Connects the scanner. 897N120838C... - Page 24 Chapter 3 SP-900 System Configuration <Rear view> [Note] Connect the printer, card reader and control pad to the connectors specified in the table below. Name Function Power supply connector Connects the supplied power cord. Outputs the video signal after separating it into Y-signal S video connector (brightness) and C-signal (color).
-
Page 25: Foot Switch Fs1 (Optional)
PinP, STORE 1 or STORE 2) assigned at the system setup. Operating this foot switch activates the function (Freeze, Black switch PinP, STORE 1 or STORE 2) assigned at the system setup. Connector Connects to the foot switch connector of SP-900. 897N120838C... -
Page 26: Names And Functions Of Keys On Control Pad Cp-900
Chapter 3 SP-900 System Configuration Names and Functions of Keys on Control Pad CP-900 PATIENT END EXAM PATIENT SEARCH SYSTEM ENTRY SPACE DATA OFF DELETE CLEAR ENTER Name Function Used for typing numbers, letters and symbols in ID or Alphanumeric keys comment input mode. - Page 27 Chapter 3 SP-900 System Configuration Name Function Rotates the image. Image rotation key (ROTATION) When this key is held pressed, the image rotates continuously. Adjusts the sensitivity of the entire ultrasound image. Gain key (GAIN) When this key is held pressed, the gain changes continuously.
-
Page 28: Screen Configuration
Chapter 3 SP-900 System Configuration Screen Configuration 3.4.1 Screen Configuration of SP-900 Area Area 22.48mm 46.05mm SCROLL Name Function Gain 64 steps from 1 to 64 Select 10 mm, 15 mm, 20 mm, 30 mm, 45 mm, or 60 Depth... -
Page 29: Scanner)
Chapter 3 SP-900 System Configuration RS-900 (Scanner) Name Function Connects an endoscopic ultrasonic probe in the P series Probe connector or PB2020-M. Scanner holder Secures RS-900 (scanner) to the scanner arm. Main unit connector Connects to SP-900 (ultrasonic processor). 897N120838C... -
Page 30: Chapter 4 Basic Operations
[Note] For how to insert the ultrasonic probe, see step (3) in “6.3 Inspection Before Use”. “4.1.1 Power-on” Startup [Note] For the location of the power switch, refer to “3.2.1 SP-900”. Ultrasound Examination Ultrasound “6.5 Preparation for Ultrasound Examination” examination “6.6 Acquiring Ultrasonic Image”... -
Page 31: Power-On And Power-Off
Chapter 4 Basic Operations Power-on and Power-off 4.1.1 Power-on (1) Press the power switch to turn on the ultrasonic processor. (2) Connect an endoscopic ultrasonic probe and press the [FREEZE] key. The B-mode screen appears in the image area. Area Area 22.48mm 46.05mm... -
Page 32: Logoff
Chapter 4 Basic Operations 4.1.2 Logoff [Note] This function is available only when the user is logged in to the SP-900 and no examination is being performed. “5.3 Security Function” (1) Press the [SYSTEM] key. PATIENT END EXAM PATIENT SEARCH... -
Page 33: Power-Off
Chapter 4 Basic Operations 4.1.3 Power-off (1) Press the power switch to turn off the ultrasonic processor. 897N120838C... -
Page 34: Entering Comments
Chapter 4 Basic Operations Entering Comments 4.2.1 Entering Text (1) Press the [COMMENT] key. [Note] The text cursor blinks in green at the center of the screen. (2) Move the text cursor to the desired position. (3) Enter a text with the keyboard on the control pad. -
Page 35: Correcting Text
Chapter 4 Basic Operations (4) Move the cursor away from the input text to confirm the input. [Note] The confirmed characters are displayed in white and are treated as one text block. (5) Repeat steps (2) to (4) as necessary. (6) Press the [COMMENT] key to finish comment input mode. - Page 36 Chapter 4 Basic Operations (2) Press the [SET] key. T h e c o l o r o f t h e t e x t c h a n g e s t o g r e e n , indicating that the text is selected.
-
Page 37: Moving In Text Block
Chapter 4 Basic Operations 4.2.3 Moving in Text Block (1) Press the [COMMENT] key. [Note] The text cursor blinks in green at the center of the screen. (2) Press the [SET] key. T h e c o l o r o f t h e t e x t c h a n g e s t o g r e e n , indicating that the text is selected. -
Page 38: Deleting Text
Chapter 4 Basic Operations (5) Press the [SCROLL] or [SET] key. The text is displayed in white and the position is finalized. (6) Press the [COMMENT] key to finish comment input mode. 4.2.4 Deleting Text (1) Press the [COMMENT] key. [Note] The text cursor blinks in green at the center of the screen. -
Page 39: Deleting All Texts
Chapter 4 Basic Operations (3) Press the [CLEAR] key. The characters at the text cursor position will be deleted. SPACE DATA OFF DELETE CLEAR ENTER 4.2.5 Deleting All Texts (1) Press the [COMMENT] key. [Note] The text cursor blinks in green at the center of the screen. -
Page 40: Chapter 5 Initial Settings
Chapter 5 Initial Settings Chapter 5 Initial Settings User Setting Mode The setup of this product is performed on the menu displayed by pressing the [SYSTEM] key. 5.1.1 Setup Items in “User Menu” Screen Details on the “User Menu” screen displayed when the [SYSTEM] key is pressed are shown in the table below. - Page 41 Chapter 5 Initial Settings Settings Setting content Description Large item Middle item Small item System Volume Volume OFF, Low, Mid, Hi Select the volume of the Setup Setup buzzer. STORE 1 Data Hold Time 0, 0.3, 0.4, 0.5, 0.6, 0.8, Select the time to pause (Sec.) 1.0, 1.5, 2.0, 2.8...
- Page 42 Chapter 5 Initial Settings Settings Setting content Description Large item Middle item Small item Memory Internal Personal ON, OFF Select whether or not to Setup Memory Information Protect hide patient information at the time of storing images to an external storage device.
- Page 43 Select the model of the Setting connected peripheral. Connecting Port RS232C-1, RS232C-2 Select the communication port. Monitor Usage Not used, FUJIFILM/ Select the model of the JVC (3MODE), connected monitor. Panasonic (3MODE), NDS (3MODE), FUJIFILM/JVC (2MODE), Panasonic (2MODE), NDS (2MODE)
- Page 44 Chapter 5 Initial Settings Settings Setting content Description Large item Middle item Small item Peripheral Card |- ID_Length (Numerical value Specify the length of an Information selection) ID number. Setup Preview Preview |- Name_Start (Numerical value Specify the starting selection) position of a patient name.
-
Page 45: Initialization Of External Storage Device
[Note] The external storage device is optional. Use the recommended storage device (manufactured by Swissbit), which is compatible with this product. For external storage devices, contact your local FUJIFILM dealer. (1) Connect an external storage device to the external storage device slot. - Page 46 Chapter 5 Initial Settings [Note] User Menu D i s p l a y S e t u p S y s t e m S e t u p M e m o r y S e t u p P e r i p h e r a l S y s t e m The “User Menu”...
-
Page 47: Security Function
Cancel OK(Set) [Note] Once the user logs in to the SP-900, all the information can be accessed until the user logs off or turns off the SP-900. When stepping away from the SP-900, be sure to log off or turn off the SP-900. -
Page 48: Changing Login Password
PATIENT SEARCH SYSTEM ENTRY [Note] When the user information protection of the security function is effective, if the user is not logged in to the SP-900, the login authentication screen is displayed. SPACE DATA OFF DELETE CLEAR ENTER Enter the password and touch [OK] button to log in to the SP-900. - Page 49 Chapter 5 Initial Settings [Note] The “Input Password” screen appears. lnput Password Current Enter Re-Enter Show lnput Password Password Change Back [TRACK BALL] Move [ENTER] Select [CANCEL] Cancel (4) Enter the current password in the “Current” column. lnput Password Current : ●●●R Enter Re-Enter...
-
Page 50: Chapter 6 Starting/Closing Exam
Use the rated voltage only. Plug the power plug into a medical outlet with a ground terminal. Connect the power plug to the protective earth receptacle. Only FUJIFILM authorized service personnel are permitted to open the covers. Not adhering to these instructions may cause electric shock. - Page 51 Chapter 6 Starting/Closing Exam (4) Press the [FREEZE] key. Make sure that the ultrasonic frequency of the connected endoscopic ultrasonic probe is displayed in the “FREQ” area on the right side of screen. [Note] If foreign matter adheres to the probe code, the frequency may not be accurately displayed.
-
Page 52: Initial Settings
Chapter 6 Starting/Closing Exam Initial Settings Set the date, time and hospital name. (1) Press the [SYSTEM] key. PATIENT END EXAM PATIENT SEARCH SYSTEM ENTRY SPACE DATA OFF DELETE CLEAR ENTER [Note] User Menu D i s p l a y S e t u p S y s t e m S e t u p M e m o r y S e t u p P e r i p h e r a l... - Page 53 Chapter 6 Starting/Closing Exam (3) Use the character entry keys to enter the date User Menu D i s p l a y S e t u p S y s t e m S e t u p M e m o r y S e t u p P e r i p h e r a l S y s t e m and press the [ENTER] or [SET] key.
- Page 54 Chapter 6 Starting/Closing Exam (7) Use the character entry keys to enter the hospital name (up to 20 characters) and press the [ENTER] or [SET] key. (8) Move the cursor to "Save and Exit" and press the [ENTER] or [SET] key. The settings are saved and operation returns to the examination screen.
-
Page 55: Inspection Before Use
Chapter 6 Starting/Closing Exam Inspection Before Use (1) Check that the exterior of the endoscopic ultrasonic probe is free from cracks, scratches, dents or sharp edges or protrusions that may injure a patient. (2) Check that there are no bubbles in the ultra- sound head. - Page 56 Chapter 6 Starting/Closing Exam (4) Immerse the tip of the probe in a glass of sterile water. (5) Press the [FREEZE] key to cancel freeze mode. Make sure that the transducer is rotating and a radial image is displayed. Press the [FREEZE] key again to make sure that the rotation of the transducer stops.
-
Page 57: Registration Of Patient Data
Chapter 6 Starting/Closing Exam Registration of Patient Data Patient data such as ID and patient name can be displayed on the monitor. Alphanumeric data can be displayed. [Note] Check the input patient information for mistakes. [Note] Turn off this product for personal information protection when you leave it unattended. -
Page 58: Details Of The "Patient Information Entry" Screen
Chapter 6 Starting/Closing Exam 6.4.1 Details of the “Patient Information Entry” Screen Press the [PATIENT ENTRY] or [PATIENT] key to display the “Patient Information Entry” screen on the main monitor. Patient Information Exam No. Patient ID Patinet Name Male Female D.o.B Move Select... -
Page 59: Preparation For Ultrasound Examination
Chapter 6 Starting/Closing Exam Preparation for Ultrasound Examination CAUTION When inserting the endoscopic ultrasonic probe through an endoscope, do not pass its distal end while the endoscope is bent. Do not perform bending operation while the distal end of the endoscopic ultrasonic probe is in the bending portion. - Page 60 Chapter 6 Starting/Closing Exam (4) Insert the probe into the forceps inlet of an endoscope with the forceps valve on. (5) Insert the probe up to a position where the ultrasound head is visible in the endoscopic image. 897N120838C...
-
Page 61: Acquiring Ultrasonic Image
Chapter 6 Starting/Closing Exam Acquiring Ultrasonic Image WARNING Do not perform scanning when the endoscopic ultrasonic probe is not visible. Do not let the endoscopic ultrasonic probe press against the inner surface of the body cavity. Doing so may cause perforation or damage to mucous. - Page 62 Chapter 6 Starting/Closing Exam (3) Press the [FREEZE] key for FREEZE mode (scan OFF) to freeze the image. Press the [FREEZE] key again to return to a live image (scan ON). 897N120838C...
-
Page 63: Gain Adjustment
Chapter 6 Starting/Closing Exam Gain Adjustment The sensitivity of the entire ultrasound image can be adjusted. Pressing the upper side of the [GAIN] key increases the gain, while pressing the lower side decreases the gain. Numerical value in 64 degrees, ranging from 1 to 64, will be displayed at the upper right of the screen. -
Page 64: Ending Exam
Chapter 6 Starting/Closing Exam Ending Exam (1) Press the [END EXAM] key. PATIENT END EXAM PATIENT SEARCH SYSTEM ENTRY SPACE DATA OFF DELETE CLEAR ENTER [Note] [Yes] and [No] are displayed. E x a m i n a t i o n w i l l b e e x u t e d . O K ? 5 5 0 0 3 (2) Move the cursor to [Yes], and press the... -
Page 65: Chapter 7 Function Of B Mode
Chapter 7 Function of B Mode Chapter 7 Function of B Mode B-mode This section describes the functions of the B-mode and how to operate them. B-mode is a mode that displays the strength of reflected ultrasonic signals on the screen by converting it into the degree of brightness. -
Page 66: Gain Adjustment
Chapter 7 Function of B Mode 7.2.1 Gain Adjustment Press the upper side of the [GAIN] key to increase the gain. Press the lower side of the [GAIN] key to decrease the gain. [Note] When the upper or lower side of the [GAIN] key is held pressed, the gain changes continuously. -
Page 67: Image Rotation
Chapter 7 Function of B Mode Image Rotation Pressing the right or left side of the [ROTATION] key allows the clockwise or counterclockwise rotation of an image in radial scan. [Note] The rotation angle of an image can be set on the “User Menu”... -
Page 68: Mirror Image
Chapter 7 Function of B Mode Mirror Image (1) Press the [MIRROR] key to reverse the image to observe the image in different directions. View from the endoscopic ultrasonic probe’s distal end will be displayed as “DISTAL VIEW” and view from the endoscope’s control portion will be displayed as “PROX. -
Page 69: Dynamic Range Adjustment
Chapter 7 Function of B Mode Dynamic Range Adjustment The dynamic range of the entire ultrasonic image can be adjusted in 8 steps. Press the upper side of the [DR] key to soften the image. Press the lower side of the [DR] key to harden the image. -
Page 70: Measuring Distance
Chapter 7 Function of B Mode Measuring Distance Two calipers can be displayed on screen to measure the distance between two points. Measurement can be performed both in scanning and FREEZE mode. (1) P r e s s t h e [ M E A S U R E ] k e y t o e n t e r measurement mode. - Page 71 Chapter 7 Function of B Mode (4) Move the end point caliper to the measurement point. Press the [SET] key to determine the end point. (5) When the two points are determined, the color of the starting point caliper, the end point caliper and the dotted line connecting the two calipers changes to light blue.
-
Page 72: Measuring Circumference And Area
Chapter 7 Function of B Mode 7.10 Measuring Circumference and Area Calipers can be displayed on screen to measure the circumference and area. Measurement can be performed both in scanning and FREEZE mode. “Area” or “Trace” can be selected for circumference and area measurements. [Note] The “Area”... - Page 73 Chapter 7 Function of B Mode (4) Move the end point caliper to the measurement point. Press the [SET] key to determine the end point. [Note] In the “Area” measurement, the size of an ellipse can be changed with the trackball. (5) When the two points are determined by pressing the [SET] key again, the color of the starting point caliper, the end point caliper and...
-
Page 74: P In P
7.11 P in P The PinP function of the monitor is used. [Note] Settings may be required for the monitor and the processor, depending on their combination. For details on the necessary settings, contact your local FUJIFILM dealer. Ultrasonic Processor Processor... -
Page 75: Operation Of Pinp
[Note] The PinP is a function that controls the monitor settings externally. Depending on the monitor, connections and settings may be required prior to use. For details on the connections and settings, contact your local FUJIFILM dealer. 897N120838C... -
Page 76: Chapter 8 Recording And Replaying Images
Chapter 8 Recording and Replaying Images Chapter 8 Recording and Replaying Images Cine Memory With this product, image data saved in the cine memory can be obtained and played back. The images to be played back can be switched by operating the trackball horizontally, while the image is frozen. -
Page 77: Storing Exam Images
Overview Ultrasonic images and exam data can be stored electronically in the internal storage device of SP-900. In addition, those data can be stored in the external storage device. “8.6 Copying Exam Images to External Storage Device” Data that have been printed or stored in an external storage device should be deleted from the internal storage device on a regular basis. -
Page 78: Printing Images With Color Printer (Remote System)
The image observed on the monitor can be printed out on paper by connecting the color printer to SP-900. [Note] SP-900 has two REMOTE terminals (REMOTE 1 and REMOTE 2). [Note] Since the color printer and the monitor differ in their display properties, images output from the color printer and those displayed on the monitor may differ in color. -
Page 79: Setting Printing Function
Chapter 8 Recording and Replaying Images 8.3.2 Setting Printing Function This section explains how to assign the print function to [STORE 1] or [STORE 2] key. (1) Press [SYSTEM] key. (2) Use the trackball to move the cursor to the “System Setup”... -
Page 80: Printing Image
Chapter 8 Recording and Replaying Images 8.3.4 Printing Image The exported image can be printed. When the print button on the printer or on the remote controller is pressed, the image is printed out. 897N120838C... -
Page 81: Printing Images With Digital Printer
An image observed on the monitor can be printed on paper by connecting a digital printer to SP-900. [Note] SP-900 has one USB terminal (printer). [Note] Since the digital printer and the monitor differ in their display properties, images output from the digital printer and those displayed on the monitor may differ in color. -
Page 82: Setting Printing Function
8.4.3 Digital Printer Settings This section explains how to perform the setting of the digital printer connected to SP-900. (1) Press the [SYSTEM] key. (2) Use the trackball to move the cursor to the “Peripheral” tab. (3) Move the cursor to the “Digital Printer Setup”... - Page 83 Chapter 8 Recording and Replaying Images (4) Perform the setting of the following items. Adjustment item Adjustment range UP-D25MD UP-55MD Red (C-R) These items can be adjusted by These items cannot be set. 2 within the range of -32 to +32. Green (M-G) Blue (Y-B) Contrast...
-
Page 84: Exporting Image
Chapter 8 Recording and Replaying Images 8.4.4 Exporting Image This section explains how to export the image to the digital printer. (1) Focus the object to be printed on the screen, and then freeze the image by pressing the [FREEZE] key. (2) When the key specified in accordance with “8.4.2 Setting Printing Function”... -
Page 85: Reviewing Exam Images
Chapter 8 Recording and Replaying Images Reviewing Exam Images Stored images can be reviewed. Press the [SEARCH] key to activate the review function. 8.5.1 Searching Exam Images (Setting Search Conditions) (1) P r e s s t h e [ S E A R C H ] k e y t o d i s p l a y t h e "Search"... - Page 86 Chapter 8 Recording and Replaying Images (4) Press the [ENTER] or [SET] key confirm the input. PATIENT PATIENT SEARCH SYSTEM ENTRY CLEAR ENTER (5) Use the trackball to move the cursor to “Search Search All” or "Search". Search All Search Conditions Exam No.
-
Page 87: Searching Exam Images (Search Results)
Chapter 8 Recording and Replaying Images 8.5.2 Searching Exam Images (Search Results) A list of search results can be displayed. (1) Select an item with the trackball. Search Search Conditions Search Result 1/4 [Note] Date of Exam Patient ID Patient Name Examination No. -
Page 88: Printing Images
Chapter 8 Recording and Replaying Images (2) Select an exam image with the trackball. E x a m . D a t a [Note] The selected image is indicated by a green frame. [Note] When there are multiple exam image pages, 0001/0014 001/002 operate the trackball vertically to switch the... - Page 89 Chapter 8 Recording and Replaying Images (4) Press the [STORE 1] or [STORE 2] key with the printing function assigned. Printing starts. [Note] For details on how to assign the printing function to the [STORE 1] or [STORE 2] key, see “8.4.2 Setting Printing Function”.
-
Page 90: Copying Exam Images To External Storage Device
“5.2 Initialization of External Storage Device” [Note] Use the external storage device only for SP-900 in use. Do not share it with another SP-900. [Note] Do not remove the external storage device while data writing to an external storage device is in progress. - Page 91 Chapter 8 Recording and Replaying Images The procedure for copying examination data is described below. (1) To copy examination (image) data to an external storage device, insert an external storage device into the external storage device slot. [Note] When the external storage device is set, insert Keep the opening it with the opening of the connector facing facing upward.
- Page 92 Chapter 8 Recording and Replaying Images (4) Select “Yes” and press the [SET] key to copy the examination data. Copying of the selected examination starts. [Note] When “No” is selected, the examination is not exported. [Note] If the free space on the external storage device is insufficient, a warning message is displayed.
-
Page 93: Deleting Exam Image Data
Chapter 8 Recording and Replaying Images Deleting Exam Image Data Exam image data stored in the internal storage device of SP-900 or an external storage device can be deleted. [Note] Deleted images cannot be restored. Delete exam image data by following the procedure below. - Page 94 Chapter 8 Recording and Replaying Images (4) To delete the exam image data, press the [SET] key. The selected exam image data is deleted. [Note] When “No” is selected, the exam image data is not deleted. 897N120838C...
-
Page 95: Chapter 9 Storage And Maintenance
This section describes the inspection and maintenance work which the user must implement. In addition to the work stated herein, please have the product inspected by FUJIFILM authorized service personnel once every 6 months. 897N120838C... -
Page 96: Maintenance Of Sp-900, Rs-900 And Cp-900
Chapter 9 Storage and Maintenance Maintenance of SP-900, RS-900 and CP-900 CAUTION Perform cleaning with specified way. Do not perform disinfection and sterilization by immersing the equipment in chemical liquid or by gas. Do not spill water or disinfectants on the equipment body. Not adhering to these instructions may cause equipment failure. -
Page 97: Method Of Storage
Method of Storage CAUTION Do not store the equipment in a place which does not meet the storage conditions. Doing so may cause equipment failure. Store SP-900 in a place that meets the following conditions. Storage Conditions Temperature : -20 to +60°C... -
Page 98: Before Bringing This Product For Service
Chapter 9 Storage and Maintenance Before Bringing This Product for Service Before submitting the equipment to repair, perform checking once again. If the equipment still does not operate correctly, contact your local FUJIFILM dealer. Symptom Possible Causes Solutions Power indicator does The power cord is not connected. -
Page 99: Replacing Fuse
Chapter 9 Storage and Maintenance Replacing Fuse CAUTION Do not replace the fuse. If the fuse needs to be replaced, contact your local FUJIFILM dealer. 897N120838C... -
Page 100: Monthly Inspection
If there is one or more “Fail” inspection results, the inspection is assessed “Fail” as a whole. Deal with the “Fail” items. This product may not be used while there is an item assessed as “Fail”. If you have any questions, contact your local FUJIFILM dealer. Item Inspection Item... - Page 101 Chapter 9 Storage and Maintenance Item Inspection Item Inspection Method Acceptance Criterion 1. Keys Check if the keys can be operated Operation should be smoothly without backlash or smooth. looseness. 2. Positioning of the monitor Check if they can be operated Operate smoothly (vertical/horizontal) and smoothly without abnormal sound.
-
Page 102: Storage
SP-900 uses the secondary battery to store the clock and data. When SP-900 has remained off for a long period of time, the clock function may not be retained. (The date and time may be displayed incorrectly.) In such cases, make the initial settings again. -
Page 103: Moving Cart
Chapter 9 Storage and Maintenance Moving Cart CAUTION Move the cart by two people. Not doing so may cause the cart to tip over and result in personal injury. Move the cart by three people in uneven places. Not doing so may cause the cart to tip over and result in personal injury. - Page 104 Chapter 9 Storage and Maintenance (3) After the cart is in position at the destination, lock the casters. 897N120838C...
-
Page 105: Chapter 10 Troubleshooting
4) Check if the rated voltage is being supplied. 5) Fuse blown 5) Contact your local FUJIFILM dealer. 6) The AC switch was turned on within 5 6) Turn off the AC switch and wait for seconds after being turned off. - Page 106 5) Discontinue use immediately, straighten the bending portion of the endoscope and pull out the endoscopic ultrasonic probe from the endoscope. Submit the SP-900 system to expert repairs. Image output is 1) The endoscopic ultrasonic probe 1) Straighten the bending portion of suppressed during connection is incomplete.
-
Page 107: Error Messages
10.2 Error Messages If an error occurs, an error message appears on the monitor screen. [Note] When contacting your local FUJIFILM dealer, inform the dealer of the error message and error code that appear on the monitor screen. Error Message... - Page 108 2] key again. If the error message again. If the error recurs, contact appears repeatedly, contact your local the sales agent or our service FUJIFILM dealer and provide them representatives. with the error code. Connection to the still recorder Connection with the still Check if the still image recorder is cannot be confirmed.
- Page 109 Chapter 10 Troubleshooting Error Message Possible Causes Solutions No disk is inserted in the still No disk is inserted into Insert a disk into the still image recorder. the still image recorder. recorder. Insert a disk. The disk in the still recorder is not The disk in the still image Insert a DVD-RAM into the still image supported.
- Page 110 Chapter 10 Troubleshooting Error Message Possible Causes Solutions Initialization of External Memory Initialization of the Check the connection of the external failed. Check the connection of the external storage device storage device, and initialize it again. If memory device and initialize the has failed.
-
Page 111: Chapter 11 System Installation
Chapter 11 System Installation Chapter 11 System Installation Only FUJIFILM authorized service personnel is allowed to install this system. 11.1 Operating Conditions The following conditions are required for using SP-900 including the environment and power supply. 11.1.1 Environment WARNING Do not use this product in flammable gas atmosphere. Doing so may cause an explosion. -
Page 112: Power Supply
[Note] If SP-900 is installed together with the VP-7000, VP-4450HD and VP-3500HD processors and is used at 200V or higher, connect the power plug of SP-900 directly to a receptacle via an insulating transformer. -
Page 113: Installation Of Sp-900 System (Initial Installation)
Chapter 11 System Installation 11.2 Installation of SP-900 System (Initial Installation) To avoid electric shock and equipment falling off, follow the precautions below. <To avoid electric shock> • Connect the power plug of the VP-7000, VP-4450HD or VP-3500HD processor directly to the receptacle for the processor/light source on the cart. -
Page 114: System Added To It
Chapter 11 System Installation 11.2.1 Installation of the Standard System with an Endoscopic System Added to It (1) Lock the casters of the cart. (2) Fix the rear of LCD monitor to the monitor mount arm of cart with the accessory 4 screws. [Note] For the procedure to adjust the vertical balance of the arm unit, refer to the operation manual of... - Page 115 E v e n w h e n t h e p o w e r c o r d i s a l r e a d y connected, make sure that the power cord is connected securely. (5) Place SP-900 on the movable shelf (the lower shelf) of cart. To avoid SP-900 from falling off, place the feet of SP-900 along the inner edges of the stoppers.
- Page 116 CP-900 on it. (7) Pass the cable of keyboard through the rear side of cart to connect with the USB port (control pad) on the rear panel of SP-900. REMOTE FOOT SW [Note] Connect the control pad CP-900 only.
- Page 117 Chapter 11 System Installation (9) Insert the accessory power cord of the VP-7000 VM0306B or VP-4450HD processor into the power supply connector on the rear panel of it and connect it securely. (For VP-7000 or VP-4450HD) [Note] Do not use the power cord other than attached one.
- Page 118 Chapter 11 System Installation (11) Place the light source on the processor from the front side of cart. (12) While holding the rear panel of processor to keep it from moving, push the light source toward the rear side of cart. (13) Place the feet of light source in the dents of processor.
- Page 119 Chapter 11 System Installation (14) Insert the accessory power cord of light source VM0306B BL-7000 into the power supply connector on the rear panel of it and connect it securely. [Note] Do not use the power cord other than attached one.
- Page 120 (18) Connect the processor and the light source by using the interface cable CC7-101 which is an accessory of the processor. Processor Light source (19) Connect SP-900 and processor by using the interface cable. SP-900 Processor (20) Insert the power plugs of the devices such as SP-900, processor and light source directly into the outlets for processor/light source on cart.
- Page 121 DC power input port on LCD monitor. And then, connect the power cord of the AC adapter and the power plug of SP-900 to the outlets for the peripheral on the cart. (23) Remount the rear panel of the cart with 4 screws.
- Page 122 “11.1.2 Power Supply” (25) Install the scanner arm onto the cart. (26) Install the scanner onto the scanner arm. (27) Connect the scanner to SP-900. [Note] Care should be taken when connecting or disconnecting the scanner since SP-900 may move.
- Page 123 [Note 1] When CL-22, CL-24, CCL220/AR or CCL244/AR is used, use the HD-SDI cable. [Note 2] SP-900 can be operated by using the keyboard CP-8000 connected to SU-8000. (However, some operations are restricted.) [Note 3] When the image is output from the RGB TV, video or S video connector, do not use the monitor as the main observation screen.
- Page 124 [Note 2] The processor VP-3500HD can also be used. [Note 3] SP-900 can be operated by using the keyboard CP-8000 connected to SU-8000. (However, some operations are restricted.) [Note 4] When the image is output from the RGB TV, video or S video connector, do not use the monitor as the main observation screen.
- Page 125 [Note 2] CC5-301 Commercially CCL244/AR HD-SDI available BNC CL-24 cable (3CFWS) RS-232C CC5-801 [Note 1] For details on the cable to be connected, consult your local FUJIFILM dealer. [Note 2] The PinP function is not available in this combination. 897N120838C...
-
Page 126: Installation For System Expansion
Chapter 11 System Installation 11.2.2 Installation for System Expansion This system can be expanded by adding an endoscopic system and the peripherals to the standard system. An example of the system to which the printer and foot switch are added is shown in the figure below. - Page 127 Chapter 11 System Installation <Example of connections for system expansion (in case of connecting foot switch and printer)> Ultrasonic processor: SP-900 Foot switch: Printer: UP-25MD 897N120838C...
-
Page 128: Connection With Su-8000
Chapter 11 System Installation 11.2.3 Connection with SU-8000 When the SU-8000 is connected to the SP-900, if the SP702 mode is selected on the SU-8000, the SP-900 can be operated by using the keyboard for the SU-8000. However, some functions are not available. - Page 129 Chapter 11 System Installation <Names and functions of keys on keyboard CP-8000> For details on how to operate the keyboard, refer to the operation manual of the SU-8000. Name Button Button name Function Shutdown [SHUT DOWN] key Turns off the power. Ends an examination and enters input mode for patient information such as the patient...
- Page 130 Chapter 11 System Installation Name Button Button name Function Saves and prints exam images. Saving and printing of [STORE 1] key Saves the still and dynamic exam image images currently displayed in the device set in the “System [STORE 2] key Setup”...
- Page 131 Chapter 11 System Installation Name Button Button name Function Searches the images stored on freezing. Use this ball to move the center position, comment position of the selection state, and caliper Trackball/SET/ Trackball for measuring distance. CANCEL The trackball is also used for rotating an image in rotation mode and for performing frame advance/reverse in observation...
- Page 132 Chapter 11 System Installation Name Button Button name Function Adjusts the sensitivity of the Mode switch/Gain entire ultrasound image. Gain knob adjustment The gain can be selected from among 64 steps (1 to 64). [B] key This key is not used. [M] key This key is not used.
- Page 133 Chapter 11 System Installation Name Button Button name Function Switch of frequency [IMG] key This key is not used. (mainly) [TH] key This key is not used. Adjusts the dynamic range of the entire ultrasound image. [FREQ] keys Pressing the upper or lower key changes the dynamic range in one direction.
- Page 134 Chapter 11 System Installation Name Button Button name Function Used for typing letters and Alphabet and numeric Character entry numbers in ID or comment input keys mode. Clears a character to the left of [BS] key the character cursor. Used to input the uppercase [SHIFT] key characters of the keys on the keyboard.
-
Page 135: Connection With Su-1
Chapter 11 System Installation 11.2.4 Connection with SU-1 When the SU-1 is connected to the SP-900, if the SP mode is selected on the SU-1, the SP-900 can be operated by using the keyboard for the SU-1. However, some functions are not available. - Page 136 Chapter 11 System Installation <Names and functions of keys on keyboard CP-1/CP-1TB (when the SU-1 is in the SP mode)> Name Button Button name Function Enters input mode for new patient information such as the patient name and medical record Examination [PATIENT] key number.
- Page 137 Chapter 11 System Installation Name Button Button name Function Controls the monitor to switch the screen display between PinP [PinP] key ultrasonic images and endoscopic images. Display of puncture [BIOPSY] key This key is not used. guideline Optimization function [OPTIMIZE] key This key is not used.
- Page 138 Chapter 11 System Installation Name Button Button name Function Adjustment of frequency, dynamic [FREQUENCY] key This key is not used. range or gain Pressing the key increases the dynamic range. [DYMANIC RANGE] key Pressing the key decreases the dynamic range. Pressing the key increases the gain.
- Page 139 Chapter 11 System Installation Name Button Button name Function Entry of annotations [ANNOTATION] key Enters comment input mode. Menu keys on the right This key is not used. side of touch panel Menu keys below the This key is not used. touch panel Used for typing numbers, letters Touch panel...
- Page 140 Chapter 11 System Installation Name Button Button name Function Used to input the uppercase Touch panel [↑] button ↑ characters of the keys. Adds a space before the cursor. Switches between the display [Space] button Space and non-display of patient information.
-
Page 141: Connecting Power Supplies
The equipment which can be used in combination with this system is divided into the following two types according to its power connection. 1) Devices which can be used in direct combination with the SP-900 system (Applicable to EN 60601-1) Examples of such devices including the SP-900 system are shown in Table 11.1. -
Page 142: Power Connection On The Cart
5.5A. [Note] If SP-900 is installed together with the VP-7000, VP-4450HD, and VP-3500HD processors is used at 200V or higher, connect the power plug of SP-900 directly to a receptacle via an insulating transformer. 897N120838C... -
Page 143: Basic Information On Power Cord
Chapter 11 System Installation <Power connection example of SP-900> Outlet for processor and light source Processor Light source Outlet for peripherals (Max. 5.5A) LCD monitor Printer Insulating transformer Power switch Ultrasonic processor SP-900 Fuse Power plug with Protective protective grounding... -
Page 144: Preparation Before Use
Chapter 11 System Installation 11.4 Preparation Before Use This section describes preparations required for your daily operation. It is assumed that all devices are installed onto the cart and properly connected. 11.4.1 Moving and Fixing CAUTION Move the cart by two people. Not doing so may cause the cart to tip over and result in personal injury. -
Page 145: Connecting Power Supply And Potential Equalization Terminal
Chapter 11 System Installation (3) When the cart is positioned at the destination, lock the casters. 11.4.2 Connecting Power Supply and Potential Equalization Terminal WARNING The power supply should be used at the rated voltage. Otherwise, fire, electric shock or equipment failure may result. Connect the power plug to the protective earth receptacle directly. -
Page 146: Adjusting Monitor
Chapter 11 System Installation (2) Connect the accessory potential equalization cord to a potential equalization terminal. (3) Connect the other terminal of the potential equalization cord to the potential equalization terminal of the cart. 11.4.3 Adjusting Monitor < Adjustment of location and the angle> The LCD monitor can be moved horizontally or back and forth. -
Page 147: Main Specifications
2. Degree of protection against electlic shock: Type BF Applied Part 3. Degree of explosion protection: Use is prohibited in an oxygen-rich environment or in a flammable gas atmosphere. <Applied Part> Insertion portion of a compatible endoscopic ultrasonic probe <SP-900> Item Specification Voltage 100-240V~ Frequency 50 Hz/60 Hz Current consumption (rated) 0.7-0.5A... - Page 148 Main Specifications Item Specification Less than 1.0 Axial resolution (when used in combination with P2612-L) 3.0 mm or less Lateral resolution (when used in combination with P2612-L) Spatial-peak temporal-average intensity (assuming the attenuation coefficient of 0.3 dB cm Acoustic frequency Izpta.
- Page 149 Main Specifications <PB2020-M> Model PB2020-M Frequency on screen 20 MHz Working length 2150 mm Outside diameter 1.95 mm Penetration depth (assuming the attenuation coefficient of 7 mm or more 0.3 dB cm Axial resolution 2 mm or less Lateral resolution 2 mm or less Acoustic frequency 20 MHz ±...
- Page 150 <Principle of Operation> 1. Image processing The SP-900 transmits ultrasound waves into the body cavity by driving the ultrasonic transducer of the ultrasonic probe, performs processing of the reflected ultrasound signals received by the ultrasonic transducer in the body cavity, and convert the electrical signals into image or video signals.
- Page 151 Main Specifications <Connection Chart> LCD monitor: CCL244/AR Foot switch: Control pad: CP-900 Protective earth Ultrasonic processor: receptacle SP-900 REMOTE VIDEO IN Color printer: UP-25MD Protective earth receptacle <Medical Device Directive> This product complies with the requirements of European Directive 93/42/EEC.
- Page 152 Main Specifications <Electromagnetic Compatibility (EMC) Information> This product complies with Class B of EN 55011 concerning radio-frequency emissions in the combination of the PB2020-M endoscopic ultrasonic probe. In addition, in the combination of a P-series endoscopic ultrasonic probe, this product complies with Class A.
- Page 153 Main Specifications Electromagnetic immunity compliance information and guidance EN 60601-1-2 Compliance Immunity test Guidance Test level level Floors should be wood, concrete, or ceramic tile. Electrostatic discharge ±2, ±4, ±6kV: contact Same as If floors are covered with (ESD) ±2, ±4, ±8kV: air left synthetic material, the relative EN 61000-4-2...
- Page 154 Main Specifications Portable and mobile RF communications equipment compliance information and guidance EN 60601-1-2 Compliance Immunity test Guidance Test level level Portable and mobile RF communications equipment should be used no closer to any part of this product, including cables, than the recommended separation distance calculated from the equation applicable to the frequency of the transmitter.
- Page 155 Main Specifications Recommended separation distance between portable and mobile RF communications equipment and this product The customer or the user of this product can prevent electromagnetic interference by maintaining the minimum distance between this product and cell phone or RF communication equipment (table below). Referring to the table below, keep cell phone or RF communication equipment away from this product.
-
Page 156: Index
Index Index <A> <P> Alphabet and number keys ....... 26 Patient data ..........57 Power plug ........120, 143 <B> Power supply ........... 145 Back space key ......... 26 Power supply connector ....115, 117 <C> Power switch ..........23 Cart .......... -
Page 157: Software Used In This Product
Software Used in This Product Software Used in This Product This product uses the software based on GNU General Public License (hereinafter called GPL). [Note] GPL is the free software license advocated by GNU project. Permission to use, copy, modify and redistribute the GPL software is granted without fee. -
Page 158: After-Sales Service
If the equipment does not work properly, check it first by reading this manual again and follow all instructions. If the equipment is still not working well, contact your local FUJIFILM dealer. Repairs during the warranty period We will repair your equipment free of charge according to the provisions of the warranty. -
Page 159: Disposal Of Electric And Electronic Equipment
The recycling of materials will help to conserve natural resources. For more detailed information about recycling of this product, contact your local FUJIFILM dealer. In Countries outside the EU: If you wish to discard this product, contact your local authorities and ask for the correct way of disposal. -
Page 160: Service Centers
Contact our regional representative below or the distributor from which you purchased the product. <Europe> FUJIFILM Europe GmbH http://www.fujifilm.eu/eu/ See our website to locate our representative in your country. <USA> FUJIFILM Medical Systems U.S.A., Inc. http://www.fujifilmendoscopy.com/ (800) 385-4666 <Australia> FUJIFILM Australia Pty Ltd. http://www.fujifilm.com.au/ 1800 060 209 <Asia>... - Page 161 Service Centers 897N120838C...
- Page 162 FUJIFILM Corporation 26-30, Nishiazabu 2-chome, Minato-ku, Tokyo 106-8620, Japan FUJIFILM Europe GmbH Heesenstrasse 31, 40549 Duesseldorf, Germany EU Importer: FUJIFILM Europe B.V. Oudenstaart 1, 5047 TK Tilburg, The Netherlands 897N120838C 170426- 4.0 - DT - E2 FV647A Printed in Japan...
Need help?
Do you have a question about the SP-900 and is the answer not in the manual?
Questions and answers