Genelec 8010A Operating Manual
Active monitoring system
Hide thumbs
Also See for 8010A:
- Operating manual (9 pages) ,
- Operating manual (38 pages) ,
- Operating manual (8 pages)
Table of Contents
Advertisement
Quick Links
Operating Manual
General description
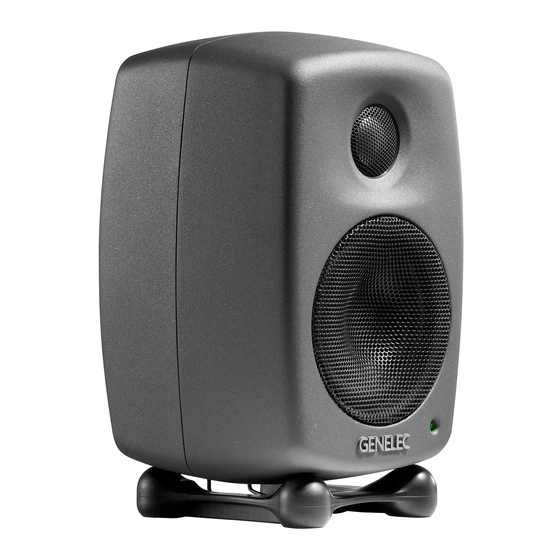
The bi-amplified Genelec 8010A is an extremely
compact two-way active monitoring loudspeaker
designed for professional applications. It con-
tains drivers, power amplifiers, active crossover
filters and protection circuitry. The MDE™ (Mini-
mum Diffraction Enclosure™) enclosure is made
of die-cast aluminium and shaped to reduce edge
diffraction. Combined with the advanced Direc-
tivity Control Waveguide
provides excellent frequency balance in difficult
acoustic environments. If necessary, the bass re-
sponse of 8010A can be extended with a Genelec
subwoofer.
Packing contents
Each 8010A is supplied with a mains cable and
this operating manual.
Mounting considerations
Align the monitors correctly
Always place monitors so that their acoustic
axes converge at ear height at the listening posi-
tion (see Figures 1 and 2). Vertical orientation of
monitors is preferred, as it minimises acoustical
cancellation problems around the crossover fre-
quency.
Maintain symmetry
Check that the monitors are placed symmetrically
and at equal distance from the listening position.
If possible, place the monitors so that the listen-
ing position is on the centerline of the room and
the monitors are at an equal distance from the
(DCW
), this design
TM
TM
8010A
Active Monitoring System
room centerline.
Minimise reflections
Acoustic reflections from objects close to the
monitors, like desks, cabinets, computer moni-
tors etc. can cause unwanted colouration and
blurring of the sound image. These reflections
can be minimised by placing the monitor away
from such surfaces.
Minimum clearances
If the monitor is installed in a restricted space
such as a cabinet or integrated into a wall struc-
ture, sufficient cooling for the amplifier and func-
tioning of the reflex port must be ensured.
A minimum clearance of 2.5 centimeters (1 in)
behind, above and on sides of the monitor must
be found. The space adjacent to the amplifier
must either be ventilated or sufficiently large to
dissipate heat so that the ambient temperature
does not rise above 35 degrees Celsius (95°F)
Connections
Connect the mains cables only after you have
completed connecting audio signal cabling.
The 8010A has a balanced XLR 7 kOhm audio
input connector. It can also be connected to an
unbalanced RCA line level audio source with a
suitable adapter cable your Genelec dealer can
provide. As the 8010A contains amplifiers, no
power amplifier is needed. Never connect 8010A
to the loudspeaker outputs of a power amplifier,
integrated amplifier, or receiver.
English 1
Advertisement
Table of Contents

Related Manuals for Genelec 8010A


Summary of Contents for Genelec 8010A
- Page 1 If necessary, the bass re- Minimum clearances sponse of 8010A can be extended with a Genelec subwoofer. If the monitor is installed in a restricted space such as a cabinet or integrated into a wall struc-...
-
Page 2: Mains Connector
XLR SIGNAL MAINS INPUT MAINS 50 / 60 Hz 30 W 100 - 240 V~ INPUT CONNECTOR 8010A BI-AMPLIFIED MONITORING SYSTEM CONNECTOR MADE IN FINLAND www.genelec.com Figure 3. Control and connector layout on the rear panel of a 8010A. 2 English... -
Page 3: Sensitivity Adjustment
Autostart function Tone controls The signal sensing Autostart function of the 8010A powers it up when playback begins. Au- The frequency response of the Genelec 8010A tomatic powering down to standby mode hap- can be adjusted to match the acoustic envi- pens after the playback has ended. -
Page 4: Mounting Options
Any maintenance or repair of the 8010A should only be done by qualified service person- Note: This equipment has been tested and found to comply with the limits for a nel. - Page 5 (dBr) vs freq (Hz) 10 Jan 13 Figure 5. The upper curve group shows the 0° horizontal directivity characteristics of the 15° 8010A measured at 30° 1 m. The lower curve 45° shows the system's 60° power response. 70 100...
-
Page 6: System Specifications
sysTEM spECiFiCATions CrossovEr sECTion Lower cut-off frequency, –6 dB: < 67 Hz Input connector: XLR female 7 kOhm: pin 1 gnd, pin 2 + Upper cut-off frequency, –6 dB: > 25 kHz pin 3 - Free field frequency response (± 2.5 74 Hz–20 kHz Input level for 100 dB SPL output at 1 m: -6 dBu... - Page 7 厘米 (1英寸) 的间距。 功放周围的空间必须通风或具 有足够大的散热空间, 以确保环境温度不超过35摄氏 每只8010A配有一条电源线和这本使用说明书。 度 (95华氏度) 。 安装注意事项 连接 正确摆放音箱 在完成音频信号线连接后方可连接电源线。 请正确摆放音箱, 让所有音箱的声轴都瞄准听音位置 的耳朵高度。 垂直放置音箱是最佳选择, 因为它能够 8010A包含一个阻抗10kOhm的平衡XLR输入接口。 也可以通过合适的转接器连接非平衡RCA线路电平 最大程度减轻分频点附近的声学抵消问题。 音频信号, 详询真力经销商。 由于8010A包含功放, 因 此不需要额外的功放。 切勿将8010A连接到功放、 合 保持对称 并功放或影音接收机的扬声器输出端口。 请检查音箱放置是否对称, 以及到达监听位置的距离 当音频连接完成后, 使用附送的电源线将音箱接通电 是否相等。 如果可能, 将监听位置放在房间的中线上, 源。 音箱会自动启动。 且使音箱到中线距离相等。 中文 7...
- Page 8 图1. 声轴位置 图2. 5声道系统中正确的音箱的摆位方式 图3. 8010A背板上的控制和接口布局 8 中文...
- Page 9 下, 音箱通过背板上的电源开关来开启和关闭。 统调整。 通过测量或系统地聆听不同的设置组合来找 出最佳的频响平衡。 灵敏度调整 低音衰减 低音衰减 (Bass Tilt) 控制为低频响应提供了三个衰 8010A的输入灵敏度 (回放电平) 有两个不同的设定: 减电平, 通常在音箱放置于靠近房间边界位置时需要 正常和-10dB。 正常设定为出厂设置, 更低的-10dB 开启。 衰减电平包括-2dB (开关1 “ ON” ) , -4dB (开关 灵敏度可以通过将背板的 “SENSITIVITY -10dB” 2 “ ON” ) 以及-6dB (两个开关均 “ON” ) 。...
- Page 10 安装选件 质保 8010A提供了多种安装选件: Iso-Pod™ (Isolation 产品为材料和工艺上的瑕疵提供2年质保。 请参考供 Positioner/Decoupler™) 隔振底座可以使音箱倾斜 货商的销售和质保条款。 以指向听音者。 音箱背面有三对螺纹孔, 适配不同类 型的支架。 如需要安装选件的完整列表, 请查阅www. FCC符合性声明 genelec.com上的真力附件目录或联系您的真力经 销商。 该设备符合FCC规定的第15部分。 操作必须符合以下两个条件: (1) 此设备不造成有害干扰 维护 (2) 设备必须接受所收到的干扰, 包括可能导致意外操作的干扰 注意: 该设备已经经过测试, 符合B类数字设备的限制, 且符合FCC 在 音 箱 内 没 有 需 要 用 户 维 修 的 零 部 件 。 任 何 关 于...
- Page 11 Genelec Oy 8010 (dBr) vs freq (Hz) 10 Jan 13 图4. 图上的曲线显示了 8010A的 “低音衰减” 和 “ 桌面控制” 在自由场响应 中的效果 BASS TILT DESKTOP 70 100 Genelec Oy 8010 (dBr) vs freq (Hz) 10 Jan 13 图 5 . 上 方 曲 线 组 表 示...
- Page 12 系统参数 分频部分 低频截止频率, –6 dB: 输入接口: XLR母座7kOhm: < 67 Hz pin 1 gnd, pin 2 + pin 3 - 高频截止频率, –6 dB: > 25 kHz 获得1米处100dB SPL输出所需的输入电平: -6 dBu 自由场频率响应 ( ± 2.5 dB) : (-10dB灵敏 74 Hz–20 kHz 度设置关闭) 半开放空间内,...
Need help?
Do you have a question about the 8010A and is the answer not in the manual?
Questions and answers