Table of Contents
Advertisement
Advertisement
Table of Contents

Related Manuals for ELNA Elnita ec60


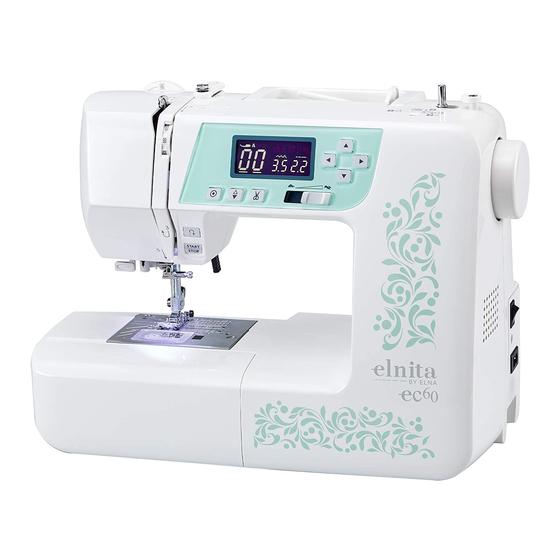
Summary of Contents for ELNA Elnita ec60
- Page 1 First Edition: 07 May 2020 SERVICE MANUAL MODEL: ec60...
-
Page 2: Table Of Contents
INDEX WHAT TO DO WHEN ......................1 to 3 CHANGING EXTERNAL PARTS FACE COVER ........................... 4 FREE ARM COVER ......................... 5 FRONT COVER ....................... 6 to 7 REAR COVER......................... 8 MECHANICAL ADJUSTMENT PRESSER BAR HEIGHT ......................9 NEEDLE DROP POSITION..................... 10 ADJUSTMENT OF HOOK TIMING .................. -
Page 3: What To Do When
WHAT TO DO WHEN CONDITION CAUSE HOW TO FIX REFERENCE 1. SKIPPING 1. NEEDLE IS NOT INSERTED INSERT THE NEEDLE PROPERLY. STITCHES PROPERLY. 2. NEEDLE IS BENT OR WORN. CHANGE THE NEEDLE. 3. INCORRECTLY THREADED. RETHREAD. 4. NEEDLE OR THREAD ARE USE THE RECOMMENDED SEWING INAPPROPRIATE FOR THE NEEDLE AND THREAD. - Page 4 CONDITION CAUSE HOW TO FIX REFERENCE 3. BREAKING 1. INITIAL SEWING SPEED IS START WITH MEDIUM SPEED. UPPER TOO FAST. THREAD. 2. THREAD PATH IS INCORRECT. USE THE PROPER THREAD PATH. 3. NEEDLE IS BENT OR DULL. REPLACE WITH A NEW NEEDLE. 4.
- Page 5 CONDITION CAUSE HOW TO FIX REFERENCE 6. NOISY 1. BACKLASH BETWEEN HOOK ELIMINATE THE BACKLASH. OPERATION GEAR AND LOWER SHAFT GEAR IS TOO GREAT. 2. LOWER SHAFT GEAR IS ELIMINATE THE LOOSENESS. LOOSE. P. 25 3. INAPPROPRIATE BELT SEE PART REMOVAL AND TENSION.
-
Page 6: Changing External Parts
CHANGING EXTERNAL PARTS FACE COVER TO REMOVE: 1. Remove the setscrew (A) and lift the face cover to disengage the rib on the inside. Remove the face cover (B). TO ATTACH: 2. Follow the above procedures in reverse. -
Page 7: Free Arm Cover
CHANGING EXTERNAL PARTS FREE ARM COVER TO REMOVE: 1. Remove the setscrew (A) (2 pcs). Move the free arm cover (B) to the left and remove the free arm cover. TO ATTACH: 2. Follow the above procedures in reverse. - Page 8 CHANGING EXTERNAL PARTS FRONT COVER (1) TO REMOVE: 1. Remove the face cover and free arm cover (see pages 4 and 5). 2. Remove the setscrews (A) (2 pcs.). 3. Remove the setscrews (B) (2 pcs.) and back cover (C). 4.
-
Page 9: Front Cover
CHANGING EXTERNAL PARTS FRONT COVER (2) 6. Disengage the front cover and rear cover hooks. 7. Disconnect all the connectors from the printed circuit board A. NOTE: Do not disconnect the connectors by pulling on cord. To disconnect, grasp the connector, not the cord. 8. -
Page 10: Rear Cover
CHANGING EXTERNAL PARTS REAR COVER TO REMOVE: 1. Remove the face cover and free arm cover (see pages 4 and 5). 2. Remove the setscrews (A) (2 pcs.). 3. Remove the setscrews (B) (2 pcs.). 4. Remove the setscrews (C) (2 pcs.) and back cover. 5. -
Page 11: Mechanical Adjustment
MECHANICAL ADJUSTMENT PRESSER BAR HEIGHT The distance between the bottom of the presser foot in up position and the needle plate should be 6.0 mm. TO REMOVE: 1. Remove the face plate and needle. 2. Lower the feed dog below the needle plate. Place a block 6 mm thick under the presser foot and lower the presser foot lifter (A). -
Page 12: Needle Drop Position
MECHANICAL ADJUSTMENT NEEDLE DROP POSITION Set the stitch pattern to “ ”. The standard needle drop position should be at center of the needle plate hole (A). Select zigzag stitch “ ”, and set the stitch width at “7.0”. The clearance between the needle and the edge of the needle hole in the needle plate should be at least 0.2 mm on either side. -
Page 13: Adjustment Of Hook Timing
MECHANICAL ADJUSTMENT ADJUSTMENT OF HOOK TIMING The amount of ascending travel of the needle bar from its lowest position to the position ( ) where the tip of the rotary hook exactly meets the right side of the needle should be 3.25 to 3.55 mm. TO ADJUST: 1. -
Page 14: Adjustment Of Needle Bar Height
MECHANICAL ADJUSTMENT ADJUSTMENT OF NEEDLE BAR HEIGHT Before proceeding with this adjustment, check the hook timing (see page 11). The distance between the upper edge of the needle eye and the tip of the hook should be in the range of 1.6 to 2.0 mm when the tip of the hook timing meets right side of the needle in the left needle position ( the needle ascends from its lowest position. -
Page 15: Clearance Between Needle And Tip Of Hook Rotary
MECHANICAL ADJUSTMENT CLEARANCE BETWEEN NEEDLE AND TIP OF THE ROTARY HOOK * The clearance between the needle and the point of hook should be –0.10 to +0.05 mm. ADJUSTMENT PROCEDURE: 1. Remove the needle plate and bobbin holder. Attach the master needle. Turn the power switch on and set the zigzag width at maximum. -
Page 16: Feed Dog Height
MECHANICAL ADJUSTMENT FEED DOG HEIGHT The highest position of the feed dog should be between 0.80 and 0.90 mm from the surface of the needle plate. 1. Lower the presser foot and turn the power switch on. 2. Turn the handwheel toward you to set the feed dog at the highest position. 3. -
Page 17: Feed Dog Adjustment
MECHANICAL ADJUSTMENT FEED DOG ADJUSTMENT The highest position of the feed dog should be parallel to the surface of the needle plate. If not, adjust as follows. 1. Use a hexagonal socket screw (4 x 6). Insert the screw to the hole B. Tighten the hexagonal socket screw as far as it goes. 2. -
Page 18: Top Tension
MECHANICAL ADJUSTMENT TOP TENSION The top tension should be between 65 and 80 grams-force when pulling the thread up in the direction of C. * Use polyester sewing thread #50 (White). * If it is not within the above limit, adjust as follows. 1. -
Page 19: Replacing The Electronic Components
REPLACING THE ELECTRONIC COMPONENTS PRINTED CIRCUIT BOARD A CONNECTION NOTE: Do not disconnect the connectors by pulling on cord. To disconnect, grasp the connector, not the cord. q PRINTED CIRCUIT BOARD P u SOLENOID w FEED MOTOR i PRINTED CIRCUIT BOARD F e THREAD CUTTER MOTOR o PRINTED CIRCUIT BOARD L r BOBBIN WINDING SWITCH... - Page 20 SELF-DIAGNOSTIC TEST PREPARATION: 1. Turn the power switch off. 2. Move the bobbin winder spindle to the left. 3. Raise the feed dog. 4. Set the speed control lever to the left. 5. Remove the presser foot and raise the presser foot lifter. 6.
- Page 21 SELF-DIAGNOSTIC TEST Step and items Procedure Correct Condition Defective Condition to check Turn on the power switch while Sewing lamp and LCD backlight lits. LCD Sewing lamp does not lit. simultaneously pressing the start/stop displays “01”. LCD backlight does not lit. Function of button and locking stitch button.
- Page 22 SELF-DIAGNOSTIC TEST Step and items Procedure Correct Condition Defective Condition to check Raise or lower the preser foot lifter. LCD displays “SC 05”. Buzzer does not sound. If the result is correct condition, press Buzzer sounds when presser foot lifter is The presser foot symbol Presser foot the start/stop button to proceed the...
- Page 23 SELF-DIAGNOSTIC TEST Step and items Procedure Correct Condition Defective Condition to check Attach the foot control to the LCD displays “SC 08”. The foot control Foot control sewing machine. symbol does not Depress the foot control as far as it appear.
-
Page 24: Self-Diagnostic Test
SELF-DIAGNOSTIC TEST Buzzer sounds after few seconds when the self-diagnostic test has been finished. The test result has been determined. CORRECT: Buzzer sounds and LCD displays “00”. DEFECTIVE: Caution buzzer sounds and LCD displays the defective part number. See pages 19 to 21 and fix the defective part. The defective part number. See pages 19 to 21 “Steps and items” section. Turn the power switch off when the self-diagnostic test is finished. - Page 25 REPLACING THE ELECTRONIC COMPONENTS PRINTED CIRCUIT BOARD A (1) TO REMOVE: 1. Remove the front cover (see pages 6 and 7). 2. Pull out connectors from the printed circuit board A. 3. Remove the setscrews (6 pcs.) and the printed circuit board A. TO ATTACH: 4.
-
Page 26: Circuit Board-A
REPLACING THE ELECTRONIC COMPONENTS PRINTED CIRCUIT BOARD A (2) SETTING THE PRINTED CIRCUIT BOARD A After install the printed circuit board A, select the appropriate setting of the printed circuit board A. 1. Turn the power switch on while simultaneously pressing left cursor button “... -
Page 27: Driving Motor
REPLACING THE ELECTRONIC COMPONENTS DRIVING MOTOR TO REMOVE: 1. Remove the front cover. 2. Remove the setscrews (2 pcs.) and the driving motor and the belt. TO ATTACH: 3. Install the driving motor and the motor belt. Tighten them with setscrews (2 pcs.) lightly. 4. -
Page 28: Switching Regulator Unit
REPLACING THE ELECTRONIC COMPONENTS SWITCHING REGULATOR UNIT TO REMOVE: 1. Remove the front cover and the rear cover (see pages 4 to 5). 2. Remove the setscrews (A) (3 pcs.) and the switching regulator. 3. Remove the setscrews (B) (4 pcs.). TO ATTACH: Follow the above procedures in reverse. -
Page 29: Adjusting Buttonhole Lever Position
MECHANICAL ADJUSTMENT ADJUSTING BUTTONHOLE LEVER POSITION TO ADJUST THE BUTTONHOLE LEVER GUIDE: 1. Enter the buttonhole sensor adjusting mode. (see below. The LCD should display BH symbol.) 2. Remove the face cover (see page 4) and loosen the setscrew (A). 3.
Need help?
Do you have a question about the Elnita ec60 and is the answer not in the manual?
Questions and answers
How do I select a different stitch
On the ELNA Elnita EC60, you can select a different stitch by using the machine's stitch selection buttons. The machine includes 60 stitches, and you can navigate through them by pressing the appropriate button until you reach the desired stitch number.
This answer is automatically generated