Table of Contents
Advertisement
Advertisement
Table of Contents

Related Manuals for Janome Memory Craft 9850


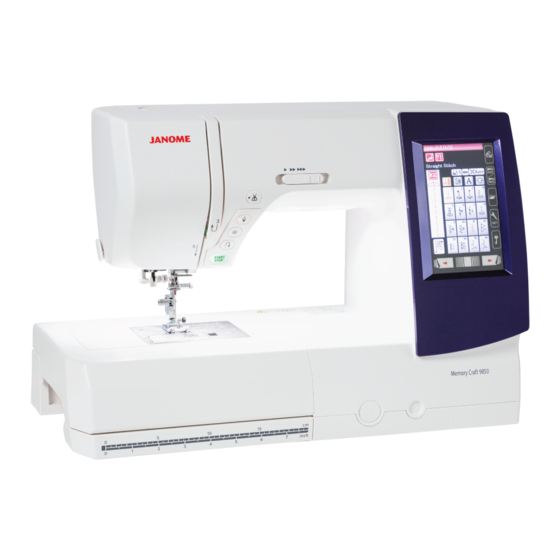
Summary of Contents for Janome Memory Craft 9850
- Page 1 Instruction Book...
- Page 3 IMPORTANT SAFETY INSTRUCTIONS When using an electrical appliance, basic safety precautions should always be followed, including the following: This sewing machine is designed and manufactured for household use only. Read all instructions before using this sewing machine. DANGER — To reduce the risk of electric shock: 1.
-
Page 4: Table Of Contents
TABLE OF CONTENTS Tacking ................69 GETTING READY TO SEW Names of Parts ..............1-2 ................70 Patchwork ................ 71 ............3-4 Quilting ............... 72-74 Extension Table ..............5 ............... 5 ..........6 CUSTOMIZING MACHINE SETTINGS ..........75-78 ............ 7 ........ -
Page 5: Getting Ready To Sew
GETTING READY TO SEW Names of Parts Top cover Spool pin Spool holder (Large) Touch panel stylus holder Bobbin thread cutter B Presser foot pressure dial Bobbin winder spindle Bobbin thread cutter A Thread take-up lever Visual touch screen Feed balancing dial cap Extension table (accessory storage) Needle plate release lever... - Page 6 Handwheel Connector for external thread cutter switch USB port Drop feed dog lever Machine socket Power switch Carrying handle Presser foot lifter Cover Embroidery unit socket Embroidery unit Carriage arm Carriage arm release lever...
- Page 7 Standard Accessories Zigzag foot A (set on the machine) Overedge foot M Satin stitch foot F Blind hemming foot G Zipper foot E Automatic buttonhole foot R Rolled hem foot D Darning foot PD-H Button sewing foot T Embroidery foot P Bobbin X 5 (1 set on the machine) Needle set Screwdriver...
- Page 8 Embroidery hoop SQ14a (with template) Bobbin holder for embroidery Power supply cable* Foot control Instruction book Key icon reference chart Template CD * The power supply cable included may differ from...
-
Page 9: Extension Table
Extension Table The extension table provides an extended sewing area To remove: To attach: Free arm sewing The free arm is used for stitching sleeves, waistbands, Accessory Storage The accessories can be conveniently stored in the q Extra spool pin w Bobbins Accessory storage for straight stitch needle plate The straight stitch needle plate (optional item) can be... - Page 10 Connecting the Power Supply z First make sure the power switch q x Insert the machine plug w of the power supply cable into the machine socket e c Insert the power supply plug r into the wall outlet t, and turn the power switch q q Power switch w Machine plug...
-
Page 11: Foot Control
Controlling Sewing Speed Speed control slider You can limit the maximum sewing speed in both the ordi- nary sewing mode and embroidery mode with the speed Foot control The harder you press the foot control, the faster the NOTES: The machine runs at the maximum speed set by the speed control slider when the foot control is fully This machine is equipped with an automatic shutdown safety feature to prevent overheating whenever the... -
Page 12: Machine Operating Buttons
Machine Operating Buttons q Start/stop button stitches, it then runs at the speed set by the speed control The button will turn red when the machine is running, and Pressing and holding this button while sewing will slow down the sewing speed and the machine will stop when NOTES: w Reverse button When sewing stitch pattern U1, U4, U9, U10, Q1-Q3 or... -
Page 13: Touch Panel Keys
Touch Panel Keys CAUTION: Do not press the touch panel or visual touch screen with q Home key Press this key to return to the initial page of the ordinary w Mode switch key Press this key to enter into embroidery mode or to return You can open pattern combinations, monograms and embroidery designs saved in the machine’s internal r Set mode key... -
Page 14: Winding The Bobbin
Setting the Spool of Thread NOTE: Use the small spool holder to hold narrow or small spools Extra spool pin Use the extra spool pin when you need to wind the bobbin without unthreading the machine while working on NOTE: Winding the Bobbin Removing the bobbin CAUTION:... -
Page 15: Winding The Bobbin
Winding the bobbin Hold the thread with both hands and pass the thread into the guide slot q q Guide slot x Draw the thread to the left and forward around the thread guide w Draw the thread to the rear and to the right around and under the guide plate e Firmly pull the thread to the right while holding it with w Thread guide... -
Page 16: Inserting The Bobbin
Inserting the bobbin Place a bobbin in the bobbin holder with the thread running off counterclockwise as shown on the hook q End of thread w Bobbin holder e Hook cover plate Guide the thread into the front notch of the bobbin r Front notch t Guide c Draw the thread to the left to pass it into the guide... -
Page 17: Threading The Machine
Threading the Machine Press the needle up/down button to raise the take-up lever q Lockout key Pass the thread in order from z to m z Hold the thread with both hands and pass the thread w Guide slot x Hold the thread with both hands and draw the thread Firmly pull the thread toward you along the right e Corner of the guide r Right channel... -
Page 18: Needle Threader
Needle threader NOTE: The needle threader can be used with a #11 to #16 The threader hook comes out through the needle eye q Threader knob w Threader hook x Draw the thread from the left to the right, under the left e Left guide r Right guide c Raise the threader slowly so a loop of the thread is... -
Page 19: Drawing Up The Bobbin Thread
Drawing up the Bobbin Thread After using auto thread cutting or threading the bobbin holder, you can start sewing without drawing up the However, you need to draw up the bobbin thread when holder again and rethread the bobbin holder according q Bobbin thread NOTE: w Thread cutter... -
Page 20: Replacing Needles
Replacing Needles CAUTION: Always make sure to press the lockout key to lockout the machine or turn the power switch off before replacing the q Lockout key Loosen the needle clamp screw by turning it counter- w Needle clamp screw e Flat side When inserting the needle into the needle clamp, push it up against the stopper pin and tighten the needle clamp... -
Page 21: Replacing The Presser Foot
Replacing the Presser Foot CAUTION: Always make sure to press the lockout key to lockout the machine or turn the power switch off before replacing the q Lockout key w Presser foot lifter e Lever CAUTION Place the desired foot under the foot holder so that the r Pin t Groove... -
Page 22: Replacing The Foot Holder
Replacing the Foot Holder Replace the foot holder, if you use the darning foot or em- CAUTION: Press the lockout key to lockout the machine or turn the Removing the presser foot holder Press the lockout key and raise the presser foot with the q Lockout key w Presser foot lifter Loosen the thumbscrew and remove the presser foot... -
Page 23: Replacing The Needle Plate
Replacing the Needle Plate The straight stitch needle plate (optional item) is also when CAUTION: Always make sure to press the lockout key to lockout q Lockout key Push down the needle plate release lever and the needle w Needle plate release lever A message will appear warning that the needle plate is e Extra lifted position Push down on the mark of the needle plate until it locks in... -
Page 24: Raising And Lowering The Presser Foot
Raising and Lowering the Presser Foot q Presser foot lifter You can raise the presser foot higher than the normal up also helps you to place thick layers of fabrics under the w Extra lifted position... -
Page 25: Raising And Dropping The Feed Dog
Adjusting the Foot Pressure q Foot pressure dial w Setting mark e Recommended setting Raising and Dropping the Feed Dog The feed dog can be lowered for basting, sewing on Shift the drop feed lever toward you to lower the feed q Drop feed lever w Feed dog Shift the drop feed lever away from you to raise the feed... - Page 26 Mode Selection When you turn the power switch on, the visual touch screen will show the ordinary sewing mode after a few NOTE: After turning on the power, it takes several seconds to q Mode switch key message e the embroidery mode and the carriage will move to the To switch back to the ordinary sewing mode, press the mode switch key and follow the instructions in the For embroidery sewing, please refer to embroidery...
-
Page 27: Ordinary Sewing Mode
ORDINARY SEWING MODE Ordinary Stitch Patterns In the ordinary sewing mode, there are 4 NOTE: In this manual, the pattern number refers to the For example pattern #3 in the Buttonhole is q Utility stitches, Buttonholes and speciality stitches You can select utility stitches (U), buttonholes and w Decorative and quilting stitches Applique stitches (A) Heirloom stitches (H) - Page 28 r Sewing applications You can select the appropriate stitch for a...
- Page 29 Function Keys in Ordinary Sewing Mode q Adjust key w Twin needle key Press this key to set the stitch width for twin needle The key will be grayed out if the selected pattern is not e Program key When this key is pressed, the cursor keys, mirror image r Vertical mirror image key Press this key to sew a vertical mirror image of the t Horizontal mirror image key...
- Page 30 i Letter size key o Letter case key Press this key to select upper case or lower case for !0 Cursor keys Press one of the cursor keys to move the cursor up or !1 Startover key If you stop sewing in the middle of a stitch pattern and wish to sew the pattern again from the beginning, press Press this key once to startover from the beginning of the current pattern, or press this key twice to startover from...
-
Page 31: Changing Sewing Direction
Utility Stitches Straight stitches NOTE: patterns U1, U2 or U3, and use straight stitch needle plate (optional item) for better sewing result (refer to page Starting to sew Place the fabric next to a seam guide line on the needle Pull the needle thread towards the rear and lower the Gently guide the fabric along the seam guide line letting q Start/stop button... -
Page 32: Cutting Threads
Securing seams For fastening the ends of seams, press the reverse button The machine sews in reverse as long as you press and q Reverse button Press the reverse button once when sewing the lock-a-matic stitch (pattern U2) or locking stitch (pattern U3) and the machine will lock the stitches off and stop Cutting threads w Thread cutter button... -
Page 33: Variety Of Straight Stitches
Variety of straight stitches U1 Straight stitch in center needle position U2 Lock-a-matic stitch Use this stitch to secure the beginning and the end of a When you reach the end of the seam, press the reverse The machine will sew four reverse stitches, four forward U3 Locking stitch This unique stitch is used where an invisible locking stitch The machine will sew several locking stitches at the be-... -
Page 34: Zigzag Stitches
U8 Basting Zigzag stitches U9, U10 Zigzag stitches Zigzag stitches are used for various sewing needs includ- U11 Multiple zigzag stitch... -
Page 35: Variety Of Overcasting Stitches
Variety of overcasting stitches U11 Multiple zigzag stitch: Zigzag foot A Sew along the fabric edge leaving an adequate seam U12 Overcasting stitch: Overedge foot M This stitch can be used to simultaneously seam and Place the fabric edge next to the guide of the foot and U13 Knit stitch: Overedge foot M This stitch is recommended for sewing such fabrics as synthetic knits and stretch velour as it provides the... - Page 36 U15, U16 Blind hemming U17 Shell tuck U18 Hemstitch...
- Page 37 Manual Stitch Settings You can alter the stitch width (or needle drop position of the straight stitches), stitch length and Press the “+” or “–” key beside the setting you Altering needle drop position (straight stitches) Press the “+” key to move the needle drop Press the “–”...
- Page 38 Adjusting thread tension This machine is equipped with automatic thread tension control, which optimizes the “Auto” will be indicated in the thread tension window when automatic thread tension control q Thread tension window Balanced thread tension Straight stitch: Both needle and bobbin Zigzag stitch: The needle thread appears the tension balance depending on the sewing When manual thread tension control is...
-
Page 39: Cloth Guide (Optional Item)
Cloth guide (optional item) CAUTION: Do not use the cloth guide when the buttonhole foot R is The extension table cannot be opened when the cloth Attaching the cloth guide Turn the attaching knob clockwise to secure the cloth q Pin w Cloth Guide e Carriage Hole r Attaching knob... - Page 40 Buttonholes and Specialty Stitches Variety of buttonholes Sensor (Square) buttonhole Auto (Square) buttonhole This is also a square buttonhole similar to the sensor square buttonhole, but you can manually set the buttonhole size and the machine memorizes it to sew buttonholes of Round end buttonhole Fine fabric buttonhole Keyhole buttonhole...
- Page 41 B1 Sensor (Square) buttonhole z Pull open the button holder of the automatic buttonhole foot R, and place the button in the button q Button holder NOTE: NOTES: The buttonhole size is automatically set by placing a e Marker c Draw the needle thread to the left through the hole of Mark the buttonhole position on the fabric and place r Starting point...
- Page 42 v Lower the buttonhole foot and pull down the Start sewing while pulling the needle thread lightly to t Buttonhole lever NOTE: A warning message will appear and the machine will stop automatically if you start the machine without pulling Make sure there is no gap between the slider and front stopper, otherwise the buttonhole will be out of position or y No gap...
-
Page 43: Manual Settings
Manual settings q Altering buttonhole opening width Press the “–’’ key to make the buttonhole opening w Altering buttonhole width e Altering buttonhole stitch density Press the “+” key to make the buttonhole stitches less NOTE:... - Page 44 Using the Stabilizer Plate (optional item) The stabilizer plate holds and supports the fabric so it is helpful when sewing buttonholes over the hem of thick z Insert the tab of the stabilizer plate q into the slot w q Stabilizer plate w Slot Insert the fabric between buttonhole foot and stabilizer needle thread to the left between the...
- Page 45 B2 Automatic (square) buttonhole Place the fabric under the foot, and lower the needle at Lower the foot and start sewing while pulling the needle NOTE: If you wish to sew a buttonhole longer than the size permitted by the automatic buttonhole foot R, use satin NOTE: Step-1 Sew the left side up to the required buttonhole length and...
- Page 46 Step-3 Start sewing again, and the machine sews the front Step-4 Start sewing again, and the machine sews the back bartack and locking stitches then stops automatically with To make the next buttonhole, position the fabric and start To sew another buttonhole in a different size press the X NOTES: To cut the buttonhole opening, refer to the instructions on The memorized length will be cancelled if the startover...
-
Page 47: Other Buttonholes
Other buttonholes The sewing procedure is the same as that of B1 sensor NOTE: B5 Keyhole buttonhole The sewing procedure is the same as B1 sensor (square) NOTE: B6 Stretch buttonhole The sewing procedure is the same as B1 sensor (square) NOTE:... -
Page 48: Corded Buttonhole
Corded buttonhole To sew a corded buttonhole, follow the same procedure Place the button on the button holder on the buttonhole Bring up the ends of the cord and insert both ends q Spur w Metal plate Set the stabilizer plate (optional item) as necessary and Lower the needle into the fabric where the buttonhole will After sewing a few stitches, free the thread and continue Remove the fabric from the machine and cut the sewing... -
Page 49: B7 Darning
B7 Darning z Attach the automatic buttonhole foot R and pull the x Start the machine and sew to the required length, then q Required length NOTE: To sew the same size darning Simply start the machine to sew another layer of darning To sew the next layer of darning in a different size, press To adjust the evenness of darning stitches: You can correct unevenness of darning stitches by... -
Page 50: B9 Eyelet
B9 Eyelet Place the garment under the foot and lower the needle to q Starting point To correct the shape of an eyelet:... - Page 51 Decorative Stitches These patterns are programmable and you can make a Applique stitches (A): 1 page Heirloom stitches (H): 2 pages This group provides heirloom stitches and cross stitches Quilting stitches (Q): 4 pages Satin stitches (S): 1 page The stitches in this group can be elongated up to 5 times their original length while the stitch density remains the...
- Page 52 Bridge stitches (BR): 1 page Bridge stitches are used for inserting straight stitches The number beside the stitch image on the straight stitch Patterns BR5 and BR7 will inherit the needle drop position and stitch length of the previous pattern in the Decorative stitches (D): 4 pages More than 50 attractive patterns are available in this Long stitches (L): 1 page...
-
Page 53: Quilting(Q)
Quilting(Q) Using the quilting guide bar The quilting guide bar is helpful when sewing parallel, Insert the quilting guide bar into the hole in the back of q Quilting guide bar w Hole Sew rows of stitches while tracing the previous row of Q1-Q3 Patchwork piecing Patterns Q1 to Q3 are special stitches for seaming q Guide... - Page 54 S1-S12 Decorative satin stitches Patterns S1 to S12 are decorative satin stitches for which the pattern length can be elongated without changing the w “+” key (elongation) e “–” key (elongation) The pattern can be elongated up to 5 times the original r Elongation ratio...
- Page 55 Twin Needle Sewing Some of the utility stitches and decorative stitches can be Replace the needle with the twin needle supplied with the CAUTION: Turn the power switch off or press the lockout key before Do not use twin needles other than the one included in the standard accessories, otherwise the needle may hit q Lockout key w Extra spool pin...
-
Page 56: Programming A Pattern Combination
Programming a Pattern Combination The patterns in the decorative stitch category and monograms can be programmed to make a pattern Press the program key and select as many patterns as The images of programmed patterns are shown on the q Program key Mirror image of patterns To sew or program the pattern as a mirror image, press Mirror image icon appears on the screen and mirror image... -
Page 57: Editing A Pattern Combination
Editing a pattern combination Deleting the pattern The pattern before the cursor or shown in red is deleted q Cursor w Delete key To delete a pattern in the middle of a combination, press e Cursor key r Selected pattern Inserting the pattern Press the cursor key to select the pattern next to where t Inserted pattern... -
Page 58: Checking Pattern Combination Length
Startover key This is a 2-way function key to start sewing a pattern When you stop sewing a pattern combination, the The key shows a triangle and single bar that means the When you press the startover key, the key will change and show a triangle and double bar that means the ma- Current pattern startover If you wish to start sewing from the beginning of the cur-... -
Page 59: Monogramming
Monogramming Press the monogram key and the font selection window q Monogram key Select the desired font by pressing the corresponding w Block font key e Script font key r Block font key (9 mm) Function keys t Cursor key y Letter size key u Letter case key i Delete key... -
Page 60: Manual Thread Tension
Manual thread tension This machine is equipped with automatic thread tension Individual thread tension adjustment tension window turns to orange w NOTE: Spacing To enter a space in monogramming, press one of the three space keys on the lower right corner of the q Space keys w Small-size space e Medium-size space... -
Page 61: Programming A Monogram
Programming a monogram Simply enter the characters by pressing the Example 1: “Quilt” in Block font “Q” q Letter case key Enter “u”, “i”, “l” and “t Example 2: “Café” in Script font Enter “C Enter “a” and “f” Enter “é” NOTES:... -
Page 62: Zipper Sewing
Sewing Application Sewing application is a unique feature that provides you Press the sewing application key and the sewing The 12 sewing applications are as follows: q Seaming w Overedge e Blind Hem & Shell Tuck r Rolled Hem t Zipper Sewing y Gathering u Basting i Button Sewing... - Page 63 Seaming q Woven w Stretch/Knit e Curve r Topstitching...
-
Page 64: Overedge
Overedge q Woven w Stretch/Knit e Woven r Heavy Double overedge stitch for preventing raw edges of linens... -
Page 65: Blind Hem
Blind hem q Woven w Stretch/Knit To sew: (A) Medium to heavy fabrics: The raw edge should be Position the fabric so that the fold comes to the left side t Fold y Guide Adjusting the needle drop position Press the “+” key in the upper row to move the needle Press the “–”... - Page 66 Altering blind hem stitch width Press the “+” key in the lower row to increase the stitch Press the “–” key in the lower row to decrease the stitch NOTE: You can move the left needle drop position with the “+” or Shell tuck q Small Narrow shell tuck stitch...
-
Page 67: Rolled Hem
Rolled hem q Straight Stitch Rolled hemming with straight stitch w Zigzag Stitch Rolled hemming with narrow zigzag stitch e 4 mm & 6 mm (optional) Rolled hemming using optional rolled hemming feet D1 and D2 To sew: 5 cm Place the fabric aligning the hem edge with the guide of Lower the foot and sew several stitches slowly while pull- Raise the foot and insert the folded portion of the fabric... - Page 68 Zipper sewing q Lapped zipper w Concealed zipper (optional) Concealed zipper application using optional concealed Lapped zipper sewing Press the lapped zipper icon and the zipper sewing Press the sewing step icon so the machine setting will be Fabric preparation q Zipper size w Opening size r End of opening...
- Page 69 Sew left side w Zipper teeth e Fold Opening size Lower the foot onto the topside at the bottom of the zip- per so that the needle pierces the fabric next to the fold Sew along the zipper guiding the zipper teeth along the...
- Page 70 Basting q Basting Sew right side 1 cm Stitch through the garment and zipper tape, guiding the Lower the needle into the fabric, raise the foot and w Basting stitches Open the zipper and move the slider to the rear of the Lower the foot and stitch the remainder of the seam...
-
Page 71: Gathering
Gathering In addition to the regular gathering stitch, this section Easing a sleeve top Pull the bobbin threads to contract the sleeve top Basting Basting (Auto) Basting (Manual/Quilting) NOTE: To sew... -
Page 72: Button Sewing
Button sewing Attaching button sewing foot T Insert the rear pin of the foot into the rear groove of the q Rear pin w Rear groove Gently lower the presser foot lifter while holding the foot Place a button on the fabric and lower the needle into the left hole of the button by turning the handwheel with your Lower the foot to hold the button in place, aligning the Raise the needle by turning the handwheel until the... -
Page 73: Tacking
Tacking Tacking is used to reinforce pockets, crotches and belt There are 3 auto tacking sizes and manual tacking Auto tacking The machine will sew the tack of the selected size and q Starting point Manual tacking Start the machine and sew to the required length, then w Required length NOTE: To sew the same size tack... - Page 74 Applique There are 6 types of applique stitches available in this You can select the needle stop position either up or down q Needle stop position key The letter above the stitch image denotes the baseline of M: Middle (center) R: Right NOTE: Make sure to stop the machine with the needle dropped...
-
Page 75: Patchwork
Patchwork Patchwork piecing There are 3 stitches for seaming patchwork pieces in this Place the patchwork pieces under the foot so that the q Edges of fabric w Guide Press OK key and the machine memorizes the seam After sewing the memorized length, a message will To sew the same length, start the machine and it will stop... -
Page 76: Quilting
Quilting In this section, 5 types of useful stitches for quilting are q Straight stitches w Clasp stitches e Free motion quilting stitches r Sculpture stitches t Hand-look quilt stitches Straight stitches Straight stitches in this section are suitable for seaming Quilting bar Insert the quilting guide bar into the hole in the rear of the q Quilting guide bar... - Page 77 Free quilting For free quilting, use the darning foot PD-H (refer to page 18 for how to attach the darning foot) One stitch off The machine stops automatically after sewing one stitch so that you can bring the bobbin thread up to prevent it Hold the needle thread and sew one stitch and the Hold both the needle and bobbin threads and sew several The machine will stitch continuously when you resume...
- Page 78 Sculpture stitches These stitches are used to accentuate design outlines Hand-look quilt stitches Use a transparent nylon thread for the needle and The bobbin thread is pulled up on the right side of the...
-
Page 79: Customizing Machine Settings
CUSTOMIZING MACHINE SETTINGS Press the set mode key to enter the machine setting You can select various options and customize the q Set mode key w Common Setting Mode In this mode, you can customize the machine settings e Ordinary Sewing Setting Mode In this mode, you can customize the machine settings r Embroidery Setting Mode In this mode, you can customize the machine settings... - Page 80 Common Setting Mode q Screen Contrast Sound Volume e Inch/mm Option You can set your machine’s measurement unit to either inches or millimeters by pressing the “inch” or “mm” icon r Standby Timer The sewing lights will turn off, the visual touch screen will go dark and the machine will be in standby mode if you have not used the machine within the time period set If you wish to turn off the timer, press and hold the “+”...
- Page 81 y Formatting the memory stick does not function due to damage to the memory To format the machine’s internal memory, press the CAUTION: drive while a warning message is displayed otherwise u Upper Thread Sensor If you need to run the machine without threads, turn off After altering the settings press the OK key to enable the i Sewing Light Press the YES key to open the sewing light option...
- Page 82 o Background Color You can select black, green or pink for the background color of the visual touch screen by pressing the relevant !0 Auto-off Timer The machine will be automatically turned off if you do not If you wish to turn off the timer, press and hold the “+” key NOTE: The auto-off timer is available in EU countries and !1 Reset All to Defaults...
- Page 83 Ordinary Sewing Setting Mode q Auto thread tension w Low bobbin thread warning The machine has a function to display warning message Set the level to a larger number when using thick threads To turn off the low bobbin thread warning, press the “–” e Needle Stop Position The machine always stops with the needle in the down position except when sewing buttonholes, specialty...
- Page 84 t Cloth Guide (optional item) t-1 Calibration of the default position Press the OK key and the carriage will move to the Press the key to back to the default cloth guide Press the OK key and the carriage will return to the home t-2 Saving favorite position To save favorite position, press the ON/OFF key to turn...
- Page 85 y Thread Cut after Auto-Lock The machine automatically trims the threads after sewing The LED signal o is turned on when “Thread Cut u Favorite Stitch Adjustment If you wish to save the changes to manual stitch settings, Press the delete icon !0 NOTE: This option is available for all stitches except i Resume Mode...
- Page 86 Correcting Deformed Stitch Patterns The sewing results of the stretch stitch patterns may vary depending upon the sewing conditions, such as sewing Always test sew on a scrap piece of the fabric that you If decorative stitch patterns, letters, numbers or the manual buttonhole stitch are deformed, correct them with q Cap Decorative stretch stitch patterns...
-
Page 87: Embroidery Mode Embroidery Unit
EMBROIDERY MODE Embroidery Unit NOTE: Attaching the embroidery unit w Cover NOTE:... -
Page 88: Extending The Carriage Arm
Extending the carriage arm CAUTION: CAUTION:... -
Page 89: Detaching The Embroidery Unit
Detaching the embroidery unit NOTE: NOTES: WARNING: CAUTION: t Cover... -
Page 90: Attaching The Embroidery Foot
Attaching the Embroidery Foot Foot pressure... - Page 91 Attaching the Straight Stitch Needle Plate (optional item) NOTE:...
- Page 92 Special Bobbin Holder for Embroidery NOTE: r Stopper NOTE:...
-
Page 93: Embroidery Hoop
Embroidery Hoop q Embroidery hoop SQ14a... - Page 94 Stabilizers How to use: Attaching the stabilizer NOTES: Types of the stabilizers Usage Type Property NOTE:...
- Page 95 Setting the Fabric in an Embroidery Hoop NOTE: NOTE:...
-
Page 96: Attaching The Embroidery Hoop To The Machine
Attaching the Embroidery Hoop to the Machine NOTE: NOTE: Thread holder... - Page 97 Selecting Built-in Embroidery Designs Design category Hoop size...
-
Page 98: Monogramming
Monogramming NOTE:... -
Page 99: Function Keys
Function keys q Font selection key w Lettering orientation key e Letter size key L (Large): M (Medium): S (Small): r Letter case key y Delete key u Cursor key i OK key o Space adjust key NOTE:... -
Page 100: Programming A Monogram
Programming a monogram Example: “R&B” “R” “&” “&” is “B” “B” is Color change Monogram placement q Left Justify w Center Justify e Right Justify... -
Page 101: 2- Letter Monogram
2- Letter monogram Example: “A” “B” NOTES:... -
Page 102: Editing A Monogram
Editing a monogram Deleting a character: “R” “MART” “R” “R” Inserting a character: “E” “MAT” “A” “E” “E” “A”... - Page 103 Ready to Sew Window Stitch back/forward keys Editing mode key Function keys...
- Page 104 NOTE: Auto thread tension level Tail length of jump thread cutting...
- Page 105 Pattern tracing 1. Trace without stitching 2. Trace and baste (single) 3. Trace and baste (double) NOTES:...
- Page 106 Pattern information w Presser foot pressure...
- Page 107 Starting to sew embroidery Sewing results NOTE:...
-
Page 108: Fringe Designs
Fringe designs Example: Example:... - Page 109 Applique designs Example: NOTE:...
- Page 110 Alternative method...
-
Page 111: Editing Mode
Editing Mode NOTES: Opening the embroidery designs Selecting the pattern to edit Moving a pattern NOTE:... - Page 112 Resizing a pattern Duplicating a pattern NOTE: Deleting the pattern Rotating the pattern Flipping the pattern...
- Page 113 Zooming in the editing window Grouping the patterns...
- Page 114 Customizing the display colors NOTE:...
- Page 115 Color grouping NOTE: Sewing order...
- Page 116 Monogramming in an arc...
-
Page 117: Free Arm Hoop (Optional Item)
Free Arm Hoop (optional item) Opening width: Free arm embroidery... -
Page 118: Customizing Machine Settings Embroidery Mode Settings
CUSTOMIZING MACHINE SETTINGS Embroidery mode settings q Auto thread tension w Low bobbin thread warning e Maximum embroidery speed NOTE: r One stitch stop on/off t Consecutive color grouping on/off u Hoop calibration... - Page 119 i Auto thread cutting (basic) o Auto thread cutting (advanced) o-2 Jump thread cutting length o-3 Thread cutting at color change o-4 Cutting command on/off !0 Thread selection...
- Page 120 !1 Grid line on/off !2 Grid size !3 Resume mode...
-
Page 121: File Management
FILE MANAGEMENT Ordinary sewing Embroidery Saving and Opening a File ... -
Page 122: Creating A New Folder
Creating a new folder Embroidery Ordinary sewing... - Page 123 Ordinary sewing Embroidery...
- Page 124 Embroidery Ordinary sewing...
-
Page 125: Care And Maintenance Cleaning The Hook Area
CARE AND MAINTENANCE Cleaning the Hook Area NOTE: u Stopper... -
Page 126: Cleaning The Inside Of The Thread Guide
Cleaning the Inside of the Thread Guide... -
Page 127: Troubleshooting
Troubleshooting Reference Problem Cause ... - Page 128 Problem Cause Reference...
- Page 129 STITCH CHART Ordinary Sewing Utility (U) Buttonhole (B) Applique (A) Heirloom (H) Quilt (Q)
- Page 130 STITCH CHART Ordinary Sewing Satin (S) Bridge (BR) Decorative (D) Long (L) Pictograph (P) Play (PL)
- Page 131 STITCH CHART Ordinary Sewing Block Script Block (9 mm)
- Page 132 DESIGN CHART Embroidery Favorite Designs (SQ14a) (RE20a) Geometric Designs (SQ14a) Pantry Designs (SQ14a) (SQ14a) (RE20a) (RE20a)
- Page 133 DESIGN CHART Embroidery Monochrome Designs (SQ14a) (RE20a) Cross Stitch Designs (SQ14a) Quilting Designs (SQ14a) (RE20a) Fringe Designs (SQ14a) (RE20a)
- Page 134 DESIGN CHART Embroidery Floral Alphabet Designs (SQ14a) Calibration Pattern...
- Page 135 DESIGN CHART Embroidery Script Gothic Cheltenham 2 Letters / 3 Letters Border Normal Sew...
- Page 138 861-800-573 (EN)
Need help?
Do you have a question about the Memory Craft 9850 and is the answer not in the manual?
Questions and answers