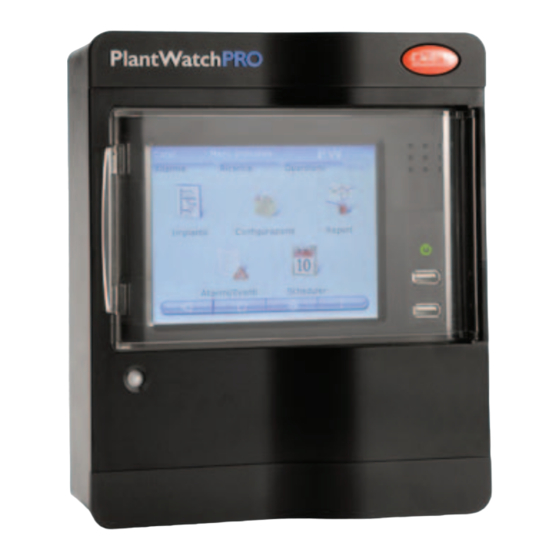
Carel PlantWatchPRO User Manual
Supervisor for small-medium installations
Hide thumbs
Also See for PlantWatchPRO:
- User manual (40 pages) ,
- Manual (2 pages) ,
- Assembly and installation (2 pages)
Table of Contents
Advertisement
Quick Links
Advertisement
Table of Contents

Related Manuals for Carel PlantWatchPRO


Summary of Contents for Carel PlantWatchPRO
- Page 1 PlantWatchPRO supervisor for small-medium installations User manual LEGGI E CONSERVA QUESTE ISTRUZIONI READ AND SAVE THESE INSTRUCTIONS NO POWER & SIGNAL CABLES TOGETHER READ CAREFULLY IN THE TEXT! I n t e g r a t e d C o n t r o l S o l u t i o n s & E n e r g y S a v i n g s...
-
Page 3: Table Of Contents
Floating suction ...............20 remote pc System pages ..............20 Network configuration ...........21 PlantWatchPRO from a remote PC via a telephone connection ................48 How to configure a simple line ......24 15. Function tree How to differentiate a device (or a group of devices) from the standard ...........27... - Page 4 Never run power cables (including the electrical panel wiring) and signal READ CAREFULLY IN THE TEXT! cables in the same conduits. Before performing any operations, check that the PlantWatchPRO box contains: the two plastic faceplates (top and bottom); the user manual;...
-
Page 5: Presentation
1. prEsENtatioN PlantWatchPRO is the new solution from CAREL for lights and defrosts; • the supervision of small-medium installations. possibility to export data (alarms, events, system Complete network and alarm configuration, simple and model configurations and variable reports) navigation and an attractive design are some of the... - Page 6 10 optional GSM/GPRS modem (code PLWOPGSM00) required to be able to use all the SMS functions; using modems other than the one supplied by CAREL will not guarantee correct operation of the appliance and technical service +040000021 - rel. 2.0 - 20.02.2009...
-
Page 7: Key
PlantWatchPRO USB key indicates that the function can only be accessed directly from PlantWatchPRO... -
Page 8: Assembly Procedure
4. assEmblY procEdurE assembly Remove PlantWatchPRO from the plastic bag it is To safeguard operators and the boards, disconnect wrapped in and place it on the bench. power before performing any operations. Electrical damage may occur to the electronic ... - Page 9 Remove the board using a fl at-head screwdriver, Now drill the plastic frame of PlantWatchPRO to make levering the two tabs (3a and 3b) on the grill that the opening for the connection cables, holding it secures it in place; then fully place the board on the fi rmly by hand, as shown in the fi gure.
- Page 10 Using the drilling template (provided on the box), Once PlantWatchPRO has been fastened to the wall, drill the wall where PlantWatchPRO is to be mounted, and the cables have been run through the holes in and then fasten it to the wall using four screws.
- Page 11 Finally, fi t the top and bottom plastic faceplates, by PlantWatchPRO again, making sure the two tabs click lightly pressing them into place. into the corresponding slots. Then fasten the front to the rear using the four screws supplied.
-
Page 12: Board And Connections
• only use standard USB cable, less than 30 m long: to ensure correct operation of the USB connection, CAREL recommends cables no longer than 5 m; for longer cables, signal repeater devices should be used; +040000021 - rel. 2.0 - 20.02.2009... - Page 13 5. board aNd coNNEctioNs Terminals and connections: relay 1 J P 10 Input: 110-240 V ~ 50/60 Hz J P 6 relay 2 Max current: 150 mA Re la y 3 relay 3 JP15 telephone line JP 5 JP10 power supply Rel ay 2 JP12 RS485 (field - line 2)
-
Page 14: Graphic Interface
The following keypad will be made available on the touchscreen display whenever data needs to be entered (letters, numbers or symbols): One of the main features of PlantWatchPRO is the user interface. Web navigation also uses the same graphic interface, identical to the touchscreen except... -
Page 15: Navigation Buttons
), after having confirmed the changes opens the window for setting the “Guardian” program; the notification channels specified will be used by the “Guardian” to send any PlantWatchPRO malfunction warnings to the specific technical personnel. This button, like the previous two, turns red (... -
Page 16: Main Menu
6. GrapHic iNtErFacE main menu The PlantWatchPRO main menu features the clock, the navigation buttons, the information on the name of the site, and five icons: Installation, Configuration, Reports, Alarms/Events and Scheduler; pressing each of these accesses other secondary menus with the lists of corresponding functions. -
Page 17: Start Up
7. start up confi guration wizard When PlantWatchPRO is fi rst started, the following presentation screen will be displayed Pressing accesses the page for selecting the LANGUAGE and the TIMEZONE. As the fi nal phase in the program initialisation... -
Page 18: Configuration
To add (or where necessary remove ) devices to/from the installation, choose the type (from those available in the PlantWatchPRO archive), then assign a short custom description and assign the address (this must be diff erent for each device on the same line, otherwise the program will display an error message);... -
Page 19: Site Information
On the USB memory key, the models to be loaded button from the login screen, so as into PlantWatchPRO must be saved in specifi c to indicate who to contact in the event of need. directories, in order to be recognised by the device: The PASSWORD IDENT and CONFIRM (password) •... -
Page 20: Users
For details on the operating status and information Update software on the showcases and compressor racks. To update the PlantWatchPRO software, see Chap. Confi guration "13. Use of the USB memory key" To confi gure the compressor racks, set the connected... -
Page 21: Network Configuration
8. coNFiGuratioN Display/Clock Control panel for the date/time and display settings. Network confi guration Confi guration of the network settings for the local network (LAN) connection. By default, the USE DHCP item is selected, which allows the system to detect the network settings automatically. - Page 22 8. coNFiGuratioN Tree of the “Configuration” menu functions Line config. Line 1/2 Device list Device customisation Connection Model management Model configuration Alarms Import standard models Log/graph/HACCP/main view Export model Description unit of measure Site info Import model Copy model Remove model Users Administrator Remote user...
- Page 23 8. coNFiGuratioN Device detail List of variables Variable detail List of device models List of alarms List of device models List of variables List of device models List of variables Normal user details Rack Rack detail Showcases List of showcases Showcase detail Rack Showcases...
-
Page 24: How To Configure A Simple Line
8. coNFiGuratioN How to confi gure a simple line First of all, the user needs to confi gure PlantWatchPRO in relation to the devices in the specifi c installation. From the home page, enter the menu CONFIGURATION LINE CONFIGURATION LINE 1 DEVICES menu. - Page 25 8. coNFiGuratioN Entering MODEL MANAGEMENT MODEL CONFIGURATION ALARMS and choosing the devices on the two lines from the list one at a time, the alarms can be enabled or disabled and the priority set (the priority of an alarm will be indicated in the list with a diff erent colour, depending on the level).
- Page 26 8. coNFiGuratioN DESCRIPTION/UNIT OF MEASURE is used to change the name and unit of measure of the variables. Reload confi guration, using button and the dedicated screen. The line is thus confi gured, and from the INSTALLATION menu all the settings defi ned thus far can be displayed under CONFIGURATION.
-
Page 27: How To Differentiate A Device (Or A Group Of Devices) From The Standard
8. coNFiGuratioN How to diff erentiate a device (or a group of devices) from the standard An example of how to create another model of device with other features starting from the IR33 From the home page, enter the CONFIGURATION MODEL MANAGEMENT COPY MODELS menu, from the ORIGINAL MODEL list... -
Page 28: Installation
& buttons to move from one device to another. PlantWatchPRO can plot up to fi ve values at the same time. Read-only variables Favourites Displays the variables set as favourites. All variables Displays all the variables. - Page 29 9. iNstallatioN Search To search for variables or parameters based on parts of the description or code. Tree of the “Installation” menu functions Device list Read-only Favourites List Details variables List Details Write Favourites List Details parameters List Details List Details List Details...
-
Page 30: Reports
Edit description printer that supports PostScript language. To modify the description of the report. Via web, PlantWatchPRO opens a dialogue box Edit confi guration prompting for the directory used to save the To modify the list of the variables in the report. - Page 31 10. rEports Tree of the “Reports” menu functions Configure Create report report Edit report Copy report Delete report List of reports Export report Export HACCP report Export log report Print report Print HACCP report Print log report Display data +040000021 - rel. 2.0 - 20.02.2009...
-
Page 32: Alarms/Events
• white - low priority. PlantWatchPRO. Pressing the corresponding fi elds and confi rming ) disables the relays. download alarms This saves the list of active alarms from a certain date onwards; the data is saved to a fi le in “.csv” format (compatible with Microsoft®... -
Page 33: How To Respond To Alarm Signals From Plantwatchpro
11. alarms/EVENts How to respond to alarm signals from plantWatchpro Below is a description of how alarms are shown on the PlantWatchPRO display and how to respond. ALARM button turns ) an alarm is active on one of the fi eld devices. - Page 34 Pressing a third time records the identity of the user who removed the alarm on PlantWatchPRO. Once the alarm has been removed, it no longer appears in the list of ACTIVE ALARMS, but rather can be seen in another screen with the list of CONCLUDED ALARMS.
-
Page 35: Scheduler
• a set of actions (fax, SMS, e-mail, print, activate simply intuitively confi gured relay, buzzer, remote access); PlantWatchPRO. • a time band; In addition, the procedure and time for resetting the • a delay. buzzer and the three relays can also be set. -
Page 36: I/O Test
12. scHEdulEr Actions For correct data entry, fi rst create the time bands Notifi cations and the actions. Confi guration of the parameters for the notifi cations and the activation of the alarm channels. Scheduled rules Display the list of scheduled rules; scheduled rules Scheduled activities can be added/removed or edited, pressing the detail List of the scheduled activities;... -
Page 37: Guardian
Confi guration of the notifi cation parameters for the “Guardian” program; the channels set are used by the “Guardian” to send notifi cations of any malfunctions on PlantWatchPRO to the technical personnel indicated. Alarm priority Used to confi gure the priority of the alarms, entering the settings in the respective fi elds. - Page 38 12. scHEdulEr Tree of the “Scheduler” menu functions I/O config. Fax config. SMS config. E-mail config. e-mail Remote config. Dial-up Network config. Relay details Phone book E-mail Remote access Daily Daily details service Rile config. Time bands Weekly Weekly details Special event Special event details...
-
Page 39: How To Set Scheduled Rules
12. scHEdulEr How to set scheduled rules Below is a step-by-step description of how to turn off the lights at 20:00 each working day and turn them on again in the morning at 9:00. From the home page, enter the SCHEDULER RULE CONFIGURATION TIME BANDS DAILY... - Page 40 12. scHEdulEr Return to the RULE CONFIGURATION ACTIONS SCHEDULED ACTIVITIES menu: enter the desired actions (on the entire installation or just on some devices, using the option for assigning the actions to the GROUPS). Two actions have been created, “lights ON”...
- Page 41 12. scHEdulEr How to set the rules Below is a description of how to set PlantWatchPRO to notify a highest priority alarm activated in the night-time time band (21:00-08:00) via SMS. From the home page, enter the SCHEDULER RULE CONFIGURATION...
- Page 42 With these settings, as soon as a highest priority alarm is activated, on any night of the week, PlantWatchPRO waits one minute and, if within this time interval the alarm has not concluded, notifi cation of a highest priority alarm will be sent via SMS to “maintenance tech.
-
Page 43: How To Configure The Guardian Program
12. scHEdulEr How to confi gure the Guardian program Below is a description of how to send a fax to a certain number if a highest priority alarm is activated on a fi eld device. From the home page, enter the SCHEDULER PHONE BOOK menu, and enter the fax number to send the notifi cation... -
Page 44: How To Configure Email
How to confi gure email Below is a step-by-step description of how to confi gure the parameters to allow PlantWatchPRO to send email. From the home page enter the SCHEDULER CONFIGURATION E-MAIL CONFIGURATION E-MAIL menu to access the parameter confi guration screen ... -
Page 45: Use Of The Usb Memory Key
The USB key must be formatted with the FAT32 fi le The USB memory key can also be used to load new system. data to the PlantWatchPRO memory; this is useful, for example, for importing the confi guration of a previously confi gured site, models created based on “G:\” is the name that usually denotes the... -
Page 46: Plantwatchpro
Below is a description of the operations to be performed by the user to download a HACCP report from PlantWatchPRO using the USB memory key, and then transfer the data to a PC. For example, download the daily report, with the data shown every 30 minutes, relating to 19 July 2007. -
Page 47: How To Update The Plantwatchpro Software Using A Usb Memory Key
13. usE oF tHE usb mEmorY KEY How to update the plantWatchpro software using a usb memory key How to update the PlantWatchPRO software with new versions released by CAREL. Check the software version currently installed. Download the software update from the http://ksa.carel.com website to the PC... -
Page 48: Navigation Via Web From A Remote Pc
This function can be used to display on the PC’s screen the exact same data that appears on the plantWatchpro from a remote pc via a telephone connection Once the PC is running, in Microsoft Windows (any version), from the Control panel create a new Internet connection, as follows: ... - Page 49 +040000021 - rel. 2.0 - 20.02.2009...
-
Page 50: Function Tree
15. FuNctioN trEE +040000021 - rel. 2.0 - 20.02.2009... - Page 51 +040000021 - rel. 2.0 - 20.02.2009...
-
Page 52: Technical Specifications
16. tEcHNical spEciFicatioNs Power supply 110 to 240 V ~ 50/60 Hz Power input 6.7 W (typ), 9 W (max) Operating conditions 5T50 °C, 20 to 80 % rH Storage conditions -20T60 °C, 20 to 80 % rH Index of protection IP65 Display resolution 240 x 320 pixels... - Page 53 Dimensions (mm) wall-mounting max PG ø32 mm 87,3 +040000021 - rel. 2.0 - 20.02.2009...
- Page 54 Note:...
- Page 56 / Agency: CAREL S.p.A. via dell’industria, 11 - 35020 brugine - padova (italy) tel. (+39) 049.9716611 - Fax (+39) 049.9716600 e-mail: carel@carel.com - www.carel.com...
Need help?
Do you have a question about the PlantWatchPRO and is the answer not in the manual?
Questions and answers