
Related Manuals for Sygonix 1911204


Summary of Contents for Sygonix 1911204
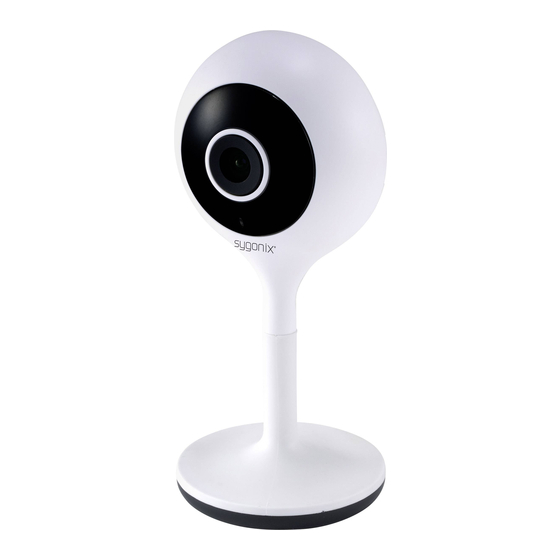
- Page 1 App-Bedienungsanleitung Sygonix Home https://conradconnect.de Best.-Nr. 1911204 Best.-Nr. 1911205...
-
Page 2: Table Of Contents
Inhalt Grundfunktionen Symbole Impressum Mobile App App herunterladen und installieren Konto registrieren Betrieb mit der App Anschließen einer Kamera Hinzufügen einer Kamera mit SmartConfig Entfernen einer Kamera Hauptfunktionen Häufig gestellte Fragen... -
Page 3: Grundfunktionen
Sygonix Home ----- Smart Life Die Smart Life-App unter Sygonix Home unterstützt derzeit die folgenden Geräte: ■ IP-Kamera (Best.-Nr. 1911204) ■ IP-Kamera (Best.-Nr. 1911205) Grundfunktionen Videoüberwachung in Echtzeit Die Kamera kann Echtzeit-Video an die App übertragen, je nach Bedingungen wie Wetter, Temperatur, Gerätestatus und Uhreit. -
Page 4: Symbole
Symbole In dieser Bedienungsanleitung wird auf die folgenden Symbole zurückgegriffen: Dieses Dreieck weist auf wichtige Anweisungen in dieser Bedienungsanleitung hin, die unbedingt zu befolgen sind. Dieses Symbol weist auf besondere Ratschläge und Hinweise bezüglich der Bedienung hin. Impressum Dies ist eine Publikation der Conrad Electronic SE, Klaus-Conrad-Str. -
Page 5: Mobile App
Mobile App Es sind kompatible Android- und iOS-Apps in den jeweiligen App-Stores erhältlich. Suchen die App „Sygonix Home“ und laden Sie diese auf Ihr mobiles Gerät herunter. Eine Bedienungsanleitung für die App ist unter der in Kapitel „Aktuelle Bedienungsanleitungen“ aufgeführten URL erhältlich. - Page 6 Die App ist kompatibel mit Smartphones unter Android und iOS. Die Benutzeroberfläche der Apps kann je nach Betriebssystem unterschiedlich sein. Screenshots, die zur Veranschaulichung in der Anleitung verwendet werden, stammen von der Android- Benutzeroberfläche. Wenn Sie die App zum ersten Mal ausführen, werden mehrere Fenster geöffnet, um die Berechtigung für das Telefon zu erhalten.
-
Page 7: Konto Registrieren
Konto registrieren Neue Benutzer müssen ein Konto registrieren. Sie können sich per E-Mail oder telefonisch registrieren. Register ■ Tippen Sie auf (Registrieren) und befolgen Sie die Schritte, um die Registrierung des Kontos abzuschließen. Sie erhalten einen E-Mail- Verifizierungscode über die angegebene E-Mail-Adresse oder als SMS über Ihre Telefonnummer. - Page 8 Forgot Password (Kennwort vergessen), um Ihr Kennwort per E-Mail abzurufen. Integration mit Conrad Connect Beachten Sie, dass das „Sygonix“- Benutzerkonto unabhängig von Conrad Connect ist. Wenn Sie Ihr Smartgerät mit Conrad Connect verbinden möchten, benötigen Sie ein separates Conrad Connect-Benutzerkonto.
-
Page 9: Betrieb Mit Der App
Betrieb mit der App Welcome home ■ Starten Sie die App. Der screen (Begrüßungsbildschirm) erscheint. Welcome home screen Auf dem (Begrüßungsbildschirm) können Sie: Add Device ■ Mit (Gerät hinzufügen) oder Geräte hinzufügen ■ Geräte in verschiedenen Räumen verwalten Auf dem Smart screen (Smart-Bildschirm) automatische Aktionen für verschiedene... - Page 10 ■ Automation > Add Automatic Action (Automatisierung > Automatische Aktion hinzufügen) - zum Einrichten automatischer Ereignisse entsprechend Temperatur, Luftfeuchtigkeit, Wetter, Sonnenauf- und -untergang, einem Zeitplan und dem Gerät. ■ Tippen Sie unter „Smart-Einstellungen“ auf , um das Hintergrundbild und die Szenen zu bearbeiten und zu ändern.
-
Page 11: Anschließen Einer Kamera
Anschließen einer Kamera 1. Verwenden Sie zum Anschließen des Geräts den Netzadapter. Die Gerätekontrollleuchte leuchtet auf. 2. Wenn das Gerät eingeschaltet ist, leuchtet die LED-Anzeige in kurzen Abständen rot auf. 3. Wenn die Anzeige anders leuchtet, setzen Sie das Gerät auf die Werkseinstellungen zurück. - Page 12 ■ Überprüfen Sie, ob das WLAN-Kennwort korrekt eingegeben wurde. ■ Wenn die Geräteverbindung fehlschlägt, halten Sie die Reset-Taste auf der Rückseite des Gerätes gedrückt, um die Werkseinstellungen wiederherzustellen. Wenn die Geräteanzeige schnell rot blinkt und Sie den Signalton hören, versuchen Sie es erneut.
- Page 13 5. Wenn die Geräteanzeige schnell rot blinkt, next step tippen Sie auf (Nächster Schritt). 6. Geben Sie das richtige WLAN-Kennwort ein Confirm und tippen Sie auf (Bestätigen). Um Ihr Kennwort bei der Eingabe anzuzeigen, tippen Sie auf das Symbol mit dem geschlossenen Auge rechts neben dem Kennwortfeld.
- Page 14 7. Richten Sie den QR-Code auf dem Bildschirm des Mobiltelefons mit dem Objektiv der Kamera aus, etwa 15 cm bis 20 cm entfernt. Halten Sie Ihre Hände während des Vorgangs ruhig und stellen Sie sicher, dass der Bildschirm des Mobiltelefons frei von Rissen ist.
- Page 15 8. Wenn der QR-Code erkannt wird, ertönt Signalton. Tippen Sie zur Bestätigung auf Heard the beep (Signalton gehört). Wenn Sie den Signalton nicht hören, tippen Sie Heard nothing at all (Nichts gehört), um Hilfe zu erhalten. Wenn die Kamera keine Verbindung herstellen kann, lesen Sie unter „Ich >...
-
Page 16: Hinzufügen Einer Kamera Mit Smartconfig
Hinzufügen einer Kamera mit SmartConfig 1. Wenn das Gerät eingeschaltet ist, leuchtet die Kontrollleuchte auf. Nachdem der Signalton ertönt ist, blinkt die Geräteanzeigeleuchte schnell rot. Add Device 2. Tippen Sie auf (Gerät hinzufügen) oder auf dem Begrüßungsbildschirm. Security & Senso 3. - Page 17 5. Wenn die Geräteanzeige schnell rot blinkt, tippen Sie auf Next step (Nächster Schritt). 6. Geben Sie das richtige WLAN-Kennwort ein und tippen Sie auf Next (Weiter). Zeigen Sie das Kennwort an, um zu überprüfen, ob es korrekt ist. 7. Die Geräteanzeige beginnt schnell blau zu blinken, dann bleibt das blaue Licht an.
-
Page 18: Entfernen Einer Kamera
Wenn die Kamera keine Verbindung herstellen kann, lesen Sie unter „Ich > Hilfecenter“ in der App oder im Abschnitt „Häufig gestellte Fragen“ in der Anleitung nach. Entfernen einer Kamera ■ Löschen Sie eine Kamera, wenn sie nicht mehr benötigt wird. ■... - Page 19 Wenn ein Gerät gelöscht wird, wird der Cloud-Speicherdienst automatisch freigegeben. Wägen Sie jede Löschung sorgfältig ab.
-
Page 20: Hauptfunktionen
Hauptfunktionen Hauptbenutzeroberfläche Ein Gerät hinzufügen (tippen Sie auf eine Raum-Registerkarte, um ein Gerät für einen anderen Raum hinzuzufügen). Tippen Sie hier, um die Videobenutzeroberfläche aufzurufen. Alle Geräte, die diesem Konto hinzugefügt werden (tippen Sie auf eine Raum-Registerkarte, um den Standort der Geräte anzuzeigen). - Page 21 Live-Ansicht-Benutzeroberfläche Erläuterungen der Symbole Einstellungen. Vollbild. Wiedergabe Gespeicherten Videos wiedergeben. Bewegungserkennung ein- bzw. ausschalten. Drücken Sie und geben Sie der Kamera Sprachbefehle. PTZ-Steuerung (falls auf Ihrem Gerät vorhanden). Kamera nach oben und unten, links und rechts bewegen. Ton-Ein/Aus-Taste. Videos in Echtzeit aufnehmen und im Fotoalbum Ihres Mobiltelefons abspeichern.
- Page 22 Wiedergabebenutzeroberfläche Erläuterungen der Symbole Wiedergabe einer Videoaufnahme pausieren oder starten. Im Kalender wird das Datum mit Videoaufnahmen rot dargestellt. Videoaufnahmen auf dem Mobiltelefon aufnehmen. Schnappschuss des Bildes der Videoaufnahmen aufnehmen und auf dem Mobiltelefon speichern. Zeitskala der Video-Wiedergabe Die Zeiten in grauer Farbe beziehen sich auf Videoaufnahmen.
- Page 23 Erweitern Sie die während der Video- Wiedergabe eingeblendete Zeitleiste, um die jeweiligen Zeitintervalle vergrößert darzustellen. Allgemeine Einstellungen Gerätenamen ändern Gerätenamen ändern. Geräte freigeben Gerät für Ihre Freunde freigeben. Geräte-Infos Besitzer-ID, IP-Adresse, Geräte-ID, Zeitzone des Geräts, Stärke des WLAN-Signals anzeigen. Echo verwenden Verbinden Sie Ihr Mobilgerät mit Amazon Alexa.
- Page 24 Bewegungsalarm Bewegungsalarm ein-/ausschalten. Bewegungsalarm ein-/ausschalten. Einstellungen der SD-Karte Kapazität der SD-Karte; SD-Karte formatieren. Rückmeldung Geben Sie uns Ihr Feedback zu den Produkten. Firmware-Info Nach Firmware-Aktualisierungen suchen. Push-Alarm-Einstellungen Das Gerät unterstützt Bewegungs- und Geräuschalarme. Sobald ein Ereignis ausgelöst wird, wird eine Benachrichtigung an Ihr Mobiltelefon gesendet.
- Page 25 Für kleine Räume wählen Sie Medium (Niedrig) oder (Mittel). Für größere Umgebungen stellen Sie die Alarmempfindlichkeit auf High (Hoch) ein. Um Alarmmeldungen zu erhalten, sollten Sie Folgendes tun: - Erlauben Sie der Smart Life App über Ihre Einstellungen für mobile Geräte den Zugriff auf Benachrichtigungen.
- Page 26 ■ Öffnen Sie das Message center (Nachrichtencenter), um alle Bilder anzuzeigen, die durch das mobile Ereignis ausgelöst wurden, und pushen Sie zwei Bilder in einem Ereignis. Freigeben einer Kamera Einem Konto kann immer nur jeweils eine Kamera hinzugefügt werden. Das Konto kann nur von einem Mobiltelefon aus gesteuert werden.
- Page 27 ■ Das Konto muss zuvor bei der Smart Life App registriert worden sein. ■ Das Konto erhält eine Einladungsnachricht von der App. ■ Wenn die Freigabeanforderung eintrifft, bestätigen Sie sie, um das Gerät freizugeben.
-
Page 28: Häufig Gestellte Fragen
Häufig gestellte Fragen Weitere aktuelle häufig gestellte Fragen finden Sie im Hilfebereich der App unter: Ich > Hilfe-Center > FAQ. Warum kann ich weder ein Gerät hinzufügen noch das Netzwerk konfigurieren? ■ Überprüfen Sie anhand der LED den Gerätestatus. - Bevor Sie das Gerät hinzufügen, stellen Sie sicher, dass das Gerät rot blinkt (2 Mal in 1 Sekunde). - Page 29 ■ Überprüfen Sie, ob sich Flecken auf der Oberfläche der Linse des Gerätes befinden. ■ Vergewissern Sie sich, dass der Bildschirm des Telefons klar, rissfrei und nicht reflektierend ist. ■ Verwenden Sie eine andere Methode, um sich mit dem Netzwerk zu verbinden. Die Geräteanzeige blinkt blau, bleibt aber nicht konstant blau.
- Page 30 Wie kann man die Kamera auf die Werkseinstellungen zurücksetzen? ■ Suchen Sie die Reset-Taste am Gerät. ■ Halten Sie RESET gedrückt, bis die Kontrollleuchte erlischt. ■ Warten Sie nach dem Signalton auf den Neustart des Gerätes (die Kontrollleuchte leuchtet wieder). Warum gibt es bei einer Videoaufzeichnung einen Leerraum? ■...
- Page 31 Die Kamera wird nicht mit der Smart Life App verbunden. ■ Überprüfen Sie zunächst, ob die Stromversorgung und das Netzwerk der Kamera normal funktionieren. Wenn alles normal ist, schalten Sie die Kamera aus und starten Sie sie dann neu. Wenn die Kamera nach dem Neustart noch offline ist, entfernen Sie die Kamera aus der App, setzen Sie die Kamera auf die...
- Page 32 ■ Die Kontrollleuchte leuchtet, zwei Fälle: - Die Kontrollleuchte leuchtet rot und zeigt damit an, dass die Netzwerkverbindung der Kamera getrennt wurde. Überprüfen Sie die Stabilität des WLAN-Netzwerks und starten Sie den Router neu. Es wird empfohlen, die Kamera näher an den Router zu bringen.
- Page 33 Wie viele Personen können sich gleichzeitig anmelden? ■ Es ist nur möglich, sich von einem Mobiltelefon und einem Computer gleichzeitig im Konto anzumelden. ■ Andere können die Kamera nur über den Freigabemechanismus betrachten. Wie viele Konten kann ich für meine Familie freigeben? ■...
- Page 34 Die Kamera wurde gestohlen, kann man das Video noch sehen? ■ Wenn auf der SD-Karte aufgezeichnet wurde und die SD-Karte verloren geht, kann auf das Video auf der SD-Karte nicht aus der Ferne zugegriffen werden. ■ Die App kann nur die Bildaufzeichnung des mobilen Alarmrufs einsehen.
- Page 35 App Instruction Manual Sygonix Home https://conradconnect.de Item No. 1911204 Item No. 1911205...
- Page 36 Contents Core Functions Symbols Legal Notice Mobile application Download and install the app Register account Using the app Connecting a camera Add a camera using SmartConfig Removing a camera Main functions Frequently asked Questions...
-
Page 37: Core Functions
Sygonix Home ----- Smart Life The Smart Life app under Sygonix Home currently supports the following devices: ■ IP Camera (Best.-Nr. 1911204) ■ IP Camera (Best.-Nr. 1911205) Core Functions Real-time video surveillance Camera can transmit real time video to the app according to conditions such as weather, temperature, device status and time. -
Page 38: Symbols
Symbols The following instructional symbols are used in this instruction manual. This triangle indicates important instructions contained in these operating instructions that must be followed. This symbol indicates that special advice and notes on operation are provided. Legal Notice This is a publication by Conrad Electronic SE, Klaus-Conrad-Str. -
Page 39: Mobile Application
Mobile application There are compatible Android and iOS apps available on the respective app stores. Look for the "Sygonix Home" app and download it onto your mobile device. An app instruction manual is available under the URL listed in chapter "Up-to-date-operating instructions". - Page 40 The app is compatible for phones running Android and iOS. User interfaces may differ between the apps on the operating systems. Screenshots used for illustration in the manual are from the Android user interface. When running the app for the first time, several windows will pop up to get permission for the phone.
-
Page 41: Register Account
Register account New users need to register an account. You may register by e-mail or by phone. Register ■ Tap and follow the steps to complete the registration of the account. You will receive an email verification code via the email address provided, or as an SMS via your phone number. -
Page 42: Using The App
Forgot Password to retrieve your password via email. Integrating with Conrad Connect Note that your 'Sygonix' account is independent of Conrad Connect. If you wish to integrate your smart device with Conrad Connect you require a separate Conrad Connect account. - Page 43 Welcome home screen In the you can: Add Device or +. ■ Add devices with ■ Manage devices in various rooms. Smart screen In the set automated actions for various rooms. Choose the following: Scene > Add Scenario ■ - to add and configure scenarios to control multiple devices based on trigger automation, time and device.
-
Page 44: Connecting A Camera
Connecting a camera 1. Use the power adapter to connect the device. The device indicator lights up. 2. When the device is on, the LED-indicator will flash in red quickly. 3. If the indicator shows otherwise, reset the device to factory settings. 4. - Page 45 ■ A camera can only be linked to one account at a time. To link to a second account, you must first unlink the camera from the first one. See section "Removing a camera". Add a camera using the QR code 1.
- Page 46 5. When the device indicator is flashing red quickly, tap next step. 6. Enter the correct WIFI password and tap Confirm. To show your password as it is being entered, tap the "closed eye" icon to the right of the password box.
- Page 47 8. Align the QR code on the screen of the mobile phone with the lens of the camera, about 15 cm to 20 cm away. Hold your hands still during the process, ensure the screen of the mobile phone is free of cracks.
-
Page 48: Add A Camera Using Smartconfig
If the camera fails to connect, refer to the App "Me > Help Center" or the FAQ section of the manual. Add a camera using SmartConfig 1. When the device is powered on, the indicator light will turn on. After the beep is heard, the device indicator light flashes red quickly. - Page 49 5. Confirm that the device indicator is flashing red quickly, tap Next step. 6. Enter the correct WIFI password, tap Next. Display the password to check if the password is correct. 7. The device indicator starts flashing blue quickly, then the blue light will stay on. The mobile app starts counting seconds and is searching for devices waiting for a connection.
-
Page 50: Removing A Camera
If the camera fails to connect, refer to the App "Me > Help Center" or the FAQ section of the manual. Removing a camera ■ Delete a camera if it is no longer needed. ■ Delete a camera before you can add it to another account. - Page 51 When a device is deleted, the cloud storage service will be automatically released. Consider any deletion carefully.
-
Page 52: Main Functions
Main functions Main interface Add a device (tap on a room tab to add a device for a different room). Tap to enter the video interface. All the devices that are added to this account (tap on a room tab to see the devices' location). - Page 53 Live view interface Icon description Settings. Full screen. Playback Playback of stored videos. Turn motion detection on or off. Press and give voice commands to the camera. PTZ control (if available on your device). Move the camera up and down, left and right. Sound on/off button.
- Page 54 Playback interface Icon description Pause or start playback video recording. In Calendar, you will see the date in red color with video recordings. Record the video recordings to the mobile phone. Snapshot the picture of the video recordings and save it on the phone. Video playback timeline The times in grey color are for video recordings.
- Page 55 General settings Modify device name Rename and modify the device name. Share devices Share the device with your friends. Device info See the owner ID, IP Address, Device ID, Device time zone, WIFI signal strength. Use echo Connect your device to Amazon Alexa. Basic feature settings Turn on/off indicator light;...
- Page 56 Push Alarm Settings The device supports motion detection and sound detection alarms. A notification will be sent to your phone when an event is triggered. ■ Turn on motion detection and sound detection with the slider. ■ Select the required sensitivity. For small rooms, select Medium.
- Page 57 To receive alert messages, you should: - Give the Smart Life app access to notifications via your mobile device settings. - Enable push notifications through an in app setting: Me > Settings > Push Notification > On. ■ Set the motion detection parameters, the camera detects the moving object and pushes the alarm information and picture to the app.
- Page 58 Sharing a camera Only one camera can be added to an account. The account can only be controlled by one phone. If other users need access to the camera feed, it can be shared an unlimited number of times. Settings Device Sharing.
-
Page 59: Frequently Asked Questions
Frequently asked Questions Find more up-to-date FAQs in the help centre of the app under: Me > Help Center > FAQ. Why can't I add a device or configure the network? ■ Check for the status of the LED to verify the device status. - Page 60 ■ Use another method to connect to the network. The device indicator flashes blue but does not turn to constant blue. ■ Device does not support 5 GHz WIFI, please ensure that when adding device, the phone is connected to 2.4 GHz WIFI. ■...
- Page 61 Why is there a blank space in a video recording? ■ The blank space of the recording timeline represents no video file. SD card recording: When the device is powered off, the SD card will stop storing data. Check whether the device was powered off. If it is unintentionally powered off, please check whether the power supply, power cable and machine power interface are functional.
- Page 62 The app prompts that access to the device failed, what should I do? ■ Reset the device to factory settings. The app often cannot load the video showing disconnect? ■ Identify the problem based on the camera's indicator status: - The indicator light is off, indicating that the device is not receiving power.
- Page 63 Why is there a circle in the centre of the screen when watching a video? ■ The circle indicates that the video is loading. This delay indicates that the network has speed issues. ■ There may be network interference, or a poor network connection. It is recommended to bring the camera closer to the WIFI router.
- Page 64 Why does configuring a camera network with other mobile phones fail? ■ A camera can only be bound by one account, and other accounts can only be viewed through the sharing mechanism. ■ If other accounts need to bound the camera, remove the device under the first account.
Need help?
Do you have a question about the 1911204 and is the answer not in the manual?
Questions and answers