Table of Contents
Advertisement
Quick Links
About Handset..........................................................1-2
Display Positions and Operations ..................................................... 1-2
Viewer Position ............................................................................... 1-2
Motion Control ............................................................................... 1-3
USIM Card .................................................................1-4
About USIM Card . ........................................................................... 1-4
USIM Card Installation .................................................................... 1-5
USIM PINs . ...................................................................................... 1-5
Parts & Functions ......................................................1-6
Handset .......................................................................................... 1-6
Key Operations in Standby ............................................................... 1-8
Display . ......................................................................................... 1-10
About Battery .........................................................1-12
Before Charging . ........................................................................... 1-12
Battery Installation ........................................................................ 1-13
Charging Battery ........................................................................... 1-14
Handset Power On/Off ............................................1-15
Manner Mode .........................................................1-16
Minding Mobile Manners .............................................................. 1-16
Manner-related Features . ............................................................... 1-16
Activating Manner Mode ............................................................... 1-17
Activating Offline Mode . ................................................................ 1-17
Activating Driving Mode ................................................................ 1-17
Handset Menus .......................................................1-18
Main Menu ................................................................................... 1-18
Menu Numbers ............................................................................. 1-19
Getting Started
Standby Options .....................................................1-20
Information Window . ..................................................................... 1-20
Shortcuts....................................................................................... 1-21
Accessing Functions/Info from Standby .......................................... 1-21
Functions Available in Standby Window ......................................... 1-22
Customizing User Interface ....................................1-22
Customized Screen . ....................................................................... 1-22
Changing Display Font . .................................................................. 1-23
Private Menu ..........................................................1-24
Opening Private Menu . .................................................................. 1-24
Customizing Private Menu . ........................................................... 1-24
Adding Shortcuts . .......................................................................... 1-24
Simple Menu ...........................................................1-25
Activating Simple Menu . ................................................................ 1-25
Simple Menu . ................................................................................ 1-26
Using Videos/Music .................................................1-27
Passwords ...............................................................1-28
Phone Password . ........................................................................... 1-28
Center Access Code . ...................................................................... 1-28
Security Code ................................................................................ 1-28
Multi Task ...............................................................1-29
Activating Another Function........................................................... 1-29
Ending Current Functions .............................................................. 1-29
View Blind ..............................................................1-30
My Number .............................................................1-30
Viewer Position ......................................................1-31
Touch Panel Operations ................................................................. 1-31
Display Lock . ................................................................................. 1-33
Touch Panel Menus ....................................................................... 1-34
1
1-1
Advertisement
Table of Contents

Related Manuals for SoftBank 942P


Summary of Contents for SoftBank 942P
-
Page 1: Table Of Contents
Getting Started About Handset............1-2 Standby Options .............1-20 Display Positions and Operations ............. 1-2 Information Window ..............1-20 Viewer Position ................1-2 Shortcuts..................1-21 Motion Control ................1-3 Accessing Functions/Info from Standby .......... 1-21 USIM Card ..............1-4 Functions Available in Standby Window ......... 1-22 Customizing User Interface ........1-22 About USIM Card ................1-4 USIM Card Installation ..............1-5 Customized Screen ................ 1-22 USIM PINs . -
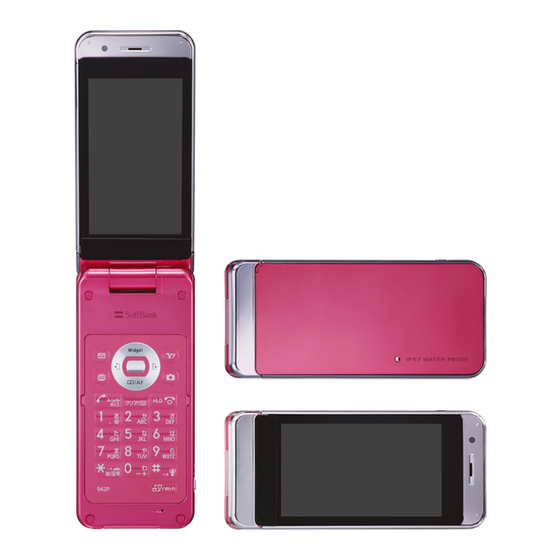
Page 2: About Handset
About Handset Viewer Position Use 942P in Normal Position and Viewer Position. Operations Rotate Display 180º clockwise and close. and functions vary by Display position. Display Positions and Operations Normal Position Viewer Position To return to Normal Position, open Display part and rotate 180º counterclockwise. Note Keep Display from striking Keypad or a table. -
Page 3: Motion Control
S e t Motion Control ● Settings Motion Control ●Customize Motion Control (ZP.18-6) In Viewer Position, rotate handset 90º counterclockwise for Landscape View; rotate 90º clockwise to return to Portrait View. ■ Motion Control Function Available for: ・ Still images ・ S! Appli (Motion Control-compatible apps only) ・ Yahoo! Keitai (Motion Control is OFF by default) ・ PC Site Browser/Direct Browser ・... -
Page 4: Usim Card
USIM Card Important USIM Card is the property of SoftBank. About USIM Card Return USIM Card to SoftBank upon service cancellation. USIM Card will be reissued for a fee if lost or damaged. Universal Subscriber Identity Module (USIM) Card is an IC If USIM Card/handset with USIM Card inserted is lost or stolen, card containing customer and authentication information, contact SoftBank Mobile Customer Center or Global Call Center including handset number, and limited Phone Book entry (ZP.19-33). ... -
Page 5: Usim Card Installation
4 to 8-digit code used to prevent unauthorized handset use. When PIN Authentication (ZP.12-2) is ON , PIN entry With IC chip down, insert USIM Card is required each time handset is turned on (with USIM Card inserted). Required to clear call times/costs or set maximum cost PIN2 (ZP.18-9). PIN Lock & Cancellation (PUK/PUK2) PIN Lock or PIN2 Lock is activated if PIN or PIN2 is incorrectly entered Notch Removing three times. Cancel PIN Lock or PIN2 Lock by entering the PIN Unblocking Key (PUK/PUK2) (ZP.12-3). Slide out USIM Card gently For information on PUK/PUK2, contact SoftBank Mobile Customer Center, General Information (ZP.19-33). Note If PUK/PUK2 is incorrectly entered ten times, USIM Card is locked and handset is disabled. Write down PUK/PUK2. For procedures required to unlock USIM Card, contact SoftBank Mobile Customer Center, General Information (ZP.19-33). Note Do not force USIM Card into or out of handset; may damage handset/ USIM Card. Be careful not to lose the removed USIM Card. Avoid touching USIM Card terminals or IC chip; doing so may hinder... -
Page 6: Parts & Functions
Parts & Functions Handset Using Earphone Microphone or Video Output Cable Connect following accessories (A) and (B) to External Port. ❶ ❿ (A) Earphone Microphone or Video Output Cable ❷ (B) Stereo Earphone Conversion Cable <Operation> ① Connect flat plug (A) to flat terminal (B) ② Connect plug (B) to External Port ⓳ ❸ ① ② ⓴ External Port ⓫ ❹ ⓬ Do not press microphone button when ❺ ⓭ connecting Earphone Microphone. Doing so ❻ ⓮ may cause malfunction. If pressed ❼... - Page 7 ❶ Light Sensor zMulti Selector Logo ・ ・ ・ Detects ambient light Scroll up/down/left/right to navigate menus Place Logo over a reader/writer when using ❷ Earpiece and text (ZP.ix) Osaifu-Keitai (ZP.13-11) ® ❸ ・ Display/Touch Panel > z Select indicators/icons/S! Quick News Battery Cover ❹ ・ ・ AMail Key z Open Phone Book Open Inner Cover and insert/remove USIM ・ ・ Open Messaging menu z Open Incoming Call Logs Card/Battery/microSD Card ・...
-
Page 8: Key Operations In Standby
Key Operations Functions Key Operations in Standby Short Press Open Phone Book search window Press or press and hold (more than one second) a key in Long Press Open Phone Book entry window Standby to execute the following. Short Press Open Incoming Call Logs Key Operations Functions Long Press Open Received address logs Short Press Initiate a call Short Press Open Redial logs Long Press Voice dial Long Press Open Sent address logs Short Press N/A Short Press Enter "1"... - Page 9 Key Operations Functions Short Press Enter " " Long Press Activate/cancel Driving Mode Short Press Enter "#" Long Press Activate/cancel Manner Mode Short Press Activate Camera Long Press Activate Camera...
-
Page 10: Display
Display ◦ ❷ ◦ ❻ Display Indicators P acket Transmission in Progress (PC) S oftware Update (Notification/Updating/Result) D ial-up Connection Established on PC Voice Mail 3G/GSM Packet Transmitting ❶ ❸ ❺ ❼ ❾ ⓫ ⓭ ⓯ ❷ ❹ ❻ ❽ ❿ ⓬ ⓮ (Blue) Bluetooth ® Device Connected O perator (set for Select Operator) Out-of-Range (Black) Bluetooth Power Save Mode ®... - Page 11 ◦ ❾ ◦ ◦ Unsent Message S! Appli Communication Mode set for USB Mode Unread Message Active/Paused microSD Mode set for USB Mode Incoming Mail Memory Full Auto Start Request Received MTP Mode set for USB Mode ◦ ◦ Security S tart Request Received while Active/ Side Key Disabled when Handset Closed Paused ◦ Privacy Key Lock Active Timer Lock at Close Active ◦ One Function Active ◦ Personal Data Lock Active Call Charge Reached Upper Limit Multiple Functions Active ◦ Key Pad Dial Lock Active Back Light OFF Digital TV Active IC Card Lock Active View Blind ON During Timer Recording S ecret Mode and Secret Data Only Active Back Light OFF; View Blind ON Recording TV Program/Paused ◦...
-
Page 12: About Battery
About Battery Battery Time Using handset in the following conditions may shorten battery time. Before Charging ・ Extreme temperatures ・ Handset/battery/AC Charger terminals are dirty Charge battery before use or after a period of disuse ・ Weak signal/out-of-range (AC Charger sold separately). ・ Handset is left mid-operation (not in Standby) Charging Time & Operating Time Estimates: ZP.19-25 ・ Playing Music Player, Wi-Fi is on, TV or S! Appli is active, etc. About Battery Extending battery time Example: Clean handset, battery & charger with dry cotton swab. -
Page 13: Battery Installation
During a Call Battery Installation A message appears and warning tone sounds via Earpiece or Speaker. After 20 seconds, call ends and handset shuts down in one minute. Always turn off handset power before removing Battery Cover and Charge or replace battery. opening Inner Cover (ZP.xxiv). Battery Strength Indicator Insert Battery Battery Strength indicator changes as remaining usage time decreases. Align battery contacts with Charge or replace battery when battery level is low (ZP.1-11) or a handset pins message appears on Display. Battery Voltage Low battery warning message appears. Charge or replace battery immediately. Operating Remove Battery Voltage Lift battery out as shown Level 3 Level 2 Level 1... -
Page 14: Charging Battery
Connect AC Charger to Desktop Holder Charging Battery Insert Charger Connector (arrows down) into Connection Port. Use Desktop Holder with AC Charger (sold separately) to Extend Charger Blades, and plug AC Charger charge battery. into AC Outlet Use only specified AC Charger. Charging time: ZP.19-25 Align External Port with Stopper, and push Charger AC Outlet handset in the direction of arrow until it clicks... -
Page 15: Handset Power On/Off
■ Handset Power On/Off Desktop Holder Stand Use Desktop Holder as a handset stand when viewing TV or videos (Viewer Press and hold L Position). Extend Stand as pictured below. Hold Desktop Holder for handset operations. Start-up window and waterproof precautions appear and handset enters Extend completely Standby. Enter PIN if PIN Authentication is ON (ZP.12-2). Press L for 2+ seconds Stand Handset shuts down. Do not turn on handset immediately Charging with AC Charger Only after turning off. Wait a few seconds. Insert Charger Connector (arrows up) into External Port Cover External Port. To remove, squeeze Release Standby Tabs and pull straight out. -
Page 16: Manner Mode
■ Manner Mode View Information Messages At time of purchase, information messages are provided for your convenience. Minding Mobile Manners Highlight an item (ZP.1-20), then press * A 7 Incoming Mail 7 Received 7 Select a message Please use your handset responsibly. Use these basic tips as Widgets and S! Quick News appear in Standby after a message is opened. a guide. Inappropriate handset use can be both dangerous and bothersome. -
Page 17: Activating Manner Mode
Activating Manner Mode Activating Offline Mode Press one key to mute handset tones and activate vibration Temporarily suspend all handset transmissions; when active, for incoming transmissions. all calls/messages and incoming information are blocked. Manner Mode settings can be changed (ZP.18-7). When Offline Mode is active, appears. When Manner Mode is active, appears. Main Menu 4 Settings Call Settings... -
Page 18: Handset Menus
Handset Menus Main Menu Icons Main Menu Messaging Yahoo! S! Appli (Yahoo! Keitai) Enjoy Mobile Net & Download, set and Create new/view PC Site browsing… use S! Appli received messages News/ Camera Videos/Music Entertainment View news/weather Capture images or Play music, videos, forecasts or post blogs record videos etc. Tools Data Folder Widget Standby Main Menu (Mobile Widget) In Standby, Main Menu appears. -
Page 19: Menu Numbers
When Menu Icons is Set to Basic or Customize Menus cannot be selected from Main Menu by keypad. ● ● ● Settings Display Color Scheme Main Menu Icons Main Menu Open menu items by entering specific number in Main Menu (Quick Open Background (ZP.18-4) Menu: ZP.19-14). ■ Top Menu Opened from Main Menu Menu Numbers W to select Display Settings Use keypad to select functions or menu items. Unnumbered Menu Items When numbers do not appear, select items as shown. -
Page 20: Standby Options
■ Standby Options Other Notifications · Missed alarm (ZP.13-6) Access the following from Standby. · S! Appli startup notice (ZP.16-3) · M issed location information request/Auto location information notice ■ Available Items (ZP.17-3) · Information Window (ZBelow) · Timer (ZP.5-13) · Mobile Widget (ZP.7-2) · Content Key (ZP.10-5) · S! Quick News (ZP.8-5) · Wi-Fi Auto-OFF notice (ZP.11-11) · S! Information Channel/Weather (ZP.8-2) · Software Update result (ZP.19-13) · Shortcuts (ZP.1-21) ·... -
Page 21: Shortcuts
Shortcuts Accessing Functions/Info from Standby Add shortcuts to Standby for quick access to frequently Select indicators/icons/ticker in Standby to access functions used functions. and information. Some functions are not available for shortcuts. > In Standby, Open a function, S [Menu] 7 z to highlight an item 7 Add shortcut icon 7 YES z [Select] Function or information appears. -
Page 22: Functions Available In Standby Window
Customizing User Interface Functions Available in Standby Window Customized Screen > In Standby, Download and set Customized Screen to personalize user Highlight an indicator/icon/ticker 7 S [Menu] 7 interface, ringtone, etc. to a selected theme. Select an item (See below) Downloading Customized Screen Item Operation/Description Auto arrange Automatically align shortcuts Main Menu 4 Data Folder... -
Page 23: Changing Display Font
Setting Customized Screen Changing Display Font z 7 S [Customize] 7 In Standby, Change Display font. Fonts can also be downloaded. Customized Screen Downloading Fonts Highlight a theme 7 A [Set] Main Menu 4 Settings Display Settings Font To toggle thumbnail and list: F[Change] Download Font 7 YES YES Follow onscreen instructions. -
Page 24: Private Menu
Private Menu Customizing Private Menu Save frequently used functions in Private Menu. z 7 In Standby, Up to 12 items can be saved. 1 [Private] 7 S [Set] Change preset functions as needed. Highlight a target 7 S [Menu] Opening Private Menu 7 Add to menu z 7 1 [Private] In Standby, Select an item Private Menu appears. -
Page 25: Simple Menu
Simple Menu Activating Simple Menu Activate Simple menu to limit menu options to basic ones. z 7 A [Simple] 7 YES In Standby, Handset is limited to basic operations (ZP.1-26). YES or NO Select YES to set all items in Font Size (ZP.18-6) to Huge/Large . z in Standby. To open Simple menu: * ■... -
Page 26: Simple Menu
Simple Menu Simple Menu Page Simple Menu Page Simple Menu Page Voice Call Camera Settings Outgoing Log P.2-13 Take Pictures P.6-8 P.1-16 Ringtones/Volume P.18-2 Incoming Log P.2-13 Shoot Videos P.6-8 P.18-3 Phone Book P.4-6 See Pictures P.6-16 Screen/Fonts Create New Phonebook P.4-3 Watch Videos P.6-16 P.18-7 Answer Phone P.2-15 Call Time & Cost P.18-9 Account Details P.1-30... -
Page 27: Using Videos/Music
Subscription to Keitai Wi-Fi service may be required for some content. Videos/Music Updates Make sure to check information before using sites. Main Menu 4 Videos/Music Select an item Follow onscreen instructions. Open Videos folder (ZP.10-13) Activate Music Player (ZP.9-6) Activate Digital Media Viewer Access My SoftBank for Keitai Wi-Fi subscription Open Wi-Fi setting window (ZP.11-11) Connect to respective sites 1-27... -
Page 28: Passwords
4-digit number specified at initial subscription, required to needed for handset use. restrict handset services (ZP.2-20). Enter number within 15 seconds. Phone Password If entered incorrectly three times, Security Code settings lock; Security Code & Center Access Code must be changed. Reach SoftBank Mobile <Default> 9999 Customer Center, General Information (ZP.19-33) for details. 4 to 8-digit number required to use/change some handset To change Security Code: ZP.2-21 functions. Note ... -
Page 29: Multi Task
Multi Task ● Other Functions while Viewing TV (ZP.5-8) Activate up to three functions; one per group from the ● Background Music (ZP.9-7) following four groups. Group Function Activating Another Function ◦ ❶ . Messaging Messaging ◦ ❷ .. Y ahoo! Keitai/ Activate another function from a different group. Multi Task Yahoo! Keitai/S! Appli/News/Entertainment S! Appli is unavailable when Simple menu is active. -
Page 30: View Blind
View Blind My Number Activate View Blind to protect Display from prying eyes. Confirm handset phone number in Account Details (ZP.4-12). Also confirm data saved in Account Details: Main Menu 4 Settings Display Settings View Blind name, mail address, etc. ON z 7 P In Standby,... -
Page 31: Viewer Position
Viewer Position Basic Operations Use Touch Pen for Touch Panel Operations. Touch Panel Operations Operation Function Use Touch Pen to operate Touch Panel in Viewer Position. Select items/execute functions Touch Panel Operations are unavailable in Normal Position. Lightly touch Display Touch an item or Control Key. Notes Do not press Touch Panel with excessive force or use sharp objects (e.g. fingernails, ballpoint pens, pins); Touch Panel may be damaged. Touch Panel may not operate with objects on Display. ... - Page 32 ■ Control Key and Slide Lever Ending Functions In Viewer Position, use Control Keys and Slide Levers for operations. Press q to end function in Viewer Position. Use Slide Lever to adjust volume/zoom. During video playback, use Slide Lever to change playback position. Note Control Keys Pressing q does not end function while Camera is active. Touch Panel Operation Guide (Japanese) View operation guide for Viewer Position. 言語設定 日本語 Available when handset language ( ) is set to (ZP.18-4).
-
Page 33: Display Lock
Canceling Display Lock Display Lock In Viewer Position, q Lock Display to disable Touch Panel Operations. Display turns on. Display Lock Automatically Activates When: Slide to the right Display enters Power Saver Mode. Return handset to Normal Position to deactivate Display Lock. Slide to within 10 seconds. Setting Display Lock In Viewer Position, q Display turns off and Display Lock activates. Press and hold q when a function window is open. Note Pressing and holding q does not activate Display Lock while Camera is active. Operations may be terminated when Display Lock is set during data transmission/copy, etc. -
Page 34: Touch Panel Menus
❸ M ain Menu (Viewer Position) Touch Panel Menus Tap tab. Tap an icon to access corresponding function. The following menus are available in Icons cannot be added/deleted. Viewer Position. For description of Main Menu items: ZP.1-36 ❶ S tandby (Viewer Position) Widgets and shortcuts set in Standby (Normal Position) appear; tap a widget or shortcut to access that function. Tap tab to return to Standby. Tap to hide widgets/shortcuts. Tap Display to show widgets/shortcuts again. ❶... - Page 35 ■ Customizing Shortcuts Menu Rearrange Shortcuts >After Step 1, touch and hold a shortcut 7 Slide to targeted location tab 7 Note The entire image may not appear as background image, depending on Select an item (See below) image size. Item Operation/Description Add a shortcut >Tap function to save* 7 OK Delete Delete a shortcut >Tap a shortcut 7 YES 7 OK Alternatively, tap one or more shortcuts then Delete . Change Change shortcut >Tap a shortcut 7 Tap function to save* 7 OK Alternatively, tap a shortcut then Change . BG image Set a background image >Tap a folder 7 Tap an image 7 Set * W hen Store folder appears at lower left-hand corner, tap a function to add or tap Store folder to return to previous menu.
- Page 36 Main Menu (Viewer Position) Menu Item Page Menu Item Page Menu Item Page Messaging Yahoo! Incoming P.14-17 Yahoo! P.15-4 Watch TV P.5-5 Create New P.14-4 Menu List P.15-4 Video P.5-12 Data Folder Retrieve P.14-16 Bookmarks P.15-9 Drafts P.14-17 Saved Pages P.15-9 Pict. Album P.10-24 Templates P.14-6 Web Search P.15-4...
Need help?
Do you have a question about the 942P and is the answer not in the manual?
Questions and answers