Table of Contents
Advertisement
SERVICE MANUAL
SERVICE MANUAL
Washing Machine 2005
Washing Machine 2005
Aqualtis
Aqualtis
DRAFT
All the parts included in this document are the property of Indesit Company S.p.A.
All rights reserved. This document and the information it contains are supplied without liability for possi-
ble errors or omissions; no part of this document can be reproduced, used or copied without written
permission or without being authorised by the terms of a contract clause.
Service Manual
Aqualtis - 2005
Edition
2005.07.06
G
Language
English
B
Advertisement
Table of Contents

Related Manuals for Indesit Ariston AQUALTIS 1600


Summary of Contents for Indesit Ariston AQUALTIS 1600
- Page 1 Aqualtis DRAFT All the parts included in this document are the property of Indesit Company S.p.A. All rights reserved. This document and the information it contains are supplied without liability for possi- ble errors or omissions; no part of this document can be reproduced, used or copied without written permission or without being authorised by the terms of a contract clause.
- Page 2 CONTENTS OF THE MANUAL: NOTE FOR THE ENGINEER This manual is a supporting document for technical personnel. It contains a description of the various product types, the general operating principle, and indications concerning assistance. Technical personnel should anyway consult the specific model on (servicenet.indesitcompany.com) to access data and updates of electrical diagrams, technical bul- letins, and spare parts.
-
Page 3: Table Of Contents
CONTENTS 1. PRODUCT TYPE Legend Interfaces Technical features Energy Label 2. OPERATING LOGIC 8-14 Product features 8-10 Explanations on Setting & Functioning 11-12 Programs 13-14 3. COMPONENTS 15-17 4. WIRING DIAGRAMS 18-19 5. TECHNICAL ASSISTANCE 20-28 Demo Mode Auto Test (Testing / Running-in) Auto Test sequence Fault &... -
Page 4: Product Type
1. TYPOLOGY OF PRODUCT: 1.1. LEGEND: 1st letter 2nd letter 3rd letter 4th letter 1st&2nd Number 3rd Number 4th letter 5th letter Brand Product line Type user interface Max Spin Speed Specs height Colour A=Ariston Q=washing machine blank= standard 6kg L= led 4 = 400 8/9=SILENT h: 100cm high... -
Page 5: Interfaces
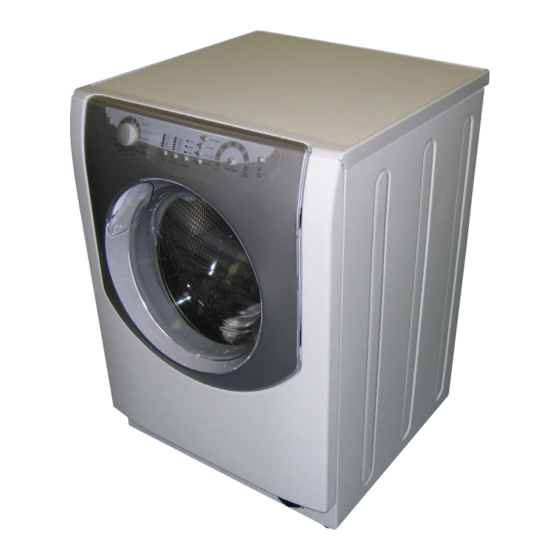
1.2. INTERFACE: DISPLAY Button /LED ON/OFF AND RESET Icon ECO KNOB PROGRAM Icon WASH PHASES Button TEMPERATURE Button /LED START/ PAUSE Button SPIN LED DOOR LOCK Button INTENSITY Button /LED CHILD LOCK Button /LED OPTIONS Service Manual Edition Language Aqualtis - 2005 2005.07.06 English... -
Page 6: Technical Features
1.3. TECHNICAL FEATURES: MODELLO: AQUALTIS 1600 Capacity: from 1 to 7,5 Kg Dimensions: Width: 59,5 cm Height: Depth: 64,5 cm Water supply: Maximum pressure: Minimum pressure: Drum capacity litres Power supply: Tension: 220/240 volt. 50 Hz Maximum power absorbed: 2100 Watt. Maximum spin speed: 1600 rpm Service Manual... -
Page 7: Energy Label
1.3. ENERGY LABEL: E n e r g y Washing machine ARISTON Brand Manufacturer Model Modello AQUALTIS More efficient Energy class Less efficient 1.27 Energy c o n s u m p t i o n Energy consumption Kw/h - normal cycles kWh/cy c l e (based on standard test results for 60 °... -
Page 8: Operating Logic
2. FUNCTIONING: 2.1. PRODUCT FEATURES AND TECHNOLOGICAL INNOVATIONS: DISPENSER: It is like a traditional dispenser, with the same prin- ciples of functioning. It is placed inside the machine, behind the door; you can reach it by opening the door. Some models are equipped with Push-Push lock. DRUM ASSEMBLY: The drum assembly is held up by three springs, it is 5°-inclined to make the machine more ergonomic... - Page 9 PRESSURE SWITCH: The connection of the pressure switch tube is placed in the lower part of the drum, but not on the level with the pump tube, as in other washing machines. Its housing is obtained by die-casting and it is the final part of an air trap, which determines the right functioning of the washing machine.
- Page 10 WATER FILLING: Water filling can occur in two phases: the first is common to all the programs, the filling is controlled by the pressure switch; the second phase, performed by some programs only, water filling changes according to the wash cycle of the washing machine setting. To know if a program performs a second water filling, look at the wash diagrams in the appendixes (from page 34 to page 42).
-
Page 11: Explanations On Setting & Functioning
2.2. BUTTONS AND WASH FUNCTIONS: ON/OFF & RESET BUTTON: This button has a double function: it switches on/off the machine and resets a program in progress. To switch on the machine, press the button. The indicator lights (led) turn on simultaneously for 1 second. To switch off the machine, press the button again, the machine will be on stand-by. - Page 12 DOOR LOCK LED: When this icon is lit, the door is blocked to prevent accidental opening or eventual damages. To unblock the door, wait for the light to switch off. This model allows the user to open the door during the program by pressing the Pause button.
-
Page 13: Programs
2.3. PROGRAMS: 2.3.1 SETTING A PROGRAM: To set a program (wash cycle), follow these instructions: 1. Open the door and load the clothes to be washed. or anticlockwise. 2. Open the dispenser and pour detergent on it. 7. The user could eventually customize the wash cycle by changing temperature, spin speed, wash 3. - Page 14 2.3.4 PROGRAM TABLE Program table Detergents Max. load (Kg) Cycle duration Icon Program overview temperature With With (°C) Mini Mini Wash Softener Normal Normal Load Load Daily programs WHITE COTTONS COLOURED COTTONS DELICATE SYNTHETICS MIN30': It is used to refresh not very dirty clothes (it is not suitable to wool, silk and clothes to be preferably washed by hand).
-
Page 15: Components
3. COMPONENTS: Tachometric Motor Ohm: 115,00 Tension: 230 volt. Watt: Amp: 3,07 amp. Ohm: 3.51 Drain pump Solenoid valve unit Tension: 230 volt. Tension: 230 volt. Amp: 3,07 amp. Ohm: 170,00 Ohm: 170,00 Heater Tension: 230 volt. Watt: 2200 Amp: 10 amp. - Page 16 Display board. Main board. Door. NTC. Transformer. Door lock. Service Manual Edition Language Aqualtis - 2005 2005.07.06 English...
- Page 17 Back part. 1 Pulley. 2 Belts 3 Motor 4 Tank 5 Heater 6 Shock absorber 7 Drain pump Upper part. 1 Display cable 2 Door gasket 3 Hopper 4 Counterweight 5 Pressure switch 6 Spring 7 Anti-noises filter 8 Solenoid valve unit Service Manual Edition Language...
-
Page 18: Wiring Diagrams
4. WIRING DIAGRAMS: Service Manual Edition Language Aqualtis - 2005 2005.07.06 English... - Page 19 Service Manual Edition Language Aqualtis - 2005 2005.07.06 English...
-
Page 20: Technical Assistance
5. TECHNICAL ASSISTANCE: 5.1. DEMO MODE: It is available only on models with LCD and Display interface. Activation: Power On + Start/Reset + 4th button at the lower part for 6 seconds. Deactivation: Power On + Start/Reset for 3 seconds. 5.2. -
Page 21: Fault & Solutions
5.3. FAULT ANALYSIS & SOLUTIONS: SIMBOLS: LED 5 LED 4 LED 3 led ON LED 2 LED 1 led OFF LED COMBINATION FAULT CAUSE TEMPERATURE LED Motor piloting triac shor t LED 5 LED 4 LED 3 LED 2 LED 1 circuited Motor blocked, motor tacho open LED 5... - Page 22 The models equipped with LCD and DIGIT interface allows to read the code of the fault occurred in the washing machine on the display (example: F-08). FAULT CAUSE CHECK-UP - Check eventual leaks of water which may involve the J9 connector, short-circuiting its contacts;...
- Page 23 FAULT CAUSE CHECK-UP - Check the efficiency of the contacts of J3 connector on the board; Wash heater relay welded - Check the state of the pressure switch verifying ohm-continuity on (signalled in presence of J3 wiring connector, pins 2 and 4 (only with empty tank), pins 2 and “empty”) or pressure switch 3 (only with water in the tank) and pin 2 and 1 (only with water in the fixed on “empty”...
-
Page 24: Doctor
5.4. DOCTOR: The main board is installed on the back part, on the right. The interface, protected by a cover, allows the connection of the hardware key to the machine: * Connect the handheld to the hardware key; * Follows the instruction in the “WM DOCTOR” manual. - Page 25 PROBLEM ANALISYS - Wrong wash temperature It does not wash well - Lack of a detergent - The program selected is not the right one - Too much detergent Presence of foam at the - Faulty drain end of the wash - The presence of foam is normal, because of the presence of zeolites - Unbalanced load - Check bearing...
-
Page 26: Assembly/Disassembly
5.5 ASSEMBLY & DISASSEMBLY: Disassembly of the Drum: To demount the drum, follow the same procedure sure to fit the spring supporting the drum in the right as in the previous models of washing machine. position (5°-inclined) in order to maintain the drum In assembling it, there is something different: make in the correct position and inclination. - Page 27 Disassembly of the Drum tube & Oko ball and in the drum there is the Oko soundproof rubber ring. gasket: 1. Remove the screw fixing the tube to the drum. 2. Pull back the tube; inside of it there is the Oko 3.
- Page 28 4. Unhook the left side of the board to completely remove it from its housing. 6. Remove the buttons. 5. Remove the connector of the board. 9. Disassembly of the Shock Absorbers. To dismantle the components listed below, follow the same procedure as on the former models of wash- 10.
-
Page 29: Exploded View
6. EXPLODED VIEW: CABINET - LCD AESTHETIC. Ref. Item Ref. Item 000 AQUALTIS QUICK GUIDE 013 DRAIN TUBE COLLAR ‘AB636TX’ 000 HANDBOOK IT 014 HARDWARE RUNNING-IN CAP FOR CABINET ‘LBE8X’ 001 CONTROLS COVER AQUA 015 SUMP HANDLE AQUALTIS 002 ASSY MODULE LCD DISPLAY AQUALTIS 016 BACK PANEL B PW CON BUGNA 003 KNOB LCD DISPLAY AQUALT 017 WIRING CLIP ‘AB636TX’... - Page 30 CABINET - DISPLAY AESTHETIC Ref. Item Ref. Item 001 SCREW FOR COUNTERWEIGHT/TANK AQUALT 016 PIPE-CLIP BAND TANK SIDE 003 UPPER COUNTERWEIGHT VPL 13KG AQUAL 019 BELLOWS DRAIN GASKET OKO AQUAL 004 SPRING RING NUT AQUAL 020 EXPANDER 005 TANK WHITE SPRING 8,5 SPIRE AQUAL 021 NUT ROMOB M6X20X1,6 006 PLASTIC TANK ASSY.
-
Page 31: Appendix
CABINET - LED AESTHETIC Ref. Item Ref. Item 000 AQUALTIS QUICK GUIDE 013 DRAIN TUBE COLLAR ‘AB636TX’ 000 HANDBOOK IT 014 HARDWARE RUNNING-IN CAP FOR CABINET ‘LBE8X’ 001 CONTROLS COVER AQUA 015 SUMP HANDLE AQUALTIS 002 ASSY MODULE LCD DISPLAY AQUALTIS 016 BACK PANEL B PW CON BUGNA 003 KNOB LCD DISPLAY AQUALT 017 WIRING CLIP ‘AB636TX’... - Page 32 DRUM ASSEMBLY. Ref. Item Ref. Item 001 VITE AUTORASCHIANTE 3,5X8 TRIFOIL DENT 019 n1040317 SERIAL KEY EVOII - LB2000 - PC 002 SUPPLY CABLE. 3 x 1.5 1,5MT SHUKO TRIF. 019 SERIAL CABLE WM2000 EVOII-PC MASC/FEMM 003 SPIRALLED SUPPORT FOR DRAIN TUBE 021 HEATER WITH THERMOF.2000W/230V L=190MM 004 DRAIN TUBE USA WASHING MACHINES PH 022 TEMPERATURE SENSOR NTC ELTH TL PH2001...
- Page 33 ELECTRICAL AND ELECTRONICAL COMPARTMENTS. Ref. Item Ref. Item 001 BASIC WIRING D 24000096600 004 WIRING EVL + EVP 240000700C1 002 WIRING ML + PS 240000700L0 005 WIRING DISPLAY COMMUNICATION 240000700B1 003 WIRING THREE-PHASE EARTH 240000700Y0 006 BASIC WIRING A 24000096600 Service Manual Edition Language...
-
Page 34: Wash Data Table
7. APPENDX: Wash data table: Name Temperature Max load kg Energy Wash Tot time Wash time Wash water Tot water kwh/kg R.W. White cotton Standard 60°C 0,18 1,026 22,4 Mini Load 60°C 0,22 1,025 13,6 Super Wash 60°C 0,26 1,045 26,3 Easy Iron 60°C... -
Page 35: Programs Diagrams
Service Manual Edition Language Aqualtis - 2005 2005.07.06 English... - Page 36 Service Manual Edition Language Aqualtis - 2005 2005.07.06 English...
- Page 37 Service Manual Edition Language Aqualtis - 2005 2005.07.06 English...
- Page 38 Service Manual Edition Language Aqualtis - 2005 2005.07.06 English...
- Page 39 Service Manual Edition Language Aqualtis - 2005 2005.07.06 English...
- Page 40 Service Manual Edition Language Aqualtis - 2005 2005.07.06 English...
- Page 41 Service Manual Edition Language Aqualtis - 2005 2005.07.06 English...
- Page 42 Service Manual Edition Language Aqualtis - 2005 2005.07.06 English...
- Page 43 Service Manual Edition Language Aqualtis - 2005 2005.07.06 English...
- Page 44 Service Manual Edition Language Aqualtis - 2005 2005.07.06 English...
- Page 45 Service Manual Edition Language Aqualtis - 2005 2005.07.06 English...
- Page 46 Service Manual Edition Language Aqualtis - 2005 2005.07.06 English...
- Page 47 Service Manual Edition Language Aqualtis - 2005 2005.07.06 English...
- Page 48 Indesit Company viale Aristide Merloni, 47 60044 Fabriano - Italy tel. +39 0732 66 11 - telex 560196 - fax +39 0732 66 2954 - www.indesitcompany.com Service Manual Edition Language Aqualtis - 2005 2005.07.06 English...
Need help?
Do you have a question about the Ariston AQUALTIS 1600 and is the answer not in the manual?
Questions and answers