Table of Contents
Advertisement
Advertisement
Table of Contents

Related Manuals for Black olive PELLET GRILL


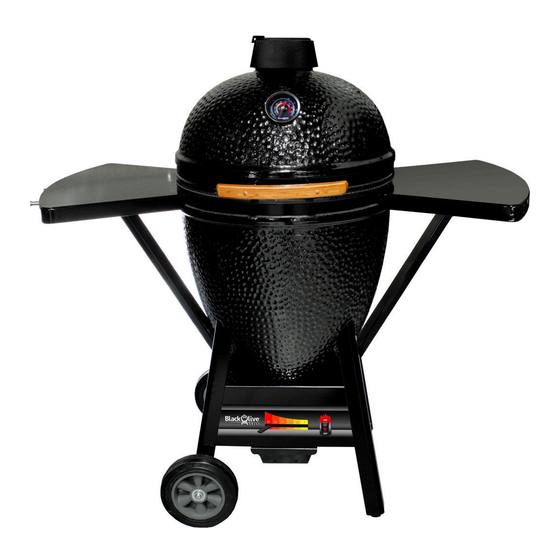
Summary of Contents for Black olive PELLET GRILL
- Page 1 OWNER’S MANUAL 4001609 OW N ER ’ S M AN UAL A mAjor cAuse of fires is fAilure to mAintAin required cleArAnces (Air spAces) to combustible mAteriAls. it is of utmost importAnce thAt this product be instAlled only in AccordAnce with these instructions 50-2615...
-
Page 3: Safety Precautions
After first use, INSPECT all fasteners for tightness The metal band on the Black Olive is designed to keep the top of your grill secure. Due to temperature changes causing expansion and contraction, checking the tightness of these fittings after the first few uses is highly recommended. - Page 4 Safety Precautions Follow these guidelines to prevent this colourless, odourless gas from poisoning you, your family or others. • Know the symptoms of carbon monoxide poisoning: headache, dizziness, weakness, nausea, vomiting, sleepiness, and confusion. Carbon monoxide reduces the blood’s ability to carry oxygen.
-
Page 5: Table Of Contents
Lighting Instructions ................15 Operating Instructions ................16 Smoking Times and Temperatures ............17 Grilling Times and Temperatures .............. 18 Maintenance and Service ................. 19 Black Olive Accessories ................20 Parts Diagram ..................21 Parts List ....................23 Troubleshooting ..................25 Technical Specifications ................28... -
Page 6: Specifications
SPECIFICATIONS Grilling Area 19 3/8” ( 290 sq in ) Maximum BTU 50,000 * Minimum BTU 2,000 * Hopper Size 11 lbs Ignition Time 2 minutes * Grill Temp Max 650 °F * Electrical Requirements 120 Volts 3.5 Amps Unit Dimensions H 49”... -
Page 7: Contents
For your safety two people are required to lift and assemble the Black Olive Grill. Your crated Black Olive Grill come partially assembled with the remainder of the parts in a seperate box. Reference the Bill of Materials below to insure you have all the correct components and fasteners. -
Page 8: Uncrating
UNCRATING Step 1: Remove the crate box. Next, using a 5/16” socket or fl at screwdriver, remove the screws in the highlighted areas shown (see Figure 2) on both sides of the crate. Both side cross members can now be removed from the crate (See Figure 3). - Page 9 UNCRATING Step 3: Remove the two screws shown (see Figure 4) from the rear packaging brace using a 5/16” socket. The crate can now be removed from the pallet and shell assembly. Note: The shell assembly is now unsupported, be careful not to knock it over igure Step 4: Next, remove the two bolts on the rear...
-
Page 10: Assembly
ASSEMBLY Step 1: Install the wheels and axle shaft onto the grill base assembly by resting the base assembly on its side as shown in Figure 7. Use a rubber mallet or hammer to install the supplied push nut onto the free end of the axle shaft. - Page 11 ASSEMBLY Step 3: Connect the wire harness at the bottom of the hopper tube assembly to the base assembly harness by matching the wire colours together (see Figure 10). Once the wires are connected tuck the harness into the base assembly and leave the control panel hanging out of the top of the hopper tube assembly.
- Page 12 ASSEMBLY Step 5: Mount the control panel underneath the front of the right side shelf using two 8-32 x 3/8” black screws (see Figure 14). The 4 remaining black screws are spares. igure Step 6: Install the left side shelf on to the bottom band mounting studs using two 1/4”-20 plated hex nuts (see Figure 15).
- Page 13 (see Figure 20). eflector lame iffuser igure Step 10: Finally, re-install the cooking grill support and place the Cast Cooking Grill on top (see Figure 21). Your Black Olive Grill is now fully assembled and ready for installation! igure...
-
Page 14: Installation Instructions
(see Figure 22). AlwAys place and use your Black Olive Grill in a sAfe and leVel spot. do not place the grill on slopes, uneven surfaces, or under any unprotected combustible materials within 36”... -
Page 15: Lighting Instructions
Note: When starting the grill in a damp environment, set the control knob to LOW, not START, until a fire has been established. To Operate Pellet Grill: When a fire has been established set the control knob to the desired igure setting. -
Page 16: Operating Instructions
Grilling 250°F - 500°F Searing 500°F - 650°F do not attempt to move your Black Olive Grill when it is hot or while cooking. DO USE CAUTION when touching exterior of grill: Exterior surfaces are HOT when in use. Always keep children, pets, and combustible items away from your grill. -
Page 17: Smoking Times And Temperatures
Smoking Times and Temperatures The following smoking and grilling times have been collected from various sources and are based on the food being fresh or defrosted. These tables should be used as a guide only. Always use a meat thermometer to ensure all meat and poultry are cooked to the correct internal temperature. -
Page 18: Grilling Times And Temperatures
Grilling Times and Temperatures rill PProx rill inished yPe of (˚f) (˚f) 120-130 rare (¾” teak thick side 130-140 medium rare 140-150 medium 450-550 (1½” 6-10 teak thick side 160-170 well done (½” atties thick side (4-6 18-22 145-160 oast 130-140 medium rare ½... -
Page 19: Maintenance And Service
MAINTENANCE AND SERVICE ASH PAN & BURN TUBE BOTTOM: Occasionally, you will need to empty the ash pan and clean the burn tube bottom underneath the grill. Failure to keep the burn tube clean and holes unblocked can result in unwanted sooting. 1. - Page 20 If loose, tighten firmly. MOLD: If the Black Olive Grill is subjected to the elements for an extended length of time and not used, moisture can be trapped inside the grill and areas of mold may appear on the grill’s internal ceramics.
-
Page 21: Black Olive Accessories
Swing Out Grill: the cooking area when more cooking surface to used in conjuction with your Black Olive Grill! This the SS Cooking Grill, Swing out grill comes with providing three seperate a pivoting support for easy... -
Page 22: Parts Diagram
PARTS DIAGRAM... - Page 23 PARTS DIAGRAM...
-
Page 24: Parts List
PARTS LIST escriPtion 50-2739 lack live 50-2740 lack live ottom 50-2741 ssembly 50-2742 ottom ssembly 50-2744 helf w 50-2743 ight helf 50-2699 oPPer 50-2700 amboo andle w lugs 50-2701 50-2745 oPPer and ssembly 50-2704 oP or ottom asket 50-2746 inge ssembly 50-2706 ePlacement... - Page 25 PARTS LIST escriPtion ef-001 uger otor 50-968 uger ushing ollar 50-1806 uger ushing 50-2714 eveling 220 d 50-2755 egree imit witch 50-2715 gnitor 50-2791 gnitor ec-044 lectrical train elief 120v e ec-042 lectrical ower 50-2717 uger over 160 d 50-2725 egree witch 50-2753...
-
Page 26: Troubleshooting
HIGH. Check if the auger is turning. If not, contact your local Black Olive Dealer. Turn grill on to HIGH and check ash pan for fresh pellets. If no pellets are found, it is a feed problem. - Page 27 TROUBLESHOOTING roblem ossible ause olution Push the smoke switch on the control panel to GRILL. rill is in smoke mode A fuel with incorrectly sized pellets will have a slower rill does not achieve feed rate and will cause the grill to burn colder. A fuel with excess amounts of loose sawdust will also affect high temPerature uality of fuel...
-
Page 28: Technical Specifications
Retighten the band. roken hinge or loose Contact your local Black Olive Dealer for replacement id is eavy to springs. sPrings Under certain temperatures the grill may bead or sweat. -
Page 29: Warranty
Black Olive Pellet Grill Warranty Sherwood Industries Ltd prides itself in producing the highest level of quality and customer service. The Black Olive Grill is built using only the finest material to create a durable ceramic grill/smoker. Our commitment is backed by our Exclusive Limited Lifetime Warranty to the original purchaser. - Page 30 23. Optional accessories for the Black Olive Grill are covered against defect for a period of one (1) year from purchase. 24. Fading of the BBQ cover is a natural result of exposure to the elements and is not covered by warranty.
- Page 31 Notes...
- Page 32 sherwood industries ltd 6782 OLDFIELD ROAD, VICTORIA, BRITISH COLUMBIA, V8M 2A3 blackolivegrill June 24, 2013 C-14054...
Need help?
Do you have a question about the PELLET GRILL and is the answer not in the manual?
Questions and answers