
Related Manuals for Lifetime 290038


Summary of Contents for Lifetime 290038
- Page 1 MODEL N° 290038 OWNER’S MANUAL Keep this Product ID Number and use when contacting Customer Service:...
-
Page 2: Safety Instructions
REGISTER YOUR LIFETIME PRODUCT TODAY! There are benefi ts to registering your Lifetime product. With our new online product registration form, it’s fast and easy! Register with us at www.lifetime.com and enjoy these great benefi ts: LIFETIME’S PROMISE TO YOU: Maintaining your privacy is our long-standing policy at Lifetime. -
Page 3: Before Beginning Assembly
BEFORE BEGINNING ASSEMBLY *Two adults required to complete assembly* Only adults should set up the product. Do not allow children in the setup area until assembly is complete. TOOLS AND PARTS REQUIRED FOR THIS ASSEMBLY Adjustable Wrench 9/16” Wrench 5/8” Wrench Screwdriver Ladder Scrap Wood... - Page 4 ASSEMBLY GUIDES Refer to the following areas throughout the instructions to assist in the assembly process: TOOLS AND HARDWARE REQUIRED FOR THIS PAGE This area is located at the top, left-hand corner of the page and indicates which tools and hardware are needed to complete the assembly steps on a page.
- Page 5 **IMPORTANT SAFETY INFORMATION** PLEASE READ BEFORE BEGINNING ASSEMBLY: Installation and Ground Preparation Instructions: INSTALLATION & GROUND PREPARATION INSTRUCTIONS Place the equipment on a level, well-drained ground, not less than 6 ft (1.8 m) from any structure or obstruc- tion such as a fence, garage, or house. Provide enough room so that children can use the equipment safely.
-
Page 6: Maintenance Instructions
OPERATING INSTRUCTIONS (CONTINUED) Instruct children not to twist swing chains or ropes or loop them over the top support bar since this may reduce the strength of the chain or rope. Instruct children to avoid swinging empty seats. Teach children to sit in the center of the swings with their full weight on the seats. Instruct children not to use the equipment in a manner other than intended. - Page 7 CONSUMER INFORMATION SHEET FOR PLAYGROUND SURFACING MATERIALS* The U.S. Consumer Product Safety Commission (CPSC) installed and maintained at depths of 6, 9, and 12 inches. estimates that about 100,000 playground equipment re- However, it should be recognized that all injuries due to falls lated injuries resulting from falls to the ground surface are cannot be prevented no matter what surfacing material is treated annually in U.S.
-
Page 8: Use At Your Own Risk
Safety Zone 25 feet 6 inches 6 feet Playset dimensions: 6 feet Length 13’ 6” Width 10’ 6” Recommended play area: Length 25’ 6” Width 36’ USE AT YOUR OWN RISK! USING A DRILL IS NOT RECOMMENDED FOR DRIVING BOLTS. A cordless drill can be used for driving screws;... -
Page 9: Parts List
PARTS LIST Item Description Item Description Box 1 Top Pole Box 2 HARDWARE LIST Item Description Item Description Box 2 A-Frame Assembly Hardware (1049899) Swing Bar Assembly Hardware (1049898) Pendulum Final Assembly Hardware (1049900) PARTS IDENTIFIER Parts shown at 10% of Actual Size Top Pole... -
Page 10: Hardware Identifier
PARTS IDENTIFIER Parts shown at 5% of Actual Size Part shown at 25% of Actual Size HARDWARE IDENTIFIER SWING BAR ASSEMBLY HARDWARE Hardware shown at Actual Size Pendulum... - Page 11 HARDWARE IDENTIFIER A-FRAME ASSEMBLY HARDWARE Hardware shown at Actual Size FINAL ASSEMBLY HARDWARE Hardware shown at Actual Size...
-
Page 12: Hardware Required
SWING BAR ASSEMBLY HARDWARE REQUIRED Hardware shown at Actual Size Pendulum PARTS REQUIRED Parts shown at 10% of Actual Size TOOLS REQUIRED Scrap Wood Adjustable Wrench 9/16” Wrench... - Page 13 TOOLS AND HARDWARE REQUIRED FOR THIS PAGE NO TOOLS REQUIRED FOR THIS PAGE 4 1/2” Outside Swing Bar (BKS) Middle Swing Bar (BKR) 1/2” Nylon Washers (ANK) Pendulum (ARP) Note: Only finger tighten the hardware in this step. Outside Swing Bar (BKS) Middle Swing Bar (BKR) 1/2”...
- Page 14 TOOLS AND HARDWARE REQUIRED FOR THIS PAGE Scrap Wood NO NEW HARDWARE REQUIRED FOR THIS PAGE 9/16” ATTENTION: THIS STEP CANNOT BE REVERSED! Note: Do not hit your feet with the pole WARNING sections, as serious injury could occur. The Poles must be seated together! They must be struck on a hard surface fi...
- Page 15 TOOLS AND HARDWARE REQUIRED FOR THIS PAGE 9/16” 1/2” Nylon Washers (ANK) Pendulum (ARP) 3” Round Caps (ASV)
- Page 16 A-FRAME ASSEMBLY HARDWARE REQUIRED Hardware shown at Actual Size PARTS REQUIRED Parts shown at 10% of Actual Size Top Pole TOOLS REQUIRED Scrap Wood 7/32” Allen Wrench Screwdriver 5/8” Wrench...
- Page 17 TOOLS AND HARDWARE REQUIRED FOR THIS PAGE Top Pole (ALH) Middle Pole (ALF) Note: The 1/4” x 3/4” Screw should be flush with the pole, but will spin freely once installed. Do not jam the poles together until instructed. Middle Pole (ALF) Bottom Pole (ALE) Note: The 1/4”...
- Page 18 TOOLS AND HARDWARE REQUIRED FOR THIS PAGE Scrap Wood NO HARDWARE REQUIRED FOR THIS PAGE ATTENTION: THIS STEP CANNOT BE REVERSED! Top and Middle Poles (ALH & ALF) Middle and Bottom Poles (ALF & ALE) DO NOT COMPLETE ASSEMBLY WARNING Note: Do not hit your feet with the pole sections, as serious injury could occur.
- Page 19 TOOLS AND HARDWARE REQUIRED FOR THIS PAGE 7/32” 5/8” Outside Bracket (BKO) and an Inside Bracket (with notches) (BKM) Top Poles (ALH) Notches Note: Do not overtighten the hardware in this step.
- Page 20 TOOLS AND HARDWARE REQUIRED FOR THIS PAGE 7/32” 5/8” A-Side Bracket (BKQ) to a Top Pole (ALH) Outside Bracket (BKO) Straight Edge Note: Only finger tighten the hardware in this step. Note: Repeat this step to assemble the B- Side Bracket (BKP) to the other side of the assembly.
- Page 21 FINAL ASSEMBLY HARDWARE REQUIRED Hardware shown at Actual Size PARTS REQUIRED Parts shown at 5% of Actual Size Part shown at 25% of Actual Size TOOLS REQUIRED Ladder 7/32” Allen Wrench 5/8” Wrench...
- Page 22 TOOLS AND HARDWARE REQUIRED FOR THIS PAGE 7/32” 5/8” Note: Tighten the hardware from step 2.6 before continuing to the next step. Note: Repeat this step to assemble the other A-Frame Assembly to the other side of the Swing Bar Assembly. Foot Caps (BFD) and Hole Caps (ARO)
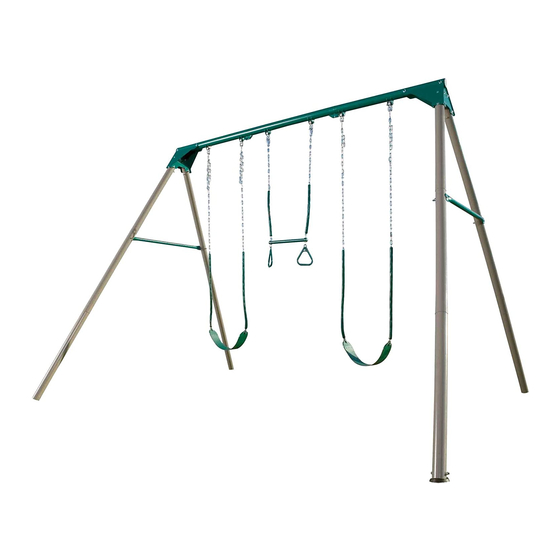
- Page 23 TOOLS AND HARDWARE REQUIRED FOR THIS PAGE NO HARDWARE REQUIRED FOR THIS PAGE Belt Swings (BKT) Trapeze Swing (BKU)
- Page 24 ENHANCE YOUR LIFETIME ® PURCHASE BY ADDING ACCESSORIES OR OTHER GREAT PRODUCTS: To purchase accessories or other Lifetime Products, visit us at: www.lifetime.com Or call: 1-800-424-3865...
- Page 25 2. This warranty is nontransferable and is expressly limited to the repair or replacement of defective playground equipment. If the equipment is defective within the terms of this warranty, Lifetime Products, Inc. will repair or replace defective parts at no cost to the purchaser.
- Page 26 Ceux-ci posent un risque • Asegúrese de que los rieles protectores estén coloca- d’étranglement. dos en su lugar todo el tiempo. • S’assurer que des garde-fous sont en place en tout temps. Lifetime Products, Inc www.lifetime.com Clearfield, UT 84016 1/05/2009 # 1049933...
Need help?
Do you have a question about the 290038 and is the answer not in the manual?
Questions and answers