
Subscribe to Our Youtube Channel
Related Manuals for DVA MINI

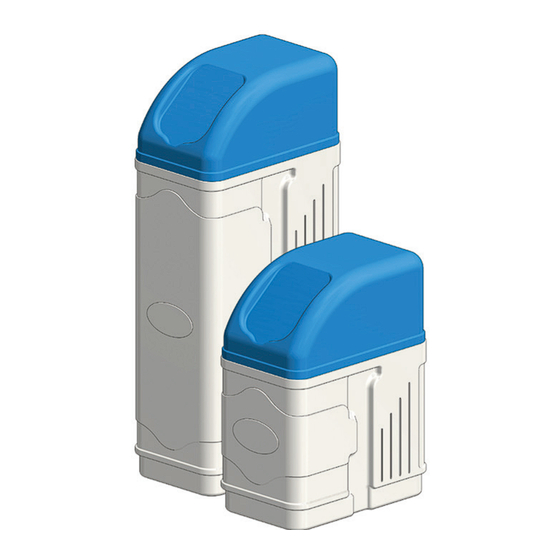
Summary of Contents for DVA MINI
- Page 1 MINI-MAXI ruzioni Manuale d’ist Instruction Manual Notice d’Utilisation CRONOMETRICO - CHRONOMETER Handbuch CHRONOMÈTRE - CHRONOMETER Manual de Istrucciones CRONÓMETRO...
- Page 2 FIG. 2 A FIG. 2 B SENZA MISCELATORE FIG. 1 FIG. 2 C LEGENDA: LEGEND: A valvola di non ritorno A non-return valve B rubinetto uscita B outlet tap C rubinetto by-pass C by-pass tap D rubinetto ingresso D inlet tap E tubo per il troppo pieno E overflow pipe F tubo scarico...
- Page 3 LEGENDA: LEGEND: A ATTACCHI RAPIDI A SPEED CONNECTIONS B EIETTORE B INJECTOR C REGOLATORE SALAMOIA C REFILL FLOW CONTROL D FILTRO EIETTORE D INJECTOR FILTER E LETTORE OTTICO E OPTICAL SENSOR F CONNESSIONE MOTORINO F MOTOR CABLE G INGRESSO ADATTATORE G AC ADAPTER Input H CONNESSIONE MOTORE E H MAIN MOTOR &...
-
Page 4: Installazione
2) COSA FA L’ADDOLCITORE MINI - MAXI? la tensione di linea disponibile corrisponda alla tensione L’addolcitore MINI - MAXI, grazie alle resine a scambio ionico indicata sulla targhetta apposta sull’apparecchio; contenute all’interno della bombola, è in grado di trattenere i 6. -
Page 5: Programmazione Del Timer
GIORNI salamoia. (fig. 14). 9) PROGRAMMAZIONE DEL TIMER 9.1 MINI - MAXI L’addolcitore MINI - MAXI si programma in modo rapido e semplice. Ha quattro pulsanti che permettono di selezionare fig. 14 Manuale d’istruzioni MINI - MAXI... - Page 6 , si passerà sa del display compare “P1”, premendo ancora si scorrono subito alla fase successiva della rigenerazione C2. 4) Premendo contemporaneamente i tasti N e tutti i parametri: , si passerà Manuale d’istruzioni MINI - MAXI...
-
Page 7: Messa In Funzione
Pulire i componenti con acqua e verificare che il foro Il compito del miscelatore è di permettere ad una certa quan- dell’eiettore non sia ostruito (fig.6, B) tità d’acqua di passare direttamente dall’entrata all’uscita Riposizionare con attenzione i particolari nelle proprie Manuale d’istruzioni MINI - MAXI... -
Page 8: Consigli Utili
Se l’errore non scompare e l’albero a camme continua a girare, verificare che il cavo di collegamento tra il motorino ed il controllo non si sia sfilato (fig. 6, H) e il sensore ottico sia nella giusta sede (fig. 6, E) Manuale d’istruzioni MINI - MAXI... -
Page 9: Installation
5. Before connecting the fixture to the electric network, make SOFTENER WORK? sure the available line voltage corresponds to the voltage The MINI - MAXI water softener, thanks to the ionic exchange indicated by the tag on the fixture; resins contained inside the bottle, traps the Magnesium and 6. -
Page 10: Setting The Timer
“DAYS” (fig. 14). 9) SETTING THE TIMER 9.1 MINI - MAXI The MINI - MAXI water softener can be programmed in a quick and easy way. It is provided with four buttons allowing to fig. 14 Istruction Manual MINI - MAXI... -
Page 11: Manual Settings
4) Pressing the buttons N and ars on the lower part of the display. Pressing again, it is , at the same time, you will possible to run through all the parametres: pass immediately to the following regeneration step, C4. Istruction Manual MINI - MAXI... -
Page 12: Setting At Work
The valve will position on service step. The di- increase the hardness of the outcoming water. splay will then show back the time. Please remember that this operation must be carried out very carefully. Istruction Manual MINI - MAXI... -
Page 13: Useful Advice
If the error signal does not disappear and the cam shaft keeps rotating, check that the connecting cable between the engine and the control are not damaged (fig. 6, H), and that the optical sensor is the right place (fig. 6, E). Istruction Manual MINI - MAXI... - Page 14 3) DANS LA BOÎTE VOUS TROUVREZ: indirectement du non-respect des consignes mention- nées ci-dessus. • 1 adoucisseur d’eau MINI - MAXI avec des résines cationi- ques convenant à l’adoucissement 8) INSTALLATION • 1 notice d’utilisation 8.1 EMPLACEMENT...
- Page 15 9.1 MINI - MAXI • Norme de produit IEC/EN 60335-1:2010 pour la sécurité L’adoucisseur MINI - MAXI peut être programmé de façon électrique des appareils électriques à utilisation domesti- simple et rapide. Il est pourvu de quatre touches qui permet- que et semblables tent de selectionner l’heure, le jour et la quantité...
-
Page 16: Réglage Manuel
La valeur à insérer est établie du fabriquant et doit être modi- C7 2 rinçage rapide fiée sous la supervision de l’installateur. C8 rajout d’eau dans le bac au saumure 1) Après avoir selectionné les jours de la régénération, une Notice d’utilisation de l’adoucisseur MINI - MAXI... -
Page 17: Entretien
Au moins une fois par an, nettoyez l’injecteur (fig. 6, B) phase C5. son filtre (fig. 6, D) et le régulateur de la saumure (fig. 6, 14. Laissez terminer le cycle (il faudra 10 minutes environ). C) selon la procédure suivante: Notice d’utilisation de l’adoucisseur MINI - MAXI... -
Page 18: Conseils Utiles
à cames continue de tourner, vérifiez que les câbles de raccordement entre le moteur et le contrôle ne soient pas endommagés (fig. 6, H) et que le senseur optique soit à sa place (fig. 6, E) Notice d’utilisation de l’adoucisseur MINI - MAXI... - Page 19 Salz in die Salzlösung regelmäßig zu füllen (Abb. 7). ige Schäden und/oder Unfälle, die durch Nichtbeachtung 3) DIE PACKUNG ENTHÄLT: dieser Anweisungen entstehen könnten. • 1 Enthärter MINI - MAXI mit kationischen Harzen, die für den 8) AUFSTELLUNG Enthärter geeignet sind 8.1 LAGE •...
- Page 20 • Produktnorm: 2014/30/EU/(EMC), EN 55014-1:2017, 9.1 MINI - MAXI EN61000-3-2:2014, EN 61000-3-3:2013, EN 55014-2:2015 Der Wasserenthärter MINI - MAXI ist leicht und einfach program- 2014/35/EU(LVD), EN 60335-1:2012+A11:2014+A13:2017 mierbar dank vier Tasten, die die Zeitauswahl, die Tagauswahl • Produktnorm: IEC/EN 60335-1:2010 für die Sicherheit von und die Auswahl der Salzmenge für die Regenerierung ermög-...
- Page 21 Salzdosierung. Der einzugebende Wert ist vom Hersteller C5 Erste Schnelle Spülung festgestellt und kann nur beim Aufsteller geändert werden. C6 Zweite Rückspülung 1) Nachdem Sie die Tage für die Regenerierung eingestellt hat- C7 Zweite schnelle Spülung Handbuch Wasserenthärter MINI - MAXI...
-
Page 22: Wartung
Wartungsarbeiten regelmäßig durchzuführen: bis zu der „C5“ Phase zu überspringen. - Alle 6 Monate die Salzlösung reinigen und allfällige 14. Lassen Sie dass das Zyklus bis zum Ende geht (zirka 10 Rückstände vom Steigrohr entfernen (Abb. 1); Handbuch Wasserenthärter MINI - MAXI... - Page 23 Falls der Fehler bleibt und die Nockenwelle noch dreht, überprüfen dass das Verbindungskabel zwischen dem Anlasser und der Kontrolle nicht abgezogen haben (Abb. 6, H) und dass der optische Sensor in dem richtigen Sitz ist (Abb. 6 E). Handbuch Wasserenthärter MINI - MAXI...
-
Page 24: Instalación
1. Antes de la instalación verifique que la máquina no presen- 1) ESTIMADO CLIENTE, te anomalías o daños causados por el transporte, en caso gracias por haber comprado el depurador de agua MINI - de desperfectos diríjase a su revendedor; 2. Este descalcificador deberà ser destinado solamente al MAXI. - Page 25 E N 5 5 0 1 4 - 2 : 2 0 1 5 2 0 1 4 / 3 5 / E U ( L V D ) , E N El descalcificador MINI - MAXI se programa de manera ràpida 60335-1:2012+A11:2014+A13:2017 y simple.
- Page 26 2) Esperar algunos minutos hasta que sobre la pantalla serà 4) Pulsar N para confirmar. visualizada la fase corriente C1. Pulsar N ssi se quiere Fìn de la programaciòn. visualizar cuantos minutos faltan al tèrmino de la fase. Manual de istrucciones MINI - MAXI...
-
Page 27: Puesta En Funcionamiento
8. Abrir lentamente el grifo de entrada y de salida de agua portante. La tarea del mezclador es lo de permitir a una (fig. 3 B,D) Manual de istrucciones MINI - MAXI... -
Page 28: Consejos Utiles
(fig. 6, H) y el sensor òptico sea en su sede (fig. 6, E). Manual de istrucciones MINI - MAXI... - Page 29 NOTES ....................
- Page 30 NOTES ....................
- Page 31 NOTES ....................
- Page 32 DATA CONTROLLO ULTIMO CONTROLLO CHECK DATE LAST CHECK Data - Date Timbro del Venditore/Installatore - Seller/Installer’s stamp...
Need help?
Do you have a question about the MINI and is the answer not in the manual?
Questions and answers