Safran MorphoAccess SIGMA Series Administration Manual
Hide thumbs
Also See for MorphoAccess SIGMA Series:
- Quick user manual (33 pages) ,
- Administration manual (517 pages) ,
- Installation manual (81 pages)

Subscribe to Our Youtube Channel
Related Manuals for Safran MorphoAccess SIGMA Series


Summary of Contents for Safran MorphoAccess SIGMA Series
- Page 1 MorphoAccess® SIGMA Series Administration Guide COPYRIGHT© 2016 Morpho Osny, France MorphoAccess® SIGMA Series – Administration Guide May 2016 2014_0000002196-09...
-
Page 2: Warning
MorphoAccess® SIGMA Series – Administration Guide Warning WARNING COPYRIGHT© 2016 All rights reserved. Information in this document is subject to change without notice and do not represent a commitment on the part of MorphoAccess® SIGMA Series. No part of this document may be reproduced or transmitted in any form or by any means, electronic or mechanical, including photocopying or recording, for any purpose without the express written permission of MorphoAccess®... -
Page 3: Revision History
MorphoAccess® SIGMA Series – Administration Guide Revision History Revision History The table below contains the history of changes made to the present document. Version Date Description November 2013 First version May 2014 Updated - Terminal Rear View Diagram - USB port with a Wi-Fi™ adapter - Default Communication Parameter - Recommendations / SD card June 2015... -
Page 4: Table Of Contents
MorphoAccess® SIGMA Series – Administration Guide Table of Contents Table of Contents WARNING ..........................2 REVISION HISTORY ....................... 3 SECTION 1 : INTRODUCTION ....................23 MorphoAccess® SIGMA Series Terminal ................24 Scope of the document ....................25 Safety Instructions ......................27 Wiring Recommendations .................... - Page 5 MorphoAccess® SIGMA Series – Administration Guide Table of Contents Connection through only one Ethernet switch ..............47 Connection through a LAN ....................48 Description ........................... 48 LAN with DNS Server......................48 LAN without DNS Server ...................... 49 Static IP address (DHCP disabled) ..................49 Dynamic IP address (DHCP enabled) ...................
- Page 6 MorphoAccess® SIGMA Series – Administration Guide Table of Contents Terminal Firmware Upgrade ................... 67 How to get last version of firmware ..................67 How to upgrade the firmware ..................... 67 Firmware upgrade using a USB Mass Storage Key ............. 67 Firmware upgrade tool for expert users ................
- Page 7 MorphoAccess® SIGMA Series – Administration Guide Table of Contents Transaction Log ......................... 189 Miscellaneous Settings ...................... 194 Web Server ........................197 Error Log Configuration ..................... 197 Sensor Log Configuration ....................200 Communication menu ....................202 Security recommendation ....................203 Ethernet Network Configuration ..................203 Wi-Fi™...
- Page 8 MorphoAccess® SIGMA Series – Administration Guide Table of Contents Delete Video Phone Server .................... 300 How User can make Video Call ..................302 SECTION 8 : TERMINAL CONFIGURATION THROUGH WEBSERVER ........304 Introduction to Webserver .................... 305 Security recommendation ....................306 Tamper Setting for Terminal Security ................
- Page 9 MorphoAccess® SIGMA Series – Administration Guide Table of Contents Information for the Administrator..................363 Integration in an Access Control System ................363 Access Granted ........................364 Access Denied ........................364 SECTION 10 : ACCESS CONTROL BY IDENTIFICATION ............365 Identification Mode Description ..................366 Identification Process ......................
- Page 10 MorphoAccess® SIGMA Series – Administration Guide Table of Contents Activation key ........................380 User Interface ........................381 BIOPIN verification - BIOPIN stored on card ..............382 Description ......................... 382 User’s data required in the terminal ................. 382 User’s data required on the user’s card ................382 Activation key ........................
- Page 11 MorphoAccess® SIGMA Series – Administration Guide Table of Contents User’s data required in the terminal ................. 396 User’s data required on the user’s card ................396 Activation key ........................397 User Interface ........................397 Allowed format for User's identifier ................399 TLV structured data ......................
- Page 12 MorphoAccess® SIGMA Series – Administration Guide Table of Contents SECTION 17 : COMPATIBILITY WITH AN ACCESS CONTROL SYSTEM ........427 Internal Relay activation on Access Granted result ............428 Description ......................... 428 Activation key ........................429 Configuration key ......................429 External activation of the internal relay ................
- Page 13 MorphoAccess® SIGMA Series – Administration Guide Table of Contents SD card ..........................455 Ethernet connection ......................455 Date / Time synchronization ..................... 455 Cleaning precautions ......................455 Recommended Conditions for Face Detection ..............456 ANNEX 1 : FINGER PLACEMENT RECOMMENDATION ............457 ANNEX 2 : COMPARISON OF AUTHENTICATION MODE WITH CONTACTLESS CARD ...
- Page 14 MorphoAccess® SIGMA Series – Administration Guide Table of Figures Table of Figures Figure 1: Minutiae are classified in two categories i.e. ridge ending and bifurcation ..... 29 Figure 2: Most Relevant Biometric Data in a Fingerprint ............30 Figure 3: Recommended Fingers for Capture ................31 Figure 4: MorphoAccess®...
- Page 15 MorphoAccess® SIGMA Series – Administration Guide Table of Figures Figure 38: Define Encryption Key ..................87 Figure 39: Entering in WLAN – IP Configuration ..............87 Figure 40: WLAN – IP Configuration ................... 88 Figure 41: Success message is displayed showing Wi-Fi™ network is configured ..... 88 Figure 42: Protocol Configuration ..................
- Page 16 MorphoAccess® SIGMA Series – Administration Guide Table of Figures Figure 80: Entering first digits of the searched User ID ............118 Figure 81: Selecting User ID ....................119 Figure 82: Enrolment Information screen is displayed for editing ........119 Figure 83: Authenticate User ....................121 Figure 84: Entering User ID for authentication ..............121 Figure 85:...
- Page 17 MorphoAccess® SIGMA Series – Administration Guide Table of Figures Figure 122: Enter Active Pages ....................154 Figure 123: Reset card ......................155 Figure 124: Success message is displayed showing card is reset successfully ....156 Figure 125: Multimedia Menu ....................157 Figure 126: Uploading Audio File in device .................159 Figure 127: Confirmation Pop-up ..................159 Figure 128:...
- Page 18 MorphoAccess® SIGMA Series – Administration Guide Table of Figures Figure 164: Web Server .......................197 Figure 165: Select Error Log Configuration .................198 Figure 166: Enable Error Logging ..................199 Figure 167: Setting Error Log Debug Level ................199 Figure 168: Communication Menu ..................202 Figure 169: Selecting Ethernet-Network Configuration .............203 Figure 170:...
- Page 19 MorphoAccess® SIGMA Series – Administration Guide Table of Figures Figure 206: Viewing authorized IP Addresses ..............239 Figure 207: Viewing IP Address Range ................239 Figure 208: Deleting an IP Address ..................240 Figure 209: Delete an IP Address Ranges ................241 Figure 210: SSL Configuration .....................244 Figure 211: Configuring SSL Mode and parameters ............245...
- Page 20 MorphoAccess® SIGMA Series – Administration Guide Table of Figures Figure 248: A confirmation message pop-up ..............276 Figure 249: A success message is displayed showing error log is exported .......277 Figure 250: Exporting data into USB Mass Storage Device ..........278 Figure 251: A confirmation message pop-up ..............278 Figure 252: Enter Passphrase ....................279...
- Page 21 MorphoAccess® SIGMA Series – Administration Guide Table of Figures Figure 290: Time and Attendance UI in Normal mode with Icons ........315 Figure 291: Time and Attendance UI in Extended mode ............316 Figure 292: Settings for Transaction Log ................317 Figure 293: Biometric Security Setting through Webserver ..........319 Figure 294: Network parameters settings through Webserver ..........321...
- Page 22 MorphoAccess® SIGMA Series – Administration Guide Table of Figures Figure 332: Authentication without biometric check and with User ID check in card ..392 Figure 333: Authentication without biometric control, and with the user login ....395 Figure 334: Authentication process specified by user's card ..........397 Figure 335: Using a Wiegand frame as User ID ..............403 Figure 336:...
-
Page 23: Section 1 : Introduction
MorphoAccess® SIGMA Series – Administration Guide Introduction Section 1 : Introduction – R 2014_0000002196-09 ORPHO OCUMENT EPRODUCTION AND ISCLOSURE ORBIDDEN May 2016... -
Page 24: Morphoaccess® Sigma Series Terminal
MorphoAccess® SIGMA Series – Administration Guide Introduction MorphoAccess® SIGMA Series Terminal Congratulations for choosing a MorphoAccess® SIGMA Series Automatic Fingerprint Recognition Terminal. MorphoAccess® SIGMA Series provides an innovative and effective solution for access control applications using Fingerprint Verification or/and Identification. Among a range of alternative biometric technologies, the use of finger imaging has significant advantages: each finger constitutes an unalterable physical signature, developed before birth and preserved until death. -
Page 25: Scope Of The Document
MorphoAccess® SIGMA Series – Administration Guide Introduction Scope of the document This document is intended to guide administrators on how to use MorphoAccess® SIGMA Series Terminal. Contactless smartcard reader Terminal Terminal Biometrics Outdoor iCLASS® Series Name MIFARE® Prox DESFire® iCLASS® ®... - Page 26 MorphoAccess® SIGMA Series – Administration Guide Introduction An administrator can learn about Access Control Processes, Compatibility with access control systems, Time & Attendance mode and how terminal is configurable from Webserver, refer “Terminal Configuration through Webserver”. In order to perform all operations with the best efficiency, it is recommended to read this guide.
-
Page 27: Safety Instructions
MorphoAccess® SIGMA Series – Administration Guide Introduction Safety Instructions The installation of this product should be made by a qualified service Person and should comply with all local regulations. It is strongly recommended to use a class II power supply at 12V [9V-16V] and 1. min in conformity with Safety Electrical Low Voltage (SELV). -
Page 28: Europe Information
Changes or modifications not expressly approved by the party responsible for compliance could void the user's authority to operate the equipment. Responsible Party: SAFRAN Morpho, 11, boulevard Gallieni 92130 Issy-les-Moulineaux – France NOTE: This equipment has been tested and found to comply with the limits for a Class B digital terminal, pursuant to Part 15 of the FCC Rules. -
Page 29: About Biometrics
MorphoAccess® SIGMA Series – Administration Guide Introduction About Biometrics About fingerprint biometrics Fingerprints are permanent and unique. They are formed before birth and last throughout one's life. Classification and systematic matching of fingerprints for different purposes have been in use since the late 19th century. The skin on the underside of fingers is different from the skin on other areas of an administrator body. -
Page 30: Acquisition Principles
MorphoAccess® SIGMA Series – Administration Guide Introduction Acquisition principles Areas of interest The terminal is designed to capture the area containing the most useful biometric data. In fingerprints, this is usually at the centre of the first phalanx. This is illustrated in the figure below: Area containing the maximum information... -
Page 31: Recommended Fingers
MorphoAccess® SIGMA Series – Administration Guide Introduction Recommended fingers Our terminals have been designed for the use of index (fore), middle and ring fingers. Among these, we advise people to use preferably the middle finger, which is usually the most suitable, or the fore finger as a second option. -
Page 32: Template Supported
MorphoAccess® SIGMA Series – Administration Guide Introduction Template supported Morpho terminals are able to manage external templates. Find below the list of supported template formats Morpho private fingerprint template formats PK_COMPV2, fingerprint template format (minutiae). PK_MAT, little endian fingerprint template format (minutiae). PK_LITE, fingerprint template format (minutiae). -
Page 33: Section 2 : Description Of Terminal
MorphoAccess® SIGMA Series – Administration Guide Description of Terminal Section 2 : Description of Terminal – R 2014_0000002196-09 ORPHO OCUMENT EPRODUCTION AND ISCLOSURE ORBIDDEN May 2016... -
Page 34: Interfaces Description
MorphoAccess® SIGMA Series – Administration Guide Description of Terminal Interfaces Description Introduction The MorphoAccess® SIGMA Series Installation Guide describes precisely each interface and connection procedure. All connections of the MorphoAccess® SIGMA Series terminal described hereafter are of SELV (Safety Electrical Low Voltage) type. –... -
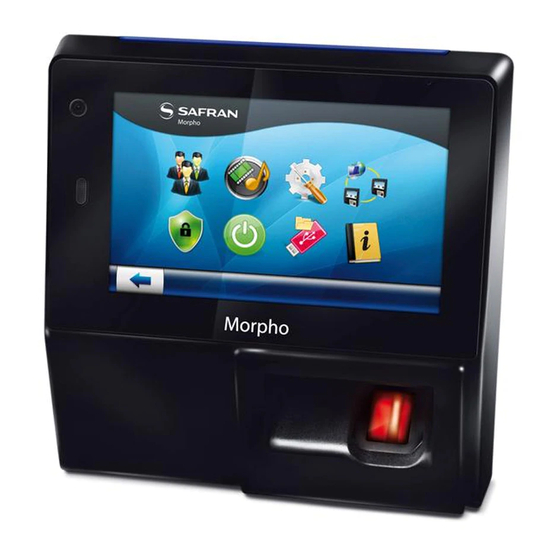
Page 35: Figure 4: Morphoaccess® Sigma Series Terminal Front View
MorphoAccess® SIGMA Series – Administration Guide Description of Terminal User Interface port (for Microphone configuration and settings with Camera mass storage key or a computer) Speaker Touch panel Sensor protection Contactless card area (optional, WR only) Biometric sensor Logo on cover when (optical) available Figure 4: MorphoAccess®... - Page 36 MorphoAccess® SIGMA Series – Administration Guide Description of Terminal The MorphoAccess® SIGMA Series terminals offer a simple and ergonomic man-machine interface designed for access control based on Fingerprint/Face recognition technology. A terminal consists (refer above figure): 1. Contactless card reader (MIFARE® and DESFire®) 2.
-
Page 37: Power Supply Interface
MorphoAccess® SIGMA Series – Administration Guide Description of Terminal Power Supply Interface POE and external power supply are not used at the same time: if both power supplies are used, priority is given to external power supply. If external power supply is shut down, switch to POE without reboot is not guaranteed. -
Page 38: Figure 5: Morphoaccess® Sigma Series Terminal Rear View Diagram
MorphoAccess® SIGMA Series – Administration Guide Description of Terminal Inversion of +12V and GND will damage the product 1 Power supply +12V 1 Wiegand IN 0 2 Power ground 2 Wiegand IN 1 3 Switch 2 3 Wiegand OUT 0 4 Switch 1 4 Wiegand OUT 1 5 Digital ground... -
Page 39: Access Control System Synoptic
MorphoAccess® SIGMA Series – Administration Guide Description of Terminal Access Control System Synoptic The terminal provides several interfaces for an easy integration into a global access control system. Sending of a message at the end of local access control The terminal is able to send a message to a distant system when local checks are completed. This message can be used, by the distant system, for a simple storage of all access requests, or to start more sophisticated processes such as additional access rights checks. -
Page 40: Usb Port Usage
MorphoAccess® SIGMA Series – Administration Guide Description of Terminal USB port usage Plugging a USB Mass storage key The external micro USB port of the MorphoAccess® SIGMA Series terminal is dedicated to the temporary connection of a USB Mass Storage key. This is used to: ... -
Page 41: Plugging A Usb Wi-Fi™ Or 3G Adapter
MorphoAccess® SIGMA Series – Administration Guide Description of Terminal Plugging a USB Wi-Fi™ or 3G adapter The rear USB port of the MorphoAccess® SIGMA Series terminal is dedicated to the connection of a Wi-Fi™ or 3G USB adapter. This micro USB port is located at the back panel of the terminal. The Wi-Fi™... -
Page 42: Connecting A Computer Through Usb
MorphoAccess® SIGMA Series – Administration Guide Description of Terminal Connecting a Computer through USB The external USB port of the MorphoAccess® SIGMA Series terminal is dedicated to the connection of a computer through a USB Cable. This is used to for firmware upgrade in the terminal using an application on a computer/server. -
Page 43: Section 3 : Connecting The Terminal To A Pc
MorphoAccess® SIGMA Series – Administration Guide Connecting the Terminal to a PC Section 3 : Connecting the Terminal to a PC – R 2014_0000002196-09 ORPHO OCUMENT EPRODUCTION AND ISCLOSURE ORBIDDEN May 2016... -
Page 44: General
MorphoAccess® SIGMA Series – Administration Guide Connecting the Terminal to a PC General Why would one connect the terminal to a PC? The MorphoAccess® SIGMA Series terminal is designed to be able to run in standalone mode, it means without any connection to a master system. But sometimes, a connection with a PC is useful to perform tasks like: ... -
Page 45: Network Parameter Initialization
MorphoAccess® SIGMA Series – Administration Guide Connecting the Terminal to a PC Network parameter initialization The network parameters of the MorphoAccess® SIGMA Series terminal are: IP address Mode Parameter Factory value Terminal IP address 0.0.0.0 Gateway IP address 0.0.0.0 Dynamic (DHCP - Default) Sub network mask 0.0.0.0 Host name... -
Page 46: Point To Point Ethernet Connection
MorphoAccess® SIGMA Series – Administration Guide Connecting the Terminal to a PC Point to Point Ethernet Connection The MorphoAccess® SIGMA Series terminal can be connected directly to a PC by an Ethernet cable. But there are some limits described in the next paragraphs. If the PC Ethernet port doesn’t support the Auto-MDIX feature, then a crossover Ethernet cable is mandatory. -
Page 47: Connection Through Only One Ethernet Switch
MorphoAccess® SIGMA Series – Administration Guide Connecting the Terminal to a PC Connection through only one Ethernet switch The MorphoAccess® SIGMA Series terminal can be connected to a PC through an Ethernet switch. This is useful when no crossover cable is available, but instead, one Ethernet switch and two Ethernet standard cables are required. -
Page 48: Connection Through A Lan
MorphoAccess® SIGMA Series – Administration Guide Connecting the Terminal to a PC Connection through a LAN Description The MorphoAccess® SIGMA Series terminal can be connected to a PC through a Local Area Network (LAN). The MorphoAccess® SIGMA Series terminal required for a connection is specified by its IP address or by its host name, if it can be added to the DNS Server database. -
Page 49: Lan Without Dns Server
MorphoAccess® SIGMA Series – Administration Guide Connecting the Terminal to a PC LAN without DNS Server This section is about LAN without DNS Server, or with DNS Server but the MorphoAccess® SIGMA Series terminal host name cannot be added to the DNS Server base. In that case the PC is not able to establish a connection with a terminal using its host name. -
Page 50: Wi-Fi™ Network Configuration
MorphoAccess® SIGMA Series – Administration Guide Connecting the Terminal to a PC Wi-Fi™ Network configuration Requirements Wi-Fi™ connection is available under the following mandatory conditions: A Morpho Wi-Fi™ USB adapter must be plugged in the rear USB port of the terminal (please refer to MorphoAccess®... -
Page 51: Section 4 : Terminal Configuration And Administration
MorphoAccess® SIGMA Series – Administration Guide Terminal Configuration and Administration Section 4 : Terminal Configuration and Administration – R 2014_0000002196-09 ORPHO OCUMENT EPRODUCTION AND ISCLOSURE ORBIDDEN May 2016... -
Page 52: Understanding Morphoaccess® Configuration
MorphoAccess® SIGMA Series – Administration Guide Terminal Configuration and Administration Understanding MorphoAccess® Configuration Presentation MorphoAccess® SIGMA Series terminal has factory default settings for all the functionalities supported. An administrator can configure the terminal as per requirement of security levels to be maintained. The terminal can be configured using one of the methods described below: ... -
Page 53: Notation
MorphoAccess® SIGMA Series – Administration Guide Terminal Configuration and Administration Notation In this manual a parameter is presented using this format: Parameter name Value Description For example to allow additional attempt for biometric authentication: Parameter name Value Description auth_param.additional_bio_c 1, 2 or 3 A value of “2”... -
Page 54: Configuring A Networked Morphoaccess
MorphoAccess® SIGMA Series – Administration Guide Terminal Configuration and Administration Configuring a Networked MorphoAccess® Introduction A MorphoAccess® SIGMA Series terminal can be managed by a PC connected to the terminal, using an application such as a web browser connected to the embedded Webserver or Morpho Bio Toolbox (in case terminal is in legacy Morpho mode). -
Page 55: Network Factory Settings
MorphoAccess® SIGMA Series – Administration Guide Terminal Configuration and Administration Network factory settings By default the terminal IP address is 134.1.32.214. This address can be changed by a distant system connected though an IP link or with a USB flash drive (USB Network Tool). The default server port is 11010. -
Page 56: Network Wi-Fi™ Configuration
MorphoAccess® SIGMA Series – Administration Guide Terminal Configuration and Administration Network Wi-Fi™ configuration Through applications like Webserver and Morpho Bio Toolbox, an administrator can configure Wi-Fi™ parameters. Wi-Fi™ connection is available under the following conditions: A Morpho WI-FI™ USB adapter, ref. 189930722, must be plugged in the rear USB port of the terminal. -
Page 57: Morphoaccess® Terminal Database Management
MorphoAccess® SIGMA Series – Administration Guide Terminal Configuration and Administration MorphoAccess® Terminal Database Management General The management of the MorphoAccess® SIGMA Series terminal can be done by administration menu of the terminal or through Webserver application connected to terminal. Adding a user to the database Adding a user means to create a record with the biometric data of two fingers of the user, and a unique identifier. - Page 58 MorphoAccess® SIGMA Series – Administration Guide Terminal Configuration and Administration Maximum Authorized User List Capacity, indicates the maximum number of users can be added to authorized user list, which is 250,000 users by default Maximum VIP user capacity, indicates the maximum capacity of the users can be enrolled as VIP users, that is 100 users by default ...
-
Page 59: Morphoaccess® Terminal License Management
MorphoAccess® SIGMA Series – Administration Guide Terminal Configuration and Administration MorphoAccess® Terminal License Management The installation of a license in the terminal, unlocks one or several optional features of the MorphoAccess® SIGMA Series terminal. The MorphoAccess® SIGMA Series terminal supports below types of licenses: ... -
Page 60: Logs Licenses
MorphoAccess® SIGMA Series – Administration Guide Terminal Configuration and Administration WARNING: It is a pre-requisite that terminal should have SD card plugged in it on upgrading user’s license. Otherwise the terminal will not boot up unless SD card is plugged. Logs licenses By default, MorphoAccess®... -
Page 61: Communication Licenses
MorphoAccess® SIGMA Series – Administration Guide Terminal Configuration and Administration Communication licenses MorphoAccess® SIGMA Series terminal supports communication to distant system through Ethernet Connection. There are other networks such as Wi-Fi™ and 3G which can be used for connecting terminal with distant systems. To enable this networks communication, it is required to install licenses. -
Page 62: Time And Attendance (T&A) License
MorphoAccess® SIGMA Series – Administration Guide Terminal Configuration and Administration Time and Attendance (T&A) license MA_TA The MA_TA license is required to be loaded on terminal, in order to enable Time & Attendance (T&A) feature. Only if the license is loaded, an administrator can configure Time &... -
Page 63: Getting A License For A Morphoaccess® Sigma Series Terminal
MorphoAccess® SIGMA Series – Administration Guide Terminal Configuration and Administration Getting a license for a MorphoAccess® SIGMA Series terminal Morpho Online License Generator allows ordering any type of license for any kind of Morpho biometric product. The file containing the license is automatically sent by email. The access to the Online License Generator requires an account in our biometric terminals support website, and an account in the License Generator sub website. -
Page 64: Figure 14: License Manager, Adding A Morphoaccess® Sigma Series Terminal
MorphoAccess® SIGMA Series – Administration Guide Terminal Configuration and Administration Screens & Steps Figure 14: License Manager, adding a MorphoAccess® SIGMA Series terminal 1. Launch the License Manager application, right click in the main window and select the “Select a MA2G” operation. Figure 15: License Manager, entering an IP address for a MorphoAccess®... -
Page 65: Figure 16: Licenses Installed In A Morphoaccess® Sigma Series Terminal
MorphoAccess® SIGMA Series – Administration Guide Terminal Configuration and Administration Figure 16: Licenses installed in a MorphoAccess® SIGMA Series terminal 3. The licenses on the MorphoAccess® SIGMA Series terminal are listed in the “license in hardware" line in the main window. For further information concerning the license management tool (License Manager PC tool), please see the document MorphoAccess®... -
Page 66: Installing A New License
MorphoAccess® SIGMA Series – Administration Guide Terminal Configuration and Administration Installing a new license Proceed as follows to install a new license: Copy the received license file (.lic extension) on the PC launch the "License Manager" application then add the MorphoAccess® SIGMA Series terminal IP address as specified in the previous section, ... -
Page 67: Terminal Firmware Upgrade
MorphoAccess® SIGMA Series – Administration Guide Terminal Configuration and Administration Terminal Firmware Upgrade How to get last version of firmware The last MorphoAccess® SIGMA Series terminal firmware can be obtained on a CD/ROM package from the customer service, or can be downloaded from Morpho Website dedicated to biometric terminals: http://www.biometric-terminals.com/ A login name and a password are required to access to the private part which contains the... - Page 68 MorphoAccess® SIGMA Series – Administration Guide Terminal Configuration and Administration This tool has no graphic interface : only a command-line interface. Syntax of the command-line [-h] [-v] -f path_to_file -e IP_address [-t timeout] [-p port_number] Options Description Displays help (this message) and returns without upgrading firmware. Verbose mode.
-
Page 69: Morphoaccess® Sigma Series Modes
MorphoAccess® SIGMA Series – Administration Guide Terminal Configuration and Administration MorphoAccess® SIGMA Series Modes MorphoAccess® SIGMA Series (also referred as MA5G) terminals are standalone biometric access control terminals which offers advance features for access rights check of the users. MorphoAccess® SIGMA Series terminals are equipped with a facility to emulate (partially) either MorphoAccess®... -
Page 70: Morphoaccess® Sigma Series Native Mode
MorphoAccess® SIGMA Series – Administration Guide Terminal Configuration and Administration MorphoAccess® SIGMA Series native mode MorphoAccess® SIGMA Series terminal is by default in native mode; this native mode is designed by MA5G, which means MorphoAccess® 5th generation. This mode supports new features and a remote management application called Webserver. -
Page 71: Section 5 : First Boot Assistant
MorphoAccess® SIGMA Series – Administration Guide First Boot Assistant Section 5 : First Boot Assistant – R 2014_0000002196-09 ORPHO OCUMENT EPRODUCTION AND ISCLOSURE ORBIDDEN May 2016... -
Page 72: Assistant Initialization
MorphoAccess® SIGMA Series – Administration Guide First Boot Assistant Assistant Initialization First Boot Assistant (FBA) is launched as soon as the MorphoAccess® SIGMA Series terminal is started for the first time. All the fundamental settings can be done from an FBA screen itself. FBA can also set to launch on terminal reboot. -
Page 73: Date & Time Configuration
MorphoAccess® SIGMA Series – Administration Guide First Boot Assistant Date & Time Configuration On first boot or reboot of the terminal it is mandatory to set the current date, time and time zone in the terminal. NOTE: The time stored in the product is not lost if power supply is removed for up to 48 hours. Access Path System Menu >... -
Page 74: Figure 20: Configuring Current Time
MorphoAccess® SIGMA Series – Administration Guide First Boot Assistant 5. Select Time Configuration Figure 20: Configuring Current Time 6. Scroll up or down to select current Hour, Minute, and Second 7. Set Hour Format as analogue i.e. ‘12 Hour’ or digital i.e. ‘24 hour’ 8. -
Page 75: Figure 22: List Of Predefined Time Zones Of World
MorphoAccess® SIGMA Series – Administration Guide First Boot Assistant 12. Select Time Zone Type as ‘Predefined’ or ‘Custom’. If an administrator selects Predefined, the list of Predefined time zones of entire world will be available to select from. And if an administrator select Custom, an administrator can set a customized time zone 13. - Page 76 MorphoAccess® SIGMA Series – Administration Guide First Boot Assistant 18. If an administrator Select Time Zone Type as ‘Custom’, then an administrator need to define below time zone parameters: 19. Select Time Zone NOTE: While setting custom time zone, make sure the GMT offset to be set is the 'Standard GMT Offset' of the region.
-
Page 77: Trigger Event
MorphoAccess® SIGMA Series – Administration Guide First Boot Assistant Trigger Event MorphoAccess® SIGMA Series terminal is able to start access rights check when a specific event occurs on terminal. Using this configuration an administrator can set on which events the terminal should perform operations. Below is the list of events available: ... -
Page 78: Language Configuration
MorphoAccess® SIGMA Series – Administration Guide First Boot Assistant Language Configuration Using this functionality an administrator can set the language in which terminal content is displayed. Multiple language options are available to select from, viz. English, French, Spanish or Arabic. Access Path System Menu >... -
Page 79: Figure 26: Language Selection On Main Screen
MorphoAccess® SIGMA Series – Administration Guide First Boot Assistant Press Language to select Figure 26: Language selection on main screen Results A user can select preferred language from the terminal main screen, as displayed in above figure. Note: The Audio messages played on terminal must be same as the selected language of terminal. -
Page 80: Show/Hide Language Icon
MorphoAccess® SIGMA Series – Administration Guide First Boot Assistant Show/Hide Language Icon Using this functionality an administrator can opt whether to display the language icon on the terminal home screen or not, through the Web Server. The values of this parameter are 0, 1. If misc.language_config_display parameter value is set to ‘0’... -
Page 81: Ethernet Interface Settings
MorphoAccess® SIGMA Series – Administration Guide First Boot Assistant Ethernet Interface Settings MorphoAccess® SIGMA Series terminal can be connected to other servers and door panels via Ethernet channel. Using Ethernet connection, the terminal can make access request to the access controller and receive result message. At First Boot Assistant, an administrator can configure the terminal to communicate through Ethernet channel. -
Page 82: Figure 29: Ip Mode Selection
MorphoAccess® SIGMA Series – Administration Guide First Boot Assistant Figure 29: IP Mode Selection 3. An administrator can select IP Mode as ‘Static’ or ‘DHCP’ 4. Use Check button “ ” to save the setting – R 2014_0000002196-09 ORPHO OCUMENT EPRODUCTION AND ISCLOSURE ORBIDDEN... -
Page 83: Wi-Fi™ Configuration
MorphoAccess® SIGMA Series – Administration Guide First Boot Assistant Wi-Fi™ Configuration MorphoAccess® SIGMA Series terminal can be connected to other servers and door panels via WLAN (Wi-Fi™ network). Using Wi-Fi™ connection, the terminal can make access request to the access controller and receive result message. At First Boot Assistant, an administrator can configure the terminal to communicate through WLAN. -
Page 84: Figure 31: Enter Encryption Key
MorphoAccess® SIGMA Series – Administration Guide First Boot Assistant Figure 31: Enter Encryption Key 2. Enter an Encryption Key to connect to the selected Wi-Fi™ network Figure 32: Success message is displayed showing Wi-Fi™ network is configured Figure 33: Connected to Wi-Fi™ network –... -
Page 85: Figure 34: Selecting Other Network To Set Up Wi-Fi™ Network Manually
MorphoAccess® SIGMA Series – Administration Guide First Boot Assistant Manual Configuration 1. Select WLAN Configuration to set up Wi-Fi™ Network Figure 34: Selecting Other Network to set up Wi-Fi™ network manually 2. The list of available Wi-Fi™ networks will be displayed. Select Other Network to set up Wi-Fi™... -
Page 86: Figure 36: Setting Ssid
MorphoAccess® SIGMA Series – Administration Guide First Boot Assistant Figure 36: Setting SSID 4. Enter SSID and click on “ ” button to save. To cancel the operation, use “ ” button Figure 37: Selecting Encryption Mode 5. Select the Encryption Mode, as supported by an administrator Wi-Fi™ Router. Encryption mode is selected for Wi-Fi™... -
Page 87: Figure 38: Define Encryption Key
MorphoAccess® SIGMA Series – Administration Guide First Boot Assistant Figure 38: Define Encryption Key 6. Enter Encryption Key to connect to Wi-Fi™. Only by entering Encryption Key, the Wi- Fi™ network can be accessed 7. Use Check button “ ” to save the setting Figure 39: Entering in WLAN –... -
Page 88: Figure 40: Wlan - Ip Configuration
MorphoAccess® SIGMA Series – Administration Guide First Boot Assistant Figure 40: WLAN – IP Configuration 10. An administrator can select IP Mode as ‘Static’ or ‘DHCP’ a. If IP Mode is ‘Static’, then enter parameters such as IP Address, Subnet Mask, Gateway Address, Preferred DNS Address and Alternate DNS Address b. -
Page 89: Protocol Configuration
MorphoAccess® SIGMA Series – Administration Guide First Boot Assistant Protocol Configuration Using Protocol Configuration an administrator can set terminal mode as Legacy L1 i.e. Bioscrypt 4G Series Legacy Mode terminals Legacy Morpho i.e. MorphoAccess® 500 or J Series legacy mode ... - Page 90 MorphoAccess® SIGMA Series – Administration Guide First Boot Assistant Results The protocol selected is saved. The terminal will be required to reboot, in order to use the terminal in any of the legacy modes. When one protocol is switched to another, MorphoAccess®...
-
Page 91: Password Configuration
MorphoAccess® SIGMA Series – Administration Guide First Boot Assistant Password Configuration This function is used to reset terminal default login password. An administrator can use the password to access administration menu and perform required operations. In order to prevent any unauthorized access to the terminal administration menu, it is recommended to change the default login password on FBA (First Boot Assistant) screen itself. -
Page 92: Figure 44: Entering New Password
MorphoAccess® SIGMA Series – Administration Guide First Boot Assistant Figure 44: Entering New Password 2. Enter a New Password of an administrator choice 3. Use “ ” button to move on next screen Figure 45: Verifying New Password 4. Re-enter the New Password for verification 5. -
Page 93: First Boot Assistance At Next Boot Configuration
MorphoAccess® SIGMA Series – Administration Guide First Boot Assistant First Boot Assistance At Next Boot Configuration The configuration defined with the First Boot Assistant, can be either permanent or temporary. This is specified by the "First Boot Configuration Storage Type" parameter as described below: ... -
Page 94: Recover Corrupted Components
MorphoAccess® SIGMA Series – Administration Guide First Boot Assistant Recover Corrupted Components There is a system within the terminal to recover corrupted secure container components like Smartcard Keys, Terminal Password, SSL Certificate and User Database. Due to problem in power failure or interrupt in operation causes the corruption. When booting up device if there is any correctuption found in secure containere component, terminal will display following screen Figure 47: Protected Data Corrupted Error... -
Page 95: Section 6 : Administration Menu
MorphoAccess® SIGMA Series – Administration Guide Administration Menu Section 6 : Administration Menu – R 2014_0000002196-09 ORPHO OCUMENT EPRODUCTION AND ISCLOSURE ORBIDDEN May 2016... -
Page 96: Access To Administration Menu
MorphoAccess® SIGMA Series – Administration Guide Administration Menu Access to Administration Menu An administrator can login to MorphoAccess® SIGMA Series terminal using a default password. An administration menu allows user to perform various actions and configurations on terminal, through below listed menus: ... -
Page 97: Figure 50: Entering Password
MorphoAccess® SIGMA Series – Administration Guide Administration Menu Figure 50: Entering Password 2. Enter Password and Press on Ok to save password Figure 51: Administrator Menu 3. On successful login, an administrator menu is displayed, with various sub menus – R 2014_0000002196-09 ORPHO OCUMENT... -
Page 98: User Menu
MorphoAccess® SIGMA Series – Administration Guide Administration Menu User Menu User menu offers all functions related to the end users. An administrator can enroll new user in the system, edit user information, delete users from the terminal database, and reset user information from contactless smart cards. -
Page 99: User Enrollment In Database
MorphoAccess® SIGMA Series – Administration Guide Administration Menu User Enrollment in Database This feature of MorphoAccess® SIGMA Series terminal allows an administrator to enroll new users in the terminal. The user information such as name, biometric data (i.e. fingerprint); User ID and PIN, access rights, etc. are entered and stored in the terminal database. Terminal will allow access to the user by comparing the data provided by the user at access request, with the data provided by the user at the time of enrolment. -
Page 100: Figure 54: Adding User Information
MorphoAccess® SIGMA Series – Administration Guide Administration Menu restrict user to edit this field. misc.user_id_edit is accessible from PC application or Web Server. 2. Press on “ ” button to save Figure 54: Adding user information 3. Under Enrolment Information screen, an administrator need to enter several parameters: Figure 55: Enter First Name of User 4. -
Page 101: Figure 56: Enrolling Finger Index
MorphoAccess® SIGMA Series – Administration Guide Administration Menu Figure 56: Enrolling Finger Index 7. A user is required to provide the biometric data of at least two different fingers. Select first finger for biometric data capture Figure 57: Select first finger to capture 8. -
Page 102: Figure 58: Biometric Data Capture
MorphoAccess® SIGMA Series – Administration Guide Administration Menu Figure 58: Biometric data capture 9. Place an administrator finger on biometric Sensor. If an administrator finger is not placed properly or within the time limit, an error message is displayed. Refer to “Finger Placement Recommendation”... -
Page 103: Figure 60: Assigning Access Rights
MorphoAccess® SIGMA Series – Administration Guide Administration Menu Figure 60: Assigning Access Rights 14. Admin Rights, an administrator can select as below: a. No Administrator Rights: This indicates that a normal user who has no rights to access administration menu and perform any configuration. Normal users can only use the terminal for access request and/or Time &... -
Page 104: Figure 61: Enter User Pin
MorphoAccess® SIGMA Series – Administration Guide Administration Menu Figure 61: Enter User PIN – Alphanumeric/Numeric 16. Enter User PIN which configurable based on LCD_configuration.PIN_keypad_type. Default value of this parameter is 1 which enable Numeric keypad for User PIN. On setting value to 0, terminal will enable Alphanumeric Keypad. The value will be of up to 15 digits alphanumeric/numeric. -
Page 105: Figure 63: Setting Job Code In User Profile
MorphoAccess® SIGMA Series – Administration Guide Administration Menu 2. When Time and Attendance mode is enable, enter job code during authentication is optional even though Job Code Check is enable. It is based on the value of parameter time_and_attendance.jobcode_by_key and selected time and attendance key during authentication. - Page 106 MorphoAccess® SIGMA Series – Administration Guide Administration Menu 21. Select an Access Schedule, if the access is allowed within particular hours of the day. By default, the access schedule is selected as Schedule 63 that means access allowed at any time of the day. NOTE: Refer to “Define Access Schedule”...
-
Page 107: Figure 65: Enrolment Information Screen - Configuring Parameters
MorphoAccess® SIGMA Series – Administration Guide Administration Menu 22. Press on “ ” to save Figure 65: Enrolment Information Screen – Configuring parameters 23. Configure Observe Holiday Schedule as ON or OFF. If this parameter is set as ON, then access on holiday will be provided as per defined holiday schedule. If this parameter is set as OFF, then authentication is done without any check on holiday schedule. -
Page 108: Figure 66: Configuring Dynamic Message For User
MorphoAccess® SIGMA Series – Administration Guide Administration Menu Figure 66: Configuring Dynamic Message for User 25. Set Dynamic Message as On Figure 67: Setting duration for dynamic message 26. Define the duration of Dynamic Message to be displayed on LCD screen by selecting Start Date and End Date 27. -
Page 109: Figure 69: Configuring Door Open Time Out
MorphoAccess® SIGMA Series – Administration Guide Administration Menu NOTE: Refer to “Images Settings” section in this document to know how dynamic message can be uploaded. 29. Press on “ ” to save Figure 69: Configuring Door Open Time Out 30. Configure Door Open Time Out in seconds. The door stays open for the time duration defined here. -
Page 110: Figure 71: Defining User Rule
MorphoAccess® SIGMA Series – Administration Guide Administration Menu 33. Configure VIP User as ON or OFF. If user is enrolled as VIP user, then at the time of authentication, terminal will not ask for biometric or PIN or BIOPIN. 34. Configure User Rule. This configuration panel allows an administrator modify the general authentication rule applied to all users, to user specific settings. -
Page 111: Figure 73: Defining User Rule - Record Reference Source
MorphoAccess® SIGMA Series – Administration Guide Administration Menu NOTE: In case the MorphoAccess® SIGMA Series terminal is used in Legacy L1 mode, a generic user rule is required to be set as authentication using Card Only. Which can be set from access path Biometric Security > Trigger event. And biometric check of the users, except the ones whose biometric check is bypass, is required to be enabled using specific user rule configuration. -
Page 112: Figure 74: Defining User Rule - Control Mode
MorphoAccess® SIGMA Series – Administration Guide Administration Menu Figure 74: Defining User Rule – Control Mode 38. Under Control Mode, an administrator can set: a. PIN mode as ON, if PIN based authentication is required b. Biometric as ON, if Biometric authentication is required Figure 75: Defining User Rule 39. - Page 113 MorphoAccess® SIGMA Series – Administration Guide Administration Menu Whenever user tries to access by providing fingerprint, terminal will match the fingerprint with the records stored in the database and allow access on successful identification. Recommendation: In case of authentication failed due to bad biometric, the user can be re- enrolled.
-
Page 114: User Enrolment In Card
MorphoAccess® SIGMA Series – Administration Guide Administration Menu User Enrolment in Card Using this functionality, an administrator can encode a contactless smartcard for a user. The user's data are saved only on the card, and not in the terminal database. It means, that the authentication of the user is done by checking the user's data stored in the card. -
Page 115: Figure 77: Enrollment Finger Index In Card
MorphoAccess® SIGMA Series – Administration Guide Administration Menu Figure 77: Enrollment Finger Index in Card b. ID + BIOPIN: This format indicates that the user authentication is done by verifying the User ID and BIOPIN (i.e. PIN that is used in place of biometric data) c. -
Page 116: User Enrolment In Card & Database
MorphoAccess® SIGMA Series – Administration Guide Administration Menu User Enrolment in Card & Database Using this functionality, an administrator can enroll a new user and store the user data in contactless smartcard as well as in database of terminal. It means, that the authentication of the user is done by checking the details stored in the card as well as in terminal database. - Page 117 MorphoAccess® SIGMA Series – Administration Guide Administration Menu 3. A message to place card at terminal is displayed. Place Smart Card now 4. On placing card, the user's data is stored in the card Results The user is enrolled successfully and user's data are stored in the terminal database and smartcard.
-
Page 118: Update User Information
MorphoAccess® SIGMA Series – Administration Guide Administration Menu Update User Information Using this functionality, an administrator can edit the user information stored in database. If user is enrolled in Card only, then it is not possible to edit the information of the user but it is possible to erase and rewrite the user's card with new data. -
Page 119: Figure 81: Selecting User Id
MorphoAccess® SIGMA Series – Administration Guide Administration Menu 3. Enter the User ID of the user account which is required to be edited 4. Press on “ ” button to move to next screen Figure 81: Selecting User ID 5. The list of User IDs matching enter id will be displayed. Select User ID from the list and Press on Save button Figure 82: Enrolment Information screen is displayed for editing 6. - Page 120 MorphoAccess® SIGMA Series – Administration Guide Administration Menu d. Update User Pin e. Assign Job Code f. Configure Access Schedule g. Set Observe Holiday Schedule h. Set Door Open Timeout i. Set Infinite Expiry Date j. Configure Authorized list k. Configure VIP User l.
-
Page 121: Authenticate User
MorphoAccess® SIGMA Series – Administration Guide Administration Menu Authenticate User Using this functionality, an administrator can authenticate user. This feature can be used by administrator to test whether the enrolled user is allowed access or not. However a user can authenticate from home screen itself, by entering in User ID and then placing finger when asked. - Page 122 MorphoAccess® SIGMA Series – Administration Guide Administration Menu Results A success message is displayed and user will be granted access on successful authentication. In case authentication is not successful access is denied. – R 2014_0000002196-09 ORPHO OCUMENT EPRODUCTION AND ISCLOSURE ORBIDDEN May 2016...
-
Page 123: Delete User
MorphoAccess® SIGMA Series – Administration Guide Administration Menu Delete User Using this functionality, an administrator can delete user information. There are several options for deleting users: Delete a User Delete All Users Delete a User Access Path User Menu > Delete User > Delete User Screens &... -
Page 124: Figure 87: Deleting User Id
MorphoAccess® SIGMA Series – Administration Guide Administration Menu 2. Enter the User ID that an administrator need to delete Figure 87: Deleting User ID 3. The list of User IDs matching entered User ID is displayed. Select an User ID 4. -
Page 125: Figure 89: Select Delete Action
MorphoAccess® SIGMA Series – Administration Guide Administration Menu Delete All User ID This functionality will delete all the users stored in terminal database. Access Path User Menu > Delete User > Delete All User Screens & Steps Figure 89: Select Delete action 1. -
Page 126: Card Manager
MorphoAccess® SIGMA Series – Administration Guide Administration Menu Card Manager MorphoAccess® SIGMA Series terminals allows user enrolment and authentication using contactless smart cards. When a user is enrolled on smart card, the User Identifier, Fingerprint Template and PIN/BIOPIN are stored in the card. Terminal can check this information on card for authenticating a user. -
Page 127: Figure 92: Renewal Of User Card
MorphoAccess® SIGMA Series – Administration Guide Administration Menu Renewal of User Card A smart card has a default expiry date. Once the smart card is expired it is not useful for verification. Using Renewal of User Card functionality, an administrator can renew a contactless card that is expired, with the same user data such as User ID, fingerprint, PIN and BIOPIN;... -
Page 128: Figure 93: Select Card Data Format
MorphoAccess® SIGMA Series – Administration Guide Administration Menu Figure 93: Select Card Data Format 2. Select the card data format from available options as below: a. ID + Template (fingerprint) b. ID + BIOPIN c. ID Only d. ID + PIN + Template e. -
Page 129: Figure 95: Entering User Id To Be Searched
MorphoAccess® SIGMA Series – Administration Guide Administration Menu Figure 95: Entering User ID to be searched 6. Enter the first characters of the selected search criteria. E.g. if search by User ID is selected, then enter User ID Prefix Figure 96: Selecting User ID 7. -
Page 130: Figure 97: A Success Message Is Displayed Showing User Is Stored In Card
MorphoAccess® SIGMA Series – Administration Guide Administration Menu Figure 97: A success message is displayed showing user is stored in card Results User’s data stored in terminal database are copied on the card. The card is renewed with new expiry date. Now user can use this card for authentication. –... -
Page 131: Figure 98: Encoding Administrator Card
MorphoAccess® SIGMA Series – Administration Guide Administration Menu Encode Administrator card When site key in a terminal is changed, it is required to load the same site key in all the terminals in a premise. In such scenario, an Administrator card can be used to change the site key in other terminals. -
Page 132: Figure 99: Select Card Type To Be Encoded
MorphoAccess® SIGMA Series – Administration Guide Administration Menu Figure 99: Select Card Type to be encoded 2. Select the Card Type, for which site key is to be generated. Options are MIFARE® Classic, MIFARE® Plus, DESFire® 3DES, and DESFire® AES NOTE: On encoding MIFARE®... -
Page 133: Figure 101: Encoding Visitor Card
MorphoAccess® SIGMA Series – Administration Guide Administration Menu Encode Visitor Card Encoding means writing user data, which includes Name, Biometric data, PIN or BIOPIN; on contactless smart cards. Cards for normal users as well as visitors can be encoded. Using this functionality, an administrator can encode a contactless card for visitor. Basically such card is for a guest user who needs to enter the premises for temporary work. -
Page 134: Figure 102: User Id For Visitor Card
MorphoAccess® SIGMA Series – Administration Guide Administration Menu Figure 102: User ID for Visitor Card 2. Terminal will prompt to enter User ID. NOTE: Contactless card CSN can also be used as User ID, it can be set using parameter. Refer to “Smart Card” section in MorphoAccess® SIGMA Series Parameters Guide. -
Page 135: Figure 103: Smartcard Read Profile
MorphoAccess® SIGMA Series – Administration Guide Administration Menu Smart Card Read Profile Using this functionality, an administrator can set the type of card that MorphoAccess® SIGMA Series terminal will be able to read. It means these cards can be used for authentication purpose only. -
Page 136: Figure 105: Smartcard Read Profile_Iclass
MorphoAccess® SIGMA Series – Administration Guide Administration Menu b. In case of iClass product. Figure 105: Smartcard Read Profile_iClass 2. Set the following cards read profile as ON, if an administrator require terminal to read them: In case of Multi Product a. -
Page 137: Figure 106: Smartcard Encode Profile
MorphoAccess® SIGMA Series – Administration Guide Administration Menu Smart Card Encode Profile Using this functionality, an administrator can set the type of card that MorphoAccess® SIGMA Series terminal will be able to encode. It means these cards can be used to store user’s profile and used for user authentication. - Page 138 MorphoAccess® SIGMA Series – Administration Guide Administration Menu 2. Set the following smartcards encode profile as ON, if an administrator require terminal to encode them: a. MIFARE® Classic b. MIFARE® Plus c. MIFARE® DESFire® 3DES d. MIFARE® DESFire® AES NOTE: It is not possible to encode several type of MIFARE (Plus and Classic) or DESFire (3DES and AES) cards at the same time.
-
Page 139: Figure 108: Selecting Card Type
MorphoAccess® SIGMA Series – Administration Guide Administration Menu Generate Site Key Securing card includes protecting the card by primary/secondary keys to prevent unauthorized use. At the time of authentication using a smart card, the site key stored in card and terminal must match. -
Page 140: Figure 109: Generating Site Key
MorphoAccess® SIGMA Series – Administration Guide Administration Menu Figure 109: Generating Site Key 4. Enter the Passphrase, using keyboard 5. Use check button to save Figure 110: Success message is displayed showing site key is generated in the terminal – R 2014_0000002196-09 ORPHO OCUMENT... -
Page 141: Figure 111: Resetting Keys In Selected Cards
MorphoAccess® SIGMA Series – Administration Guide Administration Menu Reset Site Key Using this functionality, an administrator can reset security keys stored in terminal to factory default settings. An administrator can select the card type from the available card types. Access Path User Menu >... - Page 142 MorphoAccess® SIGMA Series – Administration Guide Administration Menu Configure ELITE Mode Using this functionality, an administrator can confiture the iClass terminal in ELITE mode. An administrator can select the options to enable and/or disable ELITE mode. On enable terminal start accepting specific iCLASS card, ELITE card and start rejecting regular cards. There are two steps and two configuration card, to enable/disable this functionality as Key Roller Card &...
- Page 143 MorphoAccess® SIGMA Series – Administration Guide Administration Menu Screens & Steps to Disable ELITE Mode Figure 113: Disable ELITE Mode 1. Select Present Key Roller Card a. Terminal will ask to Place Card. b. Present the “Key roller card Elite->STD” Card c.
-
Page 144: Figure 112: Setting No. Of Start Block
MorphoAccess® SIGMA Series – Administration Guide Administration Menu No. of Start Block for MIFARE® Cards It is possible to define the location of the access control data on the contactless card, by specifying the number of the first block to read on the card. By default, the 1st block to read is block # 4. -
Page 145: Figure 113: Keyset Configuration
MorphoAccess® SIGMA Series – Administration Guide Administration Menu Select Keyset for Reading MIFARE® Cards Using this functionality, an administrator can select a key set that is used by terminal for authentication and reading MIFARE® cards. The below key set values can be configured: ... -
Page 146: Figure 114: Confirming Reset Key Action
MorphoAccess® SIGMA Series – Administration Guide Administration Menu Figure 116: Confirming reset key action 3. Confirm reset site key action Figure 117: Site Key is reset successfully – R 2014_0000002196-09 ORPHO OCUMENT EPRODUCTION AND ISCLOSURE ORBIDDEN May 2016... -
Page 147: Figure 116: Selecting Enroll User Id Format
MorphoAccess® SIGMA Series – Administration Guide Administration Menu Select Enroll ID Format Using this functionality, an administrator can set the User ID format to be encoded on card. Access Path User Menu > Card Manager > Enroll User ID Format Screens &... - Page 148 MorphoAccess® SIGMA Series – Administration Guide Administration Menu 5. Select User ID format used for enrolling users on card: a. No CSN: this value indicates that contactless card serial number will not be used as User ID b. Standard CSN: If this option is selected, the contactless card serial number is considered as User ID at the time of enrolment and authentication c.
- Page 149 MorphoAccess® SIGMA Series – Administration Guide Administration Menu f. Reverse HID card number: if this option is selected, terminal reverses the HID card number read from the iClass card. NOTE: This option only available in iClass product and can only set via PC application or webserver.
-
Page 150: Figure 118: Configuring Application Id And File Id
MorphoAccess® SIGMA Series – Administration Guide Administration Menu Defining Application ID and File ID for DESFIRE® Cards Using this functionality, an administrator can specify the value of Application ID and File ID for reading DESFire® cards. When the DESFire® card is presented to the reader during authentication, the application ID is read from the configured location from where the active File ID is fetched which further contains the user data. -
Page 151: Figure 119: Set Key Offset For Iclass® Cards
MorphoAccess® SIGMA Series – Administration Guide Administration Menu Defining Offset for Reading iCLASS® Cards Using this functionality an administrator can configure the offset to read the data from 2APP iCLASS® cards. When the iCLASS® card is presented to the reader, the application area 2 is read after the card is authenticated with the key 2. -
Page 152: Figure 120: Set Key Offset
MorphoAccess® SIGMA Series – Administration Guide Administration Menu Figure 122: Set Key Offset 2. Enter Offset value. An administrator can configure offset from 0x13 to 0x9F (hex values) 3. Use check button to save the Offset value – R 2014_0000002196-09 ORPHO OCUMENT EPRODUCTION AND... -
Page 153: Figure 121: Configure Active Pages For Iclass® Cards
MorphoAccess® SIGMA Series – Administration Guide Administration Menu Defining Active Pages for Reading iCLASS® Cards Using this functionality an administrator can configure the active page for reading data from 16APP iCLASS® cards. When the iCLASS® card is presented to the reader, the application area 2 is read after the card is authenticated with the key 2. - Page 154 MorphoAccess® SIGMA Series – Administration Guide Administration Menu Figure 124: Enter Active Pages 2. Enter number of Active Pages 3. Select check button to save – R 2014_0000002196-09 ORPHO OCUMENT EPRODUCTION AND ISCLOSURE ORBIDDEN May 2016...
- Page 155 MorphoAccess® SIGMA Series – Administration Guide Administration Menu Reset Card Using this functionality an administrator can reset a contactless card. The user data stored in the card is erased. Terminal will also overwrite the current site key on the card with default. Access Path User Menu >...
- Page 156 MorphoAccess® SIGMA Series – Administration Guide Administration Menu Figure 126: Success message is displayed showing card is reset successfully Results Card is reset successfully. Now a new user can be enrolled using this card. – R 2014_0000002196-09 ORPHO OCUMENT EPRODUCTION AND ISCLOSURE ORBIDDEN May 2016...
-
Page 157: Multimedia Menu
MorphoAccess® SIGMA Series – Administration Guide Administration Menu Multimedia menu Using multimedia menu, an administrator can upload and manage audio, video and images on MorphoAccess® SIGMA Series terminal. These multimedia contents are used at various actions. For example Audio is used to be played as alarm on occasions like Tamper. In below sections an administrator will learn how an administrator can upload the multimedia content in the terminal and the supported formats. -
Page 158: Audio Settings
MorphoAccess® SIGMA Series – Administration Guide Administration Menu Audio Settings MorphoAccess® SIGMA Series Terminal is able to play sound on following actions: Access Denied: Audio is played when user verification is failed and access is denied Access Granted: Audio is played when user verification is successful and access is granted ... - Page 159 MorphoAccess® SIGMA Series – Administration Guide Administration Menu Screens & Steps Step 3 Step 2 Step 1 Figure 128: Uploading Audio File in device 1. Select USB mode 2. The folders present in USB mass storage device will be displayed 3.
- Page 160 MorphoAccess® SIGMA Series – Administration Guide Administration Menu Figure 130: Success message is displayed Results Success message is displayed showing Audio file is copied to terminal. Audio is played on respective action on terminal. Using “ ” button an administrator can Delete an audio file. –...
-
Page 161: Video Settings
MorphoAccess® SIGMA Series – Administration Guide Administration Menu Video Settings MorphoAccess® SIGMA Series terminal is capable of playing video when screen is idle. Using Video settings an administrator can configure below: Upload Video files using USB mass storage device ... - Page 162 MorphoAccess® SIGMA Series – Administration Guide Administration Menu 4. An administrator can play video file and also adjust its volume 5. Press on Copy button to copy file from USB mass storage device to Terminal Figure 132: Confirmation Pop-up 6. A confirmation pop-up will appear. Press on “ ”...
- Page 163 MorphoAccess® SIGMA Series – Administration Guide Administration Menu References Refer to “Set Idle Screen Time Out” parameter under LCD Configuration To set duration of playing video, refer parameter “Set Infinite Video Play” under LCD Configuration. – R 2014_0000002196-09 ORPHO OCUMENT EPRODUCTION AND...
-
Page 164: Images Settings
MorphoAccess® SIGMA Series – Administration Guide Administration Menu Images Settings MorphoAccess® SIGMA Series terminal is capable of displaying images on the LCD screen. The images can be used for purposes listed below: Dynamic Message: The dynamic message image is shown when a specific user access is granted. - Page 165 MorphoAccess® SIGMA Series – Administration Guide Administration Menu Screens & Steps Step 3 Step 2 Step 1 Figure 134: Uploading Image File in device 1. Select USB mode 2. The folders present in USB mass storage device will be displayed 3.
- Page 166 MorphoAccess® SIGMA Series – Administration Guide Administration Menu Figure 136: Success message is displayed Figure 137: Image uploaded is displayed as wallpaper Results Success message is displayed showing image file is copied to terminal. The uploaded image is displayed as wallpaper or dynamic message. Using “...
-
Page 167: System Menu
MorphoAccess® SIGMA Series – Administration Guide Administration Menu System Menu Using System menu, an administrator can configure fundamental parameters of Terminal, LCD screen parameters and transaction log settings. System menu also allows an administrator to launch First Boot Assistant that has all basic parameters in one screen. Only an administrator with full administrative rights can access this menu. -
Page 168: Terminal Configurations
MorphoAccess® SIGMA Series – Administration Guide Administration Menu Terminal Configurations Set Factory Default This functionality is used for resetting all the parameters of MorphoAccess® SIGMA Series terminal to their default value. An administrator can also select particular parameters manually, for which values are needed to be reset as factory default value. Access Path System Menu >... - Page 169 MorphoAccess® SIGMA Series – Administration Guide Administration Menu 3. Press on check button to move next Figure 141: Confirmation message displayed 4. Select check button to confirm resetting of selected parameters of the terminal to factory default settings Results The values of selected parameters will be reset as their default values. –...
- Page 170 MorphoAccess® SIGMA Series – Administration Guide Administration Menu Date and Time Configuration This functionality allows an administrator to set time zone, current date and time in the MorphoAccess® SIGMA Series terminal. There are also options to set the format of date and time.
- Page 171 MorphoAccess® SIGMA Series – Administration Guide Administration Menu Set Date Using this functionality, an administrator can configure the current date in the terminal. An administrator can also select the preferred format of date to be displayed. Access Path System Menu > Terminal Settings > Date and Time Configuration > Clock Parameters Screens &...
- Page 172 MorphoAccess® SIGMA Series – Administration Guide Administration Menu Single Door Controller (SDC) Configuration Single Door Controller (SDC) is used to control the access through a door when specific actions are triggered on MorphoAccess® SIGMA Series terminal. For example, on successful identification of a user, door must open automatically to allow user access into premises.
- Page 173 MorphoAccess® SIGMA Series – Administration Guide Administration Menu Tamper Occurred: When Tamper Mode is enabled and if tamper gets triggered i.e. Physical movement of the terminal housing triggers a reed switch which in turn activates user specified Tamper options on the terminal. ...
- Page 174 MorphoAccess® SIGMA Series – Administration Guide Administration Menu Screens & Steps Figure 143: SDC Parameters configuration 1. Press on GPIO State to select modes Figure 144: Selecting GPIO State 2. By default “GPIO General Mode” is selected. In order to configure SDC on a terminal, select SDC Mode 3.
- Page 175 MorphoAccess® SIGMA Series – Administration Guide Administration Menu Figure 145: Configuring Parameters in “SDC Mode” Once an administrator select SDC Mode, an administrator need to configure below parameters: 4. Press on Door Unlock Time field to set duration (in Seconds only) for which the door should be unlocked after access is granted.
- Page 176 MorphoAccess® SIGMA Series – Administration Guide Administration Menu Time Override Mode (TOM) Configuration Time Override Mode (TOM) allows an administrator to temporarily suspend the need for verification of user for a specific time period on a terminal. Whenever TOM is triggered on terminal then door gets unlock and user can open Door without any authentication till TOM remains continue.
- Page 177 MorphoAccess® SIGMA Series – Administration Guide Administration Menu Figure 147: Setting TOM Duration 2. Press on TOM Duration to set the duration for which door should be under TOM 3. Enter the number of minutes TOM will be active into the Time Override Duration field and use “...
- Page 178 MorphoAccess® SIGMA Series – Administration Guide Administration Menu Tamper Configuration for Terminal Security The MorphoAccess® SIGMA Series terminal can detect two intrusion attempt types: Someone tries to steal the complete terminal, Someone tries to open the terminal At such intrusions, Tamper switch is triggered on terminal and Tamper alarm is played on terminal.
- Page 179 MorphoAccess® SIGMA Series – Administration Guide Administration Menu Figure 149: Tamper Parameters Configuration Once an administrator enables Tamper State, an administrator requires configuring below parameters: 4. 130 bit Wiegand String can be set as ON or OFF. When this parameter is set as ON, then on tamper detection, 130 bit Wiegand string is generated for tamper alarm through a Wiegand output line 5.
- Page 180 MorphoAccess® SIGMA Series – Administration Guide Administration Menu LCD Configuration LCD Configuration allows an administrator to control the look and feel of the content/multimedia displayed on the LCD touch screen of MorphoAccess® SIGMA Series terminal. Several Parameters that an administrator can configure are: ...
- Page 181 MorphoAccess® SIGMA Series – Administration Guide Administration Menu 2. On next screen an administrator can adjust the brightness of LCD back light by scrolling the curser left or right Scroll Figure 151: LCD Brightness adjustment 3. Move curser left to reduce brightness and right to increase brightness of the LCD 4.
- Page 182 MorphoAccess® SIGMA Series – Administration Guide Administration Menu Disable Sensor in Idle Mode This parameter allows an administrator to disable the biometric sensor backlight when terminal is in idle mode. When terminal is in idle mode, the biometric sensor will automatically power off.
- Page 183 MorphoAccess® SIGMA Series – Administration Guide Administration Menu Set Idle Screen Status This parameter indicates that if no actions are triggered on terminal, then terminal should be auto locked and a video is played. The video to be played can be uploaded in the Idle Screen Video folder, using “Video Settings”...
- Page 184 MorphoAccess® SIGMA Series – Administration Guide Administration Menu Video Play Brightness Control Scroll Figure 154: Video Play Brightness Control 1. Press on Video Play Brightness 2. On next screen an administrator can adjust the brightness of Video Play by scrolling the curser left or right 3.
- Page 185 MorphoAccess® SIGMA Series – Administration Guide Administration Menu Set Idle Screen Time Out Figure 155: Configuring Idle Screen Timeout 1. Idle Screen Timeout parameter indicates that if there is no action taken on LCD for specified duration, then screen should be auto-locked and video play starts 2.
- Page 186 MorphoAccess® SIGMA Series – Administration Guide Administration Menu Set Infinite Video Play Figure 156: Infinite Video Play on idle screen 1. This parameter indicates whether the video to played on idle screen for infinite duration or not. 2. Select OFF or ON 3.
- Page 187 MorphoAccess® SIGMA Series – Administration Guide Administration Menu Video Play Duration Figure 157: Setting Video Play Duration 1. Press on Video Play Duration and enter the number of seconds an administrator require video to be played when terminal is idle 2.
- Page 188 MorphoAccess® SIGMA Series – Administration Guide Administration Menu Video Phone Configuration This feature allows user to make a video call from terminal to the customer care center for resolving any queries. Video phone feature requires server configuration. Refer to “Videophone Facility” section of this document for more information on Video Phone feature.
-
Page 189: Transaction Log
MorphoAccess® SIGMA Series – Administration Guide Administration Menu Transaction Log The MorphoAccess® SIGMA Series terminal records each event taken place on a terminal. The logs has both action triggered and result given by terminal are called transaction logs. The events that can be logged are: ... - Page 190 MorphoAccess® SIGMA Series – Administration Guide Administration Menu Configure Transaction Logging Mode Using this functionality an administrator can select which event has to be logged: No Log: An administrator can set Transaction Logging to ‘No Log’ mode. This indicates that no actions will be recorded and stored on terminal ...
- Page 191 MorphoAccess® SIGMA Series – Administration Guide Administration Menu Define Actions on Log Full Event Using this functionality an administrator can select the action to perform when there is no room for a new log record: Delete Partial Logs Delete Full Logs Based on this configuration, terminal will delete logs entirely or partially, when log full event occurs.
- Page 192 MorphoAccess® SIGMA Series – Administration Guide Administration Menu Figure 160: Defining number of logs to be deleted 3. If an administrator have selected Delete Partial Logs as delete log status, then an administrator need to define Number of Logs to be Deleted when delete action is triggered.
- Page 193 MorphoAccess® SIGMA Series – Administration Guide Administration Menu Delete Transaction Logs Using this functionality, an administrator can delete all transaction logs recorded and stored in terminal database. Access Path System Menu >Transaction log > Delete All Logs Screens & Steps Figure 161: Deleting Transaction logs 1.
-
Page 194: Miscellaneous Settings
MorphoAccess® SIGMA Series – Administration Guide Administration Menu Miscellaneous Settings Global Device Volume MorphoAccess® SIGMA Series terminal is able to play sound when specific event occurs. Using Global Terminal Volume, an administrator can set volume of all the audio/video files that are uploaded in the terminal. - Page 195 MorphoAccess® SIGMA Series – Administration Guide Administration Menu 2. Scroll the radio button to right side for increasing the volume and scroll towards left to decrease the volume 3. Press on check button to save settings Results Sound will be played as per the Global Terminal Volume set. References ...
- Page 196 MorphoAccess® SIGMA Series – Administration Guide Administration Menu Enable AZERTY Keyboard By default, the keyboard displayed in MorphoAccess® SIGMA Series terminal is QWERTY (English standard keyboard). Using this functionality, an administrator can enable AZERTY (French standard) keyboard type. Access Path System Menu >...
-
Page 197: Web Server
MorphoAccess® SIGMA Series – Administration Guide Administration Menu Web Server The MorphoAccess® SIGMA Series terminal allows an administrator to enable the access to the Web Server. It allows an administrator to configure any parameter of terminal by connecting remotely. Refer “Introduction to Webserver” in this document. By default the access to Web Server is disabled in a MorphoAccess®... - Page 198 MorphoAccess® SIGMA Series – Administration Guide Administration Menu Screens & Steps Figure 167: Select Error Log Configuration 1. Select Error Log Configuration – R 2014_0000002196-09 ORPHO OCUMENT EPRODUCTION AND ISCLOSURE ORBIDDEN May 2016...
- Page 199 MorphoAccess® SIGMA Series – Administration Guide Administration Menu Figure 168: Enable Error Logging 2. Select Error Log as ON, to enable error logging. Figure 169: Setting Error Log Debug Level 3. Select Debug Level from the available list a. Fatal b.
-
Page 200: Sensor Log Configuration
MorphoAccess® SIGMA Series – Administration Guide Administration Menu NOTE: The selected debug level error logs as well as the error logs that fall into previous levels will also be included in the Error Log File. For example, if an administrator selected the debug level as ‘Debug’, then the Error Log file will consist the logs of debug level as well as the logs of previous levels such as Fatal, Alert, Critical, Error, WARNING, Notice and Info. - Page 201 MorphoAccess® SIGMA Series – Administration Guide Administration Menu Figure 171: Enable Error Logging 2. Select Sensor Log as ON, to enable sensor logging. Figure 172: Sensor Modules Log Activation 3. Set Module Log Activation value inbetween 0 to 65535 NOTE: The sensor logs of modules WRAPPER, SDK, IHM, SCFG, LOG, SETTING_SENSOR, IMG_PROCESSING, FFD, DTPR, ACQ_MGR, LIBBIO, BIODB, SRV, PARAM, PAL Modules based on the value set in Module Log Activation will be included in the Error Log File.
-
Page 202: Communication Menu
MorphoAccess® SIGMA Series – Administration Guide Administration Menu Communication menu MorphoAccess® SIGMA Series terminals are standalone terminals, it means the configuration and operations are performed without any connection to a host application. However, MorphoAccess® SIGMA Series Terminal is required to communicate with distant applications such as door controller, access controller or hosted application like Webserver. -
Page 203: Security Recommendation
MorphoAccess® SIGMA Series – Administration Guide Administration Menu Security recommendation To avoid security break, it is recommended to disable unused communication channels. But be sure to let at least one way to configure the terminal. Ethernet Network Configuration MorphoAccess® SIGMA Series terminal can be connected to devices (such as central access controller, and door controller) via Ethernet. - Page 204 MorphoAccess® SIGMA Series – Administration Guide Administration Menu Figure 175: Ethernet Configuration 3. Under Ethernet, an administrator can select IPV4 or IPV6 4. On next screen, default IP Mode is selected as DHCP. Press on IP Mode for update Figure 176: IP Mode Selection 5.
- Page 205 MorphoAccess® SIGMA Series – Administration Guide Administration Menu Figure 177: Configuring IP Address under Static IP Mode 7. Under Static IP Mode, an administrator can manually configure ‘IP Address’ of the terminal, ‘Subnet Mask’, 'Network Mask', 'Gateway Address' and 'DNS Servers Results Once the Ethernet Configuration is done, the terminal is connected to a distant server.
-
Page 206: Wi-Fi™ Network Configuration
MorphoAccess® SIGMA Series – Administration Guide Administration Menu Wi-Fi™ Network Configuration MorphoAccess® SIGMA Series terminal can be connected to devices (such as central access controller and door controller) via WLAN (Wi-Fi™ network). Using Wi-Fi™ connection, the terminal can make access request to the access controller and receive result message. At First Boot Assistant, an administrator can configure the terminal to communicate through WLAN. - Page 207 MorphoAccess® SIGMA Series – Administration Guide Administration Menu Figure 179: Enter Encryption Key 2. Enter an Encryption Key to connect to the selected Wi-Fi™ network Figure 180: Success message is displayed showing Wi-Fi™ network is configured Figure 181: Connected to Wi-Fi™ network –...
- Page 208 MorphoAccess® SIGMA Series – Administration Guide Administration Menu Manual Configuration 1. Select WLAN Configuration to set up Wi-Fi™ Network Figure 182: Selecting Other Network to set up Wi-Fi™ network manually 2. The list of available Wi-Fi™ networks will be displayed. Select Other Network to set up Wi-Fi™...
- Page 209 MorphoAccess® SIGMA Series – Administration Guide Administration Menu Figure 184: Setting SSID 4. Enter SSID and click on “ ” button to save. To cancel the operation, use “ ” button Figure 185: Selecting Encryption Mode 5. Select the Encryption Mode, as provided by the Wi-Fi™ network administrator. Encryption mode is selected for Wi-Fi™...
- Page 210 MorphoAccess® SIGMA Series – Administration Guide Administration Menu Figure 186: Define Encryption Key 6. Enter Encryption Key to connect to Wi-Fi™. Only by entering Encryption Key, the Wi- Fi™ network can be accessed 7. Use Check button “ ” to save the setting Figure 187: Entering in WLAN –...
- Page 211 MorphoAccess® SIGMA Series – Administration Guide Administration Menu Figure 188: WLAN – IP Configuration 10. An administrator can select IP Mode as ‘Static’ or ‘DHCP’ a. If IP Mode is ‘Static’, then enter parameters such as IP Address, Subnet Mask, Gateway Address, Preferred DNS Address and Alternate DNS Address must be entered manually b.
-
Page 212: Configure Hostname
MorphoAccess® SIGMA Series – Administration Guide Administration Menu Configure Hostname When IP Mode is select as DHCP, the Hostname parameter can be configured. By Default, the hostname of a MorphoAccess® SIGMA Series terminal is MA<Serial Number>. The host name is used instead of IP address, when a DNS (Domain Name Server) exists in the network. -
Page 213: Serial Parameters
MorphoAccess® SIGMA Series – Administration Guide Administration Menu Serial Parameters MorphoAccess® SIGMA Series terminal is able to communicate with external controller using Serial Port, through RS422 or RS485 protocols. When terminal is communicating (i.e. receiving inputs and sending outputs) through RS422, it will not be able to communicate through RS485, and vice versa. - Page 214 MorphoAccess® SIGMA Series – Administration Guide Administration Menu Figure 192: Select Baud Rate 2. The list of supported Baud Rates is displayed. Select the required Baud Rate 3. Use Check button “ ” to save Figure 193: Selecting Communication Type 4.
- Page 215 MorphoAccess® SIGMA Series – Administration Guide Administration Menu Figure 194: Enter Net ID 6. Enter a Net ID (will be used to identify the terminal in a RS485 network connection) 7. Press on “ ” button to save 8. Use Check button “ ”...
-
Page 216: Security Menu
MorphoAccess® SIGMA Series – Administration Guide Administration Menu Security Menu Security Menu allows to configure the parameters related to the level of security required on MorphoAccess® SIGMA Series terminal. Security menu deals with Biometric control, Network security, multi-user verification, LCD Login Password and User Control. Figure 195: Security Menu –... -
Page 217: Biometric Security Settings
MorphoAccess® SIGMA Series – Administration Guide Administration Menu Biometric Security Settings Configure Trigger Events MorphoAccess® SIGMA Series terminal is able to perform identification and authentication operations when certain events occurs on terminal. Using this configuration an administrator can set on which events the terminal should perform operations. Below is the list of events available: ... - Page 218 MorphoAccess® SIGMA Series – Administration Guide Administration Menu 1. Select the events listed in the trigger event screen (above) as ON or OFF 2. Use Check button “ ” to save settings – R 2014_0000002196-09 ORPHO OCUMENT EPRODUCTION AND ISCLOSURE ORBIDDEN May 2016...
- Page 219 MorphoAccess® SIGMA Series – Administration Guide Administration Menu Set Duress Mode Using this parameter, an administrator can enable Duress Mode in MorphoAccess® SIGMA Series terminal. Duress Mode will allow an administrator to capture duress finger of a user, in addition to two normal fingers. On detection of duress finger, the terminal will raise a “Duress Finger Event”...
- Page 220 MorphoAccess® SIGMA Series – Administration Guide Administration Menu Biometric Check Mode The access rights check process of the MorphoAccess® SIGMA Series terminal proceeds by comparison of the biometric data of a finger placed on the biometric sensor, with the biometric data of fingers stored in the database (identification) or stored in user's card (authentication).
- Page 221 MorphoAccess® SIGMA Series – Administration Guide Administration Menu Number of Biometric Check Attempt In order to reduce the False Rejection Rate (FRR), MorphoAccess® SIGMA Series terminal allows an administrator to set Biometric Matching Strategy, in which multiple biometric check attempts are allowed to user. For instance, a user is allowed to place again his finger on the biometric sensor for a 2nd try, when the initial biometric check fails.
- Page 222 MorphoAccess® SIGMA Series – Administration Guide Administration Menu Access Path Security Menu > Biometric Settings > Biometric Matching Strategy Pre-requisites Biometric Check Mode should be set as ON Screens & Steps Figure 199: Selecting Biometric Matching Strategy 1. Select Biometric Matching Strategy as Standard, Advance or Advanced with MFU 2.
- Page 223 MorphoAccess® SIGMA Series – Administration Guide Administration Menu Biometric Timeout This parameter defines the duration within which user have to place finger on the biometric sensor of terminal. If user fails the place finger within time out, the access is rejected. In case of biometric authentication process, after User ID acquisition, the terminal lights on the backlight of the biometric sensor to request the user to place his finger on the sensor.
- Page 224 MorphoAccess® SIGMA Series – Administration Guide Administration Menu Screens & Steps Figure 200: Biometric Time Out 1. Enter the duration for Biometric Check Timeout. The entered duration is in terms of seconds 2. Use “ ” to save settings – R 2014_0000002196-09 ORPHO OCUMENT...
- Page 225 MorphoAccess® SIGMA Series – Administration Guide Administration Menu PIN Check Mode At the time of enrolment, a User ID and a PIN code are entered along with registering the biometric data of the user. An administrator can enable PIN Check Mode if an administrator require terminal to authenticate users based on the entered PIN.
- Page 226 MorphoAccess® SIGMA Series – Administration Guide Administration Menu PIN Check Attempts This parameter indicates the number of attempts a user can enter PIN, if the PIN is rejected on first attempt. This feature is helpful in reducing False Rejection Rate, by allowing users to enter PIN accurately on 2 try.
- Page 227 MorphoAccess® SIGMA Series – Administration Guide Administration Menu PIN Check Time Out PIN Check Time Out is the duration within which user is required to enter PIN. By default, the PIN Check Time Out is set as 5 seconds, which is configurable. The terminal will deny access, if user fails to enter PIN within the time limit.
- Page 228 MorphoAccess® SIGMA Series – Administration Guide Administration Menu Setting-up Matching Security Threshold The performances of a biometric system are mainly characterized by two values: False Reject Rate (FRR): number of wrongly rejected authorized users, divided by the number of access requests, ...
- Page 229 MorphoAccess® SIGMA Series – Administration Guide Administration Menu Matching threshold values are detailed in the table below: Value Description Lowest threshold value: the number of false rejects is very low, but the number of false acceptances is too high for a secure usage. It is strongly advised not to use this value, because the terminal becomes too tolerant.
- Page 230 MorphoAccess® SIGMA Series – Administration Guide Administration Menu Access Path Security Menu > Biometric Settings > Global Security Threshold Screens & Steps Figure 204: Setting Security Threshold 1. Select Global Security Threshold from values 0 to 10 2. Press on “ ”...
-
Page 231: Anti-Tamper Switch For Terminal Security
MorphoAccess® SIGMA Series – Administration Guide Administration Menu Anti-Tamper Switch For Terminal Security Description The MorphoAccess® SIGMA Series terminal is able to detect the opening of the box. This detection is controlled by anti-tamper switch attached in the terminal. The opening of the external USB port cover is not detected, but the USB port is disabled by default. - Page 232 MorphoAccess® SIGMA Series – Administration Guide Administration Menu Parameter Configuration The action(s) to be performed by the terminal on tamper detection is defined by several dedicated parameters: Parameter Name Parameter Value Description 0 or 1 Using this parameter, tamper detection can tamper.state be enabled or disabled.
- Page 233 MorphoAccess® SIGMA Series – Administration Guide Administration Menu Since the anti-tamper alarm message is sent by the same port/protocol as the access control result messages, this function must be enabled, otherwise the alarm message will not be sent (see section Sending an Access Control Result Message ) Alarm Message Sent through Wiegand or Clock &...
- Page 234 MorphoAccess® SIGMA Series – Administration Guide Administration Menu Configure parameter “remote_msg_conf.interface” is set as value ‘3’, which indicates communication is done using Wiegand channel An administrator can also set Clock and Data Identifier for sending alarm message, 65535 (0 – 65535). See “Event Configurations” under Webserver section. ...
-
Page 235: Network & Communication Security Settings
MorphoAccess® SIGMA Series – Administration Guide Administration Menu Network & Communication Security Settings Authorized IP Configuration This feature allows specifying the IP address of the computers allowed to communicate with the terminal. Connection to the terminal will be rejected for computers with an IP address not present in the list, even with a compatible configuration application. - Page 236 MorphoAccess® SIGMA Series – Administration Guide Administration Menu Figure 206: Authorized IP addresses Mode selection 2. Set Authorized IP Mode as ON or OFF. If an administrator select OFF, then any IP address is allowed to connect and communicate with terminal. If an administrator set it as ON, then an administrator require adding IP address, that are authorized to communicate with terminal.
- Page 237 MorphoAccess® SIGMA Series – Administration Guide Administration Menu Figure 208: Add IP address 3. Add IP Address that an administrator require to authorize, as shown in above screen 4. Press on “ ” icon to save Figure 209: A success message is displayed showing IP Address is added successfully –...
- Page 238 MorphoAccess® SIGMA Series – Administration Guide Administration Menu Configure IP Addresses Range Similar as IP Address, An administrator can add an IP Address Range, to authorize specific computers with IP addresses range to communicate with Morpho Access® terminal. Apart from the defined range of IP addresses, no other computer can communicate with the terminal.
- Page 239 MorphoAccess® SIGMA Series – Administration Guide Administration Menu View IP Address This functionality allows an administrator to view the IP Addresses that are added and authorized to communicate with terminal. Figure 211: Viewing authorized IP Addresses 1. Press on View IP Addresses. List of IP Addresses authorized is displayed View IP Range This functionality allows an administrator to view the Range of IP Addresses that are added and authorized to communicate with terminal.
- Page 240 MorphoAccess® SIGMA Series – Administration Guide Administration Menu Delete IP Address Using this functionality an administrator can delete an IP Address. It allows an administrator to select several IP addresses and delete them. Once deleted, that computer cannot communicate with terminal. Figure 213: Deleting an IP Address 1.
- Page 241 MorphoAccess® SIGMA Series – Administration Guide Administration Menu Delete IP Address Range Using this functionality an administrator can delete an IP Address Range. It allows an administrator to select several IP addresses range and delete them. Once deleted, that computer with an IP address within the deleted range cannot communicate with terminal. Figure 214: Delete an IP Address Ranges 1.
- Page 242 MorphoAccess® SIGMA Series – Administration Guide Administration Menu SSL Configuration Secure Sockets Layer (SSL) and its successor Transport Layer Security (TLS) are cryptographic protocol designed to provide communication security over Ethernet or Wi-Fi™ channels. These protocols are used to protect the communication between the MorphoAccess® SIGMA Series terminal and a distant system, such as a central access controller or a terminal configuration station.
- Page 243 MorphoAccess® SIGMA Series – Administration Guide Administration Menu Compatibility of cipher algorithms with SSL protocol versions Cipher Algorithm List Protocol Version sslv23 sslv3 tlsv1 tlsv1.1 tlsv1.2 AES128-SHA AES256-SHA AES128-SHA256 AES256-SHA256 AES128-GCM-SHA256 ECDHE-ECDSA-AES256-SHA:ECDH-ECDSA-AES256-SHA ECDHE-ECDSA-AES128-GCM-SHA256:ECDH-ECDSA- AES128-GCM-SHA256 ECDHE-ECDSA-AES128-SHA256:ECDH-ECDSA-AES128- SHA256 ECDHE-ECDSA-AES128-SHA:ECDH-ECDSA-AES128-SHA NOTE: Cipher algorithm that ends with ‘SHA256’ supports only SSL protocol version tls1.2. –...
- Page 244 MorphoAccess® SIGMA Series – Administration Guide Administration Menu SSL Protocol Versions support for communication Client side (from PC application) sslv23 sslv3 tlsv1 tlsv11 tlsv12 sslv23 sslv3 tlsv1 tlsv11 tlsv12 The above table describes the protocol versions supported by client side application, when communication is started by terminal using specific protocol.
- Page 245 MorphoAccess® SIGMA Series – Administration Guide Administration Menu 1. Select SSL Configuration 2. On next screen select Input Channel Figure 216: Configuring SSL Mode and parameters 3. Select SSL Mode as ON or OFF. Only if the SSL Mode is ON, the SSL protocol is used Figure 217: Entering Secure Communication Port 4.
- Page 246 MorphoAccess® SIGMA Series – Administration Guide Administration Menu Default Communication Port Using this functionality, you can define a default communication port that will be used for Ethernet connection. Access Path Security Menu > Communication > TCP Channel Screens & Steps Figure 218: Selecting Communication Port 1.
- Page 247 MorphoAccess® SIGMA Series – Administration Guide Administration Menu Enabling TCP Channel Transmission Control Protocol (TCP) is a protocol that is used for transmission of the input/output messages between the MorphoAccess® SIGMA Series terminal and distant systems, such as external controllers or Webserver application, connected through Ethernet/Wi-Fi™.
- Page 248 MorphoAccess® SIGMA Series – Administration Guide Administration Menu Enabling Serial Channel Serial Channel is used for transmission of the input/output messages between the MorphoAccess® SIGMA Series terminal and distant systems, such as external controllers, connected through RS422 and RS485. By default, Serial Channel is enabled. If this parameter is disabled, the terminal will not be able to communicate (i.e.
-
Page 249: Additional User Verification Settings
MorphoAccess® SIGMA Series – Administration Guide Administration Menu Additional User Verification Settings When this feature is activated, the terminal evaluates the access rights with the data of two different users, instead of the data of only one user. It means that, when access right is based on biometric data check, the terminal requires the fingerprint of two different users to grant the access. - Page 250 MorphoAccess® SIGMA Series – Administration Guide Administration Menu Set Additional Users Verification Timeout This parameter indicates the duration within which the additional user has to place finger on biometric sensor. If finger is not presented with the time limit, then terminal will deny access. Access Path Security Menu >...
- Page 251 MorphoAccess® SIGMA Series – Administration Guide Administration Menu Figure 224: Additional User Verification Timeout 2. Enter the Time limit 3. Use “ ” button to save 4. Use “ ” to Save – R 2014_0000002196-09 ORPHO OCUMENT EPRODUCTION AND ISCLOSURE ORBIDDEN May 2016...
-
Page 252: Change Lcd Password
MorphoAccess® SIGMA Series – Administration Guide Administration Menu Change LCD Password An administrator can login to terminal using an LCD Password. In order to prevent from password theft or malpractice, it is recommended to change the password periodically. Change password functionality helps an administrator to secure terminal and prevent from any unwanted access and data loss. - Page 253 MorphoAccess® SIGMA Series – Administration Guide Administration Menu Figure 226: Entering New Password 2. Enter the New Password of an administrator choice 3. Use “ ” button to move on next screen Figure 227: Verifying New Password 4. Re-enter the New Password for verification 5.
-
Page 254: Additional User Control Settings
MorphoAccess® SIGMA Series – Administration Guide Administration Menu Additional User Control Settings Using this configuration, an administrator can set which access control parameters are applicable to allow access to the additional users. Access Path Security Menu > Communication > Additional User Control Pre-requisites ... - Page 255 MorphoAccess® SIGMA Series – Administration Guide Administration Menu 5. Expiry Date Check: this parameter indicates, whether terminal should check the expiry date of the enrolled user 6. Job Code Check Activation: if this parameter is enabled, then at the time of user enrolment, an administrator can associate a Job Code.
- Page 256 MorphoAccess® SIGMA Series – Administration Guide Administration Menu A parameter has been added in the Complete Configuration Screen of the Web Server named ucc.users_photo_policy, whose possible values can be 1, 2 or 3. If the value is set as 1, then the user images for only successful user control will be saved.
- Page 257 MorphoAccess® SIGMA Series – Administration Guide Administration Menu ucc.users_ User Rule_Face Terminal_Face Successful Failed Failed Detection Detection Identification Identification Authentication photo_policy Mandatory Face Detection Disable Optional Face Detection Disable Optional Face Detection Disable Optional Face Detection Photo Taking Optional Face Detection Photo Taking Optional Face Detection...
- Page 258 MorphoAccess® SIGMA Series – Administration Guide Administration Menu ucc.users_ User Rule_Face Terminal_Face Successful Failed Failed Detection Detection Identification Identification Authentication photo_policy Face Detection Face Detection Mandatory Mandatory Face Detection Face Detection Mandatory Mandatory Face Detection Face Detection Mandatory Mandatory Table 1 : Face Authentication Workflow Refer below table for face authentication workflow for normal user and VIP user: Face Detection Behavior...
- Page 259 MorphoAccess® SIGMA Series – Administration Guide Administration Menu Figure 230: User Rule Check If the per user rule (ucc.per_user_rule) is defined to Terminal then Terminal will verify user data (source of data defined from ucc.user_record_reference) based on User Rule configured in Terminal (ref User Enrollment in Database).
-
Page 260: Usb Menu
MorphoAccess® SIGMA Series – Administration Guide Administration Menu USB Menu MorphoAccess® SIGMA Series terminal is equipped with a USB Port that is dedicated to a temporary connection of a USB Mass Storage. Following are the uses of USB connection: Upgrade firmware ... -
Page 261: Format Usb Mass Storage Device
MorphoAccess® SIGMA Series – Administration Guide Administration Menu Format USB Mass Storage device Format USB Mass Storage device functionality is used to deleted entire data stored in an USB Mass Storage device. Once the device is formatted, it can be initialized to store the same folder structure as in the terminal. - Page 262 MorphoAccess® SIGMA Series – Administration Guide Administration Menu 3. A confirmation message pop-up is displayed, notifying that the previous data in the USB Mass Storage device will be lost. 4. Confirm action by using “ ” button Figure 234: Success Message of USB Mass Storage device Formatted Results A success message is displayed showing USB Mass Storage device is formatted.
-
Page 263: Initialize Usb Mass Storage Device
MorphoAccess® SIGMA Series – Administration Guide Administration Menu Initialize USB Mass Storage device It is a foremost requirement to have all the folders in the USB Mass Storage device, should be arranged similar to the folder structure save in database in the Terminal. Using Initialize USB Mass Storage device functionality, terminal will copy the same folder structure in the device. - Page 264 MorphoAccess® SIGMA Series – Administration Guide Administration Menu Figure 236: A confirmation message is displayed 3. Confirm Initialize USB Mass Storage device by using “ ” button Results A success message is displayed showing USB Mass Storage device is initialized. Now, an administrator can use USB Mass Storage device for data exchange with terminal, like import data, upload multimedia, or export data.
-
Page 265: Import Data Into Terminal
MorphoAccess® SIGMA Series – Administration Guide Administration Menu Import Data into Terminal MorphoAccess® SIGMA Series terminal is capable of importing several files in its local database. Using Import Data functionality, an administrator can import: User Database: It is a general practice to maintain a backup of the user database, to prevent from situations when terminal local database is lost. - Page 266 MorphoAccess® SIGMA Series – Administration Guide Administration Menu Importing User Database Access Path USB Menu > Import Pre-requisite USB Mass Storage device should be initialized and must have the user database file in the respective folder USB Mass Storage device should be plugged into the terminal Screens &...
- Page 267 MorphoAccess® SIGMA Series – Administration Guide Administration Menu 2. The list of files present in the user database folder in USB Mass Storage device is displayed 3. Select a file to be imported Figure 239: Confirmation message to import User Database 4.
- Page 268 MorphoAccess® SIGMA Series – Administration Guide Administration Menu Figure 241: Success message of user data imported is displayed Results Once the user’s database is imported, the user information can be edited and identification of users can be performed in terminal. –...
- Page 269 MorphoAccess® SIGMA Series – Administration Guide Administration Menu Importing Language File Access Path USB Menu > Import Pre-requisite USB Mass Storage device should be initialized and must have the language file in the respective folder USB Mass Storage device should be plugged into the terminal Screens &...
- Page 270 MorphoAccess® SIGMA Series – Administration Guide Administration Menu 2. The language files present in USB Mass Storage device is displayed. The language file will be in ‘.qm’ format 3. Select a language file that is required to be uploaded 4. Press on check box Figure 244: Confirm import action 5.
-
Page 271: Export Data In Usb Mass Storage Device
MorphoAccess® SIGMA Series – Administration Guide Administration Menu Export Data in USB Mass Storage Device Using this functionality, an administrator can export the information from terminal database into the USB Mass Storage Device. The terminal allows the exportation of the data listed below: ... - Page 272 MorphoAccess® SIGMA Series – Administration Guide Administration Menu How to Export & View Transaction Logs Access Path USB Menu > Export Pre-requisites Transaction Logging Mode must be enabled, then only transaction logs are recorded in terminal Screens & Steps Figure 246: Exporting transaction logs into USB Mass Storage Device 1.
- Page 273 MorphoAccess® SIGMA Series – Administration Guide Administration Menu 2. Select the format in which data should be exported in, such as Binary Format or CSV Format NOTE: Only Transaction Log has option to be exported in .bin or .csv format. Error logs and User database is exported in encrypted format by default.
- Page 274 MorphoAccess® SIGMA Series – Administration Guide Administration Menu Figure 250: Transaction Log in .CSV Format Sample Results The file for the exported transaction logs is created and stored in the USB Mass Storage Device, in .csv format. – R 2014_0000002196-09 ORPHO OCUMENT EPRODUCTION AND...
- Page 275 MorphoAccess® SIGMA Series – Administration Guide Administration Menu How to Export & View Error Logs Access Path USB Menu > Export Pre-requisites Error Logging must be enabled. Refer to “Web Server The MorphoAccess® SIGMA Series terminal allows an administrator to enable the access to the Web Server.
- Page 276 MorphoAccess® SIGMA Series – Administration Guide Administration Menu Screens & Steps Figure 252: Exporting data into USB Mass Storage Device 1. Select a record type that an administrator requires to export into the USB Mass Storage Device. Press on Error log Figure 253: A confirmation message pop-up 2.
- Page 277 MorphoAccess® SIGMA Series – Administration Guide Administration Menu Figure 254: A success message is displayed showing error log is exported Results The file for the exported error logs is created and stored in the USB Mass Storage Device, in .tar format. The file is encrypted and non readable, for security purpose. –...
- Page 278 MorphoAccess® SIGMA Series – Administration Guide Administration Menu How to Export & View User Database Access Path USB Menu > Export Screens & Steps Figure 255: Exporting data into USB Mass Storage Device 1. Select a record type that an administrator requires to export into the USB Mass Storage Device.
- Page 279 MorphoAccess® SIGMA Series – Administration Guide Administration Menu Figure 257: Enter Passphrase 4. Enter Passphrase. The same passphrase will be required on importing the user database in terminal 5. Press on “ ” button Figure 258: A success message is displayed showing error log is exported Results The file for the user database is created in .BIN format and stored in the USB Mass Storage Device.
-
Page 280: Information Menu
MorphoAccess® SIGMA Series – Administration Guide Administration Menu Information Menu MorphoAccess® SIGMA Series terminal administration interface has Information Menu, which enables an administrator to view important data from single panel. Data such as: Information related to Terminal commercial name and license ... -
Page 281: View Device Details
MorphoAccess® SIGMA Series – Administration Guide Administration Menu View Device Details Using this functionality an administrator can view the information related to the MorphoAccess® SIGMA Series Terminal. Access Path Information Menu > Terminal Screens & Steps Figure 260: View Device Information Figure 261: View Device Regulatory Information 1. - Page 282 MorphoAccess® SIGMA Series – Administration Guide Administration Menu e. License Name f. License Identifier g. Regulatory Information – R 2014_0000002196-09 ORPHO OCUMENT EPRODUCTION AND ISCLOSURE ORBIDDEN May 2016...
-
Page 283: View Firmware Information
MorphoAccess® SIGMA Series – Administration Guide Administration Menu View Firmware Information Using this functionality, an administrator can view information regarding the current Terminal firmware version. The firmware version is upgradeable and this functionality provides an administrator the information of current firmware of the terminal. Access Path Information Menu >... -
Page 284: View Sensor Revision Information
MorphoAccess® SIGMA Series – Administration Guide Administration Menu View Sensor Revision Information Using this functionality, an administrator can view the information related to the biometric sensor. Access Path Information Menu > Sensor Revision Screens & Steps Figure 263: Biometric Sensor data 1. -
Page 285: View Communication Parameters
MorphoAccess® SIGMA Series – Administration Guide Administration Menu View Communication Parameters Under Communication, an administrator can view the information of various networks, through which the terminal is connected with distant systems. Access Path Information Menu > Communication Screens & Steps Figure 264: Selecting communication network 1. - Page 286 MorphoAccess® SIGMA Series – Administration Guide Administration Menu Figure 265: Viewing information of Ethernet network 2. Under Ethernet, select IPV4 or IPV6 3. Following information is displayed, of an IP connection : a. IP Mode i.e. Static or DHCP b. IP Address of the terminal c.
- Page 287 MorphoAccess® SIGMA Series – Administration Guide Administration Menu b. MAC Address of the terminal c. Subnet Mask d. Gateway Address e. Preferred DNS Address f. Alternate DNS Address Figure 267: Viewing Serial Protocol Configuration 5. If terminal is communicating with distant server using serial port, then parameters listed below are displayed: a.
- Page 288 MorphoAccess® SIGMA Series – Administration Guide Administration Menu Figure 268: View Hostname of the terminal 6. Hostname of the terminal is displayed – R 2014_0000002196-09 ORPHO OCUMENT EPRODUCTION AND ISCLOSURE ORBIDDEN May 2016...
-
Page 289: View Memory Status
MorphoAccess® SIGMA Series – Administration Guide Administration Menu View Memory Status Using this functionality, an administrator can view the remaining Memory of the terminal. Access Path Information Menu > Memory Status Pre-requisites SD card must be plugged in terminal Screens &... -
Page 290: View User Status
MorphoAccess® SIGMA Series – Administration Guide Administration Menu View User Status User Status gives an administrator the summary of number of enrolled users, number of authorized listed users and number of VIP users. Access Path Information Menu > View User Status Screens &... -
Page 291: View Transaction Log Status
MorphoAccess® SIGMA Series – Administration Guide Administration Menu View Transaction Log Status Transaction log status shows the number of current logs recorded in terminal database. Also the maximum capacity of logs that can be stored in terminal is displayed. Access Path Information Menu >... -
Page 292: Reboot Terminal Menu
MorphoAccess® SIGMA Series – Administration Guide Administration Menu Reboot Terminal Menu Reboot of Terminal is performed to restart the terminal (hot restart). Reboot is required in following scenarios: On firmware upgrade Installation of Wi-Fi™ USB Adapter When terminal legacy mode is changed to ‘Legacy L1’ or ‘Legacy Morpho’ or ‘MA5G’ ... - Page 293 MorphoAccess® SIGMA Series – Administration Guide Administration Menu Figure 273: Confirmation Message To Return to Home Screen – R 2014_0000002196-09 ORPHO OCUMENT EPRODUCTION AND ISCLOSURE ORBIDDEN May 2016...
-
Page 294: Section 7 : Videophone Facility
MorphoAccess® SIGMA Series – Administration Guide Videophone Facility Section 7 : Videophone Facility – R 2014_0000002196-09 ORPHO OCUMENT EPRODUCTION AND ISCLOSURE ORBIDDEN May 2016... -
Page 295: Introduction To Videophone
MorphoAccess® SIGMA Series – Administration Guide Videophone Facility Introduction to Videophone MorphoAccess® Sigma Series terminal provides a Videophone feature which allows a user to initiate a video call by pressing an icon on the main screen of the touch screen. This feature requires a Videophone server which is a PC with a VOIP client application using SIP protocol, such as Linphone. -
Page 296: Configure Video Phone Server
MorphoAccess® SIGMA Series – Administration Guide Videophone Facility Configure Video Phone Server In order to make a video phone call, it is a pre-requisite for the terminal to connect to computer based software, which can route the video call to the call centre. Thus, an administrator need to configure the server parameters, on which VoIP client application is installed. - Page 297 MorphoAccess® SIGMA Series – Administration Guide Videophone Facility Figure 276: Enter Server Name 2. Enter Server Name 3. Use “ ” button to move to next screen Figure 277: Enter Server IP 4. Enter Server IP Address 5. Use “ ”...
- Page 298 MorphoAccess® SIGMA Series – Administration Guide Videophone Facility Figure 278: Entering Server Port 6. Enter Server Port 7. Use “ ” button to save Figure 279: Videophone Server is added successfully Results A success message is displayed showing video phone server is added successfully. Video call can be connected once server is configured.
-
Page 299: Viewing Video Phone Server Details
MorphoAccess® SIGMA Series – Administration Guide Videophone Facility Viewing Video Phone Server Details Using this feature an administrator can view parameters of video phone server configured on MorphoAccess® SIGMA Series terminal. Access Path System Menu > Terminal Settings > Video Phone Configuration Screens &... -
Page 300: Delete Video Phone Server
MorphoAccess® SIGMA Series – Administration Guide Videophone Facility Delete Video Phone Server Using this functionality, an administrator can delete a registered videophone from the terminal. Access Path System Menu > Terminal Settings > Video Phone Configuration Screens & Steps Figure 281: Deleting Video Phone Server 1. - Page 301 MorphoAccess® SIGMA Series – Administration Guide Videophone Facility Results A success message is displayed on the screen showing video server is deleted. The record of the server is no longer available on terminal. Note: The videophone icon on idle screen shall not be displayed if the videophone feature is not configured.
-
Page 302: How User Can Make Video Call
MorphoAccess® SIGMA Series – Administration Guide Videophone Facility How User can make Video Call Videophone feature of MorphoAccess® SIGMA Series terminal enables end users to make a video call to a customer care centre. The executive at customer care centre can view the user and solve all functional queries on call. - Page 303 MorphoAccess® SIGMA Series – Administration Guide Videophone Facility Figure 285: Select Server to make Video Call 2. The list of servers is displayed. Video call is connected to customer care centre through these servers. 3. Select a Server Name 4. Press on Dial icon Figure 286: Making Video Call Results...
-
Page 304: Section 8 : Terminal Configuration Through Webserver
MorphoAccess® SIGMA Series – Administration Guide Terminal Configuration through Webserver Section 8 : Terminal Configuration through Webserver – R 2014_0000002196-09 ORPHO OCUMENT EPRODUCTION AND ISCLOSURE ORBIDDEN May 2016... -
Page 305: Introduction To Webserver
MorphoAccess® SIGMA Series – Administration Guide Terminal Configuration through Webserver Introduction to Webserver Webserver is a web-based application embedded in the MorphoAccess® SIGMA Series Terminal. Webserver enables the management of the settings of the terminal from any computer (desktop, laptop, tablet …) equipped with a compatible Internet browser and connected to the same network as the terminal. -
Page 306: Security Recommendation
MorphoAccess® SIGMA Series – Administration Guide Terminal Configuration through Webserver The MAC Address of the terminal fetched from Ethernet and Wi-Fi™ is displayed All Users count is displayed along with maximum user storage capacity User Enrolled count is displayed along with maximum user stored capacity ... -
Page 307: Tamper Setting For Terminal Security
MorphoAccess® SIGMA Series – Administration Guide Terminal Configuration through Webserver Tamper Setting for Terminal Security The MorphoAccess® SIGMA Series terminal can detect two intrusion attempt types: Someone tries to steal the complete terminal, Someone tries to open the terminal At such intrusions, Tamper switch is triggered on terminal and Tamper alarm is played on terminal. - Page 308 MorphoAccess® SIGMA Series – Administration Guide Terminal Configuration through Webserver c. Disable Biometric: If this parameter is enabled, then under Tamper state user will not be able to do successful biometric check on the terminal (access will be denied) d. Play MMI can be enabled if an administrator requires playing a sound alarm on terminal on tamper detection.
-
Page 309: General Purpose Input Output Configuration
MorphoAccess® SIGMA Series – Administration Guide Terminal Configuration through Webserver General Purpose Input Output Configuration General Purpose Input Output (GPIO) mode is used for passing multiple signals to door panel through input-output lines on action triggered on terminal. By default, GPIO Mode is enabled. For More detail please refer Single Door Controller (SDC) Configuration section... -
Page 310: Single Door Access Control Settings
MorphoAccess® SIGMA Series – Administration Guide Terminal Configuration through Webserver Single Door Access Control Settings Single Door Controller (SDC) mode is used for controlling access through single door. Several parameters such as door unlock duration, alarm when door held open, and time over mode can be configured. - Page 311 MorphoAccess® SIGMA Series – Administration Guide Terminal Configuration through Webserver i. If an administrator selects Push Button as exit mode, then an administrator can select Manual Door Open or Electric Door Open actions b. When Exit Mode is in ‘Push Button-Manual Door Open’, then an administrator needs to set Egress Time Out.
-
Page 312: Time And Attendance Mode Configuration
MorphoAccess® SIGMA Series – Administration Guide Terminal Configuration through Webserver Time and Attendance Mode Configuration MorphoAccess® SIGMA Series terminal can be set in Time and Attendance (T&A) Mode. Under this mode, the user has to provide T&A data by using function keys (F keys) before presenting fingerprint. - Page 313 MorphoAccess® SIGMA Series – Administration Guide Terminal Configuration through Webserver Screens & Steps Figure 291: Normal Time and Attendance mode 1. Click on Enable Time and Attendance, for enabling this mode 2. Click on Mandatory Use of Function Keys. On enabling this, terminal will pop up T&A screen every time after user presents fingerprint.
- Page 314 MorphoAccess® SIGMA Series – Administration Guide Terminal Configuration through Webserver 9. Enter Display Text. In this section an administrator can customize the text associated with the Functional Keys. The text length should be 1 to 20 characters only. By default below text is displayed, which is editable: a.
- Page 315 MorphoAccess® SIGMA Series – Administration Guide Terminal Configuration through Webserver Once T&A mode is enabled, the user interface of the terminal has a T&A button. See below screens: Figure 293: User Interface on Terminal Figure 294: Time and Attendance UI in Normal mode Figure 295: Time and Attendance UI in Normal mode with Icons –...
- Page 316 MorphoAccess® SIGMA Series – Administration Guide Terminal Configuration through Webserver Figure 296: Time and Attendance UI in Extended mode Figure 297: Time and Attendance UI in Extended mode (2x8 - 2 screens) Results Once T&A parameters are configured, T&A icon is displayed on the home screen of the MorphoAccess®...
-
Page 317: Transaction Log Settings
MorphoAccess® SIGMA Series – Administration Guide Terminal Configuration through Webserver Transaction Log Settings The MorphoAccess® SIGMA Series terminal logs various information related to each action performed by the terminal. Terminal can store User identified or not identified, it stores the result of each transaction, the date and time, the execution time, and the ID of the user. - Page 318 MorphoAccess® SIGMA Series – Administration Guide Terminal Configuration through Webserver a. Delete Partial Logs, if specific number of logs to be deleted on delete log action triggered. If delete partial logs selected, then enter Number of Log to Delete b. Delete All Logs, if all logs stored in database should be deleted on delete log action triggered 6.
-
Page 319: Biometric Security Settings
MorphoAccess® SIGMA Series – Administration Guide Terminal Configuration through Webserver Biometric Security Settings Biometric Security parameters can be configured from Webserver. Using these parameters an administrator can control the level of security of biometric comparison to prevent from false rejection of authentic users. Access Path Biometric Screens &... -
Page 320: Communication Settings
MorphoAccess® SIGMA Series – Administration Guide Terminal Configuration through Webserver Communication Settings An administrator can set the network parameters which are used for communication of MorphoAccess® SIGMA Series terminals with distant systems such as external access controller. Network parameters of Serial Channel, Ethernet and WLAN connections are configurable from Webserver. - Page 321 MorphoAccess® SIGMA Series – Administration Guide Terminal Configuration through Webserver Screens & Steps Figure 300: Network parameters settings through Webserver – R 2014_0000002196-09 ORPHO OCUMENT EPRODUCTION AND ISCLOSURE ORBIDDEN May 2016...
- Page 322 MorphoAccess® SIGMA Series – Administration Guide Terminal Configuration through Webserver 1. Serial Configuration: When terminal is connected to distant systems, through Serial Port a. Communication System: Select either Full Duplex or Half Duplex b. Net ID: Enter Net ID c. Protocol Baud Rate: Select one of the preset values (such as 115200 Bd) d.
- Page 323 MorphoAccess® SIGMA Series – Administration Guide Terminal Configuration through Webserver Figure 301: Configuring Wi-Fi™ Network 5. Scan and connect to Wi-Fi™ Network a. Click on Scan, the available network is displayed b. Enter the Password c. Click on Connect Figure 302: Configuring Wi-Fi™...
- Page 324 MorphoAccess® SIGMA Series – Administration Guide Terminal Configuration through Webserver i. Managed network indicates that the Wi-Fi™ network is connected through a centralized access point ii. Ad hoc network allows wireless devices to directly communicate with each other without any need to connect to centralized access point or a router c.
-
Page 325: Controller Feedback
MorphoAccess® SIGMA Series – Administration Guide Terminal Configuration through Webserver Controller Feedback This configuration screen allows an administrator to set parameters that enable the Access Controller to send feedback messages on every event reported by the terminal. Access Path Controller Feedback Screens &... - Page 326 MorphoAccess® SIGMA Series – Administration Guide Terminal Configuration through Webserver 2. Select Feedback Lines, it means the number of lines in which access controller will send feedback to terminal. An administrator can select “One feedback line” or “Two feedback line” 3.
- Page 327 MorphoAccess® SIGMA Series – Administration Guide Terminal Configuration through Webserver 7. Enter Keypad Timeout, for user to enter the PIN. This is used when panel mode selected as Accept/Reject/PIN and controller feedback contains PIN (asks user to enter PIN). 8. Click on Save –...
-
Page 328: Date And Time Settings
MorphoAccess® SIGMA Series – Administration Guide Terminal Configuration through Webserver Date and Time Settings This functionality allows an administrator to set time zone, current date and time of MorphoAccess® SIGMA Series terminal. There are also options to set the format of date and time. - Page 329 MorphoAccess® SIGMA Series – Administration Guide Terminal Configuration through Webserver Figure 305: Setting Custom Time Zone from Webserver a. Select Time Zone NOTE: While setting custom time zone, make sure the GMT offset value is to the 'Standard GMT Offset' of the region. b.
-
Page 330: Wiegand Parameters Settings
MorphoAccess® SIGMA Series – Administration Guide Terminal Configuration through Webserver Wiegand Parameters Settings MorphoAccess® SIGMA Series terminals can communicate with distant systems, using Wiegand interface. The protocol used for communicating on Wiegand channel is called Wiegand protocol. It is required to configure Wiegand input and output string format that is understood by terminal and distant system Several Wiegand formats are preloaded on MorphoAccess®... - Page 331 MorphoAccess® SIGMA Series – Administration Guide Terminal Configuration through Webserver Access Path Wiegand Pre-requisites MA_PAC license should be uploaded on terminal Terminal has factory default settings Screens & Steps Figure 306: Wiegand Settings through Webserver 1. Configure below Wiegand Input parameters, for action triggered through Wiegand to terminal: a.
- Page 332 MorphoAccess® SIGMA Series – Administration Guide Terminal Configuration through Webserver 2. Activate Wiegand Output: This parameter is enabled to allow the Wigand data to be sent using Wiegand Output Port. If this parameter is disabled then the terminal never tries to send any data frame through Wiegand port. Configure the Wiegand Output parameters listed below, for each event which must be communicate through Wiegand from the terminal: a.
-
Page 333: User Control Configurations
MorphoAccess® SIGMA Series – Administration Guide Terminal Configuration through Webserver User Control Configurations User Control configurations consists the list of parameters which terminal should check for authenticating and granting access to the user. An administrator can enable or disable these parameters. - Page 334 MorphoAccess® SIGMA Series – Administration Guide Terminal Configuration through Webserver 3. Keyboard Trigger: This parameter can be enabled to start access rights check, using authentication process, when a data is entered with terminal keyboard. 4. External Port Trigger: This parameter can be enabled to start access control check, using authentication process, when a data is received from an external device (such a swipe card reader) by Wiegand or Clock &...
- Page 335 MorphoAccess® SIGMA Series – Administration Guide Terminal Configuration through Webserver 15. Check additional users: Specifies the number of additional users to check before granting the access. Set this parameter value to either 0 (no additional users required) or 1 (additional one more user required). If a single user is successfully identified multiple times, the duplicates are ignored and the terminal again prompts for the additional user, until the workflow times out.
- Page 336 MorphoAccess® SIGMA Series – Administration Guide Terminal Configuration through Webserver c. If Set to “User PIN” then BIO check is substituted by PIN check. If substitution by PIN is allowed and PIN control is also enabled, then only one PIN check is performed 20.
-
Page 337: Threat Level Configuration
MorphoAccess® SIGMA Series – Administration Guide Terminal Configuration through Webserver Threat Level Configuration This feature allows an administrator to set threat levels using the TTL input lines. When enabled, the TTL signals can define the level of security and also can be used to compel users to use a specific authentication method. - Page 338 MorphoAccess® SIGMA Series – Administration Guide Terminal Configuration through Webserver Figure 309: Configuring Command Based Threat Level, using Webserver interface 4. Select Threat Level Mode as ‘Command based’. If Threat Level is set to Command Based, the active threat level from the drop-down box has to be set. With Command Based threat level, the terminal does not refer to TTL lines inputs.
-
Page 339: Event Configurations
MorphoAccess® SIGMA Series – Administration Guide Terminal Configuration through Webserver Event Configurations Events which can be monitored in MorphoAccess® SIGMA Series terminal are listed in event configuration screen of Webserver. An administrator can enable or disable the monitoring and reporting events that can be triggered on terminal. An administrator can also configure which events to be sent to access controller, GPO TTL lines and its data clock id. -
Page 340: Define Access Schedule
MorphoAccess® SIGMA Series – Administration Guide Terminal Configuration through Webserver Define Access Schedule Access Schedules is used to define a time slot, during which access is allowed, for example during working hours of working days. Before and after the selected timings, the access is denied to the user, even if authenticated successfully. - Page 341 MorphoAccess® SIGMA Series – Administration Guide Terminal Configuration through Webserver Screens & Steps Adding a New Access Schedule Figure 311: Adding Access Schedule 1. The list of default access schedules is displayed. No Access and All Access are by default created and not editable. An administrator can add new schedules as per requirement 2.
- Page 342 MorphoAccess® SIGMA Series – Administration Guide Terminal Configuration through Webserver Figure 312: Adding Access Schedule 3. Enter Name of the schedule 4. Define Time Slots for each day, by selecting Start Time (hh:mm) and End Time (hh:mm). During the selected time slot, access is granted to user. a.
- Page 343 MorphoAccess® SIGMA Series – Administration Guide Terminal Configuration through Webserver Results An Access Schedule is created and it is available for assignment to users at the time of user enrolment. User is allowed to access only during the access time scheduled. If user tries to access at another time, then MorphoAccess®...
- Page 344 MorphoAccess® SIGMA Series – Administration Guide Terminal Configuration through Webserver Editing Access Schedule Figure 313: Editing Access Schedule 1. Select an access schedule from the list 2. Click on Edit the Selected Schedule tab NOTE: The default access schedules cannot be modified. –...
- Page 345 MorphoAccess® SIGMA Series – Administration Guide Terminal Configuration through Webserver Figure 314: Editing Access Schedule 3. An administrator can edit Access Schedule Name and Time Slots 4. Once required information is updated, click on Apply 5. The Access Schedule is updated and saved –...
- Page 346 MorphoAccess® SIGMA Series – Administration Guide Terminal Configuration through Webserver Delete Access Schedule Figure 315: Deleting an Access Schedule 1. Select an Access Schedule from the list 2. Click on Delete the Selected Schedule NOTE: The default access schedules cannot be deleted. Figure 316: Deleting an Access Schedule 3.
-
Page 347: Define Holiday Schedule
MorphoAccess® SIGMA Series – Administration Guide Terminal Configuration through Webserver Define Holiday Schedule Using holiday schedule, an administrator can control access of users on holidays. Holiday Schedule can be defined for the public holidays of entire Year. When user tries to access, terminal will authenticate user and on successful authentication, terminal will check if Holiday Schedule is to be considered. - Page 348 MorphoAccess® SIGMA Series – Administration Guide Terminal Configuration through Webserver Figure 318: Creating a Holiday Schedule 1. Enter Schedule Name, usually the name of the holiday (such as "independence day") 2. Select Start Date and End Date of the holiday, by default the date format is YYYY- MM-DD.
- Page 349 MorphoAccess® SIGMA Series – Administration Guide Terminal Configuration through Webserver Edit Holiday Schedule Figure 319: Editing Holiday Schedule 1. Select a Holiday Schedule that an administrator require to update 2. Click on Edit the Selected Schedule Updated name Figure 320: Editing Holiday Schedule 3.
- Page 350 MorphoAccess® SIGMA Series – Administration Guide Terminal Configuration through Webserver Delete a Holiday Schedule Using this feature an administrator can delete holiday schedules from the terminal. The holiday schedules that are expired are recommended to be deleted. Figure 321: Deleting a Holiday Schedule 1.
-
Page 351: Door Open Schedule Configuration
MorphoAccess® SIGMA Series – Administration Guide Terminal Configuration through Webserver Door Open Schedule Configuration The Door Open Schedule option allows terminal to keep the Door Unlocked for a specific period of time. Using Webserver interface, the Door Open Schedule can be defined. During this period, access is granted without access rights check. -
Page 352: Complete Configuration (Advanced Users Only)
MorphoAccess® SIGMA Series – Administration Guide Terminal Configuration through Webserver Complete Configuration (Advanced users only) This configuration screen displays all the parameters of the terminal in only one screen. Then, it is reserved to experimented administrator, who wants to change the value of several parameters related to different features Access Path Complete Configuration... -
Page 353: Reset Factory Settings
MorphoAccess® SIGMA Series – Administration Guide Terminal Configuration through Webserver Reset Factory Settings This screen displays all the parameters that can be reset from the Webserver to Factory Default Settings. Access Path: Reset Factory Settings Screens & Steps Figure 325: Reset Factory Settings Screen on Webserver 1. - Page 354 MorphoAccess® SIGMA Series – Administration Guide Terminal Configuration through Webserver 2. To reset any parameter, select the checkbox next to the corresponding parameter name 3. Click on Reset 4. The corresponding parameter values are reset to the factory default settings. –...
-
Page 355: Section 9 : Access Control
MorphoAccess® SIGMA Series – Administration Guide Access Control Section 9 : Access Control – R 2014_0000002196-09 ORPHO OCUMENT EPRODUCTION AND ISCLOSURE ORBIDDEN May 2016... -
Page 356: Access Control Presentation
MorphoAccess® SIGMA Series – Administration Guide Access Control Access control presentation Typical architecture of an access control system Typical access control system architecture includes: One MorphoAccess® terminal per area to protect, A user management or administration menu A Central Security Controller: for area access final check and physical access command (open the door). -
Page 357: Typical Access Control Process
MorphoAccess® SIGMA Series – Administration Guide Access Control Typical access control process 1. All authorized users must be enrolled. This means that a record is created for each user, containing a unique identifier and biometric data for two of his fingers. 2. -
Page 358: Preliminary: Adding A Biometric Template In Local Database
MorphoAccess® SIGMA Series – Administration Guide Access Control Preliminary: adding a biometric template in local database The management of internal biometric database can be done locally (through the User Menu) in MorphoAccess® SIGMA Series terminals. User enrolment can be done by administrator from User Menu. The local database can be exported ciphered to other MorphoAccess®... -
Page 359: Morphoaccess® Terminal Operating Modes
MorphoAccess® SIGMA Series – Administration Guide Access Control MorphoAccess® terminal operating modes Standalone mode or Slave mode The terminal supports two exclusive operating modes: Standalone mode, where the terminal runs an access control program that can make the access decision alone, or with final authorization from a central access controller. This mode is described in detail in next section below, ... -
Page 360: Access Control Process In Identification Mode
MorphoAccess® SIGMA Series – Administration Guide Access Control Access Control Process in Identification Mode Figure 327: Access Control Flow Diagram when Terminal is in Identification Mode – R 2014_0000002196-09 ORPHO OCUMENT EPRODUCTION AND ISCLOSURE ORBIDDEN May 2016... -
Page 361: Access Control Process In Authentication Mode
MorphoAccess® SIGMA Series – Administration Guide Access Control Access Control Process in Authentication Mode Figure 328: Access Control Flow Diagram in Authentication Mode – R 2014_0000002196-09 ORPHO OCUMENT EPRODUCTION AND ISCLOSURE ORBIDDEN May 2016... -
Page 362: Access Control Process For Vip Users
MorphoAccess® SIGMA Series – Administration Guide Access Control Access Control Process for VIP Users If the user is listed as VIP, then access control flow will differ from the general access control flows. When a user is enrolled as VIP and the VIP bypass is enabled, then the VIP listed user is exempted from authentication using biometric data, PIN, or BIOPIN. -
Page 363: Access Control Result
MorphoAccess® SIGMA Series – Administration Guide Access Control Access Control Result Information for the User The MorphoAccess® SIGMA Series terminal communicates the result of the access right check by a local audible and visible signal. These signals are described in the “Audio Man Machine Interface”... -
Page 364: Access Granted
MorphoAccess® SIGMA Series – Administration Guide Access Control Access Granted Figure 329: Access Granted Diagram Access Denied Access Controller Figure 330: Access Denied diagram – R 2014_0000002196-09 ORPHO OCUMENT EPRODUCTION AND ISCLOSURE ORBIDDEN May 2016... -
Page 365: Section 10 : Access Control By Identification
MorphoAccess® SIGMA Series – Administration Guide Access Control by Identification Section 10 : Access Control by Identification – R 2014_0000002196-09 ORPHO OCUMENT EPRODUCTION AND ISCLOSURE ORBIDDEN May 2016... -
Page 366: Identification Mode Description
MorphoAccess® SIGMA Series – Administration Guide Access Control by Identification Identification Mode Description Identification Process The identification process consists in retrieving the identity of an unknown person, by comparison of a personal data with a base which contains the same type of personal data of known persons. -
Page 367: Identification Modes (Database Extension Licenses)
MorphoAccess® SIGMA Series – Administration Guide Access Control by Identification Identification Modes (database extension licenses) Identification process relay on the database, in which user’s data are stored at the time of enrolment. By default, MorphoAccess® SIGMA Series terminals database can store up to 3,000 user’s records, with the biometric data of 2 fingers per record. -
Page 368: User Interface
MorphoAccess® SIGMA Series – Administration Guide Access Control by Identification User Interface In this mode, the MorphoAccess® SIGMA Series terminal waits for the placement of a finger on the biometric sensor. This state is displayed to the user by a specific signal, as described in “Terminal States”... -
Page 369: Section 11 : Access Control By Authentication
MorphoAccess® SIGMA Series – Administration Guide Access Control by Authentication Section 11 : Access Control by Authentication – R 2014_0000002196-09 ORPHO OCUMENT EPRODUCTION AND ISCLOSURE ORBIDDEN May 2016... -
Page 370: Authentication Process
MorphoAccess® SIGMA Series – Administration Guide Access Control by Authentication Authentication Process Introduction The MorphoAccess® SIGMA Series terminal offers an authentication mode designed to works with contactless smart cards used as personal cards. Then this section relates only to terminals equipped with a contactless smartcard reader (see section Scope of the document). -
Page 371: Contactless Smart Card
MorphoAccess® SIGMA Series – Administration Guide Access Control by Authentication The user’s card must contain the user’s identifier and optionally his biometric data. The terminal performs the required identity checks using the data read on the user’s card, and if required, data stored in the internal database. When it is required, the biometric check compares the biometric data of the finger placed on the sensor with the reference biometric data of two fingers of the user, acquired during enrolment process. - Page 372 MorphoAccess® SIGMA Series – Administration Guide Access Control by Authentication MASigma/Lite iClass iCLASS SE® Card HID MODELS Morpho readers Standard for card description contactless Composite MA SIGMA communications Technology Technology MA SIGMA Lite Limited support * 3000 3050 2k bit (256 Bytes) card ISO 15693/14443B 16k bit (2k Bytes) card with 3001...
-
Page 373: Authentication Process Options
MorphoAccess® SIGMA Series – Administration Guide Access Control by Authentication Authentication Process Options The MorphoAccess® SIGMA Series terminal offers several authentication processes, depending on the user’s reference biometric data location, and the security level required. The user’s reference biometric data can be located: ... - Page 374 MorphoAccess® SIGMA Series – Administration Guide Access Control by Authentication If User rule is “Keypad only” and biometric check is enabled then also for that user BIO check is performed (Logical OR operation). Because of above change in access rule workflow, to achieve L1 use case of disabling BIO check for certain user, follow below procedure ...
-
Page 375: Automatic Bypass Of Biometric Control
MorphoAccess® SIGMA Series – Administration Guide Access Control by Authentication Automatic bypass of biometric control The MorphoAccess® SIGMA Series terminal offers an authentication mode which depends on the user’s card content. The terminal searches the user card for data indicating whether biometric control is mandatory or inhibited. -
Page 376: Selection Of User's Contactless Card Type (Mifare® And/Or Desfire®)
MorphoAccess® SIGMA Series – Administration Guide Access Control by Authentication Selection of user’s contactless card type (MIFARE® and/or DESFire®) Contactless Card type As MorphoAccess® SIGMA Series terminals are equipped with a contactless smartcard reader compatible with MIFARE® and DESFire® cards, it is possible to specify the type of card to be supported by the terminal: ... - Page 377 MorphoAccess® SIGMA Series – Administration Guide Access Control by Authentication Compatibility with “Authentication” modes Using a binary value read on the card as user’s identifier is allowed only with MIFARE® smart cards, and when the “sc.encode_profile” configuration key is set to 0 (zero). All other values of this configuration keys requires TLV formatted data, as described in the MorphoAccess®...
-
Page 378: Biometric Check, Biometric Data On User's Card
MorphoAccess® SIGMA Series – Administration Guide Access Control by Authentication Biometric check, biometric data on user's card Description In this mode, each user's card contains an identifier and the biometric data of two different fingers of the user. The terminal compares the biometric data of the finger placed on the biometric sensor, with the reference biometric data of the two user's fingers read on the card. -
Page 379: User Interface
MorphoAccess® SIGMA Series – Administration Guide Access Control by Authentication User Interface The authentication process starts when the user presents his contactless card in front of the terminal (where the antenna of the contactless card reader is located). If it is compatible (same authentication keys, and mandatory data present on card), the user will be invited to place his finger on the biometric sensor, for biometric authentication. -
Page 380: Pin Verification - Pin Stored On Card
MorphoAccess® SIGMA Series – Administration Guide Access Control by Authentication PIN verification - PIN stored on card Description In this mode, each user's card contains an identifier, PIN Code and the biometric data of two different fingers of the user. The terminal compares the entered PIN Code with the corresponding code in the user’s card. - Page 381 MorphoAccess® SIGMA Series – Administration Guide Access Control by Authentication User Interface The authentication process starts when the user presents his contactless card in front of the terminal (where the antenna of the contactless card reader is located). If it is compatible (same authentication keys, and mandatory data present on card), the user is invited to enter its PIN Code, for PIN Verification.
- Page 382 MorphoAccess® SIGMA Series – Administration Guide Access Control by Authentication BIOPIN verification - BIOPIN stored on card Description In this mode the card should contain a Biometric PIN (BIOPIN). The goal of this code is to replace fingerprints authentication by BIOPIN code verification when the fingerprints of the user are not available during enrolment for any reason.
- Page 383 MorphoAccess® SIGMA Series – Administration Guide Access Control by Authentication Following parameter is required to be configured: Parameter Name Parameter Value Description ucc.allow_biopin_us 0 or 1 Set this parameter to “0”, to disable BIOPIN check er_rule Set this parameter to “1”, to enable BIOPIN check Set this parameter to “2”, to set PIN check User Interface The authentication process starts when the user presents his contactless card in front, instead...
- Page 384 MorphoAccess® SIGMA Series – Administration Guide Access Control by Authentication Biometric check and biometric data in local database Description In this mode, the identifier of the user is the only one data read on user's card. The biometric data of two different fingers of the user are stored in the internal database, with the same user’s identifier as the one on the user’s card.
- Page 385 MorphoAccess® SIGMA Series – Administration Guide Access Control by Authentication Activation key Card Type selected at the time of User Enrolment should be User ID Trigger event “Card” must be ON Using Webserver, the User Record Reference parameter value must be set to Card for authentication using terminal database.
- Page 386 MorphoAccess® SIGMA Series – Administration Guide Access Control by Authentication Authentication with local database: User ID entered from keyboard Description In this mode, the User ID of the user is entered using the MorphoAccess® SIGMA Series terminal keyboard. If the User ID exists in the database, the terminal performs an authentication using the biometric templates associated to this User ID.
- Page 387 MorphoAccess® SIGMA Series – Administration Guide Access Control by Authentication Authentication with local database: ID input from Wiegand or Clock & Data Description This mode requires an external card reader that will send the user’s ID to authenticate to the MorphoAccess®...
- Page 388 MorphoAccess® SIGMA Series – Administration Guide Access Control by Authentication Parameter name Value Description Set ‘2’ to send data only when verification is initiated from Wiegand source wiegand.external_port_output_type 0 or 1 Storing current external port output type as: Set ‘0’...
- Page 389 MorphoAccess® SIGMA Series – Administration Guide Access Control by Authentication Wiegand Frame Configuration When set up to communicate with Wiegand protocol, the MorphoAccess® SIGMA Series terminal can handle several data formats for reading Wiegand string; refer to “Wiegand Format and Associated Values”. The default format of Wiegand string is Standard 26 Bits.
- Page 390 MorphoAccess® SIGMA Series – Administration Guide Access Control by Authentication Wiegand frame example (26 bits) For Standard 26 bit - [(26, 9, 16) (1, 8, 10) P1 = (0, Even, 1-12) P2 = (25, Odd, 13-24)], Wiegand string sent from Terminal 1 to terminal2 will be as below: …...
- Page 391 MorphoAccess® SIGMA Series – Administration Guide Access Control by Authentication No biometric check, no User ID check Description This authentication mode is the version of the “Biometric check, biometric data on user's card” authentication mode with biometric check disabled. The terminal searched only for the user’s identifier on the user’s card. No other check is performed: the user’s identifier is not searched in the local database, and there is no biometric check.
- Page 392 MorphoAccess® SIGMA Series – Administration Guide Access Control by Authentication Activation key Card Type selected at the time of User Enrolment should be User ID only Using Webserver an administrator can set User Record Reference parameter as Card for authentication using smart card, refer “User Control Configurations”...
- Page 393 MorphoAccess® SIGMA Series – Administration Guide Access Control by Authentication No biometric check, User Identifier in the database Description This authentication mode is the version of the “Biometric check and biometric data in local database” authentication mode, when biometric check is disabled. The user’s identifier is the only data read on user’s card.
- Page 394 MorphoAccess® SIGMA Series – Administration Guide Access Control by Authentication Activation key Card Type selected at the time of User Enrolment should be User ID only Using Webserver an administrator can set User Record Reference parameter as Terminal for authentication using terminal database, refer “User Control Configurations”...
- Page 395 MorphoAccess® SIGMA Series – Administration Guide Access Control by Authentication User Interface The authentication process starts when the user presents his contactless card in front of the terminal (where the antenna of the contactless smartcard reader is located). Database Figure 339: Authentication without biometric control, and with the user login The user’s identifier is read on the user’s card and searched in the local database.
-
Page 396: User's Data Required In The Terminal
MorphoAccess® SIGMA Series – Administration Guide Access Control by Authentication Authentication process specified by User's card Description When this mode is enabled, the access rights check to perform is specified by a dedicated data on user’s card. It means that the same terminal can execute a different process according to a data found on the user’s card: ... -
Page 397: Activation Key
MorphoAccess® SIGMA Series – Administration Guide Access Control by Authentication Activation key Card Type selected at the time of User Enrolment should be “User ID only”, “User ID + PIN”, “User ID or Template” or “User ID + PIN + Template” as required ... - Page 398 MorphoAccess® SIGMA Series – Administration Guide Access Control by Authentication PIN check disabled, Biometric check mandatory The terminal requires the user to place a finger on the biometric sensor. Then it executes a comparison of the biometric data of the finger placed on the sensor and the reference biometric data read on user’s card.
-
Page 399: Allowed Format For User's Identifier
MorphoAccess® SIGMA Series – Administration Guide Access Control by Authentication Allowed format for User's identifier TLV structured data The user’s identifier is stored in ASCII characters within a TLV structure. This is the default configuration of the MorphoAccess® SIGMA Series terminal: the related parameters are listed in the table below for each type of card: Parameter Name Parameter Value... - Page 400 MorphoAccess® SIGMA Series – Administration Guide Access Control by Authentication Parameter Name Parameter Value Description Sets key policy to read MIFARE® Plus card for sc_tlv_mifare_plus. 1, 2 or 3 TLV mode. key_policy Set “1” - Try to read card first with Key A then Key B (Default) Set “2”...
-
Page 401: Binary Data
MorphoAccess® SIGMA Series – Administration Guide Access Control by Authentication Binary Data Description The MorphoAccess® SIGMA Series terminal is able to use a binary value to read on specific location on user’s card, as user’s identifier. The terminal in legacy modes can also write smart card in binary data format. - Page 402 MorphoAccess® SIGMA Series – Administration Guide Access Control by Authentication User Identifier to be read in binary format sc_binary_read.data_format = 1 Binary format sc_tlv_MIFARE®.start_block [1-215] First block to read on card sc_binary_read.data_length_num_bytes User ID length in bytes and additional bits limited to 8 bytes (i.e.
- Page 403 MorphoAccess® SIGMA Series – Administration Guide Access Control by Authentication Example: 32 bits user’s identifier within a 37-bits Wiegand frame The user’s card contains, at the first block of sector 15 a full 37 bits Wiegand frame (which includes start and stop bits, the site code of the sender, and user’s identifier). The first block in sector 15 is block 46.
-
Page 404: Section 12 : Multifactor Access Control Mode
MorphoAccess® SIGMA Series – Administration Guide Multifactor Access Control Mode Section 12 : Multifactor Access Control Mode – R 2014_0000002196-09 ORPHO OCUMENT EPRODUCTION AND ISCLOSURE ORBIDDEN May 2016... -
Page 405: Multi-Factor Mode
MorphoAccess® SIGMA Series – Administration Guide Multifactor Access Control Mode Multi-factor Mode Description The MorphoAccess® SIGMA Series terminal authorizes simultaneous activation of the access control mode by identification and one of the access control modes by authentication. This is the first user action which automatically selects the access right control process to be executed. -
Page 406: Activation Keys
MorphoAccess® SIGMA Series – Administration Guide Multifactor Access Control Mode Activation keys Trigger event through Biometric, Contactless Card, Keypad and External Database should be enabled – R 2014_0000002196-09 ORPHO OCUMENT EPRODUCTION AND ISCLOSURE ORBIDDEN May 2016... -
Page 407: Section 13 : Time And Attendance Mode
MorphoAccess® SIGMA Series – Administration Guide Time and Attendance Mode Section 13 : Time and Attendance Mode – R 2014_0000002196-09 ORPHO OCUMENT EPRODUCTION AND ISCLOSURE ORBIDDEN May 2016... -
Page 408: Time And Attendance Synoptic
MorphoAccess® SIGMA Series – Administration Guide Time and Attendance Mode Time and Attendance Synoptic MorphoAccess® SIGMA Series terminals can be configured to work in Time and Attendance (T&A) mode. When T&A mode is enabled, each terminal event logged would have some attendance information (such as entry time, exit time, etc.). - Page 409 MorphoAccess® SIGMA Series – Administration Guide Time and Attendance Mode In the above sample screen, the IN function is associated to F1 key, OUT function is associated to F2 key, IN Duty is to F3 and OUT Duty is to F4. A user can select any of the Function Key to input required T&A action.
-
Page 410: Extended Mode
MorphoAccess® SIGMA Series – Administration Guide Time and Attendance Mode Extended Mode In extended mode, there are 16 function keys that can be configured and displayed to the user. When T&A data is required from the user, the terminal displays the Time and Attendance screen below: Figure 344: Time and Attendance Screen in Extended Mode 1x16... - Page 411 MorphoAccess® SIGMA Series – Administration Guide Time and Attendance Mode The selected function is written in the access request record, stored in the log file, and included in the "User Identifier" message sent to a distant system. After selection, the MorphoAccess® SIGMA Series terminal switches in biometric mode (identification or authentication).
-
Page 412: T&A Mode Mandatory Or Optional Scenarios
MorphoAccess® SIGMA Series – Administration Guide Time and Attendance Mode T&A Mode Mandatory or Optional Scenarios Mandatory: An administrator can set T&A Mode as Mandatory. It means it is mandatory for the user to input T&A action by selecting function key, in order to get access. -
Page 413: T&A - Mandatory Mode Work Flow Diagram
MorphoAccess® SIGMA Series – Administration Guide Time and Attendance Mode T&A - Mandatory Mode Work Flow Diagram Figure 346: Time and Attendance in Mandatory Mode Workflow Diagram – R 2014_0000002196-09 ORPHO OCUMENT EPRODUCTION AND ISCLOSURE ORBIDDEN May 2016... -
Page 414: T&A - Non Mandatory Mode Work Flow Diagram
MorphoAccess® SIGMA Series – Administration Guide Time and Attendance Mode T&A - Non Mandatory Mode Work Flow Diagram Figure 347: Time and Attendance in Non-Mandatory Mode Workflow Diagram – R 2014_0000002196-09 ORPHO OCUMENT EPRODUCTION AND ISCLOSURE ORBIDDEN May 2016... -
Page 415: Note On Terminal Clock Deviation
MorphoAccess® SIGMA Series – Administration Guide Time and Attendance Mode Note on Terminal Clock Deviation The terminal clock has a +/- 4 sec per day typical time deviation at +25°C. At 50°C, the time deviation may be up to -8 sec per day. For application requiring time precision (such as SSL, DESFire®), MorphoAccess®... -
Page 416: Section 14 : Proxy Mode
MorphoAccess® SIGMA Series – Administration Guide Proxy Mode Section 14 : Proxy Mode – R 2014_0000002196-09 ORPHO OCUMENT EPRODUCTION AND ISCLOSURE ORBIDDEN May 2016... -
Page 417: Presentation Of Proxy (Or Slave) Mode
MorphoAccess® SIGMA Series – Administration Guide Proxy Mode Presentation of Proxy (or slave) mode Process This operating mode allows to control the MorphoAccess® SIGMA Series terminal remotely (the link is IP or RS422) using a set of biometric and databases management commands. In Proxy mode the access control is performed remotely by the Host System: the MorphoAccess®... -
Page 418: Local Signals
MorphoAccess® SIGMA Series – Administration Guide Proxy Mode Local signals When the terminal is waiting for a command from the distant system, there is no local signal (biometric sensor backlight off, status light off). But when a command is in progress the terminal emits the signals related to the function. It means, for example, that: ... -
Page 419: Proxy Mode Use Sample
MorphoAccess® SIGMA Series – Administration Guide Proxy Mode Proxy mode use sample When terminal is in proxy mode, then using distant commands an administrator can control several functions of the terminal. For example, realize the backup of terminal database, an administrator can activate proxy mode of the terminal, do a backup of database in the remote server, and deactivate the proxy mode. -
Page 420: Section 15 : Polling Mode
MorphoAccess® SIGMA Series – Administration Guide Polling Mode Section 15 : Polling Mode – R 2014_0000002196-09 ORPHO OCUMENT EPRODUCTION AND ISCLOSURE ORBIDDEN May 2016... -
Page 421: Presentation Of Polling Mode
MorphoAccess® SIGMA Series – Administration Guide Polling Mode Presentation of Polling mode When polling mode is activated, the MorphoAccess® SIGMA Series terminal does not verify user template in its local database. This mode is useful when the user templates are stored in external database. -
Page 422: Polling Mode Activation
MorphoAccess® SIGMA Series – Administration Guide Polling Mode Polling mode activation Polling mode can be activated through Webserver > Complete Configuration, by setting “ucc.enable_external_database” parameter value as ‘1’. Only an administrator can activate polling mode. An administrator can refer to MorphoAccess Sigma Series_Parameters User Guide to know how to set this parameter. -
Page 423: Section 16 : Messages Sending
MorphoAccess® SIGMA Series – Administration Guide Messages Sending Section 16 : Messages Sending – R 2014_0000002196-09 ORPHO OCUMENT EPRODUCTION AND ISCLOSURE ORBIDDEN May 2016... -
Page 424: Principle
MorphoAccess® SIGMA Series – Administration Guide Messages Sending Principle When specific events occurred during the MorphoAccess® SIGMA Series terminal access control application’s working, some messages can be generated and sent to another physical entity. The events that produce messages sending are: ... -
Page 425: Events
MorphoAccess® SIGMA Series – Administration Guide Messages Sending Events MorphoAccess® SIGMA Series terminal allows an administrator to select several events on which messages can be sent to external controller. An administrator can enable or disable events using Webserver or distant command. Refer to “Event Configurations”... -
Page 426: Sending Interfaces
MorphoAccess® SIGMA Series – Administration Guide Messages Sending Sending Interfaces The terminal allows choosing the number of interfaces that will be available for the messages sending process. By default, no interface is available. Set below parameter for activating remote message sending: Number of available interfaces ... -
Page 427: Section 17 : Compatibility With An Access Control System
MorphoAccess® SIGMA Series – Administration Guide Compatibility with an Access Control System Section 17 : Compatibility with an Access Control System – R 2014_0000002196-09 ORPHO OCUMENT EPRODUCTION AND ISCLOSURE ORBIDDEN May 2016... -
Page 428: Internal Relay Activation On Access Granted Result
MorphoAccess® SIGMA Series – Administration Guide Compatibility with an Access Control System Internal Relay activation on Access Granted result Description If the result of the access rights check is successful, the internal relay may be optionally activated, for example, to directly trigger a door switch. The duration of the activation of the internal relay can be modified by a specific configuration key. -
Page 429: Activation Key
MorphoAccess® SIGMA Series – Administration Guide Compatibility with an Access Control System Activation key Configuration key enables internal relay activation on access granted is: Parameter name Value Description gpio.sdac_relay_default_state 0 or 1 Using this parameter, an administrator can set a default state of the internal relay, which is powered or unpowered. -
Page 430: External Activation Of The Internal Relay
MorphoAccess® SIGMA Series – Administration Guide Compatibility with an Access Control System External activation of the internal relay Description This function allows the activation of the terminal internal relay via a push button connected between the LED1 and the GND wires. Then the internal relay is activated in two cases: when the terminal authorizes the access after access rights check, and when a contact is closed between the LED1 and GND terminals. -
Page 431: Activation Key
MorphoAccess® SIGMA Series – Administration Guide Compatibility with an Access Control System Activation key A specific configuration key enables this feature. Parameter name Value Description Using this parameter, an administrator can set gpio.sdac_rte_mode 0, 1 or 2 an exit mode in SDAC. Following parameter values can be configured: ... -
Page 432: Access Request Result Log File
MorphoAccess® SIGMA Series – Administration Guide Compatibility with an Access Control System Access Request Result Log File Description When enabled, the terminal creates a record for each access request in a local log file. Each record includes: the date and the time of record creation (when access control result is known), ... -
Page 433: Activation Key
MorphoAccess® SIGMA Series – Administration Guide Compatibility with an Access Control System Activation key The creation of a record for each access request is enabled (and disabled), by only one configuration key. Parameter name Value Description This parameter allows an administrator to set transaction_log.logging 0, 1 or 2 transaction log logging status, as below:... -
Page 434: Sending An Access Control Result Message
MorphoAccess® SIGMA Series – Administration Guide Compatibility with an Access Control System Sending an Access Control Result Message Presentation After access control rights check, the MorphoAccess® SIGMA Series terminal can send a message which contains the result of the control, to a distant terminal. The MorphoAccess® SIGMA Series terminal is able to use different channels and different protocols, to send this message. -
Page 435: Serial Port (Output Only)
MorphoAccess® SIGMA Series – Administration Guide Compatibility with an Access Control System Serial Port (Output only) Protocol selection MorphoAccess® SIGMA Series terminal has two serial ports: One for Wiegand or Clock & Data protocols One port for RS485 or RS422 protocols Wiegand protocol The Wiegand frame includes only the User Identifier (which must be a numeric value). - Page 436 MorphoAccess® SIGMA Series – Administration Guide Compatibility with an Access Control System Clock & Data protocol The description provided for Wiegand protocol (see previous section) applies also to Clock & Data protocol. The sending of the message is conditioned to only one configuration key. Parameter name Value Description...
-
Page 437: Ethernet Port
MorphoAccess® SIGMA Series – Administration Guide Compatibility with an Access Control System Ethernet port Protocol selection The protocol used to send the message through the Ethernet link, must be only one of these protocols: UDP or TCP or TLS/SSL. MorphoAccess® SIGMA Series terminal is able to send message to two different distant system: one preferred (host # 1) and one alternate (host #2). -
Page 438: Note About Terminal Clock Deviation
MorphoAccess® SIGMA Series – Administration Guide Compatibility with an Access Control System Note about Terminal Clock Deviation The message sent through IP and RS422 or RS485 protocols includes the date/time of access control result. The terminal clock has a +/- 4 sec per day typical time deviation at +25°C. At 50°C, the time deviation may be up to -8 sec per day. -
Page 439: Section 18 : Terminal User Interface
MorphoAccess® SIGMA Series – Administration Guide Terminal User Interface Section 18 : Terminal User Interface – R 2014_0000002196-09 ORPHO OCUMENT EPRODUCTION AND ISCLOSURE ORBIDDEN May 2016... -
Page 440: Audio Man Machine Interface
MorphoAccess® SIGMA Series – Administration Guide Terminal User Interface Audio Man Machine Interface Audible signal The volume of the audible signal can be tuned by a specific configuration key. Parameter name Value Description audio.volume 0 to 100 Using this parameter, an administrator can set global audio volume that will be played on specific events. -
Page 441: Terminal States
MorphoAccess® SIGMA Series – Administration Guide Terminal User Interface Terminal States Identification, Authentication or Multi-factor mode: waiting for a finger or a card In identification mode, the terminal is waiting for a finger to be placed on the biometric sensor. - Page 442 MorphoAccess® SIGMA Series – Administration Guide Terminal User Interface Identification: Finger detected, Acquisition of biometric data of the finger is in process After detection of a finger on the biometric sensor, the terminal emits this signal during the whole biometric data acquisition (of the finger on the sensor) process. Do not remove the finger while this signal is emitted.
- Page 443 MorphoAccess® SIGMA Series – Administration Guide Terminal User Interface Incorrect finger position The terminal emits this signal when the position of the finger on the biometric sensor is not good enough. Remove the finger from the biometric sensor and follow the recommendations detailed in “Finger Placement Recommendation”...
- Page 444 MorphoAccess® SIGMA Series – Administration Guide Terminal User Interface Terminal in Low Consumption Mode When terminal is in idle mode, a video is played till configured video play duration. Once Video play duration is reached, terminal stops playing video and shifts to Low Consumption Mode indicated by LED blinking.
- Page 445 MorphoAccess® SIGMA Series – Administration Guide Terminal User Interface Anti-tamper alarm This signal is optionally emitted when the terminal has detected opening of the terminal (except lateral USB port cover), or separation from the wall support. Biometric Sensor backlight Status LED (On top of the terminal) On, Permanent Blue Buzzer Low pitched notes...
-
Page 446: Access Request Result
MorphoAccess® SIGMA Series – Administration Guide Terminal User Interface Access Request Result Identification or Authentication - Access granted The user is recognized and the access is allowed. Biometric Sensor backlight Not Significant Status LED (On top of the terminal) On, Permanent Blue Buzzer 1 second high pitched Notes Identification or Authentication - Access denied... -
Page 447: Enrolment
MorphoAccess® SIGMA Series – Administration Guide Terminal User Interface Finger removed too early The terminal emits this signal when the finger is removed before the end of biometric data acquisition (while the finger biometric data acquisition is still in progress). Biometric Sensor backlight Status LED (On top of the terminal) On, Permanent Blue... - Page 448 MorphoAccess® SIGMA Series – Administration Guide Terminal User Interface Current positioning - Acquisition complete (but not enrolment sequence) The current acquisition is complete and the user may remove their finger from the terminal. Biometric Sensor backlight Fixed Red Status LED (On top of the terminal) On, Permanent Blue Buzzer High 0.5 Sec Beep...
- Page 449 MorphoAccess® SIGMA Series – Administration Guide Terminal User Interface Enrolment complete The enrolment sequence has completed successfully. Depending on how long the biometric data registration process has taken, the terminal may emit the signal Enrolment complete – Registration of biometric data in process. Biometric Sensor backlight Fixed Red Status LED (On top of the terminal)
-
Page 450: Section 19 : Compatibility Accessories, Software Licenses And Software
MorphoAccess® SIGMA Series – Administration Guide Compatibility Accessories, Software Licenses and Software Applications Section 19 : Compatibility Accessories, Software Licenses and Software Applications – R 2014_0000002196-09 ORPHO OCUMENT EPRODUCTION AND ISCLOSURE ORBIDDEN May 2016... -
Page 451: Compatible Accessories & Software Licenses
MorphoAccess® SIGMA Series – Administration Guide Compatibility Accessories, Software Licenses and Software Applications Compatible Accessories & Software Licenses The following items can be ordered directly to Morpho or to an official distributor, so as to enjoy all the features of an administrator MorphoAccess® SIGMA Series terminal: ... -
Page 452: Compatible Software Applications
MorphoAccess® SIGMA Series – Administration Guide Compatibility Accessories, Software Licenses and Software Applications Compatible software applications MorphoAccess® SIGMA Series terminals are fully compatible with: the low level protocol using thrift commands, for more information refer to “Host System Interface Guide” ... -
Page 453: Section 20 : Recommendations
MorphoAccess® SIGMA Series – Administration Guide Finger Placement Recommendation Section 20 : Recommendations – R 2014_0000002196-09 ORPHO OCUMENT EPRODUCTION AND ISCLOSURE ORBIDDEN May 2016... -
Page 454: Warning
MorphoAccess® SIGMA Series – Administration Guide Finger Placement Recommendation Warning The manufacturer cannot be held responsible in case of non-compliance with the following recommendations or incorrect use of the terminal. General precautions Do not attempt to repair the MorphoAccess® SIGMA Series terminal as yourself. The manufacturer cannot be held responsible for any damage/accident that may result from attempts to repair components. -
Page 455: Sd Card
MorphoAccess® SIGMA Series – Administration Guide Finger Placement Recommendation SD card Even if the SD card is provided with the terminal, we advise an administrator to use Brand name card such as Verbatim. Use the class card type 10 for better performances. ... -
Page 456: Recommended Conditions For Face Detection
MorphoAccess® SIGMA Series – Administration Guide Finger Placement Recommendation Recommended Conditions for Face Detection User Face Position The user should face toward the terminal while identification/authentication The user should stand at the distance where terminal can recognize face (not too far or too close) ... -
Page 457: Annex 1 : Finger Placement Recommendation
MorphoAccess® SIGMA Series – Administration Guide Finger Placement Recommendation Annex 1 : Finger Placement Recommendation – R 2014_0000002196-09 ORPHO OCUMENT EPRODUCTION AND ISCLOSURE ORBIDDEN May 2016... - Page 458 MorphoAccess® SIGMA Series – Administration Guide Finger Placement Recommendation Most Useful Areas for Biometric Data The terminal is designed to capture the area containing the most useful biometric data. In fingerprints, this is usually at the center of the first phalanx. This is illustrated in the figure below: Area containing the maximum...
- Page 459 MorphoAccess® SIGMA Series – Administration Guide Finger Placement Recommendation Position of Finger Finger Height Figure 353: Finger Height Incorrect Position: Do not place the finger tip on the top of the fingertip guide. Do not place the finger tip on the surface of the sensor Correct Position: ...
- Page 460 MorphoAccess® SIGMA Series – Administration Guide Finger Placement Recommendation Finger Angle IDEAL POSITION Figure 354: Finger Angle Incorrect Position: Do not tilt the finger on right or left side of the sensor Correct Position: The finger must be parallel to sensor sides –...
- Page 461 MorphoAccess® SIGMA Series – Administration Guide Finger Placement Recommendation Finger Inclination IDEAL POSITION Figure 355: Finger Inclination Incorrect Position: Do not leave the finger in the air Do not bend finger upward or downward Correct Position: Finger must be parallel to the sensor surface –...
- Page 462 MorphoAccess® SIGMA Series – Administration Guide Finger Placement Recommendation Finger rotation IDEAL POSITION Figure 356: Finger Rotation Incorrect Position: Do not roll finger Correct Position: Finger must be parallel to the sensor surface – R 2014_0000002196-09 ORPHO OCUMENT EPRODUCTION AND ISCLOSURE ORBIDDEN...
- Page 463 MorphoAccess® SIGMA Series – Administration Guide Finger Placement Recommendation Finger Condition When finger biometric data acquisition is difficult, please follow the recommendations listed below: The finger is cold o Solution : warm up the finger The finger is wet o Solution : wipe the finger ...
-
Page 464: Annex 2 : Comparison Of Authentication Mode With Contactless Card
MorphoAccess® SIGMA Series – Administration Guide Comparison of Authentication mode with Contactless Card Annex 2 : Comparison of Authentication mode with Contactless Card – R 2014_0000002196-09 ORPHO OCUMENT EPRODUCTION AND ISCLOSURE ORBIDDEN May 2016... - Page 465 MorphoAccess® SIGMA Series – Administration Guide Comparison of Authentication mode with Contactless Card Contactless Modes Table Operation Actions Performed by Terminal Authentication with biometric Read ID on contactless card. templates in database Retrieve corresponding templates in database. Biometric authentication using...
- Page 466 MorphoAccess® SIGMA Series – Administration Guide Comparison of Authentication mode with Contactless Card Required Tags on Contactless Card Operation CARD Template Templat BIOPI MODE Authentication with templates database Authentication with templates on card Card mode authentication (ID_ONLY) Card mode authentication (PKS) Authentication with templates...
-
Page 467: Annex 3 : Bibliography
MorphoAccess® SIGMA Series – Administration Guide Bibliography Annex 3 : Bibliography – R 2014_0000002196-09 ORPHO OCUMENT EPRODUCTION AND ISCLOSURE ORBIDDEN May 2016... - Page 468 MorphoAccess® SIGMA Series – Administration Guide Bibliography How to get latest version of the documents The last version of the documents is available on a CD/ROM package from our factory, or can be downloaded from our web site at the address below: www.biometric-terminals.com (Login and password required).
- Page 469 MorphoAccess® SIGMA Series – Administration Guide Bibliography Documents concerning the MorphoAccess® terminal Document about installing the terminal MorphoAccess® SIGMA Series Installation Guide, ref. SSE-00000xxxxx This document describes terminal physical mounting procedure, electrical interfaces and connection procedures. This document is in English. Documents about administrating/using the terminal MorphoAccess®...
- Page 470 MorphoAccess® SIGMA Series – Administration Guide Bibliography Documents for Developer MorphoAccess® SIGMA Series Parameters Guide, ref. SSE-00000xxxxx This document contains the full description of all the configuration parameters for the terminal. This document is in English. MorphoAccess® SIGMA Series Host System Interface Specifications, ref.
- Page 471 MorphoAccess® SIGMA Series – Administration Guide Bibliography MorphoAccess® SIGMA Series Contactless Card Specifications, ref. SSE-00000xxxxx This document describes the contactless cards supported by a MorphoAccess® SIGMA Series terminal. It also describes the format of the data on the contactless card. MorphoAccess®...
-
Page 472: Annex 4 : Glossary, Acronyms And Abbreviation
MorphoAccess® SIGMA Series – Administration Guide Glossary, Acronyms and Abbreviation Annex 4 : Glossary, Acronyms and Abbreviation – R 2014_0000002196-09 ORPHO OCUMENT EPRODUCTION AND ISCLOSURE ORBIDDEN May 2016... - Page 473 MorphoAccess® SIGMA Series – Administration Guide Glossary, Acronyms and Abbreviation GLOSSARY Access Controller/Controller: This term is used for centralized access controller. Terminal communicates with controller for granting or denying access to the user. Terminal: This term is used for MorphoAccess® SIGMA Series terminal ...
- Page 474 MorphoAccess® SIGMA Series – Administration Guide Glossary, Acronyms and Abbreviation Template: A term used to describe the data that is stored during the enrolment process. The data is a mathematical representation of the ridge pattern of the enrolled finger scan. ...
- Page 475 MorphoAccess® SIGMA Series – Administration Guide Glossary, Acronyms and Abbreviation Acronyms and Abbreviations AUX: Auxiliary LCD: Liquid Crystal Display LED: Light Emitting Diode MAC (address): Media Access Control, a unique identifier assigned to network interfaces for communications on the physical network segment ...
-
Page 476: Annex 5 : Support
MorphoAccess® SIGMA Series – Administration Guide Support Annex 5 : Support – R 2014_0000002196-09 ORPHO OCUMENT EPRODUCTION AND ISCLOSURE ORBIDDEN May 2016... - Page 477 MorphoAccess® SIGMA Series – Administration Guide Support Troubleshooting Customer service Morpho SAV Terminaux Biométriques Boulevard Lénine - BP428 76805 Saint Etienne du Rouvray FRANCE Phone: +33 2 35 64 53 52 Hotline Morpho Support Terminaux Biométriques 18, Chaussée Jules César 95520 Osny FRANCE hotline.biometrics@morpho.com...
- Page 478 May 2016 Registered Office: Morpho 11, boulevard Gallieni 92130 Issy-les-Moulineaux – France www.morpho.com...
Need help?
Do you have a question about the MorphoAccess SIGMA Series and is the answer not in the manual?
Questions and answers