Advertisement
Quick Links
Advertisement

Related Manuals for Microcanner MC FLEX


Summary of Contents for Microcanner MC FLEX
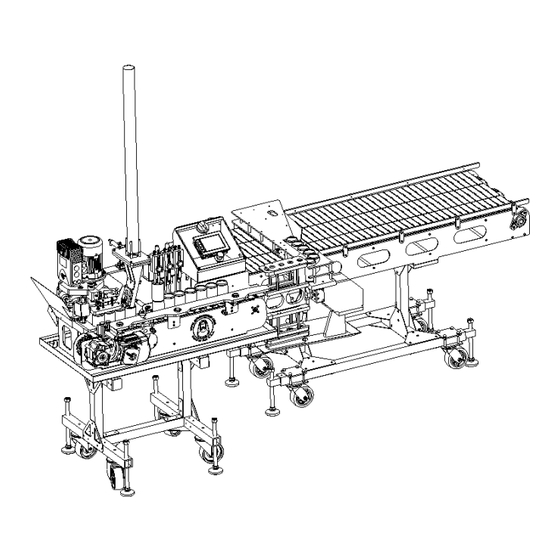
- Page 1 MC FLEX OPERATING INSTRUCTION MANUAL Version 1.0 Date 021618...
- Page 2 • It is recommended that you wear safety glasses anytime during operation of the MCFLEX canning system. • Never transport the MC FLEX while on its base. This is only for brewery mobility. The frame may fail under shock loads of the road.
-
Page 3: Table Of Contents
TABLE OF CONTENTS 1 INTRODUCTION 2 MACHINE REQUIREMENTS 3 GENERAL MACHINE SERVICE 4 START UP PROCEDURE 5 SEAM SETUP GUIDE 6 CHANGE OVER PROCEDURE 7 HMI OPERATIONS 8 TIPS FOR A SUCCESSFUL RUN MC FLEX (V1.0) Page 3 of 19... -
Page 4: Introduction
With proper operation and service your machine will offer you years of service. • The MC FLEX canning system is designed to run 8,12,16oz 202 series cans and Sleek Series cans with a few simple changeover steps. This machine can be special ordered to run Slim series cans. -
Page 5: General Machine Service
(http://www.mcmaster.com/#1242k11/=125v2xd) needs to be applied to all conveyor bearing zerc fittings. There are 4 conveyor bearings on the feeder line and 2 zercs on the main line at the end of the shafts. MC FLEX (V1.0) Page 5 of 19... - Page 6 To empty the catch bowl, push down on the grey thumb slide, then turn and pull down to take the bowl off. Empty the bowl of any water. MC FLEX (V1.0) Page 6 of 19...
-
Page 7: Start Up Procedure
4. Verify that the machine and feeder is setup to run desired size. 5. Verify that the cap shedder is at the appropriate running height. Run a can by hand under the shedder to verify the end catches and falls on top of the can. MC FLEX (V1.0) Page 7 of 19... - Page 8 Let sit for desired amount of time. f. Raise the fill station. g. Remove the 3 cans filled with sanitizer. h. Fully purge system with product. 8. Load ends into cap feeder station. MC FLEX (V1.0) Page 8 of 19...
-
Page 9: Seam Setup Guide
3. The 2 operation form tool is to the left of the chuck, and acts more as an anvil to flatten and seal the seam • Check out http://www.doubleseam.com/ for a wealth of great information. MC FLEX (V1.0) Page 9 of 19... - Page 10 Once in position, retighten the 2 set screws, and jam nuts. Take care to make sure the form tools do not move while retightening the clamp screws. MC FLEX (V1.0) Page 10 of 19...
- Page 11 Then put a wrench on the rod of the cylinder and turn the wrench clockwise to increase depth, and counter-clockwise to reduce depth. Retighten the jam nut once in desired position. MC FLEX (V1.0) Page 11 of 19...
- Page 12 10. Measure the seam and compare to seam dimensions on the F2 screen. If dimensions are out of tolerance adjust the tooling until within spec. 11. Do operation 1 until good, then proceed to operation 2, then check a sequential run. MC FLEX (V1.0) Page 12 of 19...
-
Page 13: Change Over Procedure
2. In manual mode place a can on the lift puck and using the F3 screen lift the can. Adjust the main bolt until the can has about 1/16” stroke to go (can in firm compression). 3. Retighten the jam nut MC FLEX (V1.0) Page 13 of 19... - Page 14 4. With a can and end directly under the cap in place sensor press and hold the teach button until it turns solid yellow. From time to time this sensor will need to be retaught its position. Repeat this step whenever necessary. MC FLEX (V1.0) Page 14 of 19...
-
Page 15: Hmi Operations
2. Pause (II): This button pauses the entire machine. It can be used as a brief stop of the machine. It should not be used to do machine MC FLEX (V1.0) Page 15 of 19... - Page 16 • This screen is to be used for the sanitation of the machine before and after running product through the machine, and also to set the float valves on the filling station if they ever need to be adjusted. MC FLEX (V1.0) Page 16 of 19...
- Page 17 V6 controls the valve farthest from you, or farthest right. • Each button push will add an additional 1/16 of a second. The number displayed is in milliseconds, where 1000=1 second. MC FLEX (V1.0) Page 17 of 19...
- Page 18 This button needs to be held to keep the form tooling in position. 5. Opp 2: Extends the 2 operation tooling. This button needs to be held to keep the form tooling in position. MC FLEX (V1.0) Page 18 of 19...
-
Page 19: Tips For A Successful Run
When starting out, only can the beer you know will sell in a couple of weeks. TRAINING VIDEO: https://drive.google.com/open?id=1oTe448yJyY566-DY9b98vYmMinVDEH1a MC FLEX (V1.0) Page 19 of 19...
Need help?
Do you have a question about the MC FLEX and is the answer not in the manual?
Questions and answers