Table of Contents
Advertisement
Advertisement
Table of Contents

Related Manuals for Garmin Alpha 200i


Summary of Contents for Garmin Alpha 200i
- Page 1 Alpha 200i with Training ® Owner’s Manual...
- Page 2 © 2020 Garmin Ltd. or its subsidiaries All rights reserved. Under the copyright laws, this manual may not be copied, in whole or in part, without the written consent of Garmin. Garmin reserves the right to change or improve its products and to make changes in the content of this manual without obligation to notify any person or organization of such changes or improvements.
- Page 3 Pairing a Smartphone with Your Device ........9 Connecting to a Wireless Network ..........9 Dog Collar Device Setup..........3 Garmin Explore ................. 10 Methods to Add a Dog Collar Device to a Handheld Device ..3 Syncing inReach Data..........10 Adding a Dog to the Alpha Handheld Using Wireless Pairing ..................
- Page 4 Navigating with the Bearing Pointer ........13 tempe ................... 18 Where To? Menu ..............13 Tips for Pairing ANT+ Accessories with Your Garmin Finding a Waypoint by Name ..........13 Device .................. 18 Navigating with Sight 'N Go ............13 TT 15 Battery Replacement Instructions ......
-
Page 5: Getting Started
Getting Started Alpha Device Keys WARNING See the Important Safety and Product Information guide in the product box for product warnings and other important information. Setting Up the Alpha System Before you can use the Alpha system, you must set up the devices. -
Page 6: Acquiring Satellite Signals
Press the battery into place. Turning On the Device Replace the battery cover, and turn the D-ring clockwise. • On the handheld device, press the power key. • On the dog collar device, hold the power key until the status Charging the Handheld Device LED flashes and the collar beeps. -
Page 7: Activating The Device
WARNING near the dog owner, who can share the dog wirelessly Before you can use the inReach features of your Alpha 200i (Sharing a Dog Wirelessly, page device, you must activate it... -
Page 8: Managing A Group
If another handheld device is tracking this dog, for best results, device with a third party antenna or an antenna not approved by remove the dog from the device, and use the track and control Garmin . Go to www.garmin.com/tracking-legal for details about ®... -
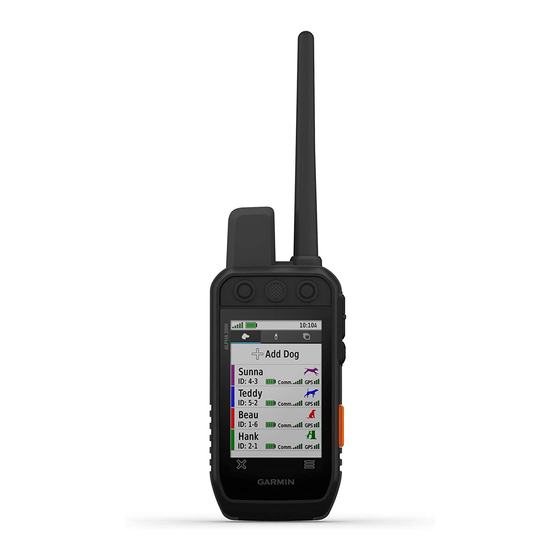
Page 9: Dog Tracking
If the strap is too long, cut off the excess, leaving at least 8 cm (3 in.) to spare. TIP: You can mark the hole used to fasten the buckle for future reference. Communication with the Collar You should keep an unobstructed line of sight between your handheld device and the dog collar device to produce the best communication signal. -
Page 10: Location Alerts
Select Setup > Map > Tracked Devices > Dog Tracks on Selecting and Installing the Contact Points Map. For best results, select the correct contact points based on your Select a time frame. dog's coat. Select the correct contact point length for your dog's coat Location Alerts type: Location alerts notify you when your dogs enter or exit a... - Page 11 Messages Press the training enter key to return to the previous screen. Your Alpha 200i device sends and receives text messages using Default Training Settings the Iridium satellite network. You can send messages to an SMS phone number, an email address, or another device that uses From the main menu, select Training Setup >...
- Page 12 Sharing Your MapShare Web Page ™ Message. You can enable MapShare at explore.garmin.com. Checking for Messages You can share a link to your MapShare web page with other When you send a message, your device listens for replies for 10 people.
-
Page 13: Testing The Device
Bluetooth technology. Some features require ® choose on the map. you to install the Garmin Explore app on your smartphone. Go to Requesting an inReach Weather Forecast garmin.com/apps for more information. For the best results, you should ensure your device has a clear BirdsEye imagery: Allows you to download BirdsEye Satellite view of the sky when you request an inReach weather forecast. -
Page 14: Contact Tracking
Adding a Contact Using Wireless Pairing Garmin Explore Before you can add a contact wirelessly, you should be near the The Garmin Explore website and mobile app allow you to plan contact's handheld device. trips and use cloud storage for your waypoints, routes, and Select Dog List >... -
Page 15: Hunting With The Alpha System
Tracking a Contact Review and edit location information (optional). Select Save. You can keep track of contacts' locations using the map. Select Active Hunt Metrics Finding Your Contact ID You can select Hunt from the main menu to view the active hunt metrics. - Page 16 Select the information bar at the top of the screen. Select the first point on the route. Select > OK. Select Use > Select Next Point. Select a point. Editing a Waypoint Repeat steps 3 through 5 to add all the points in the route. Before you can edit a waypoint, you must create a waypoint.
-
Page 17: Elevation Plot
Select a track. Calibrating the Compass Select NOTICE The beginning and the end of the track are marked by flags. Calibrate the electronic compass outdoors. To improve heading Select the information bar along the top of the screen. accuracy, do not stand near objects that influence magnetic fields, such as vehicles, buildings, and overhead power lines. -
Page 18: Customizing Your Device
Resetting the Elevation Plot Satellite Page Select Track Manager > My Track > > > Reset. The satellite page shows your current location, GPS accuracy, satellite locations, and signal strength. Trip Computer Changing the Satellite View The trip computer displays your current speed, average speed, By default, the satellite view is with North at the top. -
Page 19: Display Settings
Satellite: Sets the satellite system options and enables or Auto Zoom: Allows the map to zoom out automatically, so the disables the use of Wide Area Augmentation System/ selected devices are always displayed on the map. European Geostationary Navigation Overlay Service (WAAS/ Dog Tracks on Map: Determines how much of the track log for EGNOS) data. -
Page 20: Position Format Settings
Remote: Allows you to enable or disable the inReach remote function and device verification. NOTICE NOTE: You can pair a compatible Garmin device and use it Do not store the device where prolonged exposure to extreme to remotely send messages from your Alpha device. -
Page 21: Battery Information
Remove the battery. collar battery (Turning On Rescue Mode, page 11). Slide the card holder to the left and lift up. The device withstands pressure equivalent to a depth of 10 m. For more information, go to www.garmin.com/waterrating. Device Information... -
Page 22: Accessories And Replacement Parts
You must pair the tempe with your the Collar to a Computer, page 18). device to display temperature data from the tempe. The dog collar device turns on automatically. Tips for Pairing ANT+ Accessories with Your Garmin Select on the dog collar device. Device Open BaseCamp. - Page 23 • Before you pair the ANT+ accessory with your Garmin device, move 10 m (33 ft.) away from other ANT+ accessories. • Bring the Garmin device within range 3 m (10 ft.) of the ANT+ accessory. • After you pair the first time, your Garmin device automatically recognizes the ANT+ accessory each time it is activated.
-
Page 24: Data Field Options
Remove the screw securing the VHF antenna to the back plate. Verify the gasket is not damaged and is completely seated in the groove. Pull the length of the antenna from the antenna guide to remove the old antenna. Connect the battery connector and the power connector to the device. - Page 25 Ascent - Total: The total elevation distance ascended since the Laps: The number of laps completed for the current activity. last reset. Lap Speed: The average speed for the current lap. Automotive Turn: The direction of the next turn in the route. Last Lap Ascent: The vertical distance of ascent for the last You must be navigating for this data to appear.
- Page 26 left. R means turn right. You must be navigating for this data to appear. Velocity Made Good: The speed at which you are closing on a destination along a route. You must be navigating for this data to appear. Vertical Dist. to Dest.: The elevation distance between your current position and the final destination.
- Page 27 14 clock 14 acquiring 2 proximity 14 settings 7, 8, 14–16 fuse, changing 20 tones 15 device 15 alerts 10 Sight 'N Go 13 dog 15 sleep mode 5 Garmin Express location 6 smartphone 10 registering the device 16 altimeter, calibrating 13 applications 9 updating software 16 ANT+ sensors, pairing 18 pairing 9 geofences 6 applications 9, 10 software GPS 14...
- Page 28 July 2020 GUID-7048343C-0809-4926-9736-E4A24C88F1C4 v2...
Need help?
Do you have a question about the Alpha 200i and is the answer not in the manual?
Questions and answers