McIntosh C47 Owner's Manual
Hide thumbs
Also See for C47:
- Owner's manual (32 pages) ,
- Connection diagram (2 pages) ,
- Service manual (38 pages)

Related Manuals for McIntosh C47


Summary of Contents for McIntosh C47
- Page 1 McIntosh Laboratory, Inc. 2 Chambers Street Binghamton, New York 13903-2699 Phone: 607-723-3512 www.mcintoshlabs.com Audio Preamplifier Owner’s Manual...
- Page 2 is intended to alert the user to the presence of uninsulated “dan- alert the user to the presence of important operating and mainte- gerous voltage” within the product’s enclosure that may be of suf- nance (servicing) instructions in the literature accompanying the WARNING - TO REDUCE RISK OF ATTENTION: To prevent the risk of electric shock,...
-
Page 3: Table Of Contents
....18 _______________________________ Table of Contents ............3 General Information ..........4 Operation: Purchase Date: _______________________________ How to Operate the C47 ...........20 Connector and Cable Information ......4 Introduction ..............5 Trim Functions .............20-22 Dealer Name: ________________________________ ................23 Performance Features ..........5 Dimensions .............. -
Page 4: General Information
Ground RS232 Data Port Cable PIN 2: + Output of the C47 to be muted and the Front Panel Infor- mation Display will indicate an error message. PIN 3: - Output plug to a subminiature DB 9 connector:... -
Page 5: Introduction
The C47 has two precision Phono Preamplifier The Bass and Treble Trim Controls provide up to 12dB of boost or cut. The C47 remembers the Bass Power Transformer ensure stable noise free operation inputs have selectable loading. The circuits use the even though the power line varies. -
Page 6: Dimensions
Dimensions Dimensions The following dimensions can assist in determining the best location for your C47. There is additional information on the next page pertaining to installing the C47 into cabinets. Front View of the C47 " 44.4cm " 6" 13.7cm 15.2cm... -
Page 7: Installation
Installation Installation " 3/16 The C47 can be placed upright on a table or shelf, 43.7cm standing on its four feet. It also can be custom in- stalled in a piece of furniture or cabinet of your choice. The four feet may be removed from the bottom C47 Front Panel "... -
Page 8: Connections
C47 Remote Control HR085. With an external sensor connected to the C47, remote control operation of the system is possible from another room and/or when the C47 is located in a cabinet with the doors closed. The connection instructions below, together with the C47 Input/Output/Control Connection Diagrams located on the separate folded sheets “Mc1A/1B and... -
Page 9: Rear Panel Connections, Connecting Components .8-9
18. Connect the Audio Cables coming from the Turn- Data Control Connections: 26. Connect the C47 to a live AC Outlet using the sup- 9. Connect a Control Cable from the C47 DATA Note: If the Turntable has a Moving Magnet Car- tridge, connect the audio cables to the C47 Note: To have source components (e.g. -
Page 10: Hr085 Remote Control Push-Buttons
Press to change broadcast bands on a a video screen Tuner scans Up the dial to for the next selection Tuner scans Down the dial Note: Push-buttons whose function is not identified above are for use with other McIntosh Products. -
Page 11: How To Use The Hr085 Remote Control
How to use the HR085 Remote Control How to use the Remote Control of directly controlling the functions of contemporary via the Data Ports. Notes: 1. If at any time the C47 seems unresponsive to the HR085 Remote Control Commands, press DEVICE Push-button to select first. -
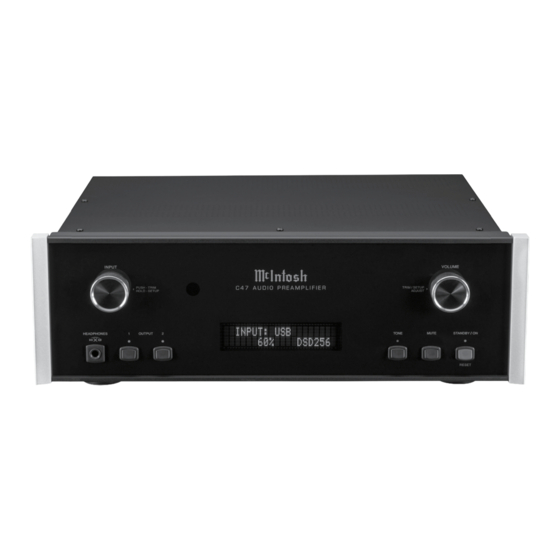
Page 12: Front Panel Displays, Controls, Push-Buttons And Jack
Headphones TONE Push-button with indicator, when de- OUTPUT 1 and 2 Push-buttons activated the audio signal bypasses the Trim with indicator, switches the C47 with indicators, switch the Tone Controls Preamplifier Outputs 1 and 2 the microprocessors... -
Page 13: Setup
The C47 provides the ability to switch unused IN- following steps. Default Settings Note: If the C47 is currently On, proceed to step 2. changed to match the name of the component con- additional information. nected to it or any other custom name desired (within the Remote Control to switch On the C47. - Page 14 Input Settings, con’t available characters for renaming the input include the 16. Rotate the INPUT Control until the character “A” following: ! < > * , / - _ 0 1 2 3 4 5 6 7 8 9 A B C D E SETUP: UNBAL 3 Control to change the character “A”...
- Page 15 Setup, con’t Output Settings SETUP: OUTPUT 2 RENAME: BAL 1 the C47 Output 1, Output 2 and Headphones function. Switched >MEDIA < OUTPUT 1 and 2: Figure 24 Figure 15 By defaut OUTPUT 1 and 2 are set to go On/Off by...
-
Page 16: Power Control Triggers 1 And 2
2 is selected. Both Triggers can also be reassigned control of the source component using the C47 sup- to a given Input or Inputs or go On/Off with the C47 Figure 32 plied HR085 Remote Control. By default, all of the The second example will use selection of Trigger 2 to power. -
Page 17: Passthru
C47 communicates (8 bit, no parity Decoder can “Passthru” the C47 and onto its associ- are used when the C47 is used in the same location as from 9,600 bits per second to 115,200 bits per second. - Page 18 IR Sensor Power Mode Factory Reset The C47 incorporates an Auto Off Feature, which If it becomes desirable to reset all the adjustable set- nals from the HR085 Remote Control, can be switched automatically places the preamplifier into the Power...
- Page 19 Notes...
-
Page 20: How To Operate The C47
Refer to Trim Functions figures 60, 61, 62 and 63. To switch OFF the C47 press different program sources, room the OFF Push-button on the Remote Control. - Page 21 C47 Volume Control when switching between different sources. Information Display. Refer to figure 70. The C47 allows the adjustment of levels for each of the level of the low frequencies. TREBLE 0 dB...
- Page 22 After approximately 6 seconds the Information ____ Figure 77 Figure 79 Notes: 1. Control of Meter Illumination via the C47 for recent McIntosh Power Amplifiers requires a power control cable connection between the Power Amplifier and C47. 2. Some A/V Processors will provide an On/Off...
- Page 23 Press the Front Panel TONE Push-button to activate 84 and 85. MC PHONO LOAD above the TONE Push-button will illuminate. To 400O The C47 will automatically turn On and switch to the Figure 84 MM PHONO LOAD turned-on. The Audio Preamplifier Front Panel Alpha- will extinguish.
-
Page 24: Optical And Digital Inputs
8.1 and Windows 10. It is also compatible with Ap- ing the INPUT UP / DOWN Push-button on the Figure 87 The C47 OUTPUT 1 and 2 along with the TONE Remote Control. When using a PC Computer with Windows, a spe- Front Panel Push-buttons are active when in the 2. - Page 25 How to Operate the C47, con’t Windows Sound Settings It is important to first install the downloaded software Product to the computer in the downloaded software package. 1. From the Windows Note: Before installing this software, please check to see...
- Page 26 There are many third party Applications (besides Ap- An example of just one of the available applications is INPUT: USB Reset of Microprocessors In the unlikely event the controls of the C47 stop func- 44.1kHz tioning, the microprocessors can be reset by perform- Figure 107...
- Page 27 How to Operate the C47, con’t ON Push-button. Note: This can be performed with the C47 On or in the Standby Mode.
-
Page 29: Photos
Photos... - Page 30 230 Volts, 50/60Hz at 30 watts 240 Volts, 50/60Hz at 30 watts Output Impedance 100 ohms Unbalanced Note: Refer to the rear panel of the C47 for the correct 200 ohms Balanced voltage. 100 ohms to 600 ohms Digital Input Sample Rates...
-
Page 31: Packing Instruction
Packing Instructions Packing Instructions In the event it is necessary to repack the equipment for Part Number Description shipment, the equipment must be packed exactly as shown below. It is very important that the four plas- 033837 End cap tic feet are attached to the bottom of the equipment. This will ensure the proper equipment location on the 033836 Inside carton only... - Page 32 McIntosh Laboratory, Inc. 2 Chambers Street Binghamton, NY 13903 www.mcintoshlabs.com The continuous improvement of its products is the policy of McIntosh Laboratory Incorporated who reserve the right to improve design without notice. Printed in the U.S.A. McIntosh Part No. 04157700...
- Page 33 HR085 Learning Guide McIntosh Laboratory, Inc. 2 Chambers Street Binghamton, New York 13903-2699 Phone: 607-723-3512 www.mcintoshlabs.com...
-
Page 34: Introduction
Refer to figure 1 and the instructions starting on page Remote Control from adversely affecting the opera- If at any time you have questions about your McIntosh 3 on “How to Learn and Store Commands”. tion of the units. Refer to figure 1 when performing product, contact your McIntosh Dealer who is familiar the steps below. -
Page 35: Preliminary Step
LEDS illuminating. 4. On the HR085, press and release the (Play) McIntosh HR085 and the other Brand Remote Con- the HR085 or the other brand remote control, to trol. Please make sure the Remote Controls have fresh illuminate as many of the four LEDs as possible. -
Page 36: Delete Learned Commands
The following HR085 information (and the table on (TV, CABLE or AUX). This will remove the the next page) is intended to be used by McIntosh 2. Press and hold the SELECT and number 1 Push- buttons simultaneously (for about 8 seconds) until stored commands for the device. - Page 37 MENU-(MENU) VOLUME UP (Note 1) VOLUME DOWN (Note 1) LEVEL UP LEVEL DOWN MUTE (Note MODE BLUE BTN (SETUP) AM-(REC MONITOR) RECORD POWER ON INPUT UP (Note INPUT DOWN (Note Note 1: Punch through to Mcintosh key definition and function...
- Page 38 McIntosh Laboratory, Inc. 2 Chambers Street Binghamton, NY 13903 www.mcintoshlabs.com The continuous improvement of its products is the policy of McIntosh Laboratory Incorporated who reserve the right to improve design without notice. Printed in the U.S.A. McIntosh Part No. 04161301...
- Page 39 Home Theater Pass Through allows for seamless integration into your ■ existing multi-channel home theater system. Incorporates classic McIntosh design cues, including a black glass front ■ panel, knobs, illuminated logo and brushed aluminum end caps. Left: C47 shown with optional MC152 amplifier, MCT450 SACD/CD Transport, XR50 speakers and MHP1000 headphones.
- Page 40 In order to ensure the highest level of customer satisfaction, “new” McIntosh products may only be purchased over-the-counter or delivered and installed by an Authorized McIntosh Dealer. McIntosh products that are purchased over the Internet, by phone or mail order are presumed to be “used” and do not qualify for any McIntosh Warranty. McIntosh does not warrant, in any way, products that are purchased from anyone who is not an Authorized Dealer or products that have had their serial number altered or defaced.
- Page 41 HOME ELECTRONICS THREE YEAR LIMITED WARRANTY elcome to the family of McIntosh McIntosh provides for your Product, and that no owners. This is the Warranty for your one, including your dealer, has any authority to new McIntosh Home Electronic Product either modify or expand upon this Warranty.
-
Page 42: Copyright 2015 © By Mcintosh Laboratory, Inc
Product for which the owner has neither completed and submitted the Warranty shall return the Product to its owner at the owner’s expense. In the alternative, McIntosh may at its sole Registration Card at the time of purchase nor included the original sales receipt with the Product when option either replace the Product without charge, or if replacement is not commercially practicable delivered for service, at McIntosh’s or its Authorized Service Agency’s then-current repair rates.
Need help?
Do you have a question about the C47 and is the answer not in the manual?
Questions and answers