
Subscribe to Our Youtube Channel
Related Manuals for Zodiac Uranus+


Summary of Contents for Zodiac Uranus+
- Page 1 Uranus+ Instructi ons for installati on and use English More documents on: www.zodiac-poolcare.com H0360700.D - 2016/02...
- Page 2 WARNINGS • Failure to respect the warnings may cause serious damage to the pool equipment or cause serious injury, even death. • The appliance is intended for a specifi c pool use and must not be used for any use other than that for which it was designed.
-
Page 3: Table Of Contents
It is prohibited to distribute or modify this document in any way without authorisati on from • Zodiac®. Zodiac® is constantly developing its products to improve their quality; therefore, the • informati on contained in this document may be modifi ed without noti ce. -
Page 4: ❶ Specifi Cati Ons
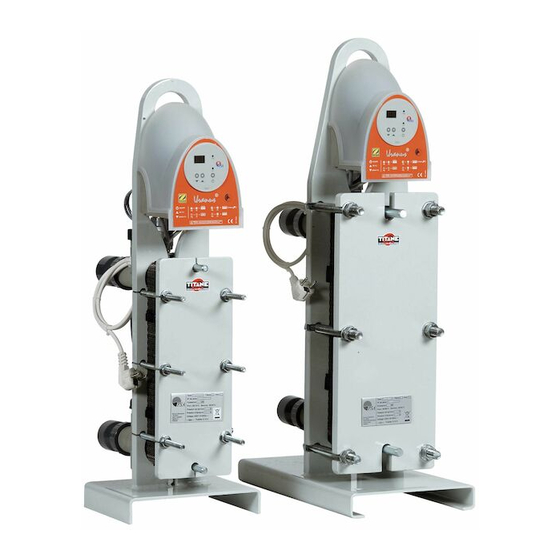
❶ Specifi cati ons 1.1 I Descripti on Ø50 connector to be glued + seal x2 Pin to be soldered Ø20/22 (UAP 35-75-120) - Ø26/28 (UAP 240) x2 1.2 I Technical specifi cati ons UAP / UAN Unit Primary °C Secondary °C Power... -
Page 5: I Dimensions And Marking
1.3 I Dimensions and marking UAP 35-70-120 UAP 240 H0360700.D - EN - 2016-02... - Page 6 UAN 35-70-120-240 255 mm 230 mm 380 mm 3/4’’ 34 mm 140 mm 45 mm 50 mm 41 mm 298 mm 255 mm 230 mm 380 mm 3/4’’ 53 mm 140 mm 45 mm 50 mm 41 mm 298 mm 255 mm 230 mm 380 mm...
-
Page 7: ❷ Installati On
❷ Installati on 2.1 I Selecti ng the locati on • The appliance must be installed in a technical room venti lated, dry and without stored pool treatment products. • Install the appliance as close as possible to the heati ng source (boiler, heat pump, geothermal, solar-powered heati ng, etc.), •... -
Page 8: I Electricity Supply Connecti Ons (Depending On The Models)
2.3 I Electricity supply connecti ons (depending on the models) Incorrectly ti ghtened terminals may cause the terminal unit to heat up and invalidate the • warranty. • Before any work inside the device, you must cut the electricity supply as there is a risk of electric shock which may cause material damage, serious injury or even death. -
Page 9: ❸ Use
❸ Use • Never run the circulati ng pump (depending on the model) without water. The circulati ng pump is very quiet when it starts up; you may not hear it running. 3.1 I Operati ng principle Your heat pump uses the calories (heat) from your home's heati ng to heat up your pool's water. The heat is exchanged through a series of pipes;... -
Page 10: I Operati Ng
3.3 I Operati ng • Never run the circulati ng pump (depending on the model) without water. The circulati ng pump is very quiet when it starts up; you may not hear it running. • Never run any water through the primary circuit without any water running through the secondary circuit. -
Page 11: I Additi Onal Functi Ons
3.4 I Additi onal functi ons 3.4.1 Setti ng the setpoint on UAP To display and modify the set point value, press 3.4.2 Operati on of the circulati ng pump on UAP 35-70-120 • When the circulati ng pump is powered up, the light comes on. - Page 12 3.4.5 Circulati ng pump operati ng modes on UAP 240 • Press to scroll through the operati ng modes: Mode Speed Lights Speed 1 Proporti onal pressure Speed 2 Speed 3 Speed 1 Constant pressure Speed 2 Speed 3 Speed 3 Constant speed Speed 2 Speed 1...
-
Page 13: ❹ Maintenance
❹ Maintenance 4.1 I Wintering • Wintering is vital to prevent the condenser breaking due to freezing. This is not covered by the warranty. • To avoid damaging the electrical box with condensati on, do not fully cover it. • Power down the regulati on, •... -
Page 14: ❺ Troubleshooti Ng
❺ Troubleshooti ng • Before you contact your reseller, please carry out these few simple checks using the following tables if a problem occurs. • If the problem conti nues contact your reseller. • : Acti ons reserved for a qualifi ed technician 5.1 I Device behaviour •... -
Page 15: I Replacing The Electrical Box Fuse (Depending On The Models)
5.3 I Replacing the electrical box fuse (depending on the models) • CAUTION! Disconnect power to the appliance! • Remove the cover, • Disconnect the regulator, • Remove the regulator cover, • Remove the protecti ve fuse (T3,15AH250V). 5.4 I Wiring diagrams power cable: 2L+E 10/16A 3G1 Regulati on thermostat with digital display Circulati ng pump motor... - Page 16 Votre revendeur Your retailer Modèle appareil Appliance model Numéro de série Serial number Trouvez plus d’informations et enregistrez votre produit sur More informations and register you product on www.zodiac-poolcare.com ZODIAC® is a registered trademark of Zodiac International, S.A.S.U., used under license.
Need help?
Do you have a question about the Uranus+ and is the answer not in the manual?
Questions and answers