
Subscribe to Our Youtube Channel
Related Manuals for inventum VR552


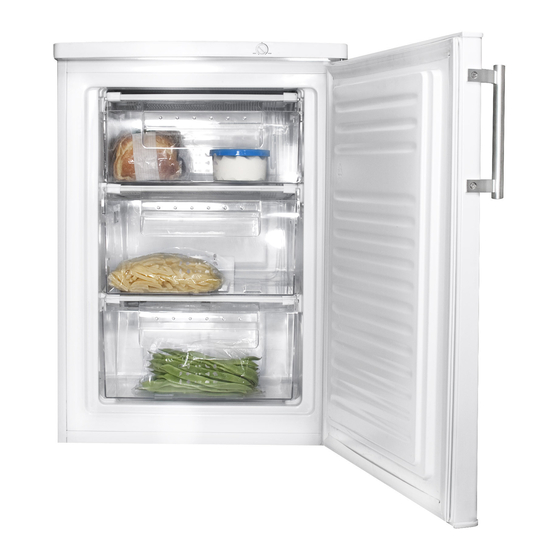
Summary of Contents for inventum VR552
- Page 1 FRIDGE vriezer VR552 & VR601 • gebruiksaanwijzing • instruction manual VR552-VR601-instructions-0115.indd 1 26-1-2015 13:56:10...
- Page 2 • VR552-VR601-instructions-0115.indd 2 26-1-2015 13:56:10...
-
Page 3: Table Of Contents
Defrosting page 16 Cleaning & maintenance page 16 Troubleshooting page 17 Reversing the door opening page 18 10. Removing the top panel page 20 Product fiche page 21 Guarantee & After sales service page 23 • VR552-VR601-instructions-0115.indd 3 26-1-2015 13:56:10... -
Page 4: Veiligheidsvoorschriften
In geen geval de stekker of Van 10°C tot 32°C het snoer zelf vervangen. Van 16°C tot 32°C • Het apparaat moet worden Van 18°C tot 38°C verplaatst en geïnstalleerd door Van 18°C tot 43°C • Nederlands VR552-VR601-instructions-0115.indd 4 26-1-2015 13:56:10... - Page 5 • Het apparaat uitsluitend binnenshuis gebruiken en opbergen. • Het netsnoer nooit scherp buigen of over hete delen laten lopen. • Verwijder de stekker altijd uit het Nederlands • VR552-VR601-instructions-0115.indd 5 26-1-2015 13:56:10...
-
Page 6: Omschrijving Van Het Apparaat
• Plaats nooit gevaarlijke, licht ontvlambare of explosieve stekker in het stopcontact. Het apparaat zal nu continue koelen stoffen zoals alcohol, aceton of benzine in de vriezer • Nederlands VR552-VR601-instructions-0115.indd 6 26-1-2015 13:56:11... -
Page 7: Tips
• Rijp of ijs zorgen ervoor dat het stroomverbruik toeneemt. Verwijder deze daarom regelmatig zodra ze 3 tot 5 mm dik zijn. • Een deurrubber die niet goed sluit kan het stroomverbruik verhogen. Laat het daarom op tijd en door een vakman vervangen. Nederlands • VR552-VR601-instructions-0115.indd 7 26-1-2015 13:56:11... -
Page 8: Storingen Zelf Oplossen
Verlichting brandt Lamp is defect Vervang de lamp niet volgens de instruc- ties Opmerking: het borrelen en het maken van expansiegeluiden in het koelcircuit is normaal. • Nederlands VR552-VR601-instructions-0115.indd 8 26-1-2015 13:56:11... -
Page 9: Draairichting Deur Wijzigen
• Voordat u het onderste scharnier weer plaatst, moet de pen van het scharnier worden verwijderd en moet de richting van het scharnier worden omgekeerd. Monteer het onderste scharnier op de linkerkant, met behulp van de twee schroeven. Nederlands • VR552-VR601-instructions-0115.indd 9 26-1-2015 13:56:13... - Page 10 • Zet de vriezer met behulp van de stelpootjes waterpas. • Laat de vriezer 2 à 3 uur rusten voordat u de stekker in het stopcontact doet. • Plaats de deur op het onderste scharnier en houd deze goed vast. • Nederlands VR552-VR601-instructions-0115.indd 10 26-1-2015 13:56:14...
-
Page 11: Bovenblad Verwijderen
• Verwijder de schroeven op het kunststof frame en het metalen scharnier van de deur. • Verwijder het scharnier en het kunststof frame. Houdt hierbij de deur stevig tegen de vriezer aan. • Plaats het metalen scharnier terug met de drie schroeven. Nederlands • VR552-VR601-instructions-0115.indd 11 26-1-2015 13:56:16... -
Page 12: Product Kaart
Netspanning [V] / netfrequentie [Hz] 220-240/ 50 220-240/ 50 Opmerking: Op het typeplaatje - welke op de achterkant van de koeler geplaatst is - vindt u de de technische gegevens van de koeler ook vermeldt. • Nederlands VR552-VR601-instructions-0115.indd 12 26-1-2015 13:56:16... -
Page 13: Safety Instructions
The fumes can create a • During installation, make sure the fire hazard or explosion. appliance does not damage the • Do not keep any bottles containing English • VR552-VR601-instructions-0115.indd 13 26-1-2015 13:56:16... - Page 14 • For your own safety, only use the accessories and spare parts from the manufacturer which are suitable for the appliance. • Never unplug it from the socket by pulling on the cable. Always ensure • English VR552-VR601-instructions-0115.indd 14 26-1-2015 13:56:16...
-
Page 15: Description Of The Appliance
The appliance now cools continuously until the set • Do not store glass bottles or containers with liquids in English • VR552-VR601-instructions-0115.indd 15 26-1-2015 13:56:16... -
Page 16: Tips
To restore efficiency, replace the gasket. • Keep the condensor on the rear wall always clean, free of dust or any impurities. • Always consider the instructions, otherwise the energyconsumption is substantially higher. • English VR552-VR601-instructions-0115.indd 16 26-1-2015 13:56:16... -
Page 17: Troubleshooting
The inside light is Lamp is Replace the bulb not working defective following the instructions Note: gurgling and hissing noises due to expansion in the refrigerant circuit are normal. English • VR552-VR601-instructions-0115.indd 17 26-1-2015 13:56:16... -
Page 18: Reversing The Door Opening
Remove the top hinge. • Before replacing the bottom hinge, remove the hinge pin and reverse the direction of the hinge. Reassemble the bottom hinge on the left hand side using the two screws. • English VR552-VR601-instructions-0115.indd 18 26-1-2015 13:56:19... - Page 19 • Refit the top panel using the screws. • Leave the appliance to stand for at least 3 hours before you insert the plug into the socket. • Lower the door onto the bottom hinge pin and hold it. English • VR552-VR601-instructions-0115.indd 19 26-1-2015 13:56:20...
-
Page 20: Removing The Top Panel
• Remove the screws on both the frame and the metal hinge. • Remove the hinge and the frame. Hold the door tight to the appliance. • Reassemble the metal hinge using the three screws. • English VR552-VR601-instructions-0115.indd 20 26-1-2015 13:56:21... -
Page 21: Product Fiche
Rated voltage [V] / frequency [Hz] 220-240/ 50 220-240/ 50 Note: On the rating label - which you can find at the back on the larder - you can also find the technical specificactions. English • VR552-VR601-instructions-0115.indd 21 26-1-2015 13:56:21... -
Page 22: Garantie & Service
3. Inventum kan u sneller en beter van dienst zijn wanneer u aan ons service adres: zich meldt bij ons servicecenter. -
Page 23: Guarantee & After Sales Service
From warranty and/or replacement are excluded: defects, loss and damage to the appliance due to an event that usually is • INVENTUM guarantees this product for a period of 2 years insured under the home contents insurance. starting from the date of purchase. The warranty covers... - Page 24 Apparaten B.V. Generatorstraat 17 3903 LH Veenendaal T +31 (0)900 -468 36 88 info@inventum.eu www.inventum.eu twitter.com/inventum1908 facebook.com/inventum1908 youtube.com/inventum1908 VR552-VR601/02.0115V Wijzigingen en drukfouten voorbehouden/ Änderungen und Druckfehler vorbehalten/ Sous réserve de modification / Modifications and printing errors reserved VR552-VR601-instructions-0115.indd 24 26-1-2015 13:56:22...
Need help?
Do you have a question about the VR552 and is the answer not in the manual?
Questions and answers