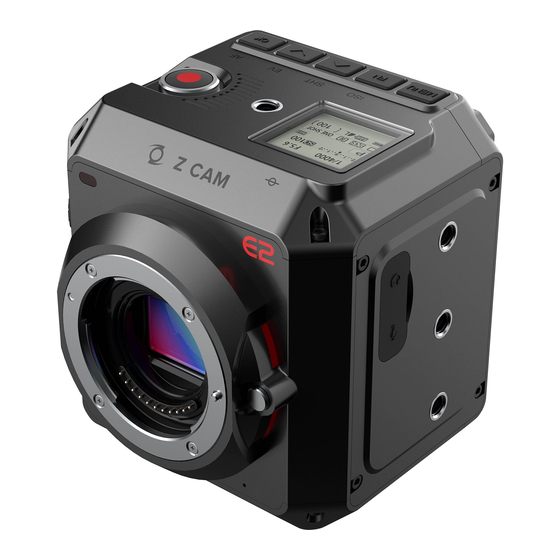
Z-CAM E2 Flagship Series User Manual

Z-CAM E2 Flagship Series User Manual

Hide thumbs Also See for E2 Flagship Series:

Advertisement

Z CAM
(Z CAM E2-S6 / E2-F6 / E2-F8 / E2-M4)
Product Name
Z CAM E2-S6
Z CAM E2-F6
Z CAM E2-F8
Z CAM E2-M4
User Manual v0.2
(Firmware 0.93)
E2 Flagship Series
Model Name
E1701
E1901
E1902
E1511

Advertisement

Table of Contents
loading

Summary of Contents for Z-CAM E2 Flagship Series

  • Page 1 Z CAM E2 Flagship Series (Z CAM E2-S6 / E2-F6 / E2-F8 / E2-M4) Product Name Model Name Z CAM E2-S6 E1701 Z CAM E2-F6 E1901 Z CAM E2-F8 E1902 Z CAM E2-M4 E1511 User Manual v0.2 (Firmware 0.93)
  • Page 2: Camera Introduction

    1.1. Camera Introduction 1.2. Lens Mount There are EF or PL lens mount options for Z CAM E2 flagship series, and MFT lens mount for Z CAM E2-S6 only. It’s interchangeable and you can purchase additional lens mount module to change it with professional tools (only for EF and PL lens mount) *.
  • Page 3: Lcd Screen

    Z CAM E2-M4 Z CAM E2-S6 EF / PL / MFT Z CAM E2-F6 EF / PL Z CAM E2-F8 EF / PL Replacement of lens mount is recommended to be operated by the manufacturer's designated agent/dealer or under professional guidance. The failure of the camera may be appearing due to changing the lens mount by the user.
  • Page 4  Preview Press FN + OK button when the camera is in Standby mode, it will switch to Preview mode. Press FN + OK again to come back to Standby mode.  Playback Short press Power button when the camera is in Standby / Preview mode, it will switch to Playback mode.
  • Page 5: Led Indicator Status

    1.4. LED Indicator Status  : Standby Green  : Recording.  Flashing Red (every 1s) : No memory card.  : Memory card is full. Flashing Red (every 0.5s)
  • Page 6  Flashing Red (every 0.2s) : Camera overheat.  : Critical error. Flashing Red (very fast)  : Low battery Flashing Red (fast & slow alternant) 1.5. Buttons  MENU button: Enter / exit the camera settings, or return to the previous menu in camera settings.
  • Page 7  Down / EV button: Down selection (or reduce value) in camera settings, or EV quick setting in standby / preview / recording mode by default.  OK button: Confirmation in camera settings, or to trigger the Auto Focus function in standby / preview / recording mode by default (with lens supports auto focus and the Auto Focus function on the camera is enabled).
  • Page 8 1.6. Interfaces  Auxiliary Power Output: DC 12V (2-pin LEMO socket), can supply power to other devices.  Remote: 2.5mm jack socket, compatible with Sony LANC protocol.  XLR audio-in: 5-pin LEMO port for dual-channel XLR microphone, require additional XLR audio connector (compatible with ARRI Mini XLR connector). ...
  • Page 9: Power Options

    * Due to the used enclosure material, the product shall only be connected to a USB Interface of version 3.0. The connection to so called power USB is prohibited.  3.5mm Audio-in: 3.5mm (TRS) jack socket for stereo audio input (Mic Level & Line Level supported), can connect to microphone or audio output device.
  • Page 10  V Mount Battery: Connect the camera to a V mount battery (with D-TAP port) with the power cable (D-TAP plug). 1.8. Storage The camera uses CFast 2.0 card or SSD as storage.  CFast card: The camera has 1 x internal CFast card slot, which supports CFast 2.0 standard.
  • Page 11  SSD: Connect the SSD through USB-C port on back of camera as storage. (Note: USB-C port must be in “Host” mode, see 2.9 Connect - USB) Please not that the SSD will NOT be recognized if there is CFast card in the camera. Attention: When using a CFast or SSD on Z CAM E2 for the first time, please format it before recording (2.10 System –...
  • Page 12: Camera Settings

    2. Camera Settings 2.1. Quick Setting When the camera is in Standby or Recording mode, some key settings can be quickly accessed by pressing the buttons on the camera.  ISO: Press FN to set ISO, then press Up / Down to adjust the value, and OK to confirm.
  • Page 13  EV: Press DOWN to set EV, then press Up / Down to adjust the value, and OK to confirm.  AF: When the lens supports auto focus and the Focus on the camera is set to AF, press OK to trigger the auto focus function.
  • Page 14  AEL (F1): Press F1 to lock the exposure, then press again to unlock  Load profile (F2) : Load the configuration saved in the camera. (2.10 System User Profile). Note: Quick setting function on the buttons can be changed in system setting (2.10 System –...
  • Page 15  Resolution Z CAM E2-M4 Resolution Details 4K DCI 4096 x 2160 4K UHD 3840 x 2160 4K DCI 2.4:1 4096 x 1728 4K UHD 2.4:1 3840 x 1620 4K 4:3 3696 x 2772 4K 6:5 3312 x 2760 Super 16 2704 x 1600 1920 x 1080 Z CAM E2-S6...
  • Page 16 4K 2.4:1 4096 x 1728 (2.4:1 aspect ratio) 4K UHD (Low 3840 x 2160, Low Noise Mode* Noise) 4K UHD 3840 x 2160 Super16 (16:9) 3392 x 1908 (16:9), S16 mode,suitable for S16 cinema camera lens. 1920 x 1080 Z CAM E2-F6 Resolution Details 6064 x 4040...
  • Page 17 8K UHD 7680 x 4320 6K DCI 6144 x 3240 6K UHD 5760 x 3240 4K UHD 3840 x 2160 Super16 (16:9) 3392 x 1908 (16:9), S16 mode, suitable for S16 cinema camera lens. * With lower noise in shadow area in this mode, but the jelly effect will be more obvious.
  • Page 18 You need to use “Z CAM™ Video Concatenator” to merge the video section before the post editing and processing. The download link as below: http://www.z-cam.com/cn/software-update/  Time Code: Set the time code, there are sub-items as below: Time Code Source: Internal / External ...
  • Page 19 NDF: Records the time code without drop frame.
Seconds and frames are separated by “:”. (Example: 00:00:00:00)  HDMI Display: On / Off. To enable / disable the display of time code through HDMI output. Playback FR: Default / VFR. When it’s set to Default, the frame rate of playback will ...
  • Page 20 VFR options are related to the Resolution and Project FPS in Record setting. And the maximum VFR is related to the exact camera model and resolution, see below: Z CAM E2-S6 Resolution Max Variable Frame Rate (fps) 6244 x 4148 6K DCI 6K UHD 6K 2.4:1...
  • Page 21 5K 4:3 5K 6:5 4K DCI 4K UHD 4K 2.4:1 Super16 (16:9) Z CAM E2-F8 Resolution Max Variable Frame Rate (fps) 8K 2.4:1 8K UHD 6K DCI 6K UHD 4K UHD Super16 (16:9) *Each resolution to the highest variable frame rate subject to H.265 encoder standard.
  • Page 22 4:2:0 4:2:0 Color Sampling Max frame rate @30fps for ZRAW encoder.  Bitrate: High / Middle / Low. Value of the bitrate varies in different resolution and frame rate. Bitrate(Mbps) Frame Rate Range Resolution (fps)* 8K(8K 2.4:1,8K UHD) FR <= 30 30 <...
  • Page 23 * If VFR is activated, the frame rate here refers to the frame rate in VFR, otherwise it refers to the frame rate in Movie Format. For ZRAW, the bitrate is 1.2Gbps.  Proxy Track: On / Off. To enable or disable proxy track recording during video recording, it will automatically “On”...
  • Page 24  Encoder: None / AAC / PCM  Input: Off / Microphone / XLR / Mic Left + XLR Right / Mic Right + XLR Left  Off:Turn off all audio input.  Microphone:The camera will use built-in microphone as audio input if there is no external microphone plugged into the 3.5mm audio-in port, and will use the external microphone if there is one plugged into the 3.5mm audio-in port.
  • Page 25 2.5. Exposure Flicker Reduction : 60Hz / 50Hz. It’s set to eliminate light flicking caused by the  frequency of the electricity, which is 60Hz in North America and some parts of Asia. (South Korea,Philippines,Taiwan of China), And 50Hz for China mainland, other countries and regions.
  • Page 26: White Balance

     eND: (to be added later).  Minimum ISO: This setting will only be enabled when ISO is set to “Auto”.  Max ISO: This setting will only be enabled when ISO is set to “Auto”.  Max Shutter Speed / Max Shutter Angle: This setting will be activated if Shutter Speed / Shutter Angle is in Auto mode.
  • Page 27  Mode: Auto / Incandescent / Cloudy / D10000 / Fluorescent / Daylight / Shade / Manual  Kelvin: When White Balance is set to “Auto” or “Preset Value”, it shows the current color temperature, when White Balance is set to “Manual”, it can be adjusted manually (2300 K ~ 7500 K) ...
  • Page 28 picture. If yes, the focus area will keep tracking the human body automatically.  Focus Area size: Small / Medium / Large. This will only be enabled when Focus Mode is set to “AF” and Focus Area is set to “Flexible Zone”. ...
  • Page 29 FLAT:It is 709 like curve with color information, and lower the contrast for easy post processing. HLG (Hybrid Log-Gamma): Encode the high-light and low-light parts of the HDR signal in two different ways in which the low-light part use the standard gamma curve and the high-light part use the logarithmic curve.
  • Page 30 cable, camera will generate the IP address. The default is: 10.98.32.1 Static: to set the IP address with configuration file. (Please contact Z CAM’s technical support if you want to set this) ETH. IP: IP address of the Ethernet when it’s connected. ...
  • Page 31  UART Role2:Controller / Pelco D / Multiplexer / Linear TC, can set separately: Controller: The camera will be controlled by UART command from a computer through COM port. Pelco D:The camera will control the external device like a gimbal through COM port with Pelco D protocol.
  • Page 32 monitor view -Opacity: 10~100, adjust the tool’s transparency on the display -Measure: Without LUT / With LUT, if it's set to ” With LUT”, then the scope tool will measure on the video with LUT, otherwise it will measure the video without LUT.
  • Page 33 Safe Area: On / Off, to turn on / off the safe area frame line on HDMI output.   Load LUT: None / Rec709 / V709 / LC709A / zRGB_AR / zRGB_AX2 / sRGB / sCINE_709 / Rec2020 / HLG / P3D60 / P3D65 / P3DCI / F709 / Import Note: 1.
  • Page 34  Record Indicator: On / Off. Set both front LED light and back LED light on / off  Restore Lens Pos.: Disable / Enable. When it’s set to “Enable”, the camera will remember the latest focusing position of the lens when the camera is shut down and restore it when it’s powered on again (with the same lens only).
  • Page 35: Video Recording

    or older) on root of storage (CFast card or external SSD), press OK when Version is selected and there will pop up a message to update the firmware. 3. Video Recording 3.1. Start / Stop Recording While camera is in Standby mode with CFast card inserted or SSD connected (and the storage is not full), press Record button to start recording, and press Record button again to stop recording.
  • Page 36 3) Go back to the standby status, an “VFR 120” icon would show up on LCD display, which means the camera is working with VFR in 120fps. Note: Different resolution and frame rate settings correspond to different variable frame rate range. Refer to 2.2 Record and 2.3 Video. 3.3.
  • Page 37: Video Playback

    4) Set other required video parameters, except the Variable Framerate can not be opened, the rest is the same as normal recording video. 5) Press Record button and the camera will start recording. Note that he recording time shown on the screen is the time-length of the video file that is being recorded, but not the time used for recording.
  • Page 38 Press OK button to play the selected footage. When the footage is being played, press the Up / Down button to speed up / slow down (2x faster / slower). Press OK button to pause, and press MENU button to stop it.
  • Page 39: Delete Video

    Please note if there is no storage in the camera, or there is storage in the camera but no video footage in the storage (or other files not supported), there will be alert message on the screen. Note:LUT is supported in playback 4.2.
  • Page 40 Power on the camera. In Connect setting, set USB to “Mass storage”. Connect the camera to a computer with an USB Type C cable, an “USB” icon would show up on LCD screen, then it’s connected successfully. PC will detect the camera and shows it as external storage device. You can access & manage the files in the CFast card inside the camera.
  • Page 41: Connect To The Camera

    5. Connect to the Camera 5.1. Wi-Fi Connection You can connect the camera to an external device (smart phone / tablet) or a computer (PC / Mac) through Wi-Fi with following steps: Install a Wi-Fi antenna to the Wi-Fi Antenna Port of the camera. In Connect –...
  • Page 42: Ethernet Connection

    5.2. Ethernet Connection There are 2 options to connect the camera to a computer through Ethernet: Direct Connection or Connection through a Router: Direct connection Follow the steps below to set up direct Ethernet connection between the camera and the computer: Set the Network-ETH.
  • Page 43 Connection through a Router You can set up an Ethernet connection between the camera and a computer through a router with following steps: Set the Network-ETH. Mode to “Router” in Connect-Network setting (2.10 Connect – Network-ETH. mode) Connect the camera to a router with an Ethernet cable, then connect the router to the computer with Ethernet cable or Wi-Fi.
  • Page 44 Check the Connect – Network setting, and there will show the IP address of the camera on ETH.IP item (e.g. 192.168.1.101) if the connection is OK. Open a browser on the PC / Mac, type in the address: http://192.168.1.101/www/index.html (192.168.1.101 is the IP address example on step 3 above, please use the actual IP address of the camera.
  • Page 45 6. Using Z Camera App Download and install the Z Camera App from App Store to your device (smart phone or tablet), then you can use this device to live view and control the camera including start / stop recording and most of the settings, with following steps ...
  • Page 46: Firmware Upgrade

    Download the latest version of firmware (E2_FX_FW_0.93.zip) for Z CAM E2 from Z CAM’s website: http://www.z-cam.com/e2/updates/ Put the firmware file to the root directory of the CFast card (DO NOT unzip it!). Insert the CFast card to the camera and power it on.
  • Page 47: Camera Maintenance

    If the version of the firmware file in CFast card is the same as or lower than the camera’s one (to refresh or downgrade the firmware), there will be no pop-up message when the camera is powered on. Go to Version in System setting, press OK button and you will see the pop-up message for firmware update.
  • Page 48  If water accidently invades the camera, please shut it down, take off the battery (if any) and the memory card, and make the camera dry within 24 hours.  As the camera’s heating range is 0-40°C, please do not place or use the camera in an environment where the temperature is lower than 0°C or higher than 40°C.
  • Page 49 Hereby, Shenzhen ImagineVision Technology Limited declares that this device is in compliance with the essential requirements and other relevant provisions of Directive 2014/53/EU. For the declaration of conformity, visit the Web site www.z-cam.com FCC statements: This device complies with part 15 of the FCC rules. Operation is subject to the following...

This manual is also suitable for:

E2-s6E2-f6E2-f8E2-m4E1701E1901 ... Show all

Table of Contents