Advertisement
Advertisement
Table of Contents

Subscribe to Our Youtube Channel
Related Manuals for Z-CAM K1 Pro


Summary of Contents for Z-CAM K1 Pro
- Page 1 CAM™ K1 Pro User Manual (Draft) v1.0...
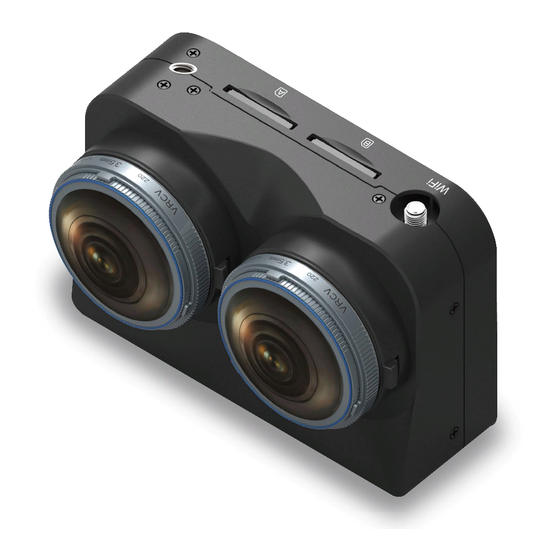
- Page 2 1. INTRODUCTION Camera Introduction Display Information...
-
Page 3: Camera Setup
LED Indicator Status • Green: When the camera is turned on with SD card in the slot. • Red: When the camera is turned on but no SD card in the slot or the SD. • Flashing Green: When the camera is recording, LED indicator will flash every second. •... - Page 4 2.4. Ethernet Connection (to Computer) With Ethernet connection to a computer (PC/Mac), you can control the camera and download files with Z CAM™ Controller (4. CAMERA CONTROL), and do live streaming with Z CAM™ WonderLive (8. LIVE STEAMING, PC only).
- Page 5 Router Mode 1) Change the “Network” setting to “Router” in Z CAM Controller (PC / Mac) or Z CAM VR app (mobile device). 2) Connect the camera to a router with an Ethernet cable, and then connect the router to the computer via Ethernet network or WiFi.
-
Page 6: Camera Reset
2) Connect the mobile device to the camera with correct WiFi ID (start with ZCAM-K1P), and default password is 12345678. You can change the password in the Z CAM VR app. * Please note that the camera has built-in antenna, and would suggest to have external antenna installed as to get better WiFi coverage and signal. -
Page 7: Before Recording
4.1. Connect to The Camera 1) Make sure the mobile device is connected to the camera through WiFi, please refer to 2.5 WiFi Connection. 2) Open the Z CAM VR app, and there will be a list of the camera connected. Select the... - Page 8 camera and it will come into the main screen. You can select one of the camera (lens) or All Cameras (both lenses) from the top menu. 4.2. SD Cards Format Tap the Setting button and select Format card, there will be a pop-up window to confirm the formatting.
-
Page 9: Timelapse (Video)
4.4. Timelapse (Video) 1) Swap to select Timelapse mode and tap Record button to start recording. 2) Timelapse interval can be modified in the Settings. -
Page 10: Camera Settings
5. CAMERA CONTROL (with Z CAM™ Controller) Z CAM™ Controller (PC & Mac) is a software that provides basic control features of all Z CAM™ VR cameras. Ethernet or WiFi connection is required for camera control. - Page 11 2) Select the camera you want to control, then double click the name of the camera or click “Choose” button, and you will come into the main window of Z CAM Controller. 5.2. SD Cards Format...
- Page 12 2) There will be a pop up window to confirm the formatting. Select OK if you want to format. Please note that all the data will be erased from the cards after formatting! 5.3. Recording 1) Click the Record button on the main window to start recording, there will be red dot flashing at the left-top of the live view window.
- Page 13 5.4. File Managers 1) Select Tools –> File Manager from the top menu. 2) Click the files you want to download from the File list, and click Download button. 3) Click Browse button to select the folder you want to save the files, then click Download button to download the files from the camera.
- Page 14 * We would suggest to keep Coordination of White Balance & Exposure as Enable as to get a good result of video footage. 6. LIVE STREAMING (with Z CAM™ WonderLive) Please check User Manual of Z CAM™ WonderLive for the detail of live streaming with the...
- Page 15 7. VIDEO STITCHING (with Z CAM™ WonderStitch) Please check User Manual of Z CAM™ WonderStitch for the detail of video stitching, which you can download from the website: http://www.z-cam.com/wonderstitch/ 8. FIRMWARE UPGRADE (with Z CAM™ Controller) Please follow the steps as below to upgrade the firmware of the camera: 1.
-
Page 16: Camera Maintenance
* Please note this document will be updated irregularly and make sure you have downloaded the latest version from the website: http://www.z-cam.com/180-vr-camera-k1-pro/ Disclaimer: All product features and technical specifications stated above are subjected to Z CAM™ ‘s sole interpretation and explanation.
Need help?
Do you have a question about the K1 Pro and is the answer not in the manual?
Questions and answers