Advertisement
Lumnia Slim - Instruction Manual
This manual is based on the latest information and is provided subject to
alteration. We reserve the right to change the construction and/or configuration
of the product and versions at any time without obligation.
All rights reserved. No part of this document may be reproduced, stored in a database or any other retrieval
system, or published, in any form or way, electronically, mechanically, digitally per photo print or microfilm
or any other way without written permission from the author.
Advertisement
Table of Contents

Related Manuals for Rentokil Lumnia Slim


Summary of Contents for Rentokil Lumnia Slim
- Page 1 Lumnia Slim - Instruction Manual This manual is based on the latest information and is provided subject to alteration. We reserve the right to change the construction and/or configuration of the product and versions at any time without obligation. All rights reserved. No part of this document may be reproduced, stored in a database or any other retrieval system, or published, in any form or way, electronically, mechanically, digitally per photo print or microfilm or any other way without written permission from the author.
- Page 2 Do not insert foreign objects into the unit. Only use the power cable supplied with the unit. Only use the extension cable supplied by Rentokil. Power cable assembly replacements must be ordered direct from Rentokil Initial to meet specific country requirements.
- Page 3 WARNUNG ADVERTENCIA Die Lampen in diesem Gerät erzeugen Las lámparas de esta unidad producen ultraviolettes (UV)-Licht, das Haut- oder ultravioleta (UV), puede Augenschäden verursachen kann, falls provocar daños en la piel o en los ojos man für längere Zeit direkt hineinblickt. si se mira en su dirección durante un Setzen Sie nur die richtigen UV-Lampen periodo prolongado.
- Page 4 AVERTISSEMENT WAARSCHUWING Les lampes de cet appareil produisent une De lampen in dit toestel produceren lumière ultraviolette (UV) susceptible de ultraviolet (UV) licht, dat huid- of oogschade causer des dommages à la peau ou aux kan veroorzaken indien men gedurende yeux en cas d’exposition prolongée.
- Page 5 UYARI ADVARSEL Üründeki lambalar ultraviyole (UV) Lampene denne enheten ışık üretmekte olup, bu türde ışık produserer ultrafiolett lys (UV-lys) doğrudan uzun süre bakıldığında cilt som kan forårsake skader på hud eller veya gözde hasara yol açabilir. Ürüne øyne hvis du ser på lyset for lenge yalnızca doğru türde UV lamba takın.
- Page 6 AVVERTENZA AVISO Le lampade in questa unità producono As lâmpadas desta unidade produzem luce ultravioletta (UV), che può causare luzes ultravioletas (UV) que podem danni alla pelle o agli occhi se vi si provocar danos oculares ou cutâneos è esposti direttamente per un lungo em caso de incidência direta durante um periodo.
-
Page 7: Equipment For Installation
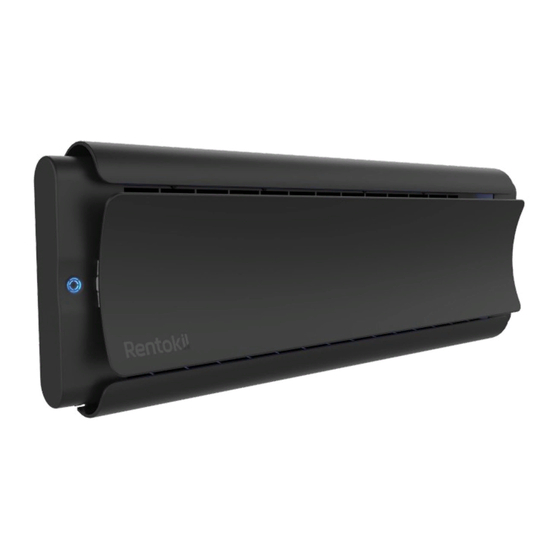
2. Introduction The Lumnia Slim unit uses one ultra-violet LED driven lamp that attracts flying insects, which are then captured on a replaceable glue board. The Slim product is a glue board monitoring device. While unpacking, check for any signs of shipment damage and, if found, notify both transporter and supplier in writing as soon as possible with full details of the damage that has occurred. - Page 8 4. Installation Instructions: Connecting the Power Source DANGER: You must NOT connect the unit into a lighting circuit. WARNING: You must connect the power cable to a standard power socket. DANGER: SERVICING OF DOUBLE-INSULATED APPLIANCES In a double-insulated appliance, two systems of insulation are provided instead of grounding. No grounding means is provided on a double-insulated appliance, nor should a means for grounding be added to the appliance.
-
Page 9: Positioning The Unit
5. Positioning the Unit Position the unit on a suitable wall at a minimum height of 1.86 metres to the bottom of the unit. Figure 1: Figure 1 illustrates the suggested mounting height. A ladder should not be required for servicing at this height. -
Page 10: Positioning Guide
For safety reasons, the unit contains a micro switch that disables the UV lamp if the front cover is removed. Figure 3 indicates the size and space considerations for mounting the product above furniture. 72 mm 553 mm Figure 3: DO NOT position the unit directly over areas where food is prepared, or where uncovered food is stored. -
Page 11: Installation Preparation
7. Installation Preparation Ø6mm 1.86 M 8. Fit & Removal of the Front Cover Click Fit: Line up the front cover so that both the left and right hinge plates sit to the right of the clasps on the unit. Slide cover to the left to fit into place. Remove: Lift the tab located on the left hinge plate and slide the cover to the right to remove. - Page 12 9. Removing and Replacing the UV - LED Lamp For lamp identification refer to reference number on Lamp. Only Lamps specified in Section 14 - Accessories and Spares to be used with this product. Do not touch LED when servicing, maintaining or cleaning the lamps.
- Page 13 10. Mounting Lumnia NOTE: Remove lamps before screwing SECURE WITH ALL 4 x SCREWS Tighten 11. Preparing the Glue Board Fold Flex Fold Flex Fold Flex Fold Flex Fold Flex Fold Flex Remove Liner Remove Liner Remove Liner...
- Page 14 12. Installing & Removing the Glue Board Installing glue board Removing glue Pull down bottom board cover Installed NOTE: Front cover can be either fitted or removed for servicing the glueboard. See Section 8 for details. 13. Adjusting the Light Output Figure 4 The front cover can be manually Figure 5...
-
Page 15: Accessories And Spares
The product described in this manual is subject to continuous development and improvement and Rentokil reserve the right to alter the specification or design without prior notice. Rentokil cannot accept any liability for any loss or damage arising from the use of any information contained within this manual, or from any incorrect use of the product described herein. -
Page 16: Troubleshooting
17..Troubleshooting See Section 5 for reference to illuminated icon. Problem Solution Icon is blue / lamp not illuminated. Check Lamp is fully inserted into Lamp connector on the left hand side. Icon is blue / lamp not illuminated. Check for LED lamp faults or damaged LED. Replace LED lamp. - Page 17 NOTES...
- Page 18 NOTES...
- Page 19 NOTES...
- Page 20 Rentokil reserve the right to alter the specification or design without prior notice. Rentokil cannot accept any liability for any loss or damage arising from the use of any information contained within this manual, or from any incorrect use of the product described herein.
Need help?
Do you have a question about the Lumnia Slim and is the answer not in the manual?
Questions and answers
Hi where can buy the replacement glue boards and replacement uv lamp for these lumnia units please Do you have a contact details where I can purchase these replacement parts for please? Many thanks Kind warm regards