Advertisement
Quick Links
Advertisement

Related Manuals for BUSH FURNITURE A186386C


Summary of Contents for BUSH FURNITURE A186386C
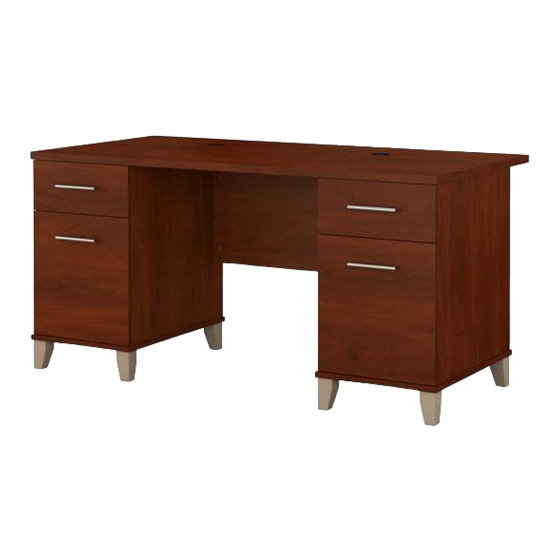
- Page 1 Pedestal Desk Lot Code # Part Number A186386C Keep manual for future reference.
- Page 2 Get Ready to Assemble A186386C...
-
Page 3: Important Safety Information
IMPORTANT SAFETY INFORMATION PLEASE READ WARNINGS Improper use can cause safety hazards, or damage to your furniture and household items. Warning Don't Why it's important Serious injury • • Assemble following all instructions Do not move unit when Improper assembly, may occur. - Page 4 Get to know your Boards A186386C Have an assembly question or need a replacement part? Just call 1-800-950-4782, we are here to help.
- Page 5 Get to know your Fasteners A186386C Fasteners are shown actual size. [ 32 ] H35251 #10 x 1/2" [ 30 ] H72988 KD Bolt [ 32 ] H28917 #6 x 1/2" [ 30 ] H71659 KD Cam [ 16 ] H26053 #10 x 1-1/4"...
- Page 6 Get to know your Hardware A186386C Hardware not to scale. 16" Slide Mount Q89897 [ 2 ] [ 4 ] H100445 DWR Bracket 16" Slide Mount [ 4 ] H100446 Q89897 [ 2 ] Drawer Bracket 16" Slide Runner H150001...
- Page 7 Get to know your Hardware A186386C Hardware not to scale. [ 4 ] Cover Cap [ 2 ] 5mm Hole Plug [ 8 ] Foot [ 2 ] Grommet Have an assembly question or need a replacement part? Just call...
- Page 8 STEP Seperate Slides A186386C Slides Must Be Separated Before Assembly. After Separated, Set Aside Until Needed for Assembly. Las diapositivas deben separarse antes del montaje. Después de la separación, déjelo a un lado hasta que sea necesario. Les glissières doivent être séparées avant l'assemblage.
- Page 9 STEP Assemble Drawer Fronts A186386C [ 4 ] H100445 [ 4 ] H100446 DWR Bracket Drawer Bracket [ 16 ] H35251 #10 x 1/2" H100446 Have an assembly question or need a replacement part? Just call 1-800-950-4782, we are here to help.
- Page 10 STEP Assemble Drawers A186386C [ 16 ] H26053 #10 x 1-1/4" H28917 [ 8 ] H28917 #6 x 1/2" [ 8 ] H101725 #6 x 1/2" H28917 H101725 H101725 Have an assembly question or need a replacement part? Just call...
- Page 11 STEP Assemble Drawers A186386C [ 12 ] H28917 16" Slide Runner #6 x 1/2" [ 4 ] H23480 #8-32 x 7/8" 16" Slide Runner H77351 [ 1 ] H150001 [ 2 ] Handle Bumper (4) per pack H23480 Have an assembly question or need a replacement part? Just call...
- Page 12 STEP Assemble Drawers A186386C [ 12 ] H101725 16" Slide Runner #6 x 1/2" [ 4 ] H23480 #8-32 x 7/8" H150001 [ 2 ] Handle H77351 [ 1 ] [ 4 ] H162488 File Extrusion Bumper (4) per pack 15-3/4"...
- Page 13 STEP Prepare Pedestal Sides A186386C 16" Slide Mount [ 3 ] H28917 #6 x 1/2" [ 3 ] H101725 #6 x 1/2" 16" Slide Mount [ 2 ] H72988 KD Bolt H28917 Have an assembly question or need a replacement part? Just call...
- Page 14 STEP Prepare Pedestal Sides A186386C 16" Slide Mount [ 3 ] H28917 #6 x 1/2" [ 3 ] H101725 #6 x 1/2" 16" Slide Mount [ 2 ] H72988 KD Bolt H28917 Have an assembly question or need a replacement part? Just call...
- Page 15 STEP Assemble Pedestal Base A186386C [ 4 ] [ 8 ] H35251 [ 5 ] H72988 #10 x 1/2" KD Bolt Foot [ 4 ] H143460 #12 x 4" Flip panel over Voltear el panel Retournez le panneau Have an assembly question or need a replacement part? Just call...
- Page 16 STEP Assemble Pedestal A186386C [ 4 ] H71659 190° KD Cam Minimum Have an assembly question or need a replacement part? Just call 1-800-950-4782, we are here to help.
- Page 17 STEP Assemble Pedestal A186386C [ 5 ] H71659 190° Minimum KD Cam Have an assembly question or need a replacement part? Just call 1-800-950-4782, we are here to help.
- Page 18 STEP Prepare Pedestal Sides A186386C [ 3 ] H28917 16" Slide Mount #6 x 1/2" [ 3 ] H101725 #6 x 1/2" 16" Slide Mount [ 2 ] H72988 KD Bolt H28917 Have an assembly question or need a replacement part? Just call...
- Page 19 STEP Prepare Pedestal Sides A186386C 16" Slide Mount [ 3 ] H28917 #6 x 1/2" [ 3 ] H101725 #6 x 1/2" 16" Slide Mount [ 2 ] H72988 KD Bolt H28917 Have an assembly question or need a replacement part? Just call...
- Page 20 STEP Assemble Pedestal Base A186386C [ 5 ] H72988 [ 8 ] H35251 [ 4 ] KD Bolt #10 x 1/2" Foot [ 4 ] H143460 #12 x 4" Flip panel over Voltear el panel Retournez le panneau Have an assembly question or need a replacement part? Just call...
- Page 21 STEP Assemble Pedestal A186386C [ 4 ] H71659 190° KD Cam Minimum Have an assembly question or need a replacement part? Just call 1-800-950-4782, we are here to help.
- Page 22 STEP Assemble Pedestal A186386C [ 5 ] H71659 190° KD Cam Minimum Have an assembly question or need a replacement part? Just call 1-800-950-4782, we are here to help.
- Page 23 STEP Prepare Pedestal Sides A186386C [ 2 ] [ 4 ] H72988 5mm Hole Plug KD Bolt 5mm Hole Plug Have an assembly question or need a replacement part? Just call 1-800-950-4782, we are here to help.
- Page 24 STEP Assemble Modesty Panel A186386C [ 4 ] H71659 190° Minimum KD Cam [ 4 ] Cover Cap Team Lift Finished view Have an assembly question or need a replacement part? Just call 1-800-950-4782, we are here to help.
- Page 25 STEP Prepare Work Surface A186386C [ 8 ] H72988 KD Bolt Have an assembly question or need a replacement part? Just call 1-800-950-4782, we are here to help.
- Page 26 STEP Assemble Work Surface A186386C [ 8 ] H71659 190° KD Cam Minimum Team Lift Have an assembly question or need a replacement part? Just call 1-800-950-4782, we are here to help.
- Page 27 STEP Insert Drawers and Grommets A186386C [ 2 ] Grommet Have an assembly question or need a replacement part? Just call 1-800-950-4782, we are here to help.
- Page 28 STEP Adjust Drawer Fronts A186386C DRAWER FRONT VIEW REQUIRED TOOL: PHILLIPS SCREWDRIVER HERRAMIENTA REQUERIDA: DESTORNILLADOR PHILLIPS OUTIL REQUIS: TOURNEVIS CRUCIFORME 1. LOOSEN SCREWS. 2. ADJUST DRAWER FRONTS. 3. TIGHTEN SCREWS. 1. Afloje los tornillos 2. Ajustar frentes de cajón 3. Apriete los tornillos 1.
- Page 29 STEP Maximum Loading And Cleaning A186386C Maximum Weight: 26 Lbs. Peso Máximo: 26 Libras Poids Maximum: 11.8 kilogramme Maximum Weight: 200 Lbs. Peso Máximo: 200 Libras Gently clean surfaces with a Poids Maximum: 90.9 kilogramme damp sponge eraser. Maximum Weight: 35 Lbs.
-
Page 30: Parts List
PARTS LIST A186386C WC81428C W187452 W176195 [ 1 ] [ 2 ] W187453 [ 2 ] W187368 [ 2 ] W187454 W187369 [ 2 ] [ 2 ] W187455 W87410 [ 2 ] [ 4 ] W187456 [ 1 ]... - Page 31 PARTS LIST A186386C WC81628 W186381 W176195 [ 1 ] [ 2 ] W186382 [ 2 ] W186355 [ 2 ] W186383 [ 2 ] W186356 [ 2 ] W186384 W87410 [ 2 ] [ 4 ] W186385 [ 1 ]...
- Page 32 PARTS LIST A186386C WC81828C W187464 [ 1 ] W176195 [ 2 ] W187465 W187404 [ 2 ] [ 2 ] W187466 [ 2 ] W187405 [ 2 ] W187467 [ 2 ] W87410 [ 4 ] W187468 [ 1 ]...
Need help?
Do you have a question about the A186386C and is the answer not in the manual?
Questions and answers