
Related Manuals for Motorola ML1000


Summary of Contents for Motorola ML1000
- Page 1 Motorola ML1000/ML1100 4-Line Wireless Phone System with Digital Receptionist and Digital Answering System Full User Guide For use with Motorola ML1000 Base Station and Motorola ML1100...
-
Page 2: Equipment Approval Information
Equipment Approval Information Your telephone equipment is approved for connection to the Public Switched Telephone Network and is in compliance with parts 15 and 68, FCC Rules and Regulations and the Technical Requirements for Telephone Terminal Equipment published by ACTA. Notification to the Local Telephone Company On the bottom of this equipment is a label indicating, among other information, the US number, Ringer Equivalence Number (REN), a product identifier in the format... - Page 3 interface may consist of any combination of devices subject only to the requirement that the sum of the RENs of all the devices not exceed five. Interference Information This device complies with Part 15 of the FCC Rules and the Industry Canada license-exempt RSS standard(s).
- Page 4 CAUTION: RISK OF ELECTRIC SHOCK DO NOT OPEN THE LIGHTNING CAUTION: THE EXCLAMATION FLASH AND TO REDUCE THE RISK OF POINT WITHIN THE ARROW HEAD ELECTRIC SHOCK, DO NOT TRIANGLE IS A WITHIN THE REMOVE COVER (OR BACK). WARNING SIGN WARNING: TRIANGLE IS A NO USER SERVICEABLE...
-
Page 5: Table Of Contents
9.15 Display Backlight..........................18 9.16 Home / Local Area Code ........................ 18 9.17 Manually Setting the Time and Date (Motorola ML1000 only) ........18 9.18 Reset Phone Settings ........................18 9.19 Restore Default Settings / Factory Reset ................18 10 Basic Operation ....................... 19 10.1... - Page 6 Night Time On/Off ..........................27 17.7 Setting Up Office Hours ......................... 28 17.8 Weekend Greeting ..........................28 Music on Hold (Motorola ML1000 only) ............28 18.1 Choosing the Music on Hold Source ..................28 18.2 Recording your Custom Music on Hold..................28 18.3...
-
Page 7: Introduction
Introduction Your Motorola multi-line / 4-line phone is a full-featured phone ideally suited for home or office use. It is designed to receive calls on up to four incoming telephone lines and serve up to 9 extensions. It also features a Digital Receptionist which will answer and redirect incoming calls to other extensions in the system. - Page 8 18. Use caution when installing or modifying telephone lines to prevent electrical shock and/ or fire. 19. Under the following conditions, unplug this product from the wall outlet and refer servicing to qualified service personnel: (a) The power supply cord or plug is damaged or frayed. (b) The product has been exposed to rain or water.
-
Page 9: Features
14. Do not store this product, or the battery(ies) provided with or identified for use with this product, in high-temperature areas. Batteries that are stored in a freezer or refrigerator for the purpose of extending shelf life should be protected from condensation during storage and defrosting. -
Page 10: Parts Checklist
Corded base • Corded handset • Corded handset cord • AC power adaptor • 4 x 2-line telephone cords (Motorola ML1000 only) • Wall mount telephone cord (Motorola ML1000 only) • Desk stand • 2.5mm to 3.5mm audio cable NOTE... -
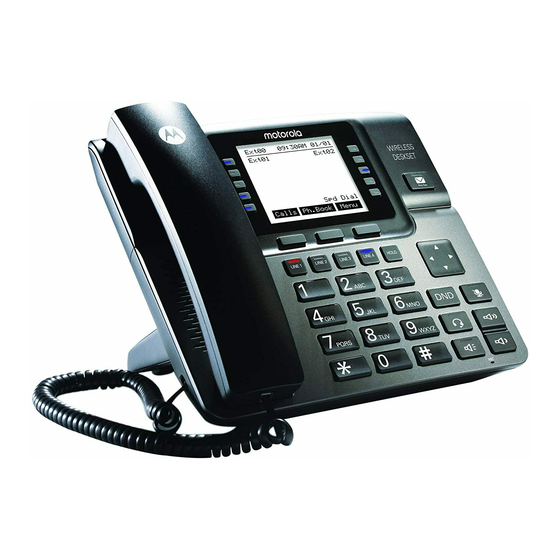
Page 11: Base Layout
Base Layout A Extension Status Indicators B Extension / Programmable Feature Keys C Answering System Button / Indicator D 3 Softkeys E Line Buttons / Indicators F Navigation Button G Do Not Disturb (DND) H Mute Headset Button / Indicator J Volume Up K Volume Down L Hold... -
Page 12: Connections And Setup
Installing the Phone The Motorola ML1000 may be connected to either two 2-line (RJ14C) wall jacks or four single line (RJ11C) wall jacks to accommodate all four lines. The Motorola ML1100 does not require connection to telephone lines. - Page 13 “Line 1+2” into the jack marked “LINE 1+2” on the back of the Motorola ML1000 base. Plug the other end of the line cord into the wall jack. Plug the other line cord into the jack marked “LINE 3+4” on the back of the phone, with the other end plugged into the wall jack as well.
-
Page 14: Connecting Your System
Connecting your System Once the Motorola ML1000 phone is set up and has dial tone, it is ready to be wirelessly connected to the other Motorola ML1100 phones and Motorola ML1200 handsets that will make up your system. Once you have unboxed and plugged in your Motorola ML1100 phone or Motorola ML1200 handset, they will be ready to register to the base. -
Page 15: Updating Your Extension List
In certain situations, such as if a phone is temporarily removed from the system or otherwise unreachable, may require a manual update to the extension list names. Menu On your Motorola ML1000 base, press softkey. 2. Using the navigation button, move the indicator to Add/Remove Phones. -
Page 16: Tone/Pulse Dial (Motorola Ml1000 Only)
5. Using of the navigation button, select the desired ring tone. Press Select softkey when you are finished. Tone/Pulse Dial (Motorola ML1000 only) Telephone lines in some areas may still require pulse dialing. Press Menu softkey while in idle mode. -
Page 17: Intercom Auto Answer
4. Choose either and press Select softkey. 9.10 Flash Time / Flash Length (Motorola ML1000 only) Flash softkey to activate custom calling services such as call waiting or call forwarding, which are available through your local phone company. Press Menu softkey while in idle mode. -
Page 18: Display Contrast
9.17 Manually Setting the Time and Date (Motorola ML1000 only) The time and date is automatically set when you receive your first Caller ID call. If you wish to manually set the time and date, follow the steps below. -
Page 19: Basic Operation
LINE button. 4. Wait for the dial tone, then dial a phone number. 5. Press h when finished. NOTE The Motorola multi-line phone system will work with most telecom headsets that have a 2.5mm headset jack. 10.4 Pre-Dialing With the phone idle and the handset in the cradle, manually enter the telephone number. -
Page 20: Switching Between The Speakerphone, Handset And Headset
4. Press LINE button corresponding to the line the incoming call is on. This will activate speakerphone mode. 5. When finished, hang up the handset, press s or h. 10.6 Switching Between the Speakerphone, Handset and Headset To switch to the speakerphone, press s. Replace the handset in the cradle. 2. -
Page 21: Releasing A Call From Hold
11.2 Releasing a Call from Hold Once a call is placed on hold, it can be released from hold on any phone on the system that has access to that phone line. Press the corresponding LINE button or HOLD to release that line’s call from hold. -
Page 22: Storing A Caller Id Record In The Phonebook
NOTE Each phone can store up to 99 caller ID records. When the memory is full, a new call record automatically replaces the oldest call in memory. 14.2 Storing a Caller ID Record in the Phonebook View Using of the navigation button, scroll to the desired call record. Press softkey. -
Page 23: Adding A New Phonebook Record
2. Using the navigation button, move the indicator to Answering System. Press Select softkey. 3. Select General MB: On/Off (ML1000) or Personal MB: On/Off (ML1100) option and press Select softkey. 4. Choose either On, Off, or Announce Only if you wish to have a greeting for callers but do not want them to be able to leave a message. -
Page 24: Deleting Messages
Answering System. Press Select softkey. General Greeting Personal Greeting Announce Only 3. Choose either (ML1000) or (ML1100) or Select greeting. Move the indicator to your choice and press softkey. Record Greeting Record Announce Only Select 4. Move the indicator to and press softkey. -
Page 25: Two-Way Recording
16.12 Accessing your Messages Remotely From a phone outside of your Motorola multi-line phone system, dial one of the phone numbers your system uses. When the Answering System answers, enter the number of the extension whose messages you wish to check. -
Page 26: 16.13 Answer Delay
Digital Receptionist (Motorola ML1000 only) You can set the Motorola ML1000 base phone to function as a Digital Receptionist. When the Digital Receptionist is on, the Motorola ML1000 automatically picks up a ringing line after the answer delay you programmed and plays the designated Digital Receptionist greeting. When a caller enters an extension number after hearing the greeting, the Digital Receptionist transfers the call to that extension. -
Page 27: Digital Receptionist Greetings
17.2 Digital Receptionist Greetings There are three different Digital Receptionist outgoing messages. They are Day Greeting, Night Greeting and Auxiliary Greeting. Day Greeting is played during the time you set as day time. Night Greeting is played during the time you set as night time. This can be helpful if you want different messages played during and after business hours. -
Page 28: Setting Up Office Hours
Music on Hold (Motorola ML1000 only) The Motorola multi-line phone system has a customizable Music On Hold feature that allows you to play the following options to held calls: • A beep to remind callers their call is still active. -
Page 29: Playing Your Custom Music On Hold Through The Auxiliary Port
18.3 Playing your Custom Music on Hold through the Auxiliary Port Plug a compatible device into the provided auxiliary cord and plug that cord into the headset port. Menu 2. Press softkey while in idle mode. 3. Using the navigation button, move the indicator to Music on Hold. -
Page 30: Troubleshooting
You may have too many extension phones on your line. Try unplugging some phones. • See solutions for ‘No dial tone’. • If the phone is an extension, make sure the phone is properly registered with the Motorola ML1000 base. You cannot be heard by the other party •... - Page 31 Make sure all extension phones are properly registered to the Motorola ML1000 base. • Make sure all extension phones are within range of the Motorola ML1000 base and there are no major sources of interference nearby. Causes of poor reception •...
-
Page 32: General Information
Consumer Products and Accessories Warranty Thank you for purchasing this Motorola branded product manufactured under license by Meizhou Guo Wei Electronics Co. Ltd., AD1 section, Economic Development Area, Dongsheng Industrial District, Meizhou, Guangdong, China. (“MZGW”) - Page 33 (c) use of the Products or Accessories for commercial purposes or subjecting the Product or Accessory to abnormal usage or conditions; or (d) other acts which are not the fault of Motorola or MZGW are excluded from coverage. Use of Non-Motorola branded Products and Accessories. Defects or damage that result from the use of Non-Motorola branded or certified Products or Accessories or other peripheral equipment are excluded from coverage.
- Page 34 Communication Services. Defects, damages, or the failure of Products or Accessories due to any communication service or signal you may subscribe to or use with the Products or Accessories is excluded from coverage. How to Obtain Warranty Service or Other Information? For service or information, please contact Customer Services on: 1-833-468-1468.
- Page 35 Manufactured, distributed or sold by Meizhou Guo Wei Electronics Co. LTD., official licensee for this product. MOTOROLA and the Stylized M Logo are trademarks or registered trademarks of Motorola Trademark Holdings, LLC. and are used under license. All other trademarks are the property of their respective owners.
Need help?
Do you have a question about the ML1000 and is the answer not in the manual?
Questions and answers
I use 3 lines but when I'm on a call and another call comes in It rings and interrupts the conversation. How i can fix this issue?
To fix call interruption issues on the Motorola ML1000 when receiving a second call, ensure the following:
1. The Do Not Disturb feature is not activated.
2. You do not have too many extension phones connected — try unplugging some.
3. The phone is properly registered with the Motorola ML1000 base if it's an extension.
4. The base station is not plugged into an outlet shared with another appliance, as this may cause static or call disruption.
These steps may help reduce or eliminate call interruptions.
This answer is automatically generated
WE ARE NOT ABLE TO DIAL ANY NUBER FROM OUT MOTOROLA ML1000 ITS SAYING
You may not be able to dial any number from your Motorola ML1000 due to the following reasons:
- The Do Not Disturb feature might be activated. Disable it and try again.
- There may be too many extension phones connected to your line. Try unplugging some.
- There might be no dial tone. Check the solutions for that issue.
- If using an extension phone, ensure it is properly registered with the Motorola ML1000 base.
Check these factors and adjust accordingly to resolve the issue.
This answer is automatically generated
My base phone is not working it rings but receiver has no audio?
How do I set up the daytime voicemail to come on when we are here but unable to answer a call?
how do I a create an additional message so patients can leave a voice mail during office hours?
I need to figure out how to setup our phone to forward calls after hours.