Table of Contents
Advertisement
Quick Links
THANK YOU
Thank you for purchasing the L5 Series AV Ready Lectern. Please read these instructions
thoroughly before installing or assembling this product.
PRODUCT FEATURES
• Quick and easy customization
• Open frame design makes easier work, with built-in power and provisions for cable management
and thermal management
• Design your own Presenter's Panel™ with the cutouts you need
• Available in 62 standard finishes and two styles for the finishing kit
• Optional Millwork kit lets your custom woodworker provide the finish
Instruction Sheet
L5 Series
AV Ready Lectern
- MODELS -
• 23" w / Presenters Panel
• 33" w / Presenters Panel
• 43" w / Presenters Panel
• 23" w / Flat Top
• 33" w / Flat Top
• 43" w / Flat Top
I-00815
Rev A
Advertisement
Table of Contents

Related Manuals for Middle Atlantic Products L5 Series

Summary of Contents for Middle Atlantic Products L5 Series
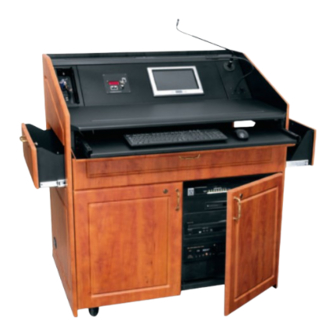
- Page 1 • 33” w / Flat Top • 43” w / Flat Top THANK YOU Thank you for purchasing the L5 Series AV Ready Lectern. Please read these instructions thoroughly before installing or assembling this product. PRODUCT FEATURES • Quick and easy customization •...
-
Page 2: Important Safety Instructions
IMPORTANT SAFETY INSTRUCTIONS • Read these instructions. WARNING: A WARNING ALERTS YOU TO A SITUATION THAT COULD RESULT IN SERIOUS PERSONAL INJURY • Keep these instructions. OR DEATH. • Heed all warnings. CAUTION: A CAUTION ALERTS YOU TO A SITUATION THAT MAY RESULT IN MINOR PERSONAL INJURY OR •... - Page 3 SUPPLIED COMPONENTS AND HARDWARE WITH FINISHING KIT (4x) (48x) (2x) (8x) (8x) Rubber #10 x 5/8 Self- #10 x 3/4 Spacer Bumper Pan Head Adhesive Pan Head Wood Screw Rubber Wood Screw Bumper Flat Frame Front Door(s) Front Doors 33” Frame (1) Wide, (1) Narrow 23”...
- Page 4 KEYBOARD DRAWER REMOVAL / INSTALLATION NOTE: To begin assembly, it is recommended to remove the keyboard drawer for ease of assembly. 1. Slide keyboard drawer out from unit and disengage from drawer slides. (FIGURE A) NOTE: Press tab to release drawer from drawer slides. (FIGURE A) 2.
- Page 5 DRAWER INSTALLATION (OPTIONAL) If installing the optional L5-SD7 Storage Drawer, follow instructions I-00817 supplied with the storage drawer. If installing the optional L5-DCD23 Document Camera Drawer, follow instructions I-00816 supplied with the document camera drawer. REAR RACKRAIL INSTALLATION (OPTIONAL) If installing the optional L5-RRKIT23 or L5-RRKIT3343 rackrail kit, follow instructions I-00823 supplied with the rackrail kit.
- Page 6 TURRET FRAME CONNECTIVITY PANEL REMOVAL / INSTALLATION (OPTIONAL) If desired, refer to the following steps to swap the location of the connectivity panel from the left to right side. 1. Remove (4x) screws securing connectivity panel to frame and remove from frame. (FIGURE C) Door Gap 2.
- Page 7 MIDDLE PANEL INSTALLATION MIDDLE PANEL INSTALLATION 1. Install Middle Panel (U) using (6x) #10 x 3/4 wood screws (E) and (6x) spacers (D). (FIGURE D) FIGURE D (43” Flat Frame Shown) Page 7...
- Page 8 KEYBOARD DRAWER PANEL INSTALLATION Hinges 1. Install keyboard drawer panel (S) on preinstalled hinges. (FIGURE E) F or G 2. Install handle (H or J) on keyboard drawer using (2x) Pan Head Screws (F or G). (FIGURE E) 3. Install (2x) self-adhesive rubber bumpers (A) for keyboard drawer panel over frame holes as shown.
- Page 9 FRONT DOOR INSTALLATION 1. Install front door(s) (L) on preinstalled hinges. (FIGURE H) F or G 2. Install handle(s) (H or J) on door(s) (L) using (2x) Pan Head Screws (F or G). (FIGURE H) 3) Install (4x) rubber bumpers (B) (2x) per door in locations shown.
-
Page 10: Worksurface Installation
WORKSURFACE INSTALLATION 1. Locate worksurface alignment slots. (FIGURE L) L5-FLATFR worksurface alignment slots (5x) Worksurface Worksurface mounting hole mounting hole L5-TURFR worksurface alignment slots (3x) Worksurface Worksurface mounting hole mounting hole FIGURE L Page 10... - Page 11 WORKSURFACE INSTALLATION (CONTINUED) 2. With keyboard shelf drawer open, align worksurface (K) on top of frame with standoffs facing down and contoured edge facing the keyboard side of lectern. (FIGURE M) 3. With sides of worksurface aligned to the sides of the frame, pull the worksurface forward approx. 2”...
-
Page 12: Side Panel Installation
SIDE PANEL INSTALLATION 1. Install side panels (M) by placing the (6x) preinstalled hooks on the panel into the (6x) slots on frame and press panels down to lock in place. (FIGURE N) 2. Install (2x) wood screws (C) to secure each panel to frame in locations shown. (FIGURE N) NOTE: If installing optional L5 flip-up side shelf, install per instructions I-00818 supplied with side shelf prior to installing side panels. - Page 13 TOP SHELF INSTALLATION (FLAT FRAME MODELS ONLY) 1. Install top shelf (P) to top shelf bracket (supplied with frame) using (6x) wood screws (C). (FIGURE P) Top Shelf Bracket FIGURE P 2. Install assembled top shelf to side panels using (4x) wood screws (C) (2x) per side. (FIGURE R) Assembled Top Shelf FIGURE R...
- Page 14 TOP SHELF INSTALLATION (TURRET FRAME MODELS ONLY) 1) Install top shelf (R) to frame using (6x) wood screws (C). (FIGURE S) (43” Turret Frame Shown) FIGURE S Page 14...
- Page 15 (OPTIONAL) STORAGE DRAWER PANEL INSTALLATION 1. With drawer removed, install storage drawer panel (U) using (6x) wood screws (C). (FIGURE T) 2. Install handle (H or J) using (2x) pan head screws (F or G). (FIGURE T) 3. Reinstall drawer in frame. When drawer is installed and side panel is in place, it may be necessary to adjust gap around drawer panel by slightly loosening wood screws (C).
- Page 16 (OPTIONAL) DOCUMENT CAMERA DRAWER PANEL INSTALLATION 1. With drawer removed, install camera drawer panel (V) using H or J (6x) wood screws. (FIGURE U) 2. Install handle (H or J) using (2x) pan head screws (F or G). (FIGURE U) F or G 3.
-
Page 17: Rear Panel Installation
REAR PANEL INSTALLATION 1. Install rear panel (N) by placing the preinstalled hooks into the slots on the frame and press down to lock in place. (FIGURE W) Hooks 2. Reinstall keyboard shelf to complete assembly. Slots FIGURE W (43” Flat Frame Shown) NOTE: For security, rear panel can be locked in place using presinstalled lock located on the top shelf of the turret frame models and located... -
Page 18: Cable Management
CABLE MANAGEMENT Middle Atlantic Products provides a clear path for all cable management within the lectern frame. Convenient Cable Cable Tray For Tie-Off Slots Connectivity Panel Cable Trough Cable Clips For Easy Integration TIP: Use Middle Atlantic Middle Atlantic LBP Lacer Bars... -
Page 19: Warranty
- customerservicecanada@middleatlantic.ca Factory Distribution USA: NJ - CA - IL Canada: ON - BC At Middle Atlantic Products we are always listening. Your comments are welcome. Middle Atlantic Products is an ISO 9001 and ISO 14001 Registered Company. Page 19...
Need help?
Do you have a question about the L5 Series and is the answer not in the manual?
Questions and answers