Advertisement
Quick Links
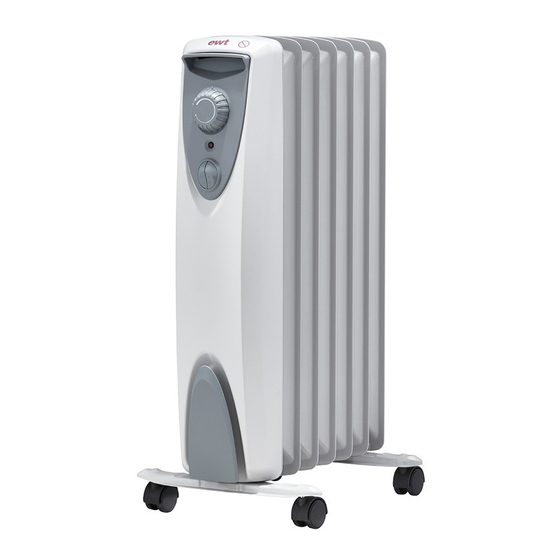
NOCeco10LCD
NOCeco10TLS, NOCeco10LCD, NOCeco15TLS, NOCeco15LCD, NOCeco20TLS,
NOCeco20LCD, NOCeco25TLS & NOCeco25LCD
UK
RU
LV
LT
EE
DE
SE
PL
FR
NL
HU
SI
CZ
IT
DA
FI
NO
ES
PT
SK
08/19834/6 Issue 6
Products comply with the European Safety Standard: EN 60335-2-30 and the European Standards for Electromagetic Compatibility (EMC)
EN55014-1 / A2: 2002 and EN55014-2:2003. These cover the essential requirements of EEC directives 2006/95/EC and 2004/108/EC.
Advertisement

Related Manuals for EWT NOCeco10TLS


Summary of Contents for EWT NOCeco10TLS
- Page 1 NOCeco10LCD NOCeco10TLS, NOCeco10LCD, NOCeco15TLS, NOCeco15LCD, NOCeco20TLS, NOCeco20LCD, NOCeco25TLS & NOCeco25LCD 08/19834/6 Issue 6 Products comply with the European Safety Standard: EN 60335-2-30 and the European Standards for Electromagetic Compatibility (EMC) EN55014-1 / A2: 2002 and EN55014-2:2003. These cover the essential requirements of EEC directives 2006/95/EC and 2004/108/EC.
- Page 2 • The power cord must not come into contact with hot appliance parts! NOCeco10TLS, NOCeco10LCD, Important Safety Advice • Never pull the plug out of the socket at the cord! NOCeco15TLS, NOCeco15LCD, •...
- Page 3 Óâàæàåìûé ïîëüçîâàòåëü! êðîâàòü), òàê êàê îí ìîæåò îïðîêèíóòüñÿ! 2. To set the minutes use the ‘-‘ & ‘+’ buttons. Confirm the minute digit by pressing Ïðåæäå ÷åì íà÷èíàòü ïîëüçîâàòüñÿ ïðèáîðîì, ïîæàëóéñòà, âíèìàòåëüíî • Íèêîãäà íå ðàçìåùàòü ïðèáîð íåïîñðåäñòâåííî ïîä ñòåííîé ðîçåòêîé. ‘enTeR’.
- Page 4 Tîkla kabelis Ïoti cienîtais pircçjs, ÍÀÑÒÐÎÉÊÀ ÂÐÅÌÅÍÈ ÂÊËÞ×ÅÍÈß “P1 ON”: 1. Íàñòðîéòå çíà÷åíèå ÷àñà ñ ïîìîùüþ êíîïîê “-” è “+” . Íàæìèòå “ENTER” Lûdzu, izlasiet pirms ekspluatâcijas uzmanîgi tâlâk aprakstîtos norâdîjumus. Tie • Lûdzu, izmantojiet tikai maksimâlai jaudai atbilstoðus, pârbaudîtus savienojoðos äëÿ...
- Page 5 Piezîme: Minûtes var uzstâdît tikai pa 10 minûðu intervâlu programmâ ‘MODE’ • Niekada netraukite jungiklio iš rozetës, laikydami uþ kabelio! Gerbiamas kliente, (REÞÎMS). Prieš eksploatavimà, prašau, ádëmiai perskaitykiti šiuos nurodymus. Jie suteikia • Niekada nejudinkite prietaiso, traukdami uþ kabelio arba nenaudokite kabelio P1 IZSLÇGŠANAS LAIKA UZSTÂDΊANA: svarbià...
- Page 6 P1 “OFF” (IŠJUNGIMO) LAIKO NUSTATYMAS: Lugupeetud klient! • Võrgukaabel ei tohi kokku puutuda seadme kuumade osadega. 3. Spauskite “-” ir “+” klavišus ir nustatysite valandas. Spauskite ENTER ir patvirtinsite • Ärge kunagi tõmmake pistikut kaablist, kui Te soovite seda pistikupesast välja võtta! Enne kasutamist lugege kasutusjuhend hoolikalt läbi.
- Page 7 (10) (11) Programmide P2, P3 ja P4 seadmiseks korrake juhiseid 1 kuni 4. Pärast programmi P4 Sehr geehrter Kunde, • Gerät nicht auf instabile Flächen (z.B. einem Bett) stellen, da hier ein Umkippen VÄLJALÜLITUMISAJA määramist väljute automaatselt programmeerimiskuvast ning bitte lesen Sie folgende hinweise vor Inbetriebnahme aufmerksam durch. möglich ist! ekraanile kuvatakse esialgne ekraanikuva.
- Page 8 (12) (13) 3. Nachdem “enTeR” gedrückt wurde, blinken die Minuten. Um die Minuten Bästa kund! • Se till att ingen kan snubbla över nätsladden så att apparaten härigenom kan einzustellen, die Tasten “-” und “+” verwenden. Die Minutenzahl durch Drücken Läs igenom anvisningen noggrant innan du tar apparaten i bruk.
- Page 9 (14) (15) TIDSInSTäLLnIng FÖR AvAKTIveRIng Av P1: Drogi klienci, Lokalizacja 3. Använd knapparna “-” och “+” för att ställa in timmen. Bekräfta vald timme genom przed rozruchem proszę zapoznać się z poniższymi wskazówkami. Stanowią • Odległość między urządzeniem i palnymi przedmiotami (np. zasłonami), ścianami att trycka på...
- Page 10 (16) (17) ustawianie aktualnej godziny Cher client, Lieu d’installation 1. Wcisnąć jeden raz przycisk ‘PROGRAM’ W lewym górnym rogu wyświetlacza veuillez veuillez lire attentivement les consignes suivantes avant la mise en • L’écartement entre l’appareil et des objets inflammables (p.ex. les rideaux), les service.
- Page 11 (18) (19) Installatie 3. Le chiffre des minutes se met ensuite à clignoter. Pour régler les minutes, utiliser Geachte klant, les boutons « - » et « + ». Appuyer sur enTeR pour enregistrer les minutes. Wij verzoeken u om de onderstaande informatie aandachtig door te lezen •...
- Page 12 (20) (21) Igen tisztelt Ügyfelünk! 2. De uren knipperen. Gebruik de toetsen ‘-‘ & ‘+’ om de uren in te stellen. Bevestig kennisgeving, worden onderworpen aan constructie- of ontwerpwijzigingen. Hálózati kábel kérjük, az üzembe helyezés előtt alaposan olvassa végig az alábbi het instellen van de uren door te drukken op ‘enTeR’.
- Page 13 (22) (23) Spoštovani kupci, Priključni kabel Most kezdjük meg a programok beállítását a P1 BE-vel kezdődően. prosimo, da pred začetkom obratovanja naprave pozorno preberete sledeča a p1 BE idejének beállítása: • Uporabljajte samo preskušene podaljševalne kable, ki ustrezajo sprejemni navodila. Le-ta vsebujejo pomembne informacije za vašo varnost in uporabo 1.
- Page 14 (24) (25) Opomba: Minute je možno nastavljati v 10 minutnih blokih v programu “moDe”. Vážený zákazník, Síťový kabel NaSTaViTEV ČaSa izklOpa p1 ON : před uvedením přístroje do provozu si pozorně přečtěte následující • Používejte pouze odzkoušené prodlužovací kabely, které odpovídají příkonu 3.
- Page 15 (26) (27) Luogo di installazione 2. Nastavte minuty pomocí tlačítek - a +. Nastavení minut potvrďte stisknutím Cari clienti, tlačítka enTeR. vi preghiamo di leggere attentamente le seguenti avvertenze prima di mettere • La distanza fra l’apparecchio ed oggetti infiammabili (ad es. tende), pareti o altri in funzione l’apparecchio.
- Page 16 (28) (29) 2. La cifra dell’ora lampeggerà. Per regolare l’ora utilizzare i tasti “-” e “+”. Vážený zákazník, Sieťový kábel Per confermare la cifra dell’ora, premere “enTeR”. pred uvedením do prevádzky si pozorne prečítajte nasledujúce pokyny. • Používajte iba príkonu prístroja zodpovedajúce, odskúšané predlžovanie 3.
- Page 17 (30) (31) 2. Minúty nastavíte pomocou tlačidiel ‘-‘ a ‘+’. Nastavené číslo pre minúty potvrdíte Kære kunde, netledning tlačidlom ‘enTeR’. Læs følgende oplysninger omhyggeligt før anvendelse af apparatet første • Brug kun en godkendt forlængerledning, som passer til apparatets Poznámka: Minúty je v programovom režime možné nastaviť iba v 10 minútových gang af hensyn til din egen sikkerhed og for at sikre korrekt brug.
- Page 18 (32) (33) verkkojohto InDSTILLIng AF P1 on TIDSPunKT (aktiveringstidspunkt): Hyvä asiakas 1. Timen indstilles vha. knapperne ‘-’ & ‘+’. Timecifferet bekræftes ved tryk på Lue huolella seuraavat tiedot ennen kuin käytät laitetta ensimmäisen kerran. • Laitteessa saa käyttää vain hyväksyttyä jatkojohtoa, joka vastaa laitteen näin takaat oman turvallisuutesi ja varmistat, että...
- Page 19 (34) (35) Kjære kunde, Strømledning P1 KäynnISTySAjAn ASeTTAmInen: 1. Aseta tunti painikkeilla - ja +. Vahvista numero painamalla enTeR. vennligst les følgende informasjon omhyggelig før bruk av apparatet for • Bruk kun en godkjent skjøteledning som egner seg til apparatets nominelle første gang, sikkerhets skyld og for å...
- Page 20 (36) (37) Ubicación InnSTILLIng Av P1 PÅ-TID: Estimado cliente: 1. For å stille inn timen, bruk knappene “-” og “+”. Bekreft timesifferet ved lea la siguiente información detenidamente antes de utilizar el aparato por • Coloque el aparato a una distancia mínima de 50 cm de cualquier objeto inflamable, å...
- Page 21 (38) (39) • A eliminação dos materiais de embalagem deverá ser efectuada correctamente! Os 3. Una vez ‘enTeR’ y empezarán a parpadear los minutos. Para ajustar los minutos Prezado Cliente, sacos de plástico devem ser mantidos afastados das crianças! utilice los botones ‘-’ & ‘+’. Para confirmar el dígito de los minutos pulse ‘enTeR’. Leia atentamente as seguintes informações antes de utilizar o aparelho pela 4.
- Page 22 (40) De - garantie Die nachstehenden Ausführungen über Umfang der Garantie, Garantiefristen und die Anmeldung von Garantieansprüchen gelten ausschließlich für die Bundesrepublik eutschland. Wir räumen dem Käufer nach seiner Wahl zusätzlich zu den ihm gegen den Verkäufer ausstehenden gesetzlichen Gewährleistungsansprüchen einen Anspruch nach Maßgabe 2.
- Page 23 Glen Dimplex Deutschland Gmbh BLUEPOINT Service Sagl, via delle Rose 7, ZI Petite Montagne Sud B.V. – Netherlands Via Cantonale 14, ewt-Kundendienst 24040 Iallio (BG) 12 rue des Cévennes Antennestraat 84, C.P. 46, +49 (911) 1805 / 398 346 035-201042...
Need help?
Do you have a question about the NOCeco10TLS and is the answer not in the manual?
Questions and answers