Table of Contents
Advertisement
Advertisement
Table of Contents

Related Manuals for Kantronics KPC-9612


Summary of Contents for Kantronics KPC-9612
- Page 1 KPC-9612 Getting Started and Reference Manual...
-
Page 2: Table Of Contents
Power Cable ............6 KPC-9612 to Computer Cable ......6 Initializing the KPC-9612 ........7 Your First Connect ..........7 KPC-9612 to 1200 baud Radio Cable ....8 Adjusting Receive Volume ........8 Adjusting Transmit Drive Level ......9 Wiring Diagrams ..........10 KPC-9612 to 9600 baud Radio Cable .... - Page 3 KPC-9612 Version 5.2 July 19, 1994 Assembly and Disassembly of the KPC-9612 ..60 Hard Reset ............60 Calibration/Equalization ........61 1200 baud adjustment ........61 9600 Baud Calibration ........61 KPC-9612 Jumpers ............ 63 Connector Configuration ..........64 1200 baud radio port (DB-9) ......64 Serial port (DB-25) ..........
-
Page 4: Who Should Read This Manual
The Getting Started portion of this manual is intended as a quick reference guide to assist new users. NOTE: The radio port wiring on the KPC-9612 is slightly different from other Kantronics TNCs as a result of added control signal capabilities. All users should review this Information before connect- ing the KPC-9612 to a radio. -
Page 5: About Your Kpc-9612
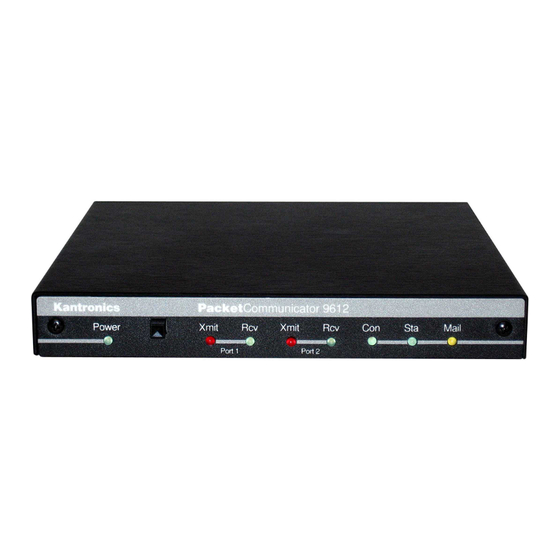
About your KPC-9612 Front Panel The front panel of the KPC-9612 has one switch and 8 LEDs. Seven of the LEDs are used to indi- cate status and one is used as a power indicator. The status indicators are divided into three groups. -
Page 6: Rear Panel
KPC-9612. KPC-9612 to Computer Cable To connect your KPC-9612 to your Computer you will need to use a modem cable. The KPC-9612 requires a 25-pin male DB connector and your Computer will normally require either a 25-pin or a 9-pin female connector. -
Page 7: Initializing The Kpc-9612
Initializing the KPC-9612 Now that the KPC-9612 is cabled to your Computer, the next step is to initialize it. Boot your Com- puter as you normally do. Place the PACTERM disk (shipped with your KPC-9612) in the A (or B) drive on your Computer and type A:PACTERM (or B:PACTERM) and press return, When the pro- gram starts you will see a menu. -
Page 8: Kpc-9612 To 1200 Baud Radio Cable
KPC-9612 to 1200 baud Radio Cable The next step in installing your KPC-9612 is to make the cable for the 1200 baud port (port 1) of your KPC-9612 to your radio. To transmit and receive data, you must make the following pin con- nections from the DB-9 connector to appropriate pins on your radio. -
Page 9: Adjusting Transmit Drive Level
Adjusting Transmit Drive Level The drive level from the KPC-9612 to your radio can be ad- justed by using potentiometer R22 and jumper J5. When J5 is placed on both posts, the drive may be adjusted through the high range (140 mV to 4 Vp-p) with R22. -
Page 10: Wiring Diagrams
KPC-9612 Version 5.2 July 19, 1994... - Page 11 KPC-9612 Version 5.2 July 19, 1994...
- Page 12 KPC-9612 Version 5.2 July 19, 1994...
-
Page 13: Kpc-9612 To 9600 Baud Radio Cable
KPC-9612 to 9600 baud Radio Cable The final step in connecting your KPC-9612 is to make the cable from the KPC-9612 to your 9600 baud radio. NOTE that 9600 baud operation requires a radio that is specifically designed or modi- fied for 9600 baud operation. -
Page 14: Operating Packet
KPC-9612 is ready to transmit packet at 1200 baud. Type the ver- tical bar (|) and the letter "a". This will set the KPC-9612 to transmit on port 1. Now use the CON- NECT command to start the connection. To connect to WD0EMR, simply type CONNECT WD0EMR and press return, just as you did in the sample connect to your mailbox. -
Page 15: Connecting At 9600 Baud
KPC-9612 to transmit at 9600 baud. To do this, type the tilde character (~) and then the letter "a" This sets the KPC-9612 to transmit packet on the A stream of the 9600 baud port. Once this is done you would then connect just as you did above, using the CONNECT command. -
Page 16: Introduction To Commands
Some of the commands in the KPC-9612 are dual-port commands, allowing you to set one value for the 1200 baud port of the KPC-9612, and a different value for the 9600 baud port. This is indi- cated by a dual-port default value (e.g. {192/63}). The value shown before the slash bar is the value used for the 1200 baud port of the KPC-9612, and the value after the slash is used for the 9600 baud port. -
Page 17: Parameter Types
You may optionally include an "extension" (SSID, Secon- dary Station Identifier) which is a decimal number between 0 and 15 (inclusive) used to distinguish two or more stations on the air with the same amateur call. SSIDs of 0 are not displayed by the KPC-9612. -
Page 18: Commands
KPC-9612 Version 5.2 July 19, 1994 Commands 8bitconv ON|OFF {OFF} When ON, transmission of 8-bit data is allowed. When OFF, the 8 data bit is set to 0 before trans- mission and all data received will have the 8 bit set to 0. - Page 19 BKondel ON|OFF {ON} When ON, the KPC-9612 will echo a back space-space-back space sequence to your terminal when the DELETE character is received from the terminal. When OFF, the KPC-9612 echoes a backslash (\) character when the DELETE character is received.
- Page 20 CD INTERNAL|EXTERNAL|SOFTWARE {INTERNAL/INTERNAL) When set to INTERNAL, the KPC-9612 will detect a signal using the carrier detect built in to the modem. For port 1 (1200 baud) a signal is detected when any energy is present. The port 2 (9600 baud) modem detects a signal based on data transitions.
- Page 21 When OFF, the custom text stored in CTEXT will not be sent to a connecting station. When ON, the custom text will be sent. When set to DISC, the custom text will be sent, and then the KPC-9612 will disconnect from that station. When set to PBBS, the custom text will be sent to the connecting station, and then the connection will automatically be transferred to your PBBS, if it is available.
- Page 22 See also: conmode, connect, intface, maxusers, monitor, nomode, users CONVers {immediate command} This command will place your KPC-9612 in the Convers Mode on the current I/0 stream. See also: k, command, stat CPactime ON|OFF...
- Page 23 • CTRl [A|B] [n|ON|OFF|LONG] ( n = 1 – 20) {immediate command} This command causes the KPC-9612 to activate the specified output line to the radio port as indi- cated. You should specify which output (A or B) for each port. If A or B output is not specified, both outputs are affected;...
- Page 24 DAytime yymmddhhmm[ss] {01/01/93 00:00:00} This command sets or reads the real-time clock and software clock in the KPC-9612. The clock de- termines date and time display in conjunction with CSTAMP, MHEARD, MSTAMP and PBBS/Node messages. When entering the daytime digits to set the clock, enter in pure number sequence .with no spaces, dashes, or slashes.
- Page 25 DISPlay [class] {immediate command} This command will display a list of parameters in the KPC-9612. If you do not specify a class, all parameters will be displayed. You may display one specific class of related parameters by specify- ing the class with the display command.
- Page 26 {OFF} When OFF, an escape character ($1B) will be sent to the terminal when one is received in a pack- et. When ON, the KPC-9612 will send a dollar sign ($) to the terminal instead of the escape char- acter.
- Page 27 When set to NEWUSER, a basic set of about 25 commands is available to simplify operation. When set to TERM, the full command set of the KPC-9612 is available (over 140 commands). Setting this command to BBS will prevent certain messages from being sent to the terminal (***connect request, ***FRMR, etc).
- Page 28 When OFF, the software controlled Front panel LEDs will not light in order to conserve power. • LFadd ON|OFF {OFF} When OFF, no line feeds will be added to the transmitted data. When ON, the KPC-9612 will ap- pend a line feed to every carriage return transmitted over the radio. See also: autolf, cradd...
- Page 29 {4/4} MAXFRAME sets an upper limit on the number of unacknowledged packets which can be outstand- ing at any one time. The KPC-9612 will send MAXFRAME number of packets in a single transmis- sion, if they are available. See also: paclen •...
- Page 30 Entering only a baud rate ( b ) will change the baud rate, leaving the other parameters unchanged. When b is set to 0, the KPC-9612 will per- form an autobaud routine when powered up.
- Page 31 KPC-9612 Version 5.2 July 19, 1994 Monitor ON|OFF {ON/ON} When ON, unconnected packets will be monitored unless prohibited by SUPLIST, BUDLIST, CON- LIST, LLIST, or PID. The MONITOR command acts as a master switch for the MALL, MCOM, MCON, MRESP, MRPT, and MXMIT commands.
- Page 32 RESTORE D, it asks you for your callsign. The callsign you en- ter is placed in this parameter. All packets originated by the KPC-9612 will contain this callsign in the FROM address field. Any packets received by the KPC-9612 with this callsign in the TO address field or digipeat fields will be responded to appropriately (connect, disconnect, ack, digipeat, etc).
- Page 33 See also: hid, pbbs • MYRemote xxxxxx- n This command sets the callsign used for remote access to the command set of the KPC-9612. En- ter up to six characters (plus optional SSID) which are different than those used for MYCALL, MYA- LIAS, MYNODE, MYPBBS, and MYGATE.
- Page 34 • Newmode ON|OFF {ON} When ON, the KPC-9612 will return to Command Mode if the station on the current I/O stream dis- connects. The KPC-9612 will not return to Command Mode if the station disconnecting is on a dif- ferent stream. When OFF, a disconnect will not cause the KPC-9612 to change modes.
- Page 35 The PASS command sets the characters used to transmit those characters which normally have special meaning to the KPC-9612 when operating in the Convers Mode. A list of the special charac- ters can be displayed with the command DISPLAY C. In order to transmit any of these, you must precede that character with the PASS character.
- Page 36 PBBS n ( n = 0 – 500 [depending on RAM]) {5 (32 K version); 100 (128 K version)} This command sets the size of the KPC-9612 Personal mailbox (in Kilobytes). The maximum value will depend on the amount of RAM available for the mailbox. The amount of RAM will also depend on the settings of MAXUSERS and NUMNODES, and will be affected by enabling the MYREMOTE.
- Page 37 BBS by the PBFORWRD command or as the result of being polled by another BBS if the HTEXT is set in your KPC-9612. When this occurs, the PBBS will add an R: line to the message indicating that it has been relayed by your station. When ON, only messages ad- dressed to your MYCALL or MYPBBS callsign will be accepted in the mailbox.
- Page 38 • POrt 1|2 This command will select which port is currently active when the KPC-9612 is first turned on. Port 1 is the 1200 baud port, and port 2 is the 9600 baud port. To change ports during operation, you must use the streamswitch characters.
- Page 39 • RELink ON|OFF {OFF/OFF} When AX25L2V2 is ON and this command is OFF, the KPC-9612 will not attempt to automatically reconnect when data has not been acknowledged and a disconnect occurs. When ON, the KPC- 9612 will attempt to reconnect if the RETRY count has been exceeded while outstanding data re- mains.
- Page 40 SYSOP functions in the PBBS remotely. When you connect to the MYREMOTE or attempt to en- ter the SYSOP Mode of the PBBS, the KPC-9612 will send three sets of numbers, one of which must be properly decoded using this string.
- Page 41 • STOp n ( n = $00 – $FF) {$13 <Ctrl-S>} This command specifies the character sent by the terminal to the KPC-9612 to stop data flow from the TNC. If set to $00, only hardware flow control will be used. For software flow control set this parameter to the character the terminal will send to stop data flow and be sure XFLOW is ON.
- Page 42 • Trans {immediate command} This command places the KPC-9612 in Transparent Mode. The current link state is not affected. If parity is set to none, you may send all 8 bits from the computer in this mode. There are no special editing characters, all characters are sent over the radio as received.
- Page 43 PTT line has been activated. • TXFlow ON|OFF {OFF} This command allows the KPC-9612 to send software flow control signals to your computer when operating in Transparent Mode. See also: trans, trflow, xflow Unproto call1 [VIA call2, call3,..call9] {CQ/CQ} This command sets the destination callsign (call1) and the digipeaters (call2 –...
- Page 44 Mode) while all other functions of the KPC-9612 are unchanged. • XOff n ( n = $00 – $FF) {$13 <Ctrl-S>} This command selects the character sent by the KPC-9612 to the terminal to stop data flow from the terminal. See also: xflow, xon •...
-
Page 45: Operation Of The Kpc-9612
Suppose you want to connect to N0GRG. Since this station was monitored on 1200 baud, you must be sure your KPC-9612 is set to transmit on Port 1. Type the | character and the letter A. The | character is your Port 1 streamswitch character, and the letter A means you will transmit on the A stream. - Page 46 While you are talking to N0GRG, you decide you want to talk to KA5ZTX. This station was heard on 9600 baud, so you must set your KPC-9612 to operate on Port 2. You may do this even though you are still connected (and talking) to N0GRG. To start the new connection you must be in the Com- mand Mode, so type <Ctrl-C>...
-
Page 47: Kantronics Pbbs
BBS (normally referred to as a full-service BBS), including the forwarding of Bulletins, Private mail, and NTS traffic. Before explaining details of your Kantronics PBBS, it is important that you understand the basics of a full-service BBS system. Each user should select one (and only one) full-service BBS that will nor- mally be used to send and receive mail. - Page 48 When you enter a message into your Kantronics PBBS and supply the routing information, that message may be forwarded automatically to another BBS. When the message is forwarded from your Kantronics mailbox, an R: line is included as the originating BBS. This line includes the same...
- Page 49 KPC-9612 Version 5.2 July 19, 1994 information as any other BBS. This R: line consists of the date/time the message was entered into your PBBS, the message number, your MYCALL (URCALL), and the HTEXT you have set For in- stance, your R: line might be: R:931008/1255 23@URCALL.#WTX.TX.USA.NOAM...
-
Page 50: Setting Up Other Functions Of Your Kpc-9612
PBBS command. You may at times, want to set up your KPC-9612 so that a user who connects to your MYCALL will automatically be switched into the mailbox. For instance, if you are not at your station, the user who tries to connect to you would end up connected to the mailbox to leave you a message. - Page 51 Choose one of these three lines and decode the RTEXT using these numbers. For example, assume your KPC-9612 has the RTEXT set to "This is a sample rtext." When you con- nect to this KPC-9612 PBBS from a remote station and give the SYSOP commend, it will send you:...
-
Page 52: Remote Access To Your Kpc-9612
Your Kantronics KPC-9612 includes the ability to connect from a remote station and change the pa- rameters in the KPC-9612. This allows you to add or delete stations from the LLIST, change the size of the PBBS, change the MYCALL and so on. Extreme caution must be used when you are ac- cessing your KPC-9612 from a remote location. -
Page 53: Host Mode Operation
Note that case is significant and spaces are considered valid characters. If you fail to properly de- code the password, the KPC-9612 will send three new lines of numbers. You will be given a maxi- mum of three attempts to properly decode the password string. If you fail in three attempts, the KPC-9612 will disconnect you and disable connects to the MYREMOTE for 15 minutes. -
Page 54: Kiss Mode Operation
KPC-9612. It is now in KISS Mode. To force your KPC-9612 out of the KISS Mode from a standard terminal program, hold the ALT key down and type the numbers 192 on the numeric keypad of your keyboard (NOT THE NUMBER KEYS ABOVE THE KEYBOARD). -
Page 55: Hardware Information
Follow the grounding instructions in your transceiver manual. Cables provided with your KPC-9612 are shielded. If you use other cabling, be certain it is shield- ed. We do not recommend the use of unshielded RS-232 ribbon cable in an amateur radio environ- ment. -
Page 56: Options
RECEIVE DATA: This line caries the data from the KPC-9612 to your computer. REQUEST TO SEND: The KPC-9612 checks this line to see if it is permitted to send data to your computer. This pin is controlled by your computer software program to provide this in- formation to the KPC-9612. -
Page 57: Connecting To Your Radio
KPC-9612. Pin 3 When the KPC-9612 needs to key your transmitter, it will apply a ground to this pin. This is an open-drain circuit and requires a positive voltage from your radio (not to exceed 50 volts and 200 mA). -
Page 58: 9600 Baud
No connection No connection Pin 1 When the KPC-9612 needs to key your transmitter, it will apply a ground to this pin. This is an open-drain circuit and requires a positive voltage from your radio (not to exceed 50 Volts and 200 mA). -
Page 59: Transmit Level Adjustment
Pin 13 When a ground is applied to this pin and the KPC-9612 CD command is set to EXTERNAL, the KPC-9612 will not transmit packet. This is normally used as an external means of sup- plying carrier detect to the KPC-9612. -
Page 60: Assembly And Disassembly Of The Kpc-9612
1200. At other terminal baud rates, a reset will occur, however no display readout will be observed. This procedure is performed as follows: 1. Open the KPC-9612 by removing the two (2) case screws on the sides of the unit and lifting the cover. -
Page 61: Calibration/Equalization
The CALIBRAT command is used to assist in adjusting the transmitter deviation and also in adjust- ing the receive equalization of your KPC-9612. The procedures listed below are a guideline for us- ing the calibration command to adjust the 1200 baud port and 9600 baud port for optimum per- formance. - Page 62 R-32 for approximately 3 kHz deviation. Press any key to stop transmitting. If you have another KPC-9612 user close to you, have that station transmit a calibrate signal to you. Measure the dc voltage on pin 8 of the DB-15 connector (or test point J). It should show...
-
Page 63: Kpc-9612 Jumpers
KPC-9612 Version 5.2 July 19, 1994 KPC-9612 Jumpers There are several junipers in the KPC-9612 which can be used to configure various options. The jumpers are listed below in sequential order as a reference. (1200 baud equalization) This two-pin jumper is used to set the equalization for the 1200 baud modem. -
Page 64: 1200 Baud Radio Port (Db-9)
RAM. When placed on the center post and 2, the KPC-9612 accepts a 512K static RAM. (DE- FAULT: 128K or less) J15 (Hard Reset) When this jumper is placed on both posts and power is applied to the KPC-9612, a hard reset is performed. This resets all parameters to the factory defaults and completely erases the RAM contents. -
Page 65: Connector Configuration
If you need to isolate the DTR/DSR connection, cut the metalized trace between the two pads of J19. It is also possible to connect the RTS input to the KPC-9612 to the DTR signal from your com- puter by placing jumper J20 on both posts. -
Page 66: Specifications
KPC-9612 Version 5.2 July 19, 1994 Specifications Size: 0.8 in. × 6.2 in. × 6.1 in. (2.1 cm × 15.8 cm × 15.5 cm) Weight: less than 16 oz. (<0.45 kg) Input Voltage Requirements: 5.5 VDC – 25 VDC Current Requirements: 45 mA (max), <20 mA (idle) -
Page 67: Ascii Chart
KPC-9612 Version 5.2 July 19, 1994 ASCII Chart Ctrl Dec Hex Code Dec Hex Char Dec Hex Char Dec Hex Char " & < > – Dec Hex Dec Hex Dec Hex... -
Page 68: Pacterm Manual
KPC-9612 Version 5.2 July 19, 1994 Pacterm Manual To Start Pacterm It is best to leave your TNC off until you have Pacterm set up and in the Terminal Mode. Having the TNC on early will cause data to be backed up between the computer and TNC. Then when Pacterm is put in the Terminal Mode, what is in the TNC will dump rapidly to the screen. - Page 69 KPC-9612 Version 5.2 July 19, 1994 If you are just starting, now is the time to turn on the TNC. At any time the F1 key can be pressed to display the help menu. The backspace key will return you to Terminal Mode.
- Page 70 KPC-9612 Version 5.2 July 19, 1994 Saving Data to Disk Alt-B buffer control The Alt-B command toggles the buffer on and off. When the buffer is on, data that appears in the receive section (top) of the screen will be saved in your computer's memory. BUFF appears in the status bar when the buffer is on.
-
Page 71: Kpc-9612 Parts List
KPC-9612 Version 5.2 July 19, 1994 Parts List Part Part Layout Schem. µ1 Desig. Description Locat. Locat. µ001 µ001 CR2032 µ1 µ001 1µ tant µ001 1µ tant 47µ al µ1 47µ al µ1 µ001 µ001 µ001 µ1 µ001 µ001 µ01 1N914 µ001... - Page 72 KPC-9612 Version 5.2 July 19, 1994 LED yellow R34C 100k ×5 SIP DB9F R34D 100k ×5 SIP DB15F R34E 100k ×5 SIP DB25F 100k 2.1mm pwrja A4 330k PN2222 PN2907A 2N7000 620R 2N7000 180k 2N7000 330k 2N7000 330k 2N7000 470k...
- Page 73 KPC-9612 Version 5.2 July 19, 1994 74HC14 74HC14 74HC14 U14A 74HC14 74HC14 U14B 74HC14 74HC14 U14C 74HC14 74HC14 U14D 74HC14 74HC14 U14E 74HC14 74HC14 U14F 74HC14 74HC14 74HC10 74HC14 U15A 74HC10 74HC14 U15B 74HC10 74HC14 U15C 74HC10 74HC14 74HC00 74HC14...
-
Page 74: Kpc-9612 Parts Layout
KPC-9612 Version 5.2 July 19, 1994 KPC-9612 Parts Layout... -
Page 75: Kpc-9612 Schematic
KPC-9612 Version 5.2 July 19, 1994... -
Page 76: Kpc-9612 Manual Addenda
KPC-9612 Version 6.0 October 25, 1995 KPC-9612 Manual Addendum KPC-9612 Version 6.0 Firmware with DAMA (slave mode) capability included... -
Page 77: Kpc-9612 Version 6.0 Firmware With Dama
TNCs which contain firmware (EPROM) that can operate in a DAMA "slave" mode (such as the Kantronics TNCs with DAMA slave mode support). The slaves may use a standard ter- minal or host mode program or any of a variety of specially written European programs, such as SP, Grafik Packet and ESKAY, some of which make use of the KISS Mode feature of the TNC. - Page 78 KPC-9612 Version 6.0 October 25, 1995 Why DAMA in Kantronics units? Kantronics units have long been popular TNCs in Europe. As the European channels have become more and more crowded and more and more DAMA systems have been established, it has become a necessity for TNCs to be equipped with the DAMA slave protocol in order to use the local net- works.
-
Page 79: Additional Commands In V6.0
KPC-9612 Version 6.0 October 25, 1995 KPC-9612 – Additional commands in V6.0 • BLt n Every|After hh:mm:ss [START hh:mm:ss] ( n = 1 – 4) {Default EVERY 00:00:00/EVERY 00:00:00} This command sets the interval between beacons for the associated string. n identifies which LT is used (1–4). - Page 80 KPC-9612 Version 6.0 October 25, 1995 • GPSInit string Initial text sent to terminal in GPS Mode (string up to 128 characters) {Default blank} This command establishes a string which will be sent to the attached GPS unit upon power-up.
- Page 81 • PMode CMD | CONVERS | TRANS {Default CMD} The PMode command controls the mode your KPC-9612 will be in when it is first powered up or reset. When set to CMD, the KPC-9612 will produce a sign-on message followed by the command prompt (cmd:).
Need help?
Do you have a question about the KPC-9612 and is the answer not in the manual?
Questions and answers