Table of Contents
Advertisement
Advertisement
Table of Contents

Related Manuals for Opex DS2200


Summary of Contents for Opex DS2200
- Page 1 DS2200 USER MANUAL AUGUST 2012...
- Page 2 The DS2200 User Manual was completely restruc- tured for better viewing on a Tablet-style reader. If you find errors, inaccuracies, or any other issues or concerns with this document, please contact the OPEX Technical Writers via email at: GroupTechwriters@opex.com Part number 95000XX ®...
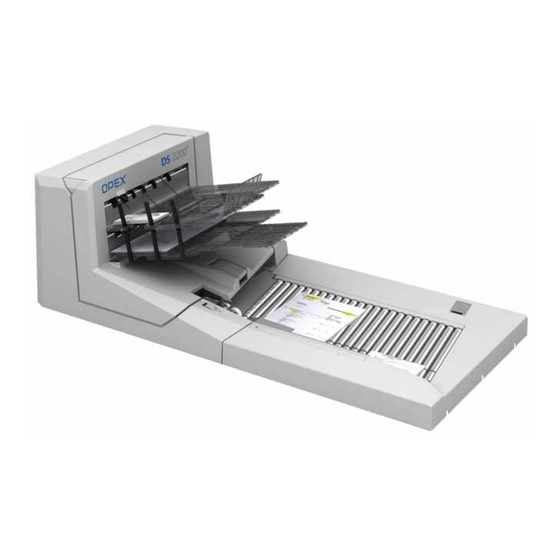
- Page 3 Efficiency and transaction integrity are critical to payment processors. The OPEX DS2200 is engineered as a single station solution that satisfies both of these key issues. Its broad capabilities enable our clients to minimize document prep, thereby reducing labor and improving throughput and accuracy.
-
Page 4: Table Of Contents
Ending the job ....................54 Viewing/editing the batch ................54 OpAssist ......................57 KeyAssist ...................... 59 Clearing Paper Jams ..................60 Scanner area ....................60 Table of Contents DS2200 User Manual - OPEX Corporation use only - not for distribution... - Page 5 DS2200 Statistics ....................74 Creating statistic reports ................74 General Information statistics ............... 78 Overall System Performance Measures statistics ........79 Performance Details statistics ............... 81 Table of Contents DS2200 User Manual - OPEX Corporation use only - not for distribution...
- Page 6 Table of Contents DS2200 User Manual - OPEX Corporation use only - not for distribution...
- Page 7 DS2200 specifications ......11 How the DS2200 Works ......12 Software .
- Page 8 Sort bins Touchscreen PC monitor Audit trail Printer(s) PC controller In-line recognition (MICR, OCR, barcodes, mark detection) Integrated Workstation Desk (optional) Drop feeder Uninterruptible Power Supply (UPS) Introduction DS2200 User Manual - OPEX Corporation use only - not for distribution...
-
Page 9: Introduction
Overview With the DS2200, intermixed, different-sized documents can be scanned together without adjustment to the scanner feed. In a single step, the DS2200 can scan, capture, read MICR, print an audit ID, and sort transactions containing checks and other documents. -
Page 10: About This Manual
• Integrated workstation/table About this manual The purpose of this manual is to instruct operators of the DS2200 in how to use the scanner to perform tasks. For more information on how to set up jobs, page types, audit trails and other functions of the machine, consult the DS2200 CertainScan Manual. -
Page 11: Ds2200 Specifications
100 - 240 VAC, 1.75 - 0.75 A, 47 - 63 Hz Non-Operating: 0°F to 110°F Temperature requirements Operating: 10°F to 100°F Non-Operating: 0% to 85% Relative Humidity Operating: 14% to 85% not to exceed 90% Introduction DS2200 User Manual - OPEX Corporation use only - not for distribution... -
Page 12: How The Ds2200 Works
How the DS2200 Works The DS2200 scanner is controlled by a single, Windows 7 driven PC. The operator interacts with the system via the CertainScan software and simply drops documents onto the drop feeder. The system scans the items based on the current job parameters. - Page 13 Introduction DS2200 User Manual - OPEX Corporation use only - not for distribution...
-
Page 14: Jobs
Jobs A job is a collection of parameters the DS2200 use for scanning documents. The jobs you set up allow you to process documents in a similar manner from run to run. The scanner captures images of documents and stores the information it collects in batches, which consist of one or more transactions. -
Page 15: Operating The System
Running Jobs ....... . 27 Clearing Paper Jams......60 DS2200 User Manual... -
Page 16: Overview
• Keep loose objects away from any exposed, moving parts of the machine. The moving parts of the DS2200 can become jammed and/or damaged by foreign objects. Also, keep hands, hair, loose clothing or jewelry away from the moving parts. -
Page 17: Ergonomics
DS2200. Follow the directions for using and adjusting your chair and scanner. Using improper procedure can result in a potentially serious injury. The DS2200 scanner has been designed for safe operation by over 95% of the user population. Operation by individuals with limited reach capability or who cannot follow the suggestions listed should be avoided or limited in duration. - Page 18 You can raise or lower the height of the workstation desk to fit your needs. Use the crank stored in the right front side of the desk to adjust the height of the workstation. Operating the System DS2200 User Manual - OPEX Corporation use only - not for distribution...
-
Page 19: Controls And Components
CIS imagers and audit trail printers are located inside the scanner Feed mode knob Conveyor Described in detail on page 47 Figure 1: Main components Operating the System DS2200 User Manual - OPEX Corporation use only - not for distribution... - Page 20 Conveyor The DS2200 allows for quick and easy feeding of mixed size documents - from business cards to documents as large as 12” x 25”. Place documents onto the drop feeder for scanning into the DS2200. The DS2200’s unique drop feed technology can handle the widest range of documents without fear of double feeds or document damage.
- Page 21 This provides quality auditing, compliance and research benefits to your process. The DS2200 comes with a bottom printer (standard); adding a top printer is optional.
-
Page 22: Connections
Connections The DS2200 has several connectors and ports for connecting the scanner to the CertainScan PC and other peripherals. Parallel port Serial port COM port HDMI Main power switch AC power plug Figure 2: DS2200 back panel connections The ethernet port is for OPEX technical support COM (Ethernet) use only. - Page 23 Insert the power cord here and connect the other AC Power end to an AC power outlet. Turns the DS2200 on and off. The switch Main power switch illuminates when power is on. Operating the System DS2200 User Manual - OPEX Corporation use only - not for distribution...
-
Page 24: Getting Started
3 Log in to Windows with your Windows/network user name and password. If your DS2200 is not connected to a network, you may not have to log in to Windows first. Proceed to step 4. -
Page 25: Navigating The Ds2200 Certainscan Software
Title bar The title bar displays the name of the current operator and other pertinent information. Click the DS2200 icon in the title bar to access the Windows functions (Restore, Move, Size, Minimize, Maximize, Close), as well as the following menus: - The Diagnostics menu contains the DS2200 system options. - Page 26 The menu options bar will change based on the current menu bar selection. Main window View and adjust settings and parameters in the main window. Title Menu Main window Menu options Figure 4: CertainScan interface Operating the System DS2200 User Manual - OPEX Corporation use only - not for distribution...
-
Page 27: Running Jobs
Select a job: 1 Select Main in the menu bar. 2 Select the icon for the job you want to run. Figure 5: Main screen Operating the System DS2200 User Manual - OPEX Corporation use only - not for distribution... - Page 28 Use the Batch Information screen to select a “received” date, a “processed” date, and the type of batch you want to run. Figure 6: Batch information screen Operating the System DS2200 User Manual - OPEX Corporation use only - not for distribution...
-
Page 29: Using The Run Screen
Scroll thumbnails View snippets Thumb- nails Preview window Information window Page types Run buttons Rotate image buttons Run screen buttons Press Go to start the scanner. Operating the System DS2200 User Manual - OPEX Corporation use only - not for distribution... - Page 30 Stop the machine. This does not end the current batch or transaction. Close the current batch. Exit the current job and close the Run screen. Operating the System DS2200 User Manual - OPEX Corporation use only - not for distribution...
- Page 31 The transaction view groups thumbnails by transaction. All of the pieces in a transaction are displayed in a single row from left to right in the order they were scanned. One thumbnail is displayed for each piece. Operating the System DS2200 User Manual - OPEX Corporation use only - not for distribution...
- Page 32 A new row will start after the fifth piece. Bin view The bin view arranges the thumbnails by the bin they were sorted to. Operating the System DS2200 User Manual - OPEX Corporation use only - not for distribution...
- Page 33 Transaction 3 Transaction 4 Dual sequence view The dual sequence view shows 2 thumbnails for each piece, grouped by the order they were scanned. Operating the System DS2200 User Manual - OPEX Corporation use only - not for distribution...
- Page 34 Check the printer tab if audit trails are not printing correctly. Note: Touch or click in the Information window to bring up the detailed view. Operating the System DS2200 User Manual - OPEX Corporation use only - not for distribution...
- Page 35 Character Read - Combined results of magnetic and optical MICR reads Barcode Results - Up to 3 per page Processing Time Used -Time used for each piece Operating the System DS2200 User Manual - OPEX Corporation use only - not for distribution...
- Page 36 Note: Touch the screen at another center point to re-center the zoom. You can re-center the zoom before or after enlarging or reducing the image. Operating the System DS2200 User Manual - OPEX Corporation use only - not for distribution...
- Page 37 Make this image the Default for this page type. View any Snippets associated with the image. The snippets the system captures are set up in the Page Type Parameters. Close the Zoom window. Operating the System DS2200 User Manual - OPEX Corporation use only - not for distribution...
- Page 38 For example, if you are scanning checks, your system may be set up to capture images of specific parts of the check, such as the back of the check or the CAR region. Operating the System DS2200 User Manual - OPEX Corporation use only - not for distribution...
- Page 39 Press Snippet 2 to view the entire back image of the check Press Snippet 3 to view the CAR region Figure 9: Viewing snippets Operating the System DS2200 User Manual - OPEX Corporation use only - not for distribution...
-
Page 40: Scanning Documents
½ inch between documents will provide for proper image capture. When dropping documents, give enough time for items to justify. The Examples: thick line indicates feeder entrance. The arrow indicates the paper path. Operating the System DS2200 User Manual - OPEX Corporation use only - not for distribution... - Page 41 To scan documents into the system: 1 Press Go on the Run screen. 2 Place the first document onto the conveyor as shown in Figure 10. Operating the System DS2200 User Manual - OPEX Corporation use only - not for distribution...
- Page 42 Drop documents here Figure 10: Ideal drop area The DS2200 will scan the document and place a thumbnail of the image in the transaction window. A large image of the document will appear in the Preview window. In this example, the system recognizes 8.5 × 11 sheets of paper as belonging to the “Portrait”...
- Page 43 4 Place an envelope onto the conveyor. The system will recognize the document as an envelope. In this example, an envelope is set up as the transaction boundary and ends the current transaction. Operating the System DS2200 User Manual - OPEX Corporation use only - not for distribution...
- Page 44 The next document scanned (in this example, another check) will start a new transaction. New transaction 5 Continue to place your documents onto the conveyor. The DS2200 will scan and sort the documents depending on the current job’s settings. Note: Unfold any folded pages so they lay flat on the conveyor. Folded pages will not be scanned correctly and may jam the system.
- Page 45 Make sure the second stack has enough pieces to stop the conveyor, or the third stack will run into the second and cause misfeeds and/or jams. Operating the System DS2200 User Manual - OPEX Corporation use only - not for distribution...
- Page 46 • 8-½ x 11” sheets can be scanned in portrait or landscape. The scanner is outfitted with 12” image sensors and can accommodate larger pieces of paper as well. Operating the System DS2200 User Manual - OPEX Corporation use only - not for distribution...
- Page 47 Note: You should also disengage the feed control knob when scanning papers that are stapled together, or when scanning flimsy or damaged pieces. Operating the System DS2200 User Manual - OPEX Corporation use only - not for distribution...
- Page 48 Operating the System DS2200 User Manual - OPEX Corporation use only - not for distribution...
-
Page 49: Assigning A Page Type
A red box around a page type button indicates that the lock is in place. Figure 13: “Locked” page type button Operating the System DS2200 User Manual - OPEX Corporation use only - not for distribution... - Page 50 1-dollar bill set up as the default, all the cash you scan will be classified as 1-dollar bills unless you assign another sub-type as described. Operating the System DS2200 User Manual - OPEX Corporation use only - not for distribution...
-
Page 51: Adjusting Image Quality
If you are not pleased with a particular image, you can rescan the document while the job is running. To rescan a document: 1 Select the document’s thumbnail. Operating the System DS2200 User Manual - OPEX Corporation use only - not for distribution... -
Page 52: Deleting Documents From The Batch
If you need to delete an image from the middle of the batch, you must also delete all the images to the end of the batch as well. Operating the System DS2200 User Manual - OPEX Corporation use only - not for distribution... -
Page 53: Voiding Documents And Transactions
The VOID stamp will appear over the image and the document will be designated as void in the batch file. Press UnVoid Item to remove the VOID stamp. Figure 16: Voiding documents Operating the System DS2200 User Manual - OPEX Corporation use only - not for distribution... -
Page 54: Starting A New Batch
• Void/un-void documents from prior batches • Assign page sub-types To access the Batch Editor: 1 Select Main in the menu bar and Batch Editor in the options bar. Operating the System DS2200 User Manual - OPEX Corporation use only - not for distribution... - Page 55 2 Click the Open button. 3 Navigate to the directory on your network where your batches are saved (see your DS2200 Administrator). The batches are saved in folders by their batch number. Open the folder for the batch you want to view and double-click on the .odi, .oxi, or .dat file to view the batch.
- Page 56 CertainScan, and that only an operator with a ManagerLevel account or an OPEX technician can fix the problem. Consult your DS2200 Administrator if you receive this error message. Operating the System DS2200 User Manual - OPEX Corporation use only - not for distribution...
-
Page 57: Opassist
Use the trigger to bring up the page sub-type selection screen so you can choose from among the available sub-types. Operating the System DS2200 User Manual - OPEX Corporation use only - not for distribution... - Page 58 For this reason, it may be best NOT to assign a default page sub-type for the page type you use this OpAssist function Figure 20: Triggering OpAssist Operating the System DS2200 User Manual - OPEX Corporation use only - not for distribution...
-
Page 59: Keyassist
90 degrees clockwise rotates the piece 180 degrees flips the front and back images (if the page type is set up to scan front and back images) Operating the System DS2200 User Manual - OPEX Corporation use only - not for distribution... -
Page 60: Clearing Paper Jams
Remove any paper or debris caught in the scanner area. To close the scanner cover, push the cover back down and press down on the latch to secure the lid. Operating the System DS2200 User Manual - OPEX Corporation use only - not for distribution... -
Page 61: Clearing The Bins
When removing the paper from the output bins, pull the piece from the side of the bins. The trays have been designed to allow access to the smallest of pages in the bins. Figure 22: Clearing the output bins Operating the System DS2200 User Manual - OPEX Corporation use only - not for distribution... - Page 62 Operating the System DS2200 User Manual - OPEX Corporation use only - not for distribution...
- Page 63 Adjusting the Printer Carriage Position... . 68 Cleaning the System ......69 DS2200 User Manual...
-
Page 64: Calibrating The Touchscreen Monitor
To calibrate the monitor: 1 From the Windows desktop, double-click on the touch screen icon to open the monitor control panel. 2 Select Calibration. Operational Maintenance DS2200 User Manual - OPEX Corporation use only - not for distribution... - Page 65 Please do not use fingers, pens, pencils, etc. 5 When calibration is complete, log in to CertainScan and test the touchscreen controls to ensure they are working properly. Operational Maintenance DS2200 User Manual - OPEX Corporation use only - not for distribution...
-
Page 66: Removing/Replacing The Printer Cartridge
When you install a new printer cartridge, first check the expiration date of the new cartridge you plan to use. In sealed containers, the DS2200 printer cartridges have a shelf life of two years from the date of manufacture. - Page 67 Figure 23: Open the back printer access plate 1 Pull the tab on the rear of the printer cartridge and rotate outward, as shown in the figure below. Operational Maintenance DS2200 User Manual - OPEX Corporation use only - not for distribution...
-
Page 68: Adjusting The Printer Carriage Position
To adjust the carriage position, loosen the thumb screw, slide the carriage to a new detented position on the shaft, and then retighten the thumb screw. Loosen thumb screw to move carriage along detent shaft Operational Maintenance DS2200 User Manual - OPEX Corporation use only - not for distribution... -
Page 69: Cleaning The System
1 Stop all jobs and ensure that all motors are stopped. 2 Check the clamshell area once a shift. Open the clamshell door (Figure 24) and clear the area of paper debris, dust, envelope flaps, etc. Operational Maintenance DS2200 User Manual - OPEX Corporation use only - not for distribution... -
Page 70: Contact Image Sensor
(front camera) and bottom (back camera). The top camera (not viewable in this picture) is on the underside of the cover directly above the bottom camera. Operational Maintenance DS2200 User Manual - OPEX Corporation use only - not for distribution... - Page 71 Operational Maintenance DS2200 User Manual - OPEX Corporation use only - not for distribution...
-
Page 72: Feed Assembly
Lift the tab on the top of the feed assembly to clean the retard pad underneath. Also clean the feed rollers that lead up to the feeder. Operational Maintenance DS2200 User Manual - OPEX Corporation use only - not for distribution... - Page 73 Statistics DS2200 Statistics ......74 Creating statistic reports ..... . . 74 General Information statistics .
-
Page 74: Ds2200 Statistics
• General Information • Overall System Performance Measures • Performance Details To create a statistics report: 1 In the Menu bar, click Main, then Statistics in the Options menu. Statistics DS2200 User Manual - OPEX Corporation use only - not for distribution... - Page 75 3rd shift (12:00 AM-8:00 AM) and the first shift (8:00 AM to 4:00 PM). - Job/Operator Lists - select one of the radio buttons: Statistics DS2200 User Manual - OPEX Corporation use only - not for distribution...
- Page 76 - Jobs - to generate a statistics report sorted by job name(s) - Operators - to generate a statistics report sorted by Operator name(s) - Check the box to exclude jobs run by the OPEX Technician in your report. 5 Click the Test Matching Runs button to see how many jobs have been run that match the criteria selected above.
- Page 77 Params > Config > Statistics Settings > Stat- sExportFilename parameter. - Exit button (red stop sign) - click to close the Statistics Report window. Statistics DS2200 User Manual - OPEX Corporation use only - not for distribution...
-
Page 78: General Information Statistics
(Summary Report only) Lists the number of jobs included in Jobs Included the report. (Summary Report only) Lists the number of jobs that ended Jobs Ended in the specified time window. Statistics DS2200 User Manual - OPEX Corporation use only - not for distribution... -
Page 79: Overall System Performance Measures Statistics
Reference Feed Rate is: Reference Reference Feed Rate = Feed Rate Input * 7200 Run Time (seconds) + (Jams * Ref. Jam Clear Time (seconds)) Statistics DS2200 User Manual - OPEX Corporation use only - not for distribution... - Page 80 Run Time (seconds) + (Jams * Ref. Jam Clear Time (seconds)) Reference Jam Estimated time it takes to clear a jam. This number is fixed Clear Time at 20 seconds. Statistics DS2200 User Manual - OPEX Corporation use only - not for distribution...
-
Page 81: Performance Details Statistics
Results when out sorting is set to reject a piece thinner than Too Thin a defined minimum allowable thickness. Results when out sorting is set to reject a piece thicker than Too Thick a defined maximum allowable thickness. Statistics DS2200 User Manual - OPEX Corporation use only - not for distribution... - Page 82 Results when the maximum transactions, pieces, stubs, or Batch Limit checks as defined in the batch parameters has been Detected reached. Statistics DS2200 User Manual - OPEX Corporation use only - not for distribution...
- Page 83 Results when the software has detected a duplicate batch Duplicate either via the used batch list or by finding batches in the Batch batch directories with the same batch number. Statistics DS2200 User Manual - OPEX Corporation use only - not for distribution...
- Page 84 Results when the controller receives invalid Software Problem information from the host or there is an assert or Detected exception within the controller. Statistics DS2200 User Manual - OPEX Corporation use only - not for distribution...
- Page 85 A gate that did not fire properly can also cause it. Statistics DS2200 User Manual - OPEX Corporation use only - not for distribution...
- Page 86 Results when there is an internal error within Internal Error Batch Manager. Results when the software detects a problem Detected a File Write with writing image or batch files to the specified Error directories. Statistics DS2200 User Manual - OPEX Corporation use only - not for distribution...
- Page 87 A piece is too tall for the imager. Justification Sensor The Justification Sensor is blocked. Blocked Feed Singulation Defeat The override feed control button is stuck in a Button Stuck down position. Statistics DS2200 User Manual - OPEX Corporation use only - not for distribution...
- Page 88 Results when the lower skew detect sensor is Lower Skew Detect blocked by something when the system is Sensor Blocked attempting to start up. Statistics DS2200 User Manual - OPEX Corporation use only - not for distribution...
- Page 89 Results when the ScanLink Plug-in has Requested a Stoppage requested a stoppage. Results when a piece is detected to be too Too Skewed skewed to pass through the system safely. Statistics DS2200 User Manual - OPEX Corporation use only - not for distribution...
- Page 90 Statistics DS2200 User Manual - OPEX Corporation use only - not for distribution...
Need help?
Do you have a question about the DS2200 and is the answer not in the manual?
Questions and answers