
Related Manuals for Wittime WT2076


Summary of Contents for Wittime WT2076
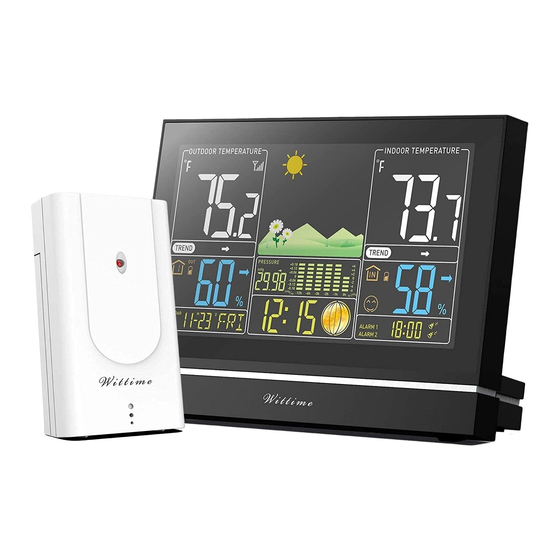
- Page 1 Digital Wireless Weather Station OPERATING INSTRUCTION Base unit: WT2076 Wireless sensor: WT2022A Remove the protective film from the display before use.
-
Page 2: Intended Use
Safety Read the following advice carefully and store these operating instructions in case you want to reread something later. If you give the item to someone else, give them these operating instructions as well. • This device may be used by children over 8 years of age and over, as well as by persons with reduced physical, sensory or mental abilities, or lack of experience and / or knowledge if they are supervised or instructed regarding the safe use of the equipment and have understood the resulting hazards. -
Page 3: Unpacking And Checking
• Do not modify the items or the power cable. Only allow repairs to be carried out by a specialist workshop as improperly repaired devices endanger the user. Unpacking and checking 1. Remove the weather station from the packaging, remove all protective films and keep the packaging materials out of the reach of children. - Page 4 Wireless sensor • Range of up to 262.5 ft (80 meters) (in open area) • Wall mounting bracket Overview of the weather station Base unit – view from above...
- Page 5 Base unit –Back Detachable base - How to plug in power adaptor? Please put the adaptor line through the hole [ 5 ] and plug it into power socket [ 3]. After this step, please assemble the detachable base to the base unit backside.
- Page 6 Operating elements and parts of the base unit Operating buttons Button MODE * Switch temperature unit (°C or °F) * Activate settings mode * Save changes to settings Button CH * Display weather data from various wireless sensors ( channel 1.2.3) * Disconnect/reconnect wireless sensor connection Button ALARM * Display alarm time...
-
Page 7: Wireless Sensor
Wireless sensor Red pilot light Loop for hanging Sliding switch 1 2 3: Set sensor number (transmission channel) Battery compartment If you wish to use only the wireless sensor included in the delivery, as a general rule, the transmission channel does not need to be changed. This is only necessary if you wish to use additional wireless sensors;... - Page 8 - If possible, use alkaline batteries instead of zinc-carbon batteries. Alkaline batteries last longer, particularly outside in low temperatures. Using addition wireless sensors The weather station comes with one wireless sensor. However, you can operate the weather station with up to three wireless sensors.
-
Page 9: Setting The Time And Date Manually
Set weather symbol manually After the base unit power on, the weather symbol will flash on the display. 1. Set the appropriate weather symbol with the UP and DOWN buttons. 2. Press the SNOOZE•LIGHT button to select. Information : The weather symbol can set Sunny, partly sunny, cloudy, rainy and heavy rain manually, snow symbols will be displayed when outdoor temperature is below -30.2°F. -
Page 10: Display Indicators
- The wireless sensor is protected against moisture but must be protected against water, e.g. rain. General The base unit and wireless sensor exchange information over a radio frequency. For this reason, the location is important for the range of the wireless connection. Note: •... - Page 11 Time function Alarm function The base unit allows you to set two different alarm times. For example, you can set an alarm for the morning and for after an afternoon nap by activating both alarm times. 1. Use the ALARM button to select the desired alarm time (A1 or A2). 2.
-
Page 12: Weather Information
On ALARM 1: • press UP once: on the display, A1 is activated • press UP twice: disappear, A1 is deactivated On ALARM 2: • press UP once: on the display, A2 is activated • press UP twice: disappear, A2 is deactivated Stopping the alarm You will be woken by the alarm at the set time, and the sound will become more and more intense as the alarm continues. - Page 13 Current transmission channel to the base unit Mold indicator Dew point Heat index Low battery indicator Humidity in percent Humidity trend Temperature unit: °C or °F Temperature Radio frequency reception symbol Stored maximum and minimum values Trend for temperature Indoor symbol Mold indicator Comfort indicator Low battery indicator...
-
Page 14: Weather Trend
Humidity trend Temperature unit:°F or °C Temperature Stored maximum and minimum values Trend for temperature The highest and lowest temperature and humidity values by repeatedly pressing the UP button. • press once: the maximum values are shown • press again: the minimum values are shown •... -
Page 15: Weather Forecast
Weather forecast After setting up initially, the weather forecast can not be used for about 12 hours, as the weather station needs this time to collect and evaluate the weather data. The weather forecast is a result of the collected data and the measured changes in air pressure. The forecast refers to the area around the weather station with a radius of about 30 to 50 km for the next 12 to 24 hours. - Page 16 constant air pressure = weather will stay the same falling air pressure = weather will get worse Mold indicator, dew-point display and heat index Keep pressing the DOWN button to display the corresponding values one after another. Mold indicator (display for indoors and outdoors) The mold indicator (“MOLD”...
- Page 17 It depends on the indoor temperature and humidity and indicates the comfort degree a person would feel. Comfort symbol Temperature range 14.2°F~ 122°F 68°F ~ 82.4°F 14.2°F~ 122°F Humidity range < 40% 40% ~ 70% >70% Degree of environment Comfortable Dry: When the indoor humidity is below 40% and temperature is within 14.2°F to 122°F range, it indicates the indoor environment is dry, the symbol will appear.
-
Page 18: Low Battery Indicator
Summer time: the second Sunday of March at 1:59 59’ changes to 3:00 00’ Winter time: the first Sunday of November at 1:59 59’ changes to 1:00 00’ Switching the light on A) Battery operation Press any buttons to light up the display for 10 seconds. B) Power mains operation When the base unit is powered through the power adapter and the power mains, the display is constantly illuminated. -
Page 19: Troubleshooting
2. Wipe the base unit with a slightly damp cloth when required. 3. Dry off the device completely before connecting it with the power adapter again. Technical Data Base unit Model: WT2076 Power consumption: 5.0V 150 mA Power supply: 3 x LR03 (AAA) / 1.5 V... -
Page 20: Power Adapter
Resolution: 0.18°F Humidity measuring range: 1 % to 99 % relative humidity Humidity measuring accuracy:+/- 2 % with a measuring range of 20% to 80%, +/-4% with measuring range of 1% to 19% and 81% to 99% Resolution: 1 % Wireless sensor Model: WT2022A Batteries: 2 x LR06 type (AA) 1.5 V... - Page 21 • Connect the equipment into an outlet on a circuit different from that to which the receiver is connected. • Consult the dealer or an experienced radio / TV technician for help. Disclaimers Manufacturer reserves the right to change specifications of the product. Manufacturer and supplier are not responsible for malfunction where interference occurs.
Need help?
Do you have a question about the WT2076 and is the answer not in the manual?
Questions and answers
how to change batteries