Advertisement
Available languages
Available languages
Quick Links
5216 Portside Dr., Medina, OH 44256 USA • PH: 1 330.722.5033 • FAX: 1 330.722.5037
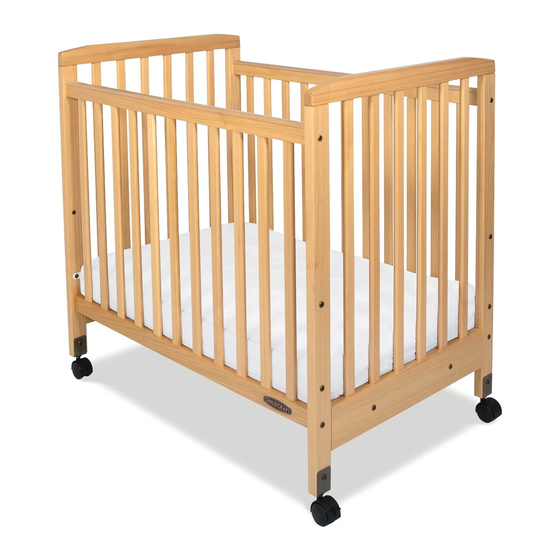
Bristol™ Compact Stationary Side Crib
Read all instructions BEFORE assembly and USE of product.
THIS IS THE ASSEMBLY INSTRUCTIONS FOR CRIBS SOLD IN CANADA
INSTRUCTIONS D'ASSEMBLAGE POUR LES LITS DE BÉBÉ VENDUS AU CANADA
FOR CUSTOMER SERVICE CALL
1-877-716-2757
(outside of U.S. 330-722-5033). DO NOT CALL
RETAILER OR RESELLER FOR SERVICE
AS THEY ARE NOT AUTHORIZED TO
RESOLVE ANY SERVICE ISSUES.
FOR WARRANTY AND FEDERAL SAFETY
STANDARD COMPLIANCE CERTIFICATES,
PLEASE VISIT OUR WEBSITE AT
www.foundations.com
ASSEMBLY ASSISTANCE
IMPORTANT: retain for future reference read
carefully.
Foundations strives for the highest quality in our
products but occasionally a missing part or problem
can occur during assembly.
If any parts are missing or broken or you need
assistance with assembly, DO NOT return the
product to your dealer. Go to our website at
www.childcraftbaby.com or call Foundations for
assistance at 1-877-716-2757 (U.S. Only) or
1-330-722-5033 (Monday through Friday, 9:00
a.m.– 4:00 p.m. Eastern Time). Please have the
model number and manufacture date available
when you call or write us at: Foundations,
5216 Portside Dr., Medina, OH. 44256
ASSEMBLY INSTRUCTIONS
• Adult assembly required.
• Read all instructions BEFORE assembly and USE
of product. KEEP INSTRUCTIONS FOR FUTURE
USE.
• Unpack carton, remove packing materials,
including poly bag. Identify and check all parts.
Foundations Worldwide, Inc.
www.childcraftbaby.com
Models Covered: F99040
KEEP INSTRUCTIONS FOR FUTURE USE.
Assembled Crib
Record the information for your product here:
Model number:
Manufacture date:
PO number:
1
AB20097A_G
Advertisement

Related Manuals for Child Craft Bristol F99040


Summary of Contents for Child Craft Bristol F99040
- Page 1 Foundations Worldwide, Inc. 5216 Portside Dr., Medina, OH 44256 USA • PH: 1 330.722.5033 • FAX: 1 330.722.5037 www.childcraftbaby.com Bristol™ Compact Stationary Side Crib Models Covered: F99040 Read all instructions BEFORE assembly and USE of product. KEEP INSTRUCTIONS FOR FUTURE USE. THIS IS THE ASSEMBLY INSTRUCTIONS FOR CRIBS SOLD IN CANADA INSTRUCTIONS D’ASSEMBLAGE POUR LES LITS DE BÉBÉ...
-
Page 2: Parts List
PARTS LIST Part Number Quantity Part Description A. 4mm Allen Wrench 11200451 B. 6mm x 60mm Allen Head Bolt 11200452 C. 6mm x 14mm Allen Head Bolt 11200453 D. 6mm x 20mm Allen Head Bolt 11200454 E. 6mm Connector Nut 11200455 F. - Page 3 STEP 1 Construct Back Assembly: IMPORTANT SAFETY NOTICE: When assembling the crib, labels on the End Panels (I) MUST face toward the inside of the crib. If crib is assembled incorrectly, it could create an entrapment hazard between the mattress and the End Panels (I).
- Page 4 STEP 3 Construct Front Assembly: Attach the remaining Stationary Side (K) to the opposite side of End Panels (I) using the same process described in Step 1. Refer to Figure 1 diagram. STEP 4 Filling Empty Holes In End Panels: Additional Allen Head Bolts (C) and Connector Nuts (E) are supplied to fill open holes in the End Panels to prevent possible finger entrapment of a child.
- Page 5 STEP 5 Install Casters: (2) Casters (G) which have a built in locking brake and (2) Casters (H) which do not have a built in locking brake are supplied with this crib. Note: Install the (2) Casters with Locking Brake on same side of crib that Childcraft Logo on Stationary Side (K) is Logo Install Casters (G and H) by sliding attached mounting...
-
Page 6: Maintenance
Maintenance Cleaning and Storage MAINTENANCE: Upon completion of the assembly, check to make sure all screws, bolts and connectors are tightened and secure. Periodically check crib for damaged hardware, loose joints, missing parts or sharp edges before and after assembly and frequently during use. DO NOT use crib if any parts are missing or broken. - Page 7 Mattress Support Adjustment Crib has two (2) mattress height adjustment positions - Newborn Position and Toddler Position. NEWBORN POSITION 1 WARNINGS • The Newborn Position 1 is for use only with children that are not able to push up on their hands and knees.
- Page 8 WARNINGS • DO NOT use this crib if you cannot exactly follow the instructions that come with it. • DO NOT use this crib for a child who can climb out of it or who is taller than 90 cm. •...
- Page 9 Foundations Worldwide, Inc. 5216 Portside Dr., Medina, OH 44256 É-U • Téléphone: 1 330.722.5033 • Télécopieur: 1 330.722.5037 www.childcraftbaby.com Lit SafetyCraft Compact fixe Side ® Les modèles visés: F99040 Veuillez lire toutes les instructions AVANT de commencer l’assemblage et l’UTILISATION de ce produit. CONSERVEZ CES INSTRUCTIONS À...
-
Page 10: Liste Des Pièces
LISTE DES PIÈCES Description des pièces Numéro de pièce Quantité A. Clé hexagonale de 4 mm 11200451 B. Boulon hexagonal de 6 mm x 60 mm 11200452 C. Boulon hexagonal de 6 mm x 14 mm 11200453 D. Boulon hexagonal de 6 mm x 20 mm 11200454 E. - Page 11 ÉTAPE 1 Pour assembler l’arrière du lit : AVIS DE SÉCURITÉ IMPORTANT : Lors du montage de la crèche, les étiquettes sur les panneaux d’extrémité (I) doit faire face vers l’intérieur de la crèche. Si votre lit est mal monté, il pourrait créer un risque de pincement entre le matelas et les panneaux d’extrémité...
- Page 12 ÉTAPE 3 Pour assembler l’avant du lit : Fixez le côté fixe restant (K) de l’autre côté de panneaux d’extrémité (I) en utilisant le même procédé décrit dans l’Etape 1 Se référer à la Figure 1 schéma. ÉTAPE 4 Remplir les trous vides dans les panneaux de fin : Allen supplémentaires boulons à...
- Page 13 ÉTAPE 5 Installez roulettes: (2) Roulettes (G) qui ont construit dans le frein et (2) Roulettes (H) de verrouillage qui n’ont pas construit dans le frein de stationnement sont fournis avec cette crèche. Remarque: Installez les (2) Roulettes avec blocage de frein du même côté...
-
Page 14: Entretien
Entretien, nettoyage et entreposage ENTRETIEN : Lorsque le lit est complètement assemblé, vérifiez que tous les boulons, vis et raccords sont fermement serrés. Vérifiez régulièrement si le lit comporte des ferrures endommagées, des joints desserrés, des pièces manquantes ou des rebords acérés avant et après l’assemblage et fréquemment lorsque le lit est utilisé. N’utilisez PAS le lit si des pièces sont manquantes ou endommagées.Si une pièce est manquante ou brisée, ou si vous avez besoin d’aide, NE retournez PAS le lit à... - Page 15 Réglage De La Hauteur Du Support Du Matelas Le lit comporte deux (2) emplacements pour régler la hauteur du matelas - Position pour nouveau-né et Position pour jeune enfant. Position 1 Pour Nouveau-né AVERTISSEMENT • La Position 1 pour nouveau-né doit être utilisée uniquement avec les enfants qui ne sont pas encore capables de se mettre à...
- Page 16 MISE EN GARDE • Ne pas utiliser le lit à moins ďêtre en mesure de suivre précisément les instructions qui ľaccompagnent. • Ne pas utiliser le lit si l’enfant est capable ďen sortir ou mesure plus de 90 cm. • Ne pas mettre dans le lit ou à proximité de celui-ci des cordes, courroies ou objets semblables qui risqueraient de s’enrouler autour du cou de l’enfant.
Need help?
Do you have a question about the Bristol F99040 and is the answer not in the manual?
Questions and answers