Table of Contents
Advertisement
Quick Links
•
Please read instructions carefully before installation.
•
Check the contents of kit. Contact your YAKIMA dealer if any parts appear missing or damaged.
•
Place these instructions in the vehicle's glove box after installation is complete.
ITEM
COMPONENT
1.
Awning Bracket Assembly
2.
M6 Nut
3.
M6 Washer
4.
M6 Bolt
TOOLS REQUIRED:
• Tape Measure
•
Spanner 10 mm / 13 mm
6
7
8
2
3
4
Note number of channels at rear of awning:
6100002998-Rev2
®
QUICK RELEASE AWNING BRACKETS
FIRST TIME INSTALLATION
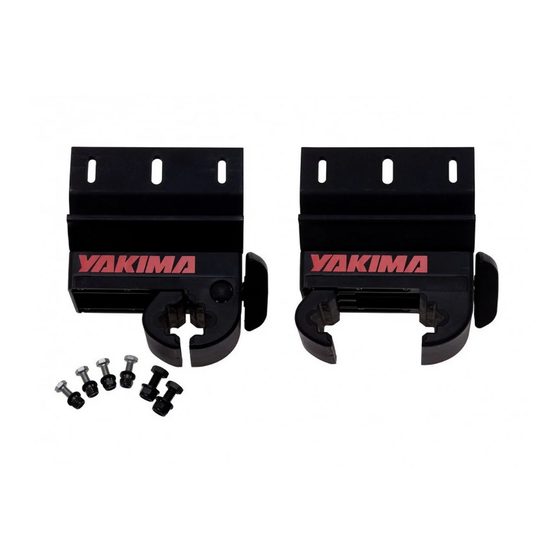
KIT CONTENTS
QTY
ITEM
x1
x4
x4
x4
1
EASY-OFF
COMPONENT
5.
Awning Bracket Assembly
(with Lock Cavity)
6.
M8 Nut
7.
M8 Washer
8.
M8 Bolt
•
For two channel awnings go to
Page 2
•
For one channel awnings go to
Page 5
QTY
AWNING SOLD SEPARATELY
5
x1
x2
x2
x2
1/8
Advertisement
Table of Contents

Related Manuals for Yakima EASY-OFF


Summary of Contents for Yakima EASY-OFF
- Page 1 FIRST TIME INSTALLATION • Please read instructions carefully before installation. • Check the contents of kit. Contact your YAKIMA dealer if any parts appear missing or damaged. • Place these instructions in the vehicle’s glove box after installation is complete. KIT CONTENTS...
- Page 2 ASSEMBLY INSTRUCTIONS: AWNINGS WITH TWO CHANNELS OPEN CLAMPS Rotate Tightening Knob on Bracket in an anti-clockwise direction to open Clamp Jaws fully. INSTALL BRACKETS ONTO AWNING The hardware used to secure the Brackets to the awning will depend on the width of the upper channel.
- Page 3 If Using M8 Hardware Insert an M8 Bolt into each end of the upper channel. Place a Bracket over each Bolt ensuring shaft runs through the largest Bracket hole in the centre. Ensure rib of Bracket sits within the bottom channel of the awning.
- Page 4 INSTALL AWNING ON VEHICLE With the assistance of a friend, carefully place the awning onto your vehicle ensuring both Clamps are seated evenly over the crossbars. If necessary, fine tune the position of the Brackets and re-measure the awning overhang on each end to ensure awning remains balanced over the bars.
- Page 5 If you have purchased movement is detected, return to previous step. lock cores, install them according to your lock core instructions. Yakima #8007202 ASSEMBLY INSTRUCTIONS: AWNINGS WITH ONE CHANNEL OPEN CLAMPS Rotate Tightening Knob on Bracket in an anti-clockwise direction to open Clamp Jaws fully.
- Page 6 INSTALL BRACKETS ONTO AWNING Insert an M8 Bolt into each end of the awning channel. Place a Bracket over each Bolt ensuring shaft runs through the largest Bracket hole in the centre. Note that the rib of the Bracket should sit below awning. Thread an M8 Washer and M8 Nut onto each Bolt before tightening loosely by hand.
- Page 7 INSTALL AWNING ON VEHICLE With the assistance of a friend, carefully place the awning onto your vehicle ensuring both Clamps are seated evenly over the crossbars. If necessary, fine tune the position of the Brackets and re-measure the awning overhang on each end to ensure awning remains balanced over the bars.
- Page 8 Yakima #8007202 REMOVAL Rotate Tightening Knob on Bracket Remove awning. in an anti-clockwise direction to unlock/open Clamp Jaws fully. www.yakima.com.au YAKIMA AUSTRALIA PTY. 17 Hinkler Court Brendale, QLD 4500 Australia 1800 143 548 YAKIMA PRODUCTS, INC. 4101 Kruse Way...
Need help?
Do you have a question about the EASY-OFF and is the answer not in the manual?
Questions and answers