Advertisement
User's Manual
TCK60-E/TCK070-E/TCK113-E
DIH602-E/DIH070-E/DIH113-E
BK60-E/BK70-E/BK602-E
BK60S-E/BK70S-E/BK602S-E
DIBK226-E/DIBK235-E/DIBK261-E/DIBK218-E
DIBK226S-E/DIBK235S-E/DIBK261S-E/DIBK218S-E
DIHG900-E/DIHG450-E
Read this manual,
before using the Range.
Theory
Cautions
Specification
How to Use
Cleaning & Troubleshooting 20~21P
Installation
Cookware for Induction
Warranty Card
1. Use an individual ELB having rated ampacity according to electric wiring
2. DO NOT block the air-intake or air-outflow panels as blocking may overheat
the unit.
3. Use pans 17cm or larger in diameter.
4. DO NOT touch the hot surface of the ceramic plate. NOTE: The induction
range itself does not produce any heat during cooking, however, the heat from
the pan will leave the surface of the ceramic hot!
5. DO NOT heat empty pots or pans. Heating an empty pan could automatically
activate the
Caution
empty pan can become dangerously hot, resulting in fire or personal injury.
6. Place the induction range on a horizontal surface and at least 10cm(4'') away
from the wall and other objects for the proper ventilation.
7. DO NOT place any objects or tools in the air-intake panel. Doing so may
cause electrical shock.
4P
5~9P
8. To protect against electrical shock, DO NOT immerse the unit, the power
10~16P
cable in water or other liquids.
17~19P
9. Close supervision is necessary when the induction range is used or near
children.
22~28P
29P
30~31P
INSTRUCTIONS and SAFEGUARDS
regulation before connecting to a distribution panel.
See page 22~23 for electrical wiring installation.
Please refer to 11 page for a list of suitable and unsuitable pans.
overheating protection function and the unit will shut off. An
2012-09-10
1
Advertisement
Table of Contents

Related Manuals for dipo INDUCTION TCK60-E


Summary of Contents for dipo INDUCTION TCK60-E
- Page 1 2012-09-10 INSTRUCTIONS and SAFEGUARDS User’s Manual 1. Use an individual ELB having rated ampacity according to electric wiring TCK60-E/TCK070-E/TCK113-E regulation before connecting to a distribution panel. DIH602-E/DIH070-E/DIH113-E See page 22~23 for electrical wiring installation. BK60-E/BK70-E/BK602-E BK60S-E/BK70S-E/BK602S-E 2. DO NOT block the air-intake or air-outflow panels as blocking may overheat the unit.
- Page 2 2012-09-10 Theory of DIPO Induction 10. DO NOT operate the induction range if it has been damaged in any manner or if the unit malfunctions. Return the unit to the nearest authorized service facility Induction Range for examination or repair.
- Page 3 2012-09-10 Warning / Cautions Warnings / Cautions Contents Warning Indicates the possibility of severe injury or death . Warning 1. Use a proper circuit breaker to standard. Indicates the possibility of injury or damage to Caution the equipment. S Y M B O L <1 Phase>...
-
Page 4: Warnings & Cautions
2012-09-10 Warnings / Cautions Warnings / Cautions Warning Warning This appliance is not intended for use by persons (including children) Don’t spray water on the range. Don’t touch the hob surface, after with reduced physical, sensory or using range. It will be hot. *It can cause a fire or a electric shock. -
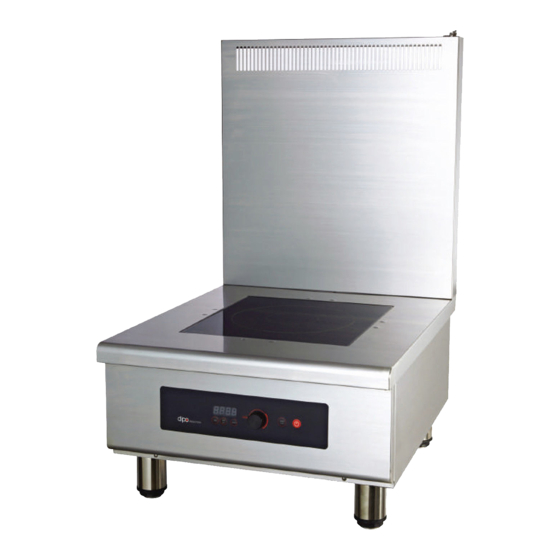
Page 5: Specifications
2012-09-10 Warnings / Cautions Specifications MODEL: TCK60-E/TCK070-E/TCK113-E Warning External Temperature Exhaust Vent Unplug or turn of the circuit Sensor Do not block the exhaust vents. breaker when not in use. Connector Ceramic Top Plate Display Use vessels of the proper size. - Page 6 2012-09-10 Specifications Specifications MODEL: BK602-E/BK60-E/BK70-E MODEL: DIH602-E/DIH070-E/DIH113-E Exhaust Vent Exhaust Vent Ceramic Top Plate External Air Intake Ceramic Temperature Sensor Top Plate Connector Control Knob Display Control Knob Display Timer Button External Start Button Temperature Timer Button Power Power Button Sensor Button Min/Sec...
- Page 7 2012-09-10 Specifications Specifications MODEL: BK602S-E/BK60S-E/BK70S-E MODEL: DIBK-E Series Control Knob External Temperature Sensor Connector Ceramic Top Plate Timer Button Exhaust Hole Air Intake Min/Sec Ceramic Top Button Plate Display Control Knob Timer Button External Back Temperature Power Burner Sensor Button Min/Sec Start Display...
- Page 8 2012-09-10 Specifications Specifications MODEL: DIBKS-E Series MODEL: DIHG900-E/DIHG450-E Control Knob Exhaust Ceramic Top <DIHG450-E> Vent Plate Timer Button Min/Sec Iron Button Plate Grease <DIHG900-E> Back Display Burner Power Button Display Control Front Air Filter Knob Burner Start Mode Display Air Intake Button Start Button...
-
Page 9: How To Use
2012-09-10 How To Use How To Use DIBK(S)-E Series BK(S)-E/TCK-E/DIH-E Series Control Knob Time Button Min/Sec Button Mode Button Start Timer Start Button Control Knob Min/Sec Power Button Button Button Button Power Button 1. Connect the power cable. 1. Connect the power cable. ◆... - Page 10 2012-09-10 How To Use Cleanings DIHG900-E/DIHG450-E Cleanings 1. Cleaning ceramic top plate and control panel ◆ Light stains : Clean the top plate with the soft and wet cloth. ◆ Severe stains : Use a soft cloth with a mild cleaning agent or detergent. ◆...
-
Page 11: Troubleshooting
◆Check that the temperature sensor is connected to the product correctly. ◆"E5" error means that the sensor isn't connected to the product. Model Output Ampere Voltage TCK60-E 220~240V 3PH DIH602-E 220~240V 3PH ◆Unplug or turn of the breaker for at least 1 minute, plug BK602(S)-E... - Page 12 2012-09-10 Installation Installation BK-E Series Installing Electricity 1. Match cut-out size to the product. 2. Space of 10cm (4”) and open louvers in front of the unit is required 3. 220V 1 Phase Circuit Breaker for ventilation. 3. For Drop-in units, be sure the counter top is adequately reinforced to bear the weight of the unit in operation.
- Page 13 2012-09-10 Installation Installation DIBK-E Series BKS-E Series 1. Match cut-out size to the product. 1. Match size of hole with size of product as possible. 2. Space of 10cm and open louvers in front of the unit is required for 2.
- Page 14 2012-09-10 Installation Installation DIBKS-E Series DIBKS-E Series 1. Match size of hole with size of product as possible. 2. Space of 10cm and holes to front of product is needed for 6. In case of DIBKS-E Model, the ventilation and the air flow guide of ventilation.
-
Page 15: Induction Cookware
2012-09-10 Induction Cookware Warranty Selecting proper pots BKP/BK 설치 가이드 Limited Warranty Statement Model Pan Bottom Diameter 1. Bottom of pots must be flat. All commercial cooking equipment manufactured by DIPO is warranted TCK-E Series 17~36cm against defects in materials and workmanship for a period of one year BK(S)-E Series from the date of invoice. - Page 16 2012-09-10 Warranty This warranty is void if it is determined upon inspection by DIPO or one it’s Authorized agents that the equipment has been modified, misused, misapplied, improperly installed, or damaged in transit or by fire, flood or act of God. Broken Glass-Ceramic tops are considered abuse and are NOT covered.
Need help?
Do you have a question about the TCK60-E and is the answer not in the manual?
Questions and answers