Advertisement
Table of Contents
- 1 Table of Contents
- 2 Mt-125 Troubleshooting and Repair Analysis
- 3 MT-275: Abnormal Operation - Warning Signals
- 4 Mt-275 Troubleshooting and Repair Analysis
- 5 Printed Circuit Board- Replacement
- 6 Motor and Fan-Replacement
- 7 Appendix
- 8 Removal of Top Cover
- 9 Microprocessor - Replacement
- 10 Start-Up Characteristics
- Download this manual
Advertisement
Table of Contents
Troubleshooting

Subscribe to Our Youtube Channel
Related Manuals for Flowtron MOSQUITO PowerTrap MT-125


Summary of Contents for Flowtron MOSQUITO PowerTrap MT-125
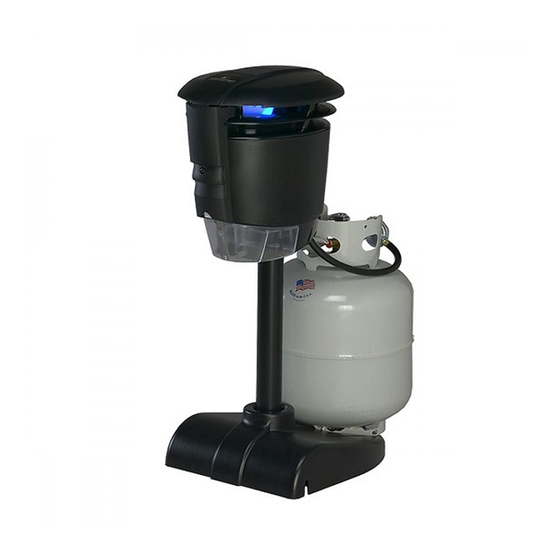
- Page 1 TECHNICAL MANUAL...
-
Page 2: Table Of Contents
FLOWTRON Outdoor Products, 15 Highland Ave., Malden, MA 02148 • www.flowtron.com TABLE OF CONTENTS 1 . MT-125: Abnormal Operation - Warning Signals MT-125: Troubleshooting and Repair Analysis MT-275: Abnormal Operation — Warning Signals MT-275: Troubleshooting and Repair Analysis Printed Circuit Board - Replacement Motor and Fan - Replacement Burner Assembly - Replacement —... -
Page 3: Mt-125 Troubleshooting And Repair Analysis
1. Lack of propane gas Cause: a). Refill propane tank b). Check for leaks c). Reset the microprocessor by interrupting the unit's electrical power d). Re-apply power to restart the unit 2. Initial start-up was unsuccessful a). Follow "Troubleshooting and Repair Analysis" on next page to determine cause and recommended corrective action 3. - Page 4 Connect the power pack to an AC outlet; connect the low voltage wire to the unit's input plug. Turn the propane valve on the propane tank to the "on" position. The thermocouple reader should show a gradual increase in temperature. When the temperature reaches approximately 195 F (90 C), the propane valve should begin to operate...
- Page 5 In the unlikely event that the burner temperature reaches 1360 F, (738 C), the unit will automatically shut down and the blue LED lights will flash signaling an overheat condition. Allow the unit to cool and then restart. If the overheat condition reoccurs, replace the propane valve. During start-up, if the red LED light flashes, this indicates that the burner temperature will not increase above 760 degrees.
-
Page 6: Mt-275: Abnormal Operation - Warning Signals
3. ABNORMAL OPERATION -WARNING SIGNALS MT-275 Three flashing mode lights on the control panel Symptom: 1 . Lack of propane gas Cause: a). Refill propane tank b). Check for leaks c). Press "off/reset" button on the control panel d). Select mode and restart the unit 2. - Page 7 Remove top cover. Connect thermocouple test leads to pins on front end of printed circuit board. (See appendix A for instructions on removing the top cover.) The thermocouple reader should show ambient (room) temperature. If it shows a minus, or negative, reading, switch the thermocouple test leads.
- Page 8 Once the valve begins to operate, the burner temperature will increase slowly (approximately 10 - 20 per second) to 250 0-270 0 F, (1 20 0-133 0 C) and then will start to increase more rapidly (approximately 3 0-40 per second). At approximately 3500 F, (1770C) the fan should begin to operate and cycle "on"...
-
Page 9: Printed Circuit Board- Replacement
5. PRINTED CIRCUIT BOARD- REPLACEMENT 1. Unplug the PowerTrap's electrical connector and disconnect the gas regulator from the propane tank. 2. Remove the top cover. (See appendix A instructions on removing the top cover). 3. Disconnect the six wires from their connectors located along the outside edge of the PCB. Disconnect the thermocouple connector located at the front edge of the PCB. - Page 10 5. Remove the two screws holding the impeller housing to the top plate. These screws also hold the motor in place and removing these screws will allow the motor to be removed from beneath the top plate. 6. Remove the fan from the motor shaft and place it on the new motor. Make certain the fan is located in the same place on the motor shaft as it was on the shaft of the old motor.
- Page 11 7. Position the replacement burner assembly in place with its tabs penetrating the metal top plate. Make certain that the white thermal shield at the top of the burner lies under the burner opening in the metal top plate. Bend the tabs at the top of the burner assembly outward to hold it in place.
-
Page 12: Appendix
8. BURNER ASSEMBLY - REPLACEMENT Applicable for units manufactured from 2011 to present 1. Unplug the PowerTrap and disconnect the regulator from the propane tank. 2. Remove the top cover. (See Appendix A for instructions on removing the top cover.) 3. -
Page 13: Removal Of Top Cover
REMOVAL OF TOP COVER TO REMOVE THE TOP COVER FROM THE POWERTRAP, PROCEED AS FOLLOWS: 1 . Unplug the PowerTrap and disconnect the gas regulator from the propane tank. Remove the two screws which secure the top cover to the metal plate located under the top cover at the front edge of the unit, to the left and right of center. -
Page 14: Microprocessor - Replacement
MICROPROCESSOR - REPLACEMENT 1 . Unplug the PowerTrap and disconnect the regulator from the propane tank. 2. Remove the top cover. (See Appendix A for instructions on removing the top cover.) as follows: 3. Remove the three nuts located at the top of the PCB and raise the board to gain access to the microprocessor. - Page 15 Temperature Function Elapsed Time Comments Srart 25 C Ambient 0:00 Valve Pulses Valve makes clicking sound;Gas flow 88 - 93 c starts Fan Starts 2:30 - 3:00 min. 170- 180 c "On" 1 second every 20 - 30 seconds Fan Intermittent 230 - 235 c "On"...
-
Page 16: Start-Up Characteristics
Fan Continuous 5:00 — 8:00 min. 398 — 405 C Auto control begins Start-up Complete 10:00 — 12:00 560 - 593 c Stabilizes at normal operating temperature PowerTrap Start-Up Characteristics (Temperature — Fahrenheit) Function Elapsed Time Temperature Comments Srart 78 F Ambient 0:00 Valve Pulses Valve makes clicking sound;Gas flow...
Need help?
Do you have a question about the MOSQUITO PowerTrap MT-125 and is the answer not in the manual?
Questions and answers