
Related Manuals for Insignia NS-TWM45W1


Summary of Contents for Insignia NS-TWM45W1
- Page 1 USER GUIDE High Efficiency Top Load Washer NS-TWM45W1 Before using your new product, please read these instructions to prevent any damage.
-
Page 2: Table Of Contents
Contents Introduction ............3 IMPORTANT SAFETY INSTRUCTIONS . -
Page 3: Introduction
ONE-YEAR LIMITED WARRANTY .........45 Introduction Congratulations on your purchase of a high-quality Insignia product. Your NS-TWM45W1 represents the state of the art in top-load washing machine technology and is designed for reliable and trouble-free performance. IMPORTANT SAFETY... - Page 4 SAFETY & PRECAUTIONS State of California Proposition 65 Warnings WARNING: Cancer and Reproductive Harm–www.P65Warnings.ca.gov. WARNING: Do not store or use gasoline or other flammable vapors and liquids in the vicinity of this or any other appliance. Basic precautions WARNING Read all instructions before using the appliance. Use this appliance only for its intended purpose as described in this User Guide.
- Page 5 SAFETY & PRECAUTIONS NS-TWM45W1 Do not place items exposed to cooking oil in your washer. Items contaminated with cooking oil may contribute to a chemical reaction that could cause a load to catch fire. This washer is not designed for maritime use or for mobile installations such as in RVs, aircraft, and other mobile platforms.
- Page 6 SAFETY & PRECAUTIONS Do not install on carpet. Install the washer on a level and solid floor that can support its weight. Failure to do so may result in abnormal vibrations, noise, or problems with the product. The washer is heavy. Two or more people may be needed to install and move the appliance.
- Page 7 SAFETY & PRECAUTIONS NS-TWM45W1 Do not let children or infirm persons use this washer unsupervised. Failure to do so may result in electric shock, burns, or injury. Do not attempt to repair, disassemble, or modify the appliance yourself. • Do not use any fuse (such as copper, steel wire, etc.) other than the standard fuse.
- Page 8 SAFETY & PRECAUTIONS Open the faucet slowly after a long period of non-use. The air pressure in the water supply hose or the water pipe may result in damage to a part or in water leakage. If a drain error occurs during an operation, check if there is a draining problem. If the washer is used when it is flooded because of a draining problem, it may result in electric shock or fire due to an electrical short circuit.
- Page 9 SAFETY & PRECAUTIONS NS-TWM45W1 Do not leave metal objects (safety pins, hair pins, and so on) or bleach in the tub for long periods of time. This may cause the tub to rust. • If rust appears on the surface of the tub, apply a neutral cleansing agent to the surface and use a sponge to clean it.
-
Page 10: Features
INSTALLATION INSTRUCTIONS Features Package contents Make sure that the following items came with your washer: Filter (2) Hose clamp (2) Hose holder (1) User Guide Drain hose and clamp (1) www.insigniaproducts.com... -
Page 11: Main Components
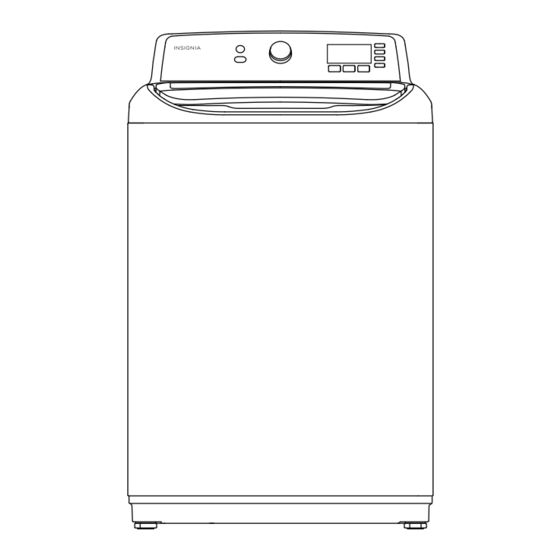
INSTALLATION INSTRUCTIONS NS-TWM45W1 Main components Faucets and water inlet hoses (not included) Drain hose and holder Power cord Control panel Water inlet valves (on Top lid the back) Attach hose clamps to predrilled holes Cabinet Drain hose outlet Four adjustable legs www.insigniaproducts.com... - Page 12 INSTALLATION INSTRUCTIONS See-through window Bleach Fabric softener compartment compartment Detergent compartment Lid lock www.insigniaproducts.com...
-
Page 13: Control Panel
For more information, see Washer options and settings on page 37. Cycle Note: ColdMotion™ is a unique Insignia feature which uses cold selector water to clean your clothing. Select this cycle when washing clothing that requires cold water but may need extra cleaning. - Page 14 INSTALLATION INSTRUCTIONS # ITEM DESCRIPTION Light to indicate what part of the cycle your washer is in. For Cycle status example, the Soak light turns on when your washer is in the soak lights process. Press to select a time when you want the cycle to begin. You can set the time up to 24 hours in advance in one-hour increments.
-
Page 15: Unpacking Your Washer
INSTALLATION INSTRUCTIONS NS-TWM45W1 Unpacking your washer WARNINGS: • Packing materials can be dangerous to children. Keep all packing materials (plastic bags, polystyrene, and so on) well out of the reach of children. • Don’t operate your washer on the foam base cushion. Doing so results in serious vibration, which could cause equipment damage or result in physical injury. -
Page 16: Washer Dimensions And Installation Measurements
INSTALLATION INSTRUCTIONS Washer dimensions and installation measurements 27 in. (68.6 cm) www.insigniaproducts.com... - Page 17 INSTALLATION INSTRUCTIONS NS-TWM45W1 28.9 in. (73.5 cm) www.insigniaproducts.com...
- Page 18 INSTALLATION INSTRUCTIONS If you install your washer in an alcove or closet, the front of the closet must have two unobstructed air openings for a combined minimum total area of 72 sq. in. (465 sq. cm) with a minimum clearance of 3 in. (7.6 mm) at the top and bottom. A slatted door with equivalent space clearance is acceptable.
-
Page 19: Electrical Requirements
INSTALLATION INSTRUCTIONS NS-TWM45W1 • Gap between the end of the water valve and the wall: • Case 1: If you connect the supply hose after you install your washer: Over 3.9 in. (10 cm) • Case 2: If you connect the supply hose before you install your washer: Over 2.8 in. -
Page 20: Water Requirements
INSTALLATION INSTRUCTIONS WARNINGS: • You’re responsible for providing adequate electrical services for your washer. • To prevent unnecessary risk of fire, electrical shock, or personal injury, all wiring and grounding must be done in accordance with the National Electrical Code ANSI/FNPA, No.70 Latest Revision and local codes and ordinances. -
Page 21: Step 2: Connect The Water Hoses
INSTALLATION INSTRUCTIONS NS-TWM45W1 • Is away from heat sources such as oil or gas. • Has enough space so that your washer doesn’t rest on its power cord. See Choosing a proper location on page 9. Step 2: Connect the water hoses Note: The water supply hoses aren’t supplied with your washer and must be... - Page 22 INSTALLATION INSTRUCTIONS Tighten the hose and faucet fittings by hand until they are snug. Tighten them an additional two-thirds of a turn with pliers or a wrench. Pull the water supply hoses downwards to make sure that they are connected securely. Cold Filter CAUTION:...
- Page 23 INSTALLATION INSTRUCTIONS NS-TWM45W1 Place the unconnected ends of the hoses into a bucket, then turn on the faucets connected to the water supply hoses for 10 or 15 seconds to remove any foreign substances. Turn off the faucets. www.insigniaproducts.com...
- Page 24 OPERATING INSTRUCTIONS Connect the ends of the water supply hoses to the water supply intake connections at the top of your washer. Make sure that the rubber washers are in place. The water supply hose connected to the hot faucet must be connected to the hot water supply intake and the water hose connected to the cold faucet must be connected to the cold water supply intake.
-
Page 25: Step 3: Connect The Drain Hose
INSTALLATION INSTRUCTIONS NS-TWM45W1 Step 3: Connect the drain hose CAUTIONS: • Failure to slide the drain hose completely over your washer’s drain pipe may result in water leakage. • Failure to move the clamp or hoop onto your washer’s drain pipe results in water leakage. - Page 26 INSTALLATION INSTRUCTIONS Move the clamp toward the drain pipe outlet. Tighten the clamp with a flat-head screwdriver. Fasten the drain hose to the washer frame at the indicated locations with the provided hose clamps (2), using a Phillips screwdriver. www.insigniaproducts.com...
- Page 27 INSTALLATION INSTRUCTIONS NS-TWM45W1 Position the other end of the drain hose (the loose end) in one of the following ways: CAUTION: Make sure that the connection between the drain hose and the wash basin, standpipe, or laundry tub isn’t airtight.
- Page 28 INSTALLATION INSTRUCTIONS • In a laundry tub - The laundry tub must be no shorter than 39 in. (99 cm) and no higher than 96 in. (244 cm) maximum. Hose retainer 96 in. max (244 cm) 39-in. min (99 cm) Tie strap www.insigniaproducts.com...
-
Page 29: Step 4: Level Your Washer
INSTALLATION INSTRUCTIONS NS-TWM45W1 Step 4: Level your washer CAUTION: Don’t use your washing machine without leveling it. If your washer isn’t level, it may: • Vibrate excessively which can cause your washer to malfunction • Make excessive noise • Indicate error codes E3 or E4 when your washer is running Extend the leveling feet only as much as is necessary. - Page 30 INSTALLATION INSTRUCTIONS If your washer isn’t level, carefully tilt your washer just enough to adjust the leveling feet (two in the front and two in the back) on the bottom of your washer. Extend the feet only as much as is necessary. If the feet are extended too much, your washer may vibrate.
-
Page 31: Step 5: Power Your Washer
INSTALLATION INSTRUCTIONS NS-TWM45W1 Step 5: Power your washer Plug the power cord into a well-grounded, 3-prong, 120 Volt 60 Hz approved electrical outlet, protected by a 15-amp fuse or comparable circuit breaker. Your washer is grounded through the third prong of the power cord. -
Page 32: Washing A Load Of Laundry
NS-TWM45W1 OPERATING INSTRUCTIONS Washing a load of laundry WARNING: To reduce the risk of fire, electric shock, or injury to persons, read the IMPORTANT SAFETY INSTRUCTIONS on page 3 before operating your washer. Step 1: Selecting a detergent Your washer is designed to use high efficiency (HE) detergents. -
Page 33: Step 4: Add Detergent And Additives To The Compartments
NS-TWM45W1 OPERATING INSTRUCTIONS Step 4: Add detergent and additives to the compartments Bleach Softener compartment compartment Detergent compartment Pour the recommended amount of laundry detergent directly into the detergent compartment before starting your washer. If you’re using color-safe bleach, add it with the detergent to the detergent compartment. -
Page 34: Step 5: Select The Appropriate Cycle And Options For The Load
OPERATING INSTRUCTIONS Step 5: Select the appropriate cycle and options for the load Turn the cycle selector to select a washing cycle. For information on wash cycles, see Washer options and settings on page 37. Optional: Use the control panel buttons (like Fabric Softener) to customize the washing cycle. -
Page 35: Step 7: Start Your Washer
OPERATING INSTRUCTIONS If you want to change the wash cycle settings while you’re setting the delay start time, turn the cycle selector. To return to setting the delay start time function, repeat Steps 1 and 2. Notes: • After the number of delay hours is reached by pushing the Delay button, release the button for three seconds to confirm the setting. -
Page 36: Step 8: Unload Your Laundry
OPERATING INSTRUCTIONS Step 8: Unload your laundry When the wash cycle is complete: • The Done light turns on. • Your washer beeps six times and flashes 11, 22, 33, 44, 55, 66 after the cycle is done. • Your washer unlocks the lid. Open the lid and remove the laundry. -
Page 37: Washer Options And Settings
INSTALLATION INSTRUCTIONS NS-TWM45W1 To turn off the child lock, press and hold both the Soil Level and Temp buttons for three seconds. WARNING: If your washer is turned off after the child lock functionality has been turned on, the lid unlocks and the water is drained from the tub. The child lock function remains on. -
Page 38: Maintaining Your Washer
USER MAINTENANCE INSTRUCTIONS FABRIC SOIL EXTRA FABRIC WATER CYCLE. TEMP DELAY SOAK TYPE LEVEL RINSE SOFTENER PLUS Extra Heavy Heavily Heavy Warm Duty soiled • • • • • Heavy Eco Warm *Deep cotton Medium Cold Wash fabrics Light Tap Cold Extra •... -
Page 39: Cleaning The Exterior
USER MAINTENANCE INSTRUCTIONS NS-TWM45W1 Cleaning the exterior • Use a soft cloth to wipe up all detergent, bleach, or other spills as they occur. Cleaning the interior • Clean the interior of your washer periodically to remove any dirt, soil, odor, mold, mildew, or bacterial residue that may remain in your washer as a result of washing clothes. -
Page 40: Troubleshooting
Unplug your washer from the electrical outlet and leave your washer’s lid open to let air circulate inside the tub. CAUTION: If your washer has been stored in below-freezing temperatures, allow time for any leftover water in your washer to thaw out before use. Troubleshooting CAUTION: Don’t try to repair your washer yourself. - Page 41 High Efficiency Top Load Washer PROBLEM SOLUTION Washer stops • Make sure that the power outlet is a working outlet. • Close the lid, then press the /Start/Pause button to start your washer. For your safety, your washer doesn’t spin unless the lid is closed.
- Page 42 PROBLEM SOLUTION Water leaks • Make sure that all hose connections are tight. See Step 2: Connect the water hoses on page 21 and Step 3: Connect the drain hose on page 25. • Make sure that the end of the drain hose is correctly inserted and secured to the drainage system.
-
Page 43: Understanding The Error Codes
See No water or not enough washer, the water level hasn’t water on page 40. changed in five minutes. • Contact Insignia Customer Care. Your washer takes more than 10 • See Washer doesn’t drain or spin minutes to drain. - Page 44 Specifications Dimensions 45 in. × 27 in. × 29 in. (H × W × D) (114.2 cm × 68.6 cm × 73.6 cm) Weight 137.8 lbs (62.5 kg) Power 120 V~/60 Hz Current draw Pulsator type Impeller Drum grain Ellipse Display type Display color Blue...
- Page 45 Product is determined to be defective by an authorized Insignia repair center or store personnel, Insignia will (at its sole option): (1) repair the Product with new or rebuilt parts; or (2) replace the Product at no charge with new or rebuilt comparable products or parts.
- Page 46 • Damage due to incorrect operation or maintenance • Connection to an incorrect voltage or power supply • Attempted repair by any person not authorized by Insignia to service the Product • Products sold “as is” or “with all faults”...
- Page 47 1-877-467-4289 (U.S. and Canada) INSIGNIA is a trademark of Best Buy and its affiliated companies. Distributed by Best Buy Purchasing, LLC V1 ENGLISH 7601 Penn Ave South, Richfield, MN 55423 U.S.A. 19-0724 ©2020 Best Buy. All rights reserved.
Need help?
Do you have a question about the NS-TWM45W1 and is the answer not in the manual?
Questions and answers
Locking mechanism troubleshooting
To troubleshoot the locking mechanism of the Insignia NS-TWM45W1 washer:
1. If error code "Fd" appears, it means the lid lock failed. Contact Insignia Customer Care.
2. If error code "CL" appears, the lid has been open for over 20 seconds with the child lock on. Do the following:
- Press the Power button to turn off the washer.
- Turn off the child lock function.
- If the issue continues, contact Insignia Customer Care.
If the child lock is on, turn it off before attempting any reset or button press.
This answer is automatically generated