Advertisement
Assembly and Installation Instructions
IMPORTANT: Read these instructions completely and carefully before attempting to
install and operate this valve. Failure to do so may result in improper valve operation
allowing for a potential storage tank overfill. An overfilled tank can create extremely haz-
ardous fuel spills which may result in personal injury and property damage. For further
information, please call our Customer Service Department at (252) 243-0150.
IMPORTANT: Veuillez lire ces instructions attentivement avant d'installer et d'exploiter
cette vanne. Ne pas le faire peut entraîner un fonctionnement incorrect de la vanne per-
mettant un potentiel débordement de la citerne de stockage. Un réservoir trop plein peut
créer des déversements de carburant extrêmement dangereuses qui peuvent entraîner
des blessures et des dommages matériels. Pour plus d'informations, s'il vous plaît com-
muniquer avec notre service à la clientèle au (252) 243-0150.
Note: All information, illustrations and specifications in this manual are based on
the latest product information available. We reserve the right to make changes
at any time without notice.
CAUTION: Never disconnect the drop elbow from the tight-fill adapter when the A1100 has
reached the positive shut-off level. At this point, the tank truck hose is still full and must not
be disconnected until enough fuel has been removed from the underground storage tank to
drain the hose. Premature disconnection will result in a hazardous spill and a potential for
personal injury and property damage.
ATTENTION: Ne jamais déconnecter le coude de baisse de l'adaptateur permet le remplis-
sage étanche lorsque le A1100 a atteint le niveau d'arrêt positive. A ce point, le tuyau de
camion-citerne est encore pleine et ne doit pas être débranché jusqu'à ce que suffisamment
de carburant a été éliminée du réservoir de stockage souterrain pour vidanger le tuyau.
Déconnexion prématurée entraîne un déversement dangereux et un risque de blessures et
de dommages matériels.
WARNING: If the underground storage tank is equipped with a ball float vent valve, make
sure it is not extended below the positive shut-off point of the A1100, or remove the float
vent valve.
ATTENTION: Si le réservoir de stockage souterrain est équipé d'un flotteur évent de balle
vanne, assurez-vous qu'il n'est pas prolongée en dessous du point d'arrêt positive de
l'A1100, ou supprimer la vanne flotteur de ventilation.
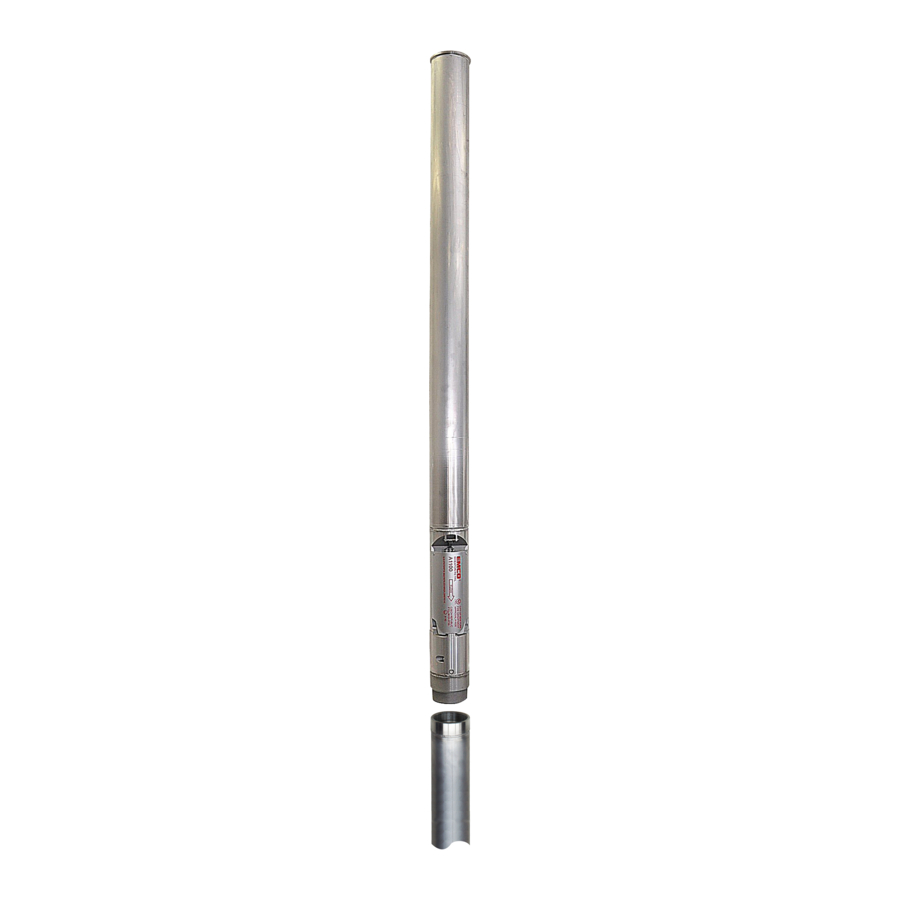
A1100 GUARDIAN COAXIAL
OVERFILL PREVENTION SYSTEM
TABLE OF CONTENTS
(with 493768 Installation Kit)
2
2
2-7
3
7-8
8
8
Advertisement
Table of Contents

Related Manuals for Emco A1100 Series

Summary of Contents for Emco A1100 Series
-
Page 1: Table Of Contents
A1100 GUARDIAN COAXIAL OVERFILL PREVENTION SYSTEM (with 493768 Installation Kit) Assembly and Installation Instructions IMPORTANT: Read these instructions completely and carefully before attempting to install and operate this valve. Failure to do so may result in improper valve operation allowing for a potential storage tank overfill. An overfilled tank can create extremely haz- ardous fuel spills which may result in personal injury and property damage. -
Page 2: Tools
ASSEMBLY PACKING LIST 493768 Assembly Kit - 06_S 493785 Assembly Kit - 08_S, Self-Sealing (1) Collar #565004 (1) Collar #565006 (1) Warning plate #564420 (6) Pop rivets #564394 (1) Gasket #565023 (6) Pop rivets #564394 (1) Seal-All #566726 (1) Disc seal #566539 (1) Hose clamp #564421 (1) Warning plate #564420 (1) Wave spring #564441... - Page 3 Figure 1 Riser Pipe With Spill Containment Manhole Figure 2 Riser Pipe Installed Inside Manway...
- Page 4 Step 3: Find Measurement B from the chart below. It is the distance from the maximum fluid height allowed to the inside top of the tank. Calculations are based on cylindrical tanks with flat ends. For exact dimensions, consult the tank gauge chart provided with your tank. NFPA30 Guidelines limit tank fill to 95%.
- Page 5 Self-Sealing Models Only Remove thrust washer (p/n 566038, supplied) and wave spring (p/n 564441, supplied) from the collar (p/n 565006, supplied). Place thrust washer first, then wave spring over the top of the tube. CONNECT THE COLLAR TO THE TOP TUBE Step 9: Insert the o-ring Step 10: Liberally lubri- (p/n 565023, supplied)
- Page 6 CONNECT THE A1100 TO THE LOWER DROP TUBE Step 13: Apply a liberal coat of pipe dope to male threads of the A1100 base. Step 14: Screw male threaded end of A1100 base into threaded end of drop tube. Step 15: Tighten. The use of strap wrenches is recommended in order to prevent raising burrs on the aluminum parts.
-
Page 7: Installation
Use the hose clamp to clamp the warning plate (p/n 564420, supplied), onto the riser pipe below the threads. Make sure label is facing up. Note: Emco recommends installing the Emco A0032-001 Adapter Clamp to pre- vent the adapter from loosening in use. -
Page 8: General Maintenance
Self-Sealing Models It is critical that the A0089-001 Fill Adapter be properly installed to allow proper vapor flow. Improper installation can result in greatly reduce vapor flow that will prevent a normal fuel drop. Step 21: Apply pipe dope to the adapt- er and riser pipe threads.
Need help?
Do you have a question about the A1100 Series and is the answer not in the manual?
Questions and answers