
Subscribe to Our Youtube Channel
Related Manuals for Lenoxx 90403B


Summary of Contents for Lenoxx 90403B
- Page 1 CHILDREN’S RIDE-ON QUAD, 6V, BATTERY OPERATED Model: 90403B / 90403R Batch no: PR4011 PLEASE READ AND RETAIN INSTRUCTIONS FOR FUTURE REFERENCE.
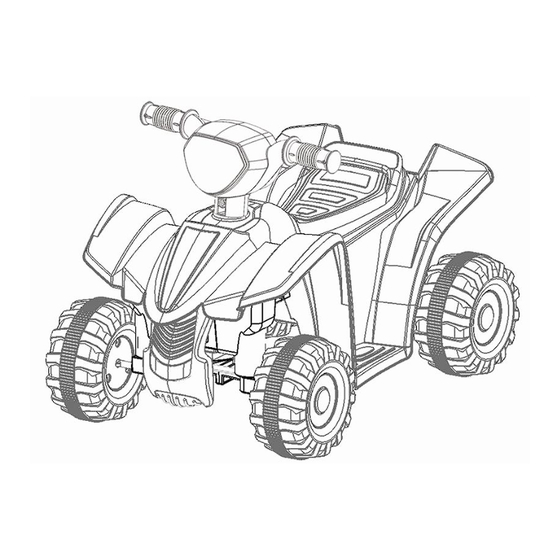
- Page 2 The illustrations used in the manual are to illustrate the operation method and structure of the product. Where there is a small difference between the physical item and the illustrations, please take the physical as the standard. SPECIFICATIONS OF THE RIDE-ON: Age range: 3 –...
-
Page 3: Connecting The Battery
Do not let children ride in the street, anywhere dangerous including slopes with more than 10 degrees, streets, next to bodies of water and away from other obstacles. Use during day light hours or in an illuminated area is advised to avoid accidents in the dark. When the ride-on is running, do not place anything on the moving parts such as the motor, gear box, wheels or steering wheel. -
Page 4: Charging The Battery
The forward/reverse switch must not be on either mode when charging. Charging time is 8 – 12 hours. The first hour of charging can get back 60% of the battery’s energy back. You may leave it to charge overnight, but NEVER continuously over 20 Hours. Otherwise you will shorten the batteries life. -
Page 5: Operation
This ride-on has a function of charging protection and while it is being charged, other functions cannot be used. The charger needs to be removed from the charging socket before it is used. Once the charger is removed, put the ride-on into either forwards or reverse mode, then press on the red acceleration button which is on the handlebars. - Page 6 5. PARTS LIST: Ride-on body X 1 Wheels X 4 Handlebar X 1 Charger X 1 Cover X 4 Axle X 4 Rear axle X 1 Small Axle X 3 Nut X 4 Φ10 Washer X 7 M4x12 Machine screw x 2 * Use a screwdriver to remove the seat and locate the gear box and battery.
- Page 7 6. ASSEMBLY: 1 Vehicle Body 2 Φ10 Washer 3 Small Axle 4 Wheels 5 Axle 6 Nut 7 Cover 8 Handlebar Before you begin: Warning: KEEP THIS GUIDE FOR FUTURE REFERENCE. ADULT ASSEMBLY REQUIRED. The product contains small parts, which are for adult assembly only. Keep children away when assembling.
- Page 8 Assemble the stand of front axle. The stand of the front axle is placed on the front axle with two screws as shown. Identify the rear axle. Note one side on it has some ‘grooves’ on it. The side with the grooves will go on the side where the normal wheel will be fitted.
- Page 9 Identify the driving wheel – this one will fit onto the gear box. Identify the normal wheel, this will go onto the other side of the box. Add this black piece to all of the wheels.
- Page 10 This is what the wheel will look like when it is put in correctly. The gear box needs to be connected to the connection from inside the ride-on.
- Page 11 Connect the gear box with the connection. Tuck the wires into the hole.
- Page 12 The gear box sits on an angle and matches up with a hole alongside the ride-on. Feed the axel through the body of the ride-on and the gear box. Add the driving wheel so it connects with the gear box. Add 1 x washer.
- Page 13 Add 1 x nut. Use your own socket (not included) to tighten it up. Repeat the steps for the other 3 x wheels which do not have a gear box attached.
- Page 14 Assemble the handlebar: Undo the nut from the handlebar. Insert the handlebar onto the end of the steering column. Insert the bolt through the handlebar and steering column, then tighten the nut. Connect the wires from the handlebar to the wires on the ride on near the steering wheel column.
- Page 15 7. MAINTENCE AND TROUBLE SHOOTING: Factors which may influence the ride-on’s performance and life span: • How flat the driving surface is • The weight of the driver • Whether the battery has been fully charged • Whether the ride-on is regularly used •...
-
Page 16: Troubleshooting
TROUBLESHOOTING: Problem Possible Cause Solution Battery low on power Recharge battery. Thermal fuse has tripped Wait 20 minutes for the fuse to reset Battery connector or wires Check that the battery connectors are firmly Ride-on does not run are loose plugged into each other. - Page 17 Storage: Do not store the ride-on in an area of high temperature, humidity or near flames. When raining or snowing, keep the ride-on under cover and out of the weather. Further information on the battery: AA BATTERIES INSIDE THE HANDLEBAR MUSIC PANEL (NOT INCLUDED): ●...
- Page 18 Battery replacement and disposal: The battery will eventually lose the ability to hold a charge. Depending on the amount of use, and varying conditions, the battery should operate for one to three years. Follow these steps to replace and dispose the battery: 1.
Need help?
Do you have a question about the 90403B and is the answer not in the manual?
Questions and answers