Advertisement
Available languages
Available languages
Quick Links
5555552COM
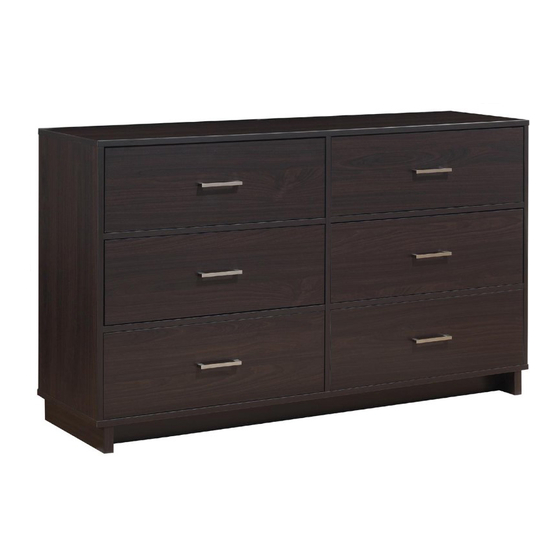
CoCeCrooC 5 Crawer CreCCer
Date of Purchase ___ / ___ / ___
Lot Number:
THIS INSTRUCTION BOOKLET CONTAINS IMPORTANT SAFETY INFORMATION. PLEASE READ AND KEEP FOR FUTURE REFERENCE.
Co Not Return ThiC Product!
Contact our customer service team for help
CaCC: 1-800-489-3351 (toll free)
Monday-Friday 9am - 5pm CST
ViCit: www.ameriwoodhome.com
WARNING
- Unit can
over causing severe injury or death.
- Anchor unit to stud in wall (if instructed to).
- Do Not allow children to climb on unit.
- Put heavy items on lower shelves or drawers.
UPC for Wal-Mart
models.
Easy
Assembly
Follow Ameriwood Home
You
Tube
B345555552COM5
Tough
Meter
Advertisement

Subscribe to Our Youtube Channel
Related Manuals for Ameriwood HOME Colebrook 5969502COM


Summary of Contents for Ameriwood HOME Colebrook 5969502COM
- Page 1 ViCit: www.ameriwoodhome.com Easy Tough Assembly Meter WARNING Follow Ameriwood Home - Unit can over causing severe injury or death. - Anchor unit to stud in wall (if instructed to). - Do Not allow children to climb on unit. Tube - Put heavy items on lower shelves or drawers.
- Page 2 Contact UC! Do NOT return this product! Contact our friendly customer service team first for help ACCemCCy TipC CaCC uC! 1-800-489-3351 Monday-Friday 9am - 5pm CST Tube ViCit ameriwoodhome.com HeCpfuC HintC PEOPLE NEEDED FOR ASSEMBLY: 1‐2 ESTIMATED ASSEMBLY TIME: 1 HOUR - Open your item in the area you plan to keep it to avoid excessive heavy lifting.
-
Page 3: Before You Start
Before You Start Read through each step carefully and follow the proper order Separate and count all your parts and hardware Give yourself enough room for the assembly process Have the following tools: Flat Head Screwdriver, #2 Phillips Head Screwdriver and Hammer Caution: If using a power drill or power screwdriver for screwing, please be aware to slow down and stop when screw is tight. - Page 4 Board Ident f cat on Not actual size T5969503010 T5969503020 T5969503030 TOP PANEL SIDE PANEL LEFT SIDE PANEL RIGHT T5969502050 T5969502040 T5969502060 DRAWER FRONT PARTITION DRAWER BACK PANEL T5969502070 T5969502080 T5969502090 SIDE RAIL LEFT DRAWER SIDE LEFT DRAWER SIDE RIGHT T5969502100 T5969502110 T5969502120...
- Page 5 Board Ident f cat on Not actual size T5969502130 T5969502140 KICK PANEL BOTTOM PANEL T5969502150 T5969502160 BACK PANEL DRAWER BOTTOM ameriwoodhome.com...
-
Page 6: Part List
Hardware Bag Reference Number : 25969502COM0 Part List Actual Size TPB0038 TPB0001 TPB0002 TPB0007 Cam Bolt Cam Lock CBS 3.5 x 15 CSK 4 x 32 15-13 TPB0005 TPB0039 TPB0040 TPB0010 DOWEL 6 X 30 PHCB 4 X 12 PH M4 X 20 NAIL Not Actual Size x1 set... - Page 7 Step 1 Quick Assembly Proper orientation of CAM LOCK TPB0002 TPB0005 TPB0007 TPB0001 TPB0036 Insert two cam lock, two screw cam bolt, and four dowel into the panel as shown. shown. SCREW HOLE POSITION FRONT BACK *raw edges are shaded ameriwoodhome.com...
- Page 8 Step 2 Quick Assembly Proper orientation of CAM LOCK TPB0002 TPB0005 TPB0007 TPB0036 LEFT SURFACE SCREW HOLE POSITION BACK FRONT RIGHT SURFACE SCREW HOLE POSITION FRONT BACK *raw edges are shaded ameriwoodhome.com...
- Page 9 Step 3 Quick Assembly Proper orientation of CAM LOCK TPB0002 TPB0005 TPB0007 Insert two cam lock, two screw cam bolt, and four dowel into the panel as shown. TPB0036 TPB0001 shown. SCREW HOLE POSITION BACK FRONT *raw edges are shaded ameriwoodhome.com...
- Page 10 Step 4 Quick Assembly Proper orientation of CAM LOCK TPB0002 TPB0005 Insert two cam lock and two dowel into two set of panel as shown. x2 Set *raw edges are shaded ameriwoodhome.com...
- Page 11 Step 5 Quick Assembly Proper orientation of CAM LOCK TPB0002 TPB0005 Insert two cam lock and two dowel into two set of panel as shown. x2 Set *raw edges are shaded ameriwoodhome.com...
- Page 12 Step 6 Attach two left brace(11) to the left panel(2) as shown. *raw edges are shaded ameriwoodhome.com...
- Page 13 Step 7 TPB0043 Attach partition panel(4) to the left brace as shown. *raw edges are shaded ameriwoodhome.com...
- Page 14 Step 8 Attach two right brace(12) to the partition panel(4) as shown. *raw edges are shaded ameriwoodhome.com...
- Page 15 Step 9 Attach right panel(3) to the right brace(12) as shown. *raw edges are shaded ameriwoodhome.com...
- Page 16 Step 10 TPB0005 Insert two dowel into side rail left as shown. *raw edges are shaded ameriwoodhome.com...
- Page 17 Step 11 TPB0005 Insert two dowel into side rail right as shown. *raw edges are shaded ameriwoodhome.com...
- Page 18 Step 12 TPB0005 Insert eight dowel into kick panel as shown. *raw edges are shaded ameriwoodhome.com...
- Page 19 Step 13 Attach side rail left(8) to the kick panel(13) as shown. *raw edges are shaded ameriwoodhome.com...
- Page 20 Step 14 Attach side rail right(10) to the kick panel(13) as shown. *raw edges are shaded ameriwoodhome.com...
- Page 21 Step 15 Attach bottom panel(14) to the components from step 14 as shown. TPB0038 Laminated Face *raw edges are shaded ameriwoodhome.com...
- Page 22 Step 16 x1 set TPB0001 TPB0017 kit into the top panel as shown. *raw edges are shaded ameriwoodhome.com...
- Page 23 Step 17 TPB0038 Attach the components from step 15 to the components from step 9 as shown. *raw edges are shaded ameriwoodhome.com...
- Page 24 Step 18 Attach the components from step 16 to the components from step 17 as shown. *raw edges are shaded ameriwoodhome.com...
- Page 25 Step 19 IMPORTANT! THE BACK PANEL IS A STRUCTURAL PART OF THIS UNIT AND MUST BE INSTALLED PROPERLY. TTA0010 Attached the back panel as shown nailing straight into the raw edges. Assure that the unit is square. Distance from corner to corner must be equal as shown. *raw edges are shaded ameriwoodhome.com...
- Page 26 Step 20 TPB0041 Insert the drawer bracket to the six set of drawer side left(7). x6 Set *raw edges are shaded ameriwoodhome.com...
- Page 27 Step 21 TPB0041 Insert the drawer bracket to the six set of drawer side right(8). x6 Set *raw edges are shaded ameriwoodhome.com...
- Page 28 Step 22 TPB0005 Insert four dowel to the six set of drawer box back(6). x6 Set *raw edges are shaded ameriwoodhome.com...
- Page 29 Step 23 TPB0038 Attach the components from step 21 to the components from step 22 as shown. x6 Set *raw edges are shaded ameriwoodhome.com...
- Page 30 Step 24 TPB0038 Attach the components from step 20 to the components from step 23 as shown. x6 Set *raw edges are shaded ameriwoodhome.com...
- Page 31 Step 25 TPB0039 Insert the drawer bottom(16) in grooving line. Attach the drawer front(5) to the components from step 24 as shown. x6 Set *raw edges are shaded ameriwoodhome.com...
- Page 32 Step 26 TPB0042 TPB0040 Attach the handle to the components from step 25 as shown. x6 Set *raw edges are shaded ameriwoodhome.com...
- Page 33 Step 27 x6 Set TPB0036 TPB0007 Attach the drawer slide to the bottom of components from step 26 as shown. x6 Set SCREW POSITION LEFT RIGHT *raw edges are shaded ameriwoodhome.com...
- Page 34 Step 28 For Masonry, Concrete, or other wall materials: TPB0017 Consult your local hardware store for appropriate anchors to bracket. IMPORTANT: THIS UNIT MUST BE SECURE TO THE WALL TO HELP PREVENT TIPOVER. FOLLOW THESE INSTRUCTIONS TO INSTALL THE ANTI-TIPPING SAFETY BRACKET PROVIDED WITH THIS PRODUCT. WARNING Serious or fatal crushing injuries can occur STUD...
- Page 35 Step 29 Notice, the drawer bracket holes are slotted. Drawer fronts can be adjusted by loosening screws, making needed adjustments and retightening screws. *raw edges are shaded ameriwoodhome.com...
- Page 36 Maximum Loads This unit has been designed to support the maximum loads shown. Exceeding these load limits could cause sagging, instability, product collapse, and/or serious injury. 75 lbs. 34.02 kg 35 lbs. 15.8 kg Warning: RiCC of injury to perConC ‐ do not pCace a teCeviCion on thiC furniture. ThiC furniture iC not approved for uCe with a teCeviCion.
- Page 37 ViCit your CocaC retaiCer'C weCCite, rate your purchaCed product and Ceave uC Come feedCacC! We wouCd CiCe to extend a Cig "ThanC You" to aCC of our cuCtomerC for taCing the to aCCemCCe thiC Ameriwood Home product, and to give uC your vaCuaCCe feedCacC. ameriwoodhome.com...
- Page 38 Español CuCierta CeCantera Este libro de instrucciones información IMPORTANTE de seguridad. Por favor lea y manténgalo para referencia en el futuro. No RegreCe eCte producto! Comuniquese con nuestro amistoso equipo de servicio al cliente para obtener ayuda. Llamenos al: 1-800-489-3351 Lunes -Viernes 9am -5pm CST ViCitar: www.ameriwoodhome.com PRECAUCION...
- Page 39 Español Página 5 Inserte dos cerraduras de leva, dos tornillos de leva de tornillo y cuatro clavijas en el panel como se muestra. Fije la corredera del cajón al panel lateral como se muestra. Página 15 Inserte dos cerraduras de leva y dos clavijas en dos juegos de panel como se muestra. Página 11 Inserte dos cerraduras de leva y dos clavijas en dos juegos de panel como se muestra.
- Page 40 Español Página 25 Conecte los panel trasero como se muestra clavando directamente en los bordes sin procesar. Asegura qie e; inidad es cuadrada. Distancia de esquina a esquina debe ser igual como se muestra por favor. IMPORTANT: El Panel trasero es una parte estructural de la unidad y debe ser instalado correctamente.
- Page 41 Nos gustaría enviar un gran "Agradecimiento" a todos nuestros clientes por tomarse el ensamblar este producto de Ameriwood Home, y por darnos sus valiosos comentarios. Gracias *raw edges are shaded ameriwoodhome.com...
- Page 42 Français Couverture Avant CE LIVRET D'INSTRUCTION CONTIENT DES INFORMATIONS IMPORTANTES SUR LA SÉCURITÉ. VEUILLEZ LIRE ET GARDER POUR UNE RÉFÉRENCE FUTURE Ne retournez paC ce produit! Contactez notre équipe de service à la clientèle amicale d'abord pour obtenir de l'aide. AppeCez‐nouC: 1-800-489-3351 (sans frais) du Lundi au Vendredi de 9h à...
- Page 43 Français Page 5 Inserte dos cerraduras de leva, dos tornillos de leva de tornillo y cuatro clavijas en el panel como se muestra. Fije la corredera del cajón al panel lateral como se muestra. Page 15 Insérez deux serrures à came et deux broches sur deux ensembles de panneau comme indiqué. Page 11 Insérez deux serrures à...
- Page 44 Français Page 25 CHARGES MAXIMALES Ce meuble a été conçu pour supporter les charges maximales indiquées. En excédant ces limites de charge, le meuble pourrait devenir instable, et/ou causer des blessures graves. AVERTISSEMENT : Risque de blessure corporelle -ne pas placer une télévision sur ce meuble. Ce meuble n'est pas approuvé...
- Page 45 Visitez le site Web de votre détaillant local, évaluez votre produit acheté et laissez-nous quelques commentaires ! Nous tenons à un grand "Merci" à tous nos clients pour avoir pris le temps d'assembler ce produit "Ameriwood Home", et de nous donner vos commentaires précieux. Merci *raw edges are shaded ameriwoodhome.com...
Need help?
Do you have a question about the Colebrook 5969502COM and is the answer not in the manual?
Questions and answers