Table of Contents
Advertisement
Available languages
Available languages
Quick Links
Betriebs- und Wartungsanleitungen / Operating and maintenance instructions /
Notice d'Utilisation et d'Entretien / Instrucciones de uso y mantenimiento /
Istruzioni per l'uso e la manutenzione / Instruções de operação e manutenção
/ Gebruiks- en onderhoudsinstructies / Instrucțiuni de exploatare și întreținere /
Drifts- och underhållsinstruktioner
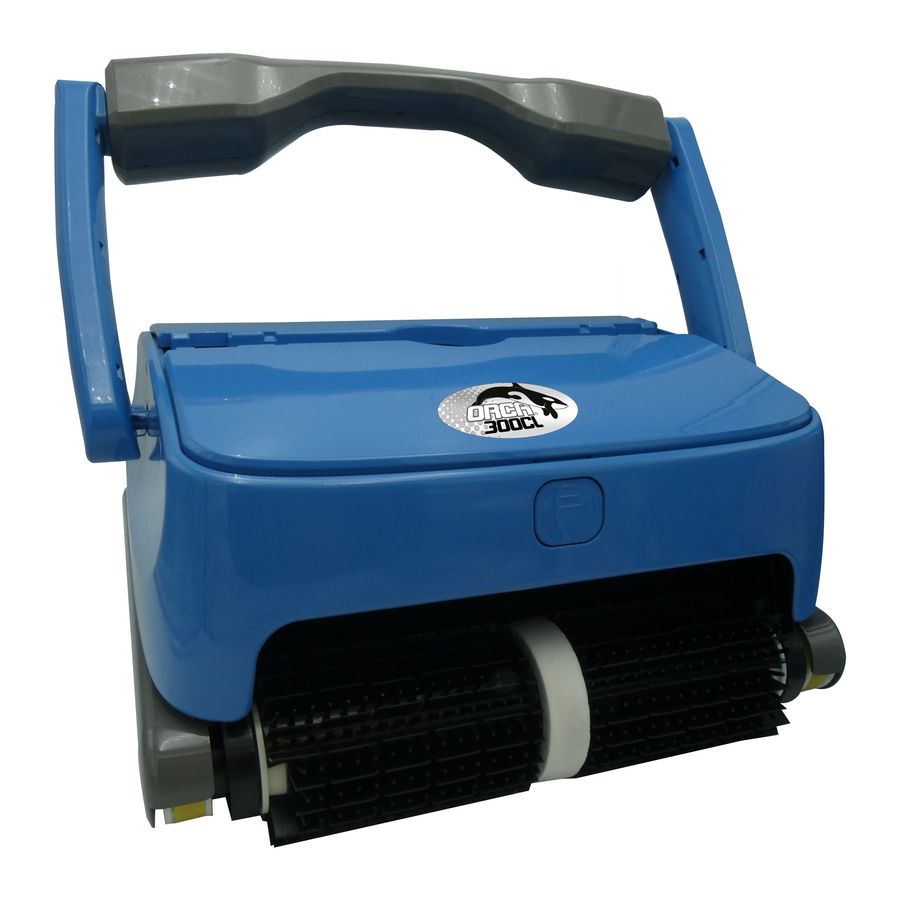
POOLROBOTER KABELLOS / CORDLESS POOL CLEANER /
ROBOT PISCINE SANS FIL / ROBOT PISCINA SENZA FILI /
ROBOT SIN CABLE / ROBÔ DE PISCINA SEM CABO /
DRAADLOZE ZWEMBADREINIGER/ CURATATOR DE PISCINA
FARA FIR
Ref 107105 – 3660231413153
Advertisement
Table of Contents

Subscribe to Our Youtube Channel
Related Manuals for Orca 300 CL


Summary of Contents for Orca 300 CL
- Page 1 Betriebs- und Wartungsanleitungen / Operating and maintenance instructions / Notice d’Utilisation et d’Entretien / Instrucciones de uso y mantenimiento / Istruzioni per l'uso e la manutenzione / Instruções de operação e manutenção / Gebruiks- en onderhoudsinstructies / Instrucțiuni de exploatare și întreținere / Drifts- och underhållsinstruktioner POOLROBOTER KABELLOS / CORDLESS POOL CLEANER / ROBOT PISCINE SANS FIL / ROBOT PISCINA SENZA FILI /...
-
Page 2: Allgemeine Bemerkungen
I.0 ALLGEMEINE BEMERKUNGEN Diese Bedienungsanleitung für den automatischen Schwimmbadbodensauger Orca 300CL soll Ihnen alle Informationen, die Sie für die optimale Bedienung und Instandhaltung benötigen, geben. Aus Sicherheitsgründen ist es unbedingt notwendig, dass Sie sich mit diesem Dokument vertraut machen, es an einem sicheren und wieder auffindbaren Platz nach der Inbetriebnahme aufbewahren, um es in der Zukunft wieder benutzen zu können. -
Page 3: Technische Informationen
Sie den Bodensauger NICHT neben Hitzequellen! I.2 Vorstellung Der wiederaufladbare Reinigungsroboter ORCA 300CL ist ein automatischer Bodensauger für Schwimmbecken. Er reinigt automatisch das Schwimmbecken, indem er das Wasser filtert. Der Bodensauger wird angetrieben durch einen 25.9V 7.8AH Lithium Akku.. - Page 4 b. Ersatzteile Wellenradabdeckung Wellenrad Abdeckung Motoreinheit Filterkartusche O-Ring(∅31.5*3.55) Akku LED Platine Elektronikplatine Walzenblock Pumpenmotor Walzenbefestigung Antriebsmotor O-Ring(∅20*2.65) Antriebsriemen 162 Boden Motoreinheit Antriebsriemen * Ladegerät 2.0 BEDIENUNGSANLEITUNG 2.1 Wichtig !! a. Hineinsetzen in das Wasser Heben Sie den Bodensauger mit der Unterseite zur Beckenwand hinein, um eventuelle Kratzer an dem Becken zu vermeiden.
- Page 5 b. Herausnehmen aus dem Wasser Am Ende des Reinigungszykluses bleibt der Bodensauger stehen, verwenden Sie den Hakenstab, um ihn aus dem Pool zu holen. c. Um eventuelle Schäden an der Beckenwand oder an dem Bodensauger zu vermeiden, achten Sie bitte darauf, dass der Bodensauger die Beckenwandnicht berührt, wenn Sie ihn herausnehmen.
-
Page 6: Erste Schritte
Erste Schritte a. Instruktionen für Schalter und für Anzeigeleuchte Schalter Ladestelle Anzeigeleuchte Schieben Sie den Schalter nach rechts, die Anzeigeleuchte wird blau leuchten, der Bodensauger ist gestartet. Schieben Sie den Schalter nach links, die rote Anzeigeleuchte erlischt, der Bodensauger ist abgeschaltet. - Page 7 Schwimmbecken entfernt. Rotes Licht zeigt den Ladevorgang an. Grünes Licht zeigt an, dass der Ladevorgang abgeschlossen ist und das Gerät von der Ladestelle getrennt werden kann. • Anzeigeleuchte am Ladegerät Anzeigeleuchte Status Grünes Licht leuchtet Warte auf Ladevorgang, oder Akku nicht verbunden oder andauernd Ladevorgang abgeschlossen Rotes Licht leuchtet...
- Page 8 Hier drücken Spülen und Reinigung der Filterkartuschen (Abb. 4-5) Halten Sie die Filterkartuschen unter rinnendes Wasser, bis das Wasser klar ist.
- Page 9 Installation der Filterkartuschen. Achten Sie darauf, dass die Filterkartuschen gut einrasten, und schließen Sie die Abdeckungen, indem Sie die beiden Knöpfe drücken. 3.2 Installation der Schaumstoffkörper Sollte der Bodensauger Schwierigkeiten haben, mit gereinigten Filterkartuschen die Wände hinaufzufahren, installieren Sie die beiden beigepackten Schaumstoffkörper, einer jeweils auf der Unterseite der Kartuschenabdeckung.
-
Page 10: Häufig Gestellte Fragen
4.0 HÄUFIG GESTELLTE FRAGEN Achtung! In jedem Fall müssen Sie die Sicherheitsanweisungen in Punkt 1.1 am Anfang der Bedienungsanleitung einhalten, um jede eventuelle mechanische oder physische Beschädigung zu vermeiden! Beobachtung Mögliche Ursache Lösung Bodensauger fährt nicht, Geringer Ladestand das Anzeigelicht blinkt Akku aufladen des Akkus. -
Page 11: Gewährleistung
5.0 GEWÄHRLEISTUNG Dieses Gerät hat alle Qualitätskontrollen und Sicherheitstests, die von der QM-Abteilung der Produktion durchgeführt wurden, bestanden. Gewährleistungsinformation: 1. Die Gewährleistung deckt Motor, Akku und elektronische Platine ab für den Zeitraum von zwei Jahren ab Datum der Kaufes und entspricht den Bedingungen der Richtlinie 1999/44/EC vom 25. Mai 1999 über Gewährleistung von Konsumentenprodukten und den jeweiligen Gesetzen der Mitgliedsstaaten der Europäischen Union Diese Gewährleistung erlischt, wenn das Produkt unautorisiert geändert, nicht seinem... - Page 12 Anmeldung einer Reklamation Waterman Kundendienst Bahnhofstr. 68 D-73240 Wendlingen Tel.: + 49 (0) 7024/4048-666 Fax:: + 49 (0) 7024/4048-667 E-Mail: service@waterman-pool.com BITTE in DRUCKBUCHSTABEN ausfüllen! Ich habe am ____________________ bei der Firma ______________________________ PLZ ___________ Ort _____________ das Produkt Typ _________________ mit der Artikelnummer ______________________ gekauft.
-
Page 13: General Comments
I.0 GENERAL COMMENTS The Orca 300 CL cleaner user manual is intended to give you all the information you need for optimal installation and maintenance. For safety reasons, it is essential to familiarize yourself with this document and keep it in a safe and familiar place after installation for future reference. - Page 14 I.2 Presentation The refillable cleaning robot ORCA 300CL is an automatic cleaning equipment for swimming pools. It can automatically clean the pool by filtering the water from the pool. This robot is powered by a 25.9V 7.8AH lithium battery.
-
Page 15: Technical Informations
1.4 Technical informations a. Technical specifications Rated output voltage of adapter: 30V Rated input voltage of adapter: 100 V – 240 V Input power of adapter : 50 Hz – 60 Hz Rated output current of adapter : 2.0 A Working Cycle : 2 h Moving speed: about 10 m / min Cleaning surface : 120 ㎡... - Page 16 2.0 OPERATING INSTRUCTIONS FOR POOL CLEANERS 2.1 Important !! a. To immerse the cleaner Put into or lift out of the pool with the cleaner bottom towards the wall to avoid any possible scratches to the pool. Hold the top handle and power on the cleaner. The cleaner will start working after emptying trapped air inside (about 20s), then the cleaner can immerse into the pool floor.
- Page 17 c. To avoid damaging the pool wall or the cleaner, make sure that the cleaner does not touch it while you remove it from the pool. d. Before removing the cleaner from the pool, it is best to hang it 10 - 15 seconds above the pool to drain it of water.
- Page 18 b. How to charge the battery Remove the cleaner from the pool. Place the cleaner indoor in at least 3.5 m away from the swimming pool for charging. Red light indicates the battery is being charged. Green light indicates the charging is finished. •...
- Page 19 c. Remove the filters : Take out the filter baskets: Press the opening button (4- 1), the top cover will pop-up automatically (4-2), open the top cover (4-3), take out the filter basket ( 4- 4). push 33333 d. Rinse and clean the filters (4-5) Put the filter under water until the water is clean...
- Page 20 e. Reinstall the filters. Pay attention to the good position and close the covers by pressing the buttons. 3.2 Installation of foam pads Install the two foam pads provided below the upper cover if the cleaner climbs the pool wall with difficulty while the filters are clean.
-
Page 21: Frequently Asked Questions
4.0 FREQUENTLY ASKED QUESTIONS Attention! In any case, always comply with the safety instructions set out in point I.I. at the beginning of this manual in order to avoid potential mechanical or physical damage. observation Possible cause Solution The cleaner does not Low remaining battery work and the indicator Charge the battery... -
Page 22: Warranty
5.0 WARRANTY This product has undergone various quality and safety tests carried out by the plant's technical department. Warranty information: 1. The warranty period is 24 months of use on the engine, battery and electronic card from the date of purchase and is established according to the terms of the consumer code, as well as the legal warranty against defects and hidden defects that applies in any case under the conditions of the items in the country of purchase. - Page 23 I.0 PRE REQUIS Le manuel d’utilisation du robot Orca 300 CL a pour but de vous donner toutes les informations nécessaires à une installation et un entretien optimal. Pour des raisons de sécurité, il est indispensable de se familiariser avec ce document et de le conserver dans un lieu sûr et connu après installation pour des consultations ultérieures.
-
Page 24: Contenu Du Carton
I.2 Présentation Le robot nettoyeur rechargeable ORCA 300CL est un équipement de nettoyage automatique pour les piscines. Il peut nettoyer la piscine automatiquement en filtrant l'eau du bassin. -
Page 25: Informations Techniques
I.4 Informations techniques a. Caractéristiques techniques Voltage d’entrée du chargeur : 100 V – 240 V Voltage max. de charge : 30 V DC Fréquence nominal : 50 Hz – 60 Hz Courant de charge : 2.0 A Autonomie : 2 h Vitesse de déplacement : environ 10 m / min Surface de nettoyage max : 120 ㎡... -
Page 26: Instructions De Fonctionnement
2.0 INSTRUCTIONS DE FONCTIONNEMENT Important !! a. Pour immerger le robot Présenter l’appareil horizontalement face à l’eau, mettre le robot dans l’eau en le prenant par la poignée. Ensuite, démarrer le robot pour évacuer l’air pendant quelques secondes. Le robot va descendre lentement au fond de la piscine. -
Page 27: Prise En Main
dessus du bassin afin de le vider de son eau. e. Éteignez le robot après chaque utilisation Prise en main a. Bouton et voyant Interrupteur Prise de charge Voyant Pousser à droite : le voyant bleu s’allume et le robot démarre. Pousser à gauche, le voyant rouge s’allume, le robot s’éteint. - Page 28 b. Chargement du robot • Sortir le robot de l’eau, le mettre à l’abri du soleil et de la pluie, à une distance minimum de 3,5 m du bord de la piscine. Brancher le chargeur. Le voyant rouge signifie que la charge est en cours.
- Page 29 Pour enlever les filtres : poser le robot par terre, appuyer sur les boutons ( 4-1), les capots se déverrouillent (4-2), ouvrir les capots ( 4-3), et enlever les filtres (4-4). Appuyer 33333 d. Rincer et nettoyer les filtres (4-5) Passer les filtres à...
- Page 30 e. Réinstaller les filtres. La face la plus large du filtre vers le milieu du robot (4-6), remettre les filtres dans le robot, fermer les capots en appuyant sur les clips ( 4-7) 3.2 Installation des blocs de mousse Si l’appareil monte difficilement le long de la paroi alors que les filtres sont propres, vous pouvez rajouter sous le capot les deux petits blocs de mousse fournis (Il s'agit d'un dispositif supplémentaire qui s’utilise uniquement dans cette situation particulière).
-
Page 31: Questions Fréquentes
4.0 QUESTIONS FRÉQUENTES Attention ! Dans tous les cas, veillez à toujours respecter les consignes de sécurité énoncées dans le point I.I au début de ce manuel afin d’éviter les potentiels dommages mécaniques ou corporels. Constat Cause possible Solution Le nettoyeur ne Faible capacité... -
Page 32: Garantie
5.0 GARANTIE Ce produit est passé par différents essais de qualité et de sécurité effectués par le département technique de l'usine. Information de la garantie: 1. La période de garantie est de 24 mois d'utilisation sur le moteur, la batterie et la carte électronique à... -
Page 33: Observaciones Generales
I.0 OBSERVACIONES GENERALES Il manuale d'uso del robot Orca 300 CL ha lo scopo di fornire tutte le informazioni necessarie per un'installazione e una manutenzione ottimali. Per motivi di sicurezza, è essenziale familiarizzare con questo documento e conservarlo in un luogo sicuro e familiare dopo l'installazione per future consultazioni. -
Page 34: Contenido De La Caja
I.2 Presentación El robot de limpieza recargable ORCA 300CL es un equipo de limpieza automática para piscinas. Puede limpiar automáticamente la piscina filtrando el agua de la piscina. Este robot es alimentado por una batería de litio de 25.9V 7.8AH. -
Page 35: Información Técnica
I.4 Información técnica a. Especificaciones Técnicas Tensión de carga máx.: 30 V DC Tensión de entrada del cargador: 100 V - 240 V Corriente de carga: 2,0 A Frecuencia nominal: 50 Hz - 60 Hz Duración de la batería: 2 horas Velocidad de desplazamiento: aprox. - Page 36 2.0 INSTRUCCIONES DE USO DE LOS LIMPIAFONDOS 2.1 Importante a. Para sumergir el robot Presente el dispositivo horizontalmente de cara al agua, introduzca el robot en el agua agarrándolo por la empuñadura. A continuación, ponga en marcha el robot para evacuar el aire durante unos segundos.
- Page 37 piscina para vaciarla de agua. Apague el robot después de cada uso. Manipulación Botón e indicador luminoso Interruptor Enchufe de carga Luz indicadora Empujar a la derecha: la luz azul se enciende y el robot se pone en marcha. Empuja a la izquierda, la luz roja se enciende, el robot se apaga.
-
Page 38: Limpieza De Los Filtros
b. Carga del robot Retire el robot del agua, protéjalo del sol y de la lluvia, a una distancia mínima de 3,5 m del borde de la piscina. Conecte el cargador. La luz roja significa que la carga está en curso. La luz verde significa que la carga está... - Page 39 Presione Enjuagar y limpiar los filtros (4-5). Cambie los filtros a agua limpia hasta que el agua esté limpia. Vuelva a instalar los filtros...
-
Page 40: Preguntas Frecuentes
Con el lado más ancho del filtro hacia el centro del robot (4-6), vuelva a colocar los filtros en el robot y cierre las tapas presionando los clips ( 4-7). Instalación de los bloques de espuma Si la unidad tiene dificultades para subir por la pared mientras los filtros están limpios, puede añadir los dos pequeños bloques de espuma que se suministran bajo la cubierta (este es un dispositivo adicional que sólo se puede utilizar en esta situación en particular). - Page 41 La luz indicadora del Fallo del cargador Póngase en contacto con el servicio cargador no se enciende postventa El sistema de filtración El dispositivo no llega a está en Desconecte el sistema de filtración. toda la piscina funcionamiento. 5.0 GARANTÍA Este producto ha sido sometido a diversas pruebas de calidad y seguridad realizadas por el departamento técnico de la planta.
-
Page 42: Osservazioni Generali
I.0 OSSERVAZIONI GENERALI Il manuale d'uso del robot Orca 300 CL ha lo scopo di fornire tutte le informazioni necessarie per un'installazione e una manutenzione ottimali. Per motivi di sicurezza, è essenziale familiarizzare con questo documento e conservarlo in un luogo sicuro e familiare dopo l'installazione per future consultazioni. -
Page 43: Contenuto Della Scatola
I.2 Presentazione Il robot di pulizia ricaricabile ORCA 300CL è un'apparecchiatura di pulizia automatica per piscine. Può pulire automaticamente la piscina filtrando l'acqua della piscina. Questo robot è alimentato da una batteria al litio da 25.9V 7.8AH. -
Page 44: Informazioni Tecniche
I.4 Informazioni tecniche a. Specifiche tecniche Tensione massima di carica: 30 V DC Tensione d'ingresso del caricabatterie: 100 V - 240 V Corrente di carica: 2,0 A Frequenza nominale: 50 Hz - 60 Hz Durata della batteria: 2 ore Velocità di marcia: circa 10 m / min. Massima area di pulizia: 120 ㎡... - Page 45 2.0 ISTRUZIONI PER L'USO DEI PULITORI 2.1 Importante !! a. Per immergere il robot Sollevare il dispositivo per la maniglia o la cintura e immergerlo nella piscina. Presentare il dispositivo verticalmente rivolto verso la parete. Inclinare l'unità su un lato per rimuovere l'aria intrappolata dall'interno.
- Page 46 2.2. Iniziare Pulsante e indicatore luminoso Interruttore Presa di carica Indicatore luminoso Spingere a destra: la luce blu si accende e il robot si avvia. Spingere a sinistra, la luce rossa si accende, il robot si spegne. Carica il robot quando si spegne. Descrizione Funzione Acceso/Spento...
-
Page 47: Pulizia Del Filtro
c. Caricamento del robot Togliere il robot dall'acqua, proteggerlo dal sole e dalla pioggia, ad una distanza minima di 3,5 m dal bordo della piscina. Collegare il caricabatterie. La luce rossa indica che la carica è in corso. La luce verde significa che la carica è... - Page 48 Per rimuovere i filtri: posizionare il robot a terra, premere i pulsanti ( 4-1), i coperchi si sbloccano (4- 2), aprire i coperchi ( 4-3) e rimuovere i filtri (4-4). Premere 33333 Risciacquare e pulire i filtri (4-5) Commutare i filtri in acqua pulita fino a quando l'acqua è pulita.
- Page 49 Reinstallare i filtri. Con il lato più largo del filtro verso il centro del robot (4-6), rimettere i filtri nel robot, chiudere i coperchi premendo le clip ( 4-7). 3.2 Installazione di blocchi di schiuma Se l'apparecchio ha difficoltà a risalire la parete mentre i filtri sono puliti, è possibile aggiungere i due piccoli blocchi di schiuma forniti sotto il coperchio (si tratta di un dispositivo aggiuntivo che può...
-
Page 50: Domande Frequenti
4.0 DOMANDE FREQUENTI Attenzione! In ogni caso, osservare sempre le avvertenze di sicurezza indicate al punto I.I.I. all'inizio di questo manuale per evitare possibili danni meccanici o fisici. Ricerca Possibile causa La soluzione Il pulitore non funziona e Capacità residua bassa Caricare la batteria la spia lampeggia della batteria... -
Page 51: Garanzia
5.0 GARANZIA Questo prodotto è stato sottoposto a diversi test di qualità e sicurezza effettuati dall'ufficio tecnico dello stabilimento. Informazioni sulla garanzia: 1. Il periodo di garanzia è di 24 mesi di utilizzo del motore, della batteria e della scheda elettronica dalla data di acquisto ed è... - Page 52 I.0 OBSERVAÇÕES GERAIS O manual do usuário do robô Orca 300 CL destina-se a fornecer-lhe todas as informações necessárias para uma instalação e manutenção ideais.Por razões de segurança, é essencial familiarizar-se com este documento e mantê-lo num local seguro e familiar após a instalação para referência futura.
-
Page 53: Conteúdo Da Caixa
I.2 Apresentações O robô de limpeza recarregável ORCA 300CL é um equipamento de limpeza automática para piscinas. Pode limpar automaticamente a piscina filtrando a água da piscina. Este robô é alimentado por uma bateria de lítio de 25.9V 7.8AH. I.3 Conteúdo da caixa Descrição... -
Page 54: Informações Técnicas
I.4 Informações Técnicas a. Especificações técnicas Tensão máx. de carga: 30 V DC Tensão de entrada do carregador: 100 V - 240 V Corrente de carga: 2,0 A Frequência nominal: 50 Hz - 60 Hz Duração da bateria: 2 horas Velocidade de viagem: cerca de 10 m / min Área máx. - Page 55 2.0 MANUAL D’INSTRUÇÕES DOS ASPIRADORES DE PISCINAS Importante!! a. Para imergir o robô Apresente o dispositivo horizontalmente de frente para a água, coloque o robô na água agarrando-o pela pega. Então inicie o robô para evacuar o ar por alguns segundos. O robô descerá lentamente até...
-
Page 56: Como Começar
Como Começar a. Botão e luz indicadora Interruptor Tomada de carga Luz indicadora Empurre para a direita: a luz azul acende-se e o robô arranca. Empurre para a esquerda, a luz vermelha acende, o robô apaga-se. Carregue o robô quando ele se desligar. Não. -
Page 57: Limpeza Do Filtro
Chargement du robot Retire o robô da água, proteja-o do sol e da chuva, a uma distância mínima de 3,5 m da borda da piscina. Ligue o carregador. A luz vermelha significa que o carregamento está em curso. A luz verde significa que o carregamento está... - Page 58 Apoiar d. Enxaguar e limpar os filtros (4-5) Troque os filtros por água limpa até que a água esteja limpa. e. Reinstale os filtros.
-
Page 59: Perguntas Mais Frequentes
Com o lado mais largo do filtro para o meio do robot (4-6), volte a colocar os filtros no robot, feche as tampas pressionando os clipes (4-7). Instalação de blocos de espuma Se a unidade tiver dificuldade em subir a parede enquanto os filtros estão limpos, pode adicionar os dois pequenos blocos de espuma fornecidos sob a capa (este é... - Page 60 O indicador luminoso do Falha no carregador Contacte o serviço pós-venda carregador não acende Desligue o sistema de filtragem. O aparelho não atinge O sistema de filtragem toda a piscina está em funcionamento. 5.0 GARANTIA Este produto foi submetido a vários testes de qualidade e segurança realizados pelo departamento técnico da fábrica.
-
Page 61: Algemene Opmerkingen
I.0 ALGEMENE OPMERKINGEN Deze gebruiksaanwijzing voor de automatische zwembadbodemzuiger Orca 300 CL geeft u alle informatie, die u nodig heeft voor de optimale bediening en onderhoud. Om veiligheidsredenen is het noodzakelijk dat u zich vertrouwd maakt met dit document en het op een veilige plaats bewaart, waar het na gebruik weer terug te vinden is, zodat u het in de toekomst opnieuw kunt gebruiken. - Page 62 Laad de accu NIET op in de nabijheid van vuur of bij extreme temperaturen. Gebruik of bewaar de bodemzuiger NIET naast warmtebronnen! I.2 Introductie De oplaadbare reinigingsrobot ORCA 300CL is een automatisch bodemzuiger voor zwembaden. De reinigt het zwembad automatisch, door het water te filteren. De bodemzuiger wordt aangedreven door een 25,9 V 7,8 AH lithium-accu.
-
Page 63: Technische Informatie
1.4 Technische informatie a. Technische specificatie Uitgangsspanning oplaadapparaat: 30 V Ingangsspanning oplaadapparaat: 100 V – 240 V Frequentie oplaadapparaat: 50 Hz – 60 Hz Uitgangsstroomsterkte oplaadapparaat: 2,0 A Reinigingscyclus: 2 uur Snelheid: circa 10 m/min Aanbevolen maximale bodemoppervlak: Buitentemperatuur tijdens het laden: 120 m²... - Page 64 2.0 GEBRUIKSAANWIJZING 2.1 Belangrijk!! a. Plaatsen in het water Til de bodemzuiger met de onderkant naar de zwembadwand gericht op, om eventuele krassen op het zwembad te voorkomen. Houd de bodemzuiger aan de handgreep vast en schakel deze in. De bodemzuiger begint te werken, eerst door de lucht die zich nog in de behuizing bevindt (ca.
-
Page 65: Eerste Stappen
e. Schakel de bodemzuiger na elk gebruik uit. 2.2. Eerste stappen c. Instructies voor schakelaar en indicatielampjes Schakelaar Oplaadpunt Indicatielampje Schuif de schakelaar naar rechts, het indicatielampje zal blauw branden, de bodemzuiger is gestart. Schuif de schakelaar naar links, het indicatielampje gaat uit, de bodemzuiger is uitgeschakeld. - Page 66 d. Laden van de accu Neem de bodemzuiger uit het zwembad Plaats deze op een afstand van minimaal 3,5 m van het zwembad. Rood licht geeft het opladen aan. Groen licht geeft aan, dat het opladen is afgesloten en dat het apparaat van de oplader kan worden losgekoppeld. •...
- Page 67 ONDERHOUD EN INSTELLING VAN DE BODEMZUIGER 3.1. Reiniging van de filterpatronen a. Maak de bodemzuiger los van de voedingsspanning. b.Neem de bodemzuiger uit het water Als de bodemzuiger in het zwembad is, trek hem dan voorzichtig met de haak naar u toe tot u bij de handgreep komt.
- Page 68 d.Spoelen en reinigen van de filterpatronen (afb. 4-5) Houd de filterpatronen onder stromend water tot het water helder is. e.Installatie van de filterpatronen Zorg ervoor dat de filterpatronen goed vastklikken en sluit de deksels door op de twee knoppen te drukken.
- Page 69 3.2 Installatie van het schuimstofelement Als de bodemzuiger moeite heeft om met gereinigde filterpatronen de wanden op te rijden, installeer dan de twee meegeleverde schuimstofelementen, één aan elke onderzijde van de patroonafdekking. (deze schuimstofelementen moeten als optie alleen onder de genoemde omstandigheden worden toegepast.) Open de afdekking en steek een zelfklevend schuimstofelement op de getoonde positie, idem voor de andere zijde.
-
Page 70: Veelgestelde Vragen
4.0 VEEL GESTELDE VRAGEN Let op! In ieder geval moet u de veiligheidsinstructies in punt 1.1 aan het begin van deze handleiding in acht nemen om eventuele mechanische of fysieke schade te voorkomen! Waarneming Mogelijke oorzaak Oplossing Bodemzuiger beweegt Lage oplaadtoestand niet, het indicatielampje Accu opladen van de accu. - Page 71 5.0 GARANTIE Dit apparaat heeft alle kwaliteitscontroles en veiligheidstests die zijn uitgevoerd door de QM-afdeling van de productie doorstaan. Garantie-informatie: 1. De garantie heeft betrekking op de motor, de accu en de elektronische schakeling voor een periode van twee jaar vanaf de datum van aankoop en voldoet aan de voorwaarden van Richtlijn 1999/44/EG van 25 mei 1999 betreffende de garantie van consumentenproducten en de respectieve wetten van de lidstaten van de Europese Unie.
-
Page 72: Observaţii Generale
I.0 OBSERVAŢII GENERALE Acest manual cu instrucţiuni de operare pentru aspiratorul automat de bază a bazinului Orca 300CL trebuie să vă ofere toate informaţiile care vă sunt necesare pentru o operare şi mentenanţă optimă. Din motive de siguranţă este obligatoriu necesar să vă familiarizaţi cu acest document, şi după... - Page 73 I.2 Prezentare Robotul de curăţare reîncărcabil ORCA 300CL este u aspiratorul automat pentru baza bazinelor de înot. El curăţă în mod automat bazinul de înot pentru care el filtrează apa. Aspiratorul pentru baza piscinei este acţionat de către un acumulator cu litiu de 25,9 V 7,8 AH.
-
Page 74: Informaţii Tehnice
1.4 Informaţii tehnice a. Specificaţii tehnice Tensiune de ieşire aparat de încărcare: Tensiune de intrare aparat de încărcare: 100 V – 240 30 V Intensitatea curentului de ieşire aparat de Frecvenţa aparatului de încărcare : 50 Hz – 60 Hz încărcare: 2.0 A Ciclu de curăţare : 2 ore Viteză: cca. - Page 75 d. Piese de schimb Acoperire roată arbore Roată arbore Capac unitate motor Cartuş filtru Inel O(∅31.5*3.55) Acumulator Placă electronică LED Placă electronică Bloc de valţ Motor pompă Fixare valţ Motor de acţionare Inel O(∅20*2,65) Curea de antrenare Unitate motor de bază 162 XL Curea de antrenare T10...
- Page 76 care mai întâi evacuează aerul cuprins încă în carcasă (cca. 20 secunde), apoi aspiratorul poate să se scufunde pe baza bazinului. b. Scoaterea din apă La sfârşitul ciclului de curăţare aspiratorul se opreşte , utilizaţi o tijă cârlig pentru a-l scoate din piscină.
-
Page 77: Primii Paşi
2.2. Primii paşi e. Instrucţiuni pentru întrerupător şi pentru lămpile indicatoare Comutator Loc de Lampă indicatoare încărcare Împingeţi comutatorul către dreapta, lampa indicatoare luminează albastru, aspiratorul este pornit Împingeţi comutatorul către stânga, lampa indicatoare roşie se stinge, aspiratorul este deconectat. Încărcaţi aspiratorul atunci când este deconectat. -
Page 78: Încărcarea Acumulatorului
f. Încărcarea acumulatorului Scoateţi aspiratorul pentru baza piscinei din piscină. Îl plasaţi cel puţin la 3,5 m îndepărtat de bazinul de înot. Lumina roşie indică procesul de încărcare. Lumina verde indică faptul că procesul de încărcare s-a încheiat şi aparatul poate fi separat de locul de încărcare. •... - Page 79 ÎNTREŢINEREA ŞI REGLAREA ASPIRATORULUI PENTRU BAZA PISCINEI Curăţarea cartuşelor filtrante a. Separaţi aspiratorul pentru baza bazinului de la alimentarea curentului electric. b.Scoateţi aspiratorul din apă Dacă aspiratorul pentru baza bazinului se află în bazin îl trageţi spre dumneavoastră cu tija cârlig până...
- Page 80 d. Spălarea şi curăţarea cartuşelor filtrante (fig. 4-5) Menţineţi cartuşele filtrante sub apă curentă până când apa este limpede. e.Instalarea cartuşelor filtrante. Acordaţi atenţie să se înclicheteze bine cartuşele filtrante şi închideţi capacele prin apăsarea ambelor butoane.
- Page 81 3.2 Instalarea corpului din material spongios Dacă aspiratorul pentru baza bazinului are dificultăţi să se deplaseze în sus pe pereţi, având cartuşele filtrante curăţate, instalaţi ambele corpuri din material spongios împachetate alăturat produsului, respectiv unul pe partea inferioară capacului cartuşelor. (Aceste corpuri din material spongios sunt de utilizat opţional numai în situaţiile amintite mai sus.) Deschideţi acoperire şi introduceţi un corp din material spongios autocolante la locul indicat, similar pe latura opusă.
-
Page 82: Întrebări Frecvente
4.0 ÎNTREBĂRI FRECVENTE Atenţie! În fiecare caz trebuie respectate instrucţiunile de siguranţă de la punctul 1.1 la începutul acestui manual cu instrucţiuni de operare, pentru a evita orice eventuale deteriorări mecanice sau vătămări fizice! Cauză posibilă Soluţie Observare Aspiratorul pentru baza Nivel de încărcare bazinului nu se deplasează, lumina... - Page 83 5.0 GARANŢIE Acest aparat are îndeplinite toate controalele de calitate şi testele de siguranţă care au fost efectuate de către departamentul QM al producţiei. Informaţie referitoare la garanţie: 1. Garanţia acoperă motorul, acumulatorul şi placa electronică pe un interval de doi ani începând cu data achiziţionării şi corespunde condiţiilor Directivei 1999/44/CE din 25 mai 1999 referitor la garanţia produselor de consum şi a respectivelor legi ale statelor membre ale Uniunii Europene 2.
-
Page 84: Allmänna Upplysningar
I.0 ALLMÄNNA UPPLYSNINGAR Denna bruksanvisning för den automatiska bassängbottensugen Orca 300CL innehåller all information du behöver för att använda och underhålla produkten på bästa sätt. Av säkerhetsskäl är det absolut nödvändigt att du bekantar dig med detta dokument och förvarar det efter driftsättningen på... -
Page 85: Förpackningens Innehåll
I.2 Presentation Den uppladdningsbara rengöringsroboten ORCA 300CL är en automatisk bottensug för simbassänger. Den rengör simbassängen automatiskt genom att filtrera vattnet. Bottensugen drivs av ett litiumbatteri på 25,9 V, 7,8 Ah. I.3 Förpackningens innehåll... - Page 86 Skydd för vågformat hjul Vågformat hjul Skydd för motorenhet Filterpatron O-ring (∅31,5×3,55) Batteri LED-kretskort Elektronikkretskort Valsblock Pumpmotor Valsinfästning Drivmotor O-ring (∅20×2,65) Drivrem 162 XL Botten på motorenhet Drivrem T10 * Laddare...
- Page 87 2.0 BRUKSANVISNING 2.1 Viktigt!! a. Nedsänkning i vattnet Lyft ner bottensugen med undersidan mot bassängväggen, för att undvika eventuella repor på bassängen. Håll bottensugen i handtaget och koppla till den. Bottensugen börjar arbeta, först genom att all luft inne i apparaten töms ut (ca 20 sekunder). Därefter kan bottensugen sjunka ner till botten.
-
Page 88: De Första Stegen
c. För att undvika eventuella skador på bassängväggen eller på bottensugen, se noga till att bottensugen inte vidrör bassängväggen när du tar upp den. d. Låt vattnet rinna ut ur bottensugen i ungefär 10–15 sekunder innan du tar upp den helt. e. - Page 89 Röd lampa blinkar: Felmeddelande b.Ladda batteriet Lyft ut bottensugen ur bassängen. Placera den minst 3,5 m från simbassängen. Röd lampa visar att laddning pågår. Grön lampa visar att laddningen är avslutad och att apparaten kan kopplas ur från laddaren. • Indikeringslampa på...
- Page 90 UNDERHÅLL OCH INSTÄLLNING AV BOTTENSUGEN Rengöring av filterpatroner a. Koppla ur bottensugen från strömförsörjningen. b.Lyft ut bottensugen ur vattnet Om bottensugen är i bassängen drar du den försiktigt till dig med krokstången, tills du når handtaget. Låt så mycket vatten som möjligt strömma ut ur höljet. c.
- Page 91 d. Sköljning och rengöring av filterpatroner (bild 4-5) Håll filterpatronerna under rinnande vatten tills vattnet är klart. e. Installation av filterpatroner Se noga till att filterpatronerna hakar i ordentligt, och stäng luckorna genom att trycka på de båda knapparna.
-
Page 92: Vanliga Frågor
3.2 Installation av skumgummidelar Om bottensugen skulle ha svårt att klättra upp för väggarna med rengjorda filterpatroner kan du installera de båda medföljande skumgummidelarna, en vardera på patronlockets undersida. (Dessa skumgummidelar ska endast användas om ovannämnda situation uppstår.) Öppna skyddet och fäst en självhäftande skumgummidel på den punkt som bilden visar, gör sedan likadant på... - Page 93 5.0 GARANTI Denna apparat har godkänts i alla kvalitetskontroller och säkerhetstester som utförts av kvalitetsavdelningen under produktionen. Garantiinformation: 1. Garantin gäller för motor, batteri och elektroniskt kretskort under en tidsperiod av två år räknat från inköpsdatum, och uppfyller villkoren i direktivet 1999/44/EC av den 25 maj 1999 om garanti för konsumentprodukter samt gällande lagar i Europeiska Unionens medlemsstater 2.
Need help?
Do you have a question about the 300 CL and is the answer not in the manual?
Questions and answers
THE CHARGER IS FLASHING RED LIGHT