
Related Manuals for A.O. Smith CAHP-MC-38


Summary of Contents for A.O. Smith CAHP-MC-38
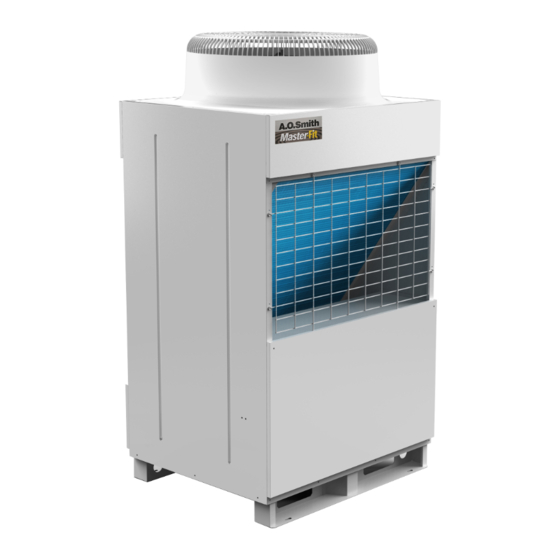
- Page 1 INSTALLATION, OPERATION AND MAINTENANCE INSTRUCTIONS AIR TO WATER HEAT PUMP WATER HEATER CAHP-MC-38...
-
Page 2: Table Of Contents
CONTENTS CONTENTS ..............................2 1 - IMPORTANT SAFETY INFORMATION ......................4 2 - PHYSICAL DIMENSIONS ........................... 6 3 - TECHNICAL SPECIFICATIONS ........................7 4 - FEATURES AND FUNCTIONS ........................8 1.1........................... 8 EATING APACITY 1.2..........................8 OWER OFF MEMORY 1.3. - Page 3 8 - TROUBLESHOOTING INSTRUCTIONS ...................... 50 12.1......................50 RROR ROUBLE HOOTING 12.2. – N ......................52 THER HENOMENA ORMAL 12.3......................53 THER HENOMENA BNORMAL 9- APPENDIX .............................. 55 12.4......................55 IRING IAGRAM 12.5....................56 ENTRAL ONTROLER IRING IAGRAM 12.6.
-
Page 4: Important Safety Information
1 - Important Safety Information Thank you for using A.O.Smith heat pump water heater. Please read all of the instructions thoroughly before the installation and operation of the water heater. Please keep this manual for future reference. Heat pump water heater is different from the common water heaters. Only qualified persons •... - Page 5 The manufacturer or seller of the water heater will not be liable for any damage caused by • unauthorized installation. These damages include but not limited to leakage of coils, dropping of the unit, the abnormal operation and poor performance caused by improper installation, adverse effect and damage of water heater, and all relevant losses.
-
Page 6: Physical Dimensions
2 - Physical Dimensions Picture 2.1 Unit Dimensions... -
Page 7: Technical Specifications
3 - Technical Specifications POWER SUPPLY 380V 3N ~ 50Hz VOLTAGE RANGE 380V +/- 10% RATED HEATING CAPACITY 38 kW RATED WATER FLOW 6.5 CMH RATED POWER INPUT 10.3 kW RATED OPERATION CURRENT 18.6 A MAX. POWER INPUT 13.2 kW MAX. -
Page 8: Features And Functions
CCB to achieve the most economic operation cost, as well as the most reliable operation. Please read the installation and operation manual of the gas storage heaters if an A.O. Smith gas storage gas heater is selected as auxiliary heater. -
Page 9: Installation Instructions
5 - Installation Instructions CAUTION: Once upon the equipment are received, please check the unit model information and • the accessory parts based on the packing list and inspect whether there is any obvious damage. If you find anything wrong during the inspection, please notify the seller or manufacturer immediately. -
Page 10: Unit Movement
1) Please see picture 5.2 if the heat pump units are installed vertically. Note: “FRONT” side is the side with the service panel.Please see picture 2.1 for details. Picture 5.2 2) Please see picture 5.3 if the heat pump units are installed horizontally. Picture 5.3 3) If the heat pump units are installed in the basement, or other closed spaces, please pay attention to the air circulation of the space to make sure each unit has an air flow rate of... -
Page 11: Installation Foundation
An auxiliary heater is requested as backup if the minimum ambient temperature is lower than 10 Celsius. A.O. Smith central controller is deigned to be able to support on three types of auxiliary heaters: 1) Storage heater. - Page 12 storage heater (maximum 150mm far from the hot water outlet from the heater) and the sensor should be well insulated. 2) Tankless heater. This type of auxiliary heater shall be installed in the line which is parallel with the heat pump system as illustrated in picture 5.4a or 5.4b.
- Page 13 Picture 5.4b...
- Page 14 Picture 5.4c...
-
Page 15: Piping Selection
Picture 5.4d 1.9. Piping Selection Please select copper pipe, PP-R pipe, galvanized pipe or stainless steel pipe based on the actual requirement and size the system main inlet and outlet piping with reference to table 5.1. Heat Pump QTY Main Outlet Piping Main Inlet Piping DN40 DN40 DN65... -
Page 16: Piping Insulation
Please size the hot water return piping based on the circulation water volume. Please refer to table 5.3 when do the preliminary selection. Hot Water Supply Piping Size (mm) 20-25 32 40 50 65 80 100 125 150 200 Hot Water Return Piping Size (mm) 20 20 25 32 40 40 50 Table 5.3 Return Piping Size 1.10. - Page 17 Picture 5.5a Picture 5.5b 1) Please design and manufacture the tank complying with all the local regulations. 2) Please design the tank with 1.0MPa design pressure.
-
Page 18: Tank Installation
3) Please design the tank with the following minimum volume: Minimum tank volume = Quantity of heat pump unit X 4000L 4) Recommend to have PU foaming on the tank to insulate the tank well (standby temperature decrease should be lower than 8 Celsius in 24 hours). 5) Please refer to picture 5.5a and 5.5b for the tank connection nozzles and accessories requirement (assume the total tank internal height is “H”): a) Install the temperature &... -
Page 19: Water Requirement
1.14. Water Requirement Please check the installation location water hardness data before formal installation. The heat pump units could only be operated with water which has hardness less than 200ppm. A water treatment device is requested if the water hardness is higher than 200ppm. Please do not use the untreated water from river, lake, or underground directly. -
Page 20: Electrical Connection
Supply Capacity(A) Protection Phase Neutral Ground Wire Wire Wire 380V CAHP-MC-38 3N~50Hz 30mA less than 0.1S Central 220V 50Hz > Controller Table 5.6 Hot Water System Power Supply Requirement Note: 1. Please install four-pole leakage protection switch (with neutral line) and do not use the three pole leakage protection switch. - Page 21 (2) Low voltage cables requirement There are many communication and signal cables in the hot water system. Please refer to table 5.7 for the detailed requirements on these cables. Standard Max. Cable Description Size Remarks Length Length The communication cable between the central controller and the furthest 2*1 mm 200m...
-
Page 22: Series Number Setting
The A.O. Smith central controller provides intelligent control on the entire hot water system. The dimension of the central controller is 400X500X141mm (WXLXD). Please refer to picture 5.8 for the layout of the central controller. Picture 5.8 (to be updated with the new label) The central controller should be installed in the area with ambient temperature from -10~50 Celsius and it might not operate abnormally if the ambient temperature is out of this range. -
Page 23: Trial Operation
Picture 5.9 Unit No.1 No.2 No.3 No.4 No.5 No.6 No.7 No.8 Table 5.9 Series No. Setting 1.18. Trial Operation 1.19. Inspection prior to trial operation Heat pump unit inspection. Please inspect the following items on the heat pump unit, • 1. -
Page 24: Trial Operation
do the clock setting as well as other user settings as per information listed in chapter 6. 1.20. Trial Operation Power on the system and wait for 12 hours. Press the start button on the display of the central • controller to start the hot water system. -
Page 25: Operation Instructions
6 - Operation Instructions 6.1. UIM and Button Description The UIM (User Interface Module) of this central controller include two areas, display area and button area. The display area displays all the information of the system setting and operation. The button area includes five buttons which could be pressed for system setting and operation. -
Page 26: Uim Interface Introduction
6.2. UIM Interface Introduction The UIM interface includes two pages of display, the main page and the secondary page. The two pages could be switched by pressing the UP/DOWN buttons. The UIM will display the main page as default. Press the UP or DOWN button to go to the secondary page. If there is no operation for 10S when the secondary page is displayed, the UIM will return to the main page automatically. - Page 27 Area① Time TIME Display the current day of the week and the clock time ( hour & minute). Information The icon indication of the timer status. The timer is ON if the icon is displayed and is off otherwise. Communication error alarm. If the central controller could not get the timing information from the heat pump units, this icon will be displayed diamatically (size change), and the timer function will be disabled.
- Page 28 ① A.O.SMITH HOT WATER SYSTEM TANK SETPOINT 53℃ TIME ② ③ CONTROL TEMP 43℃ AUTO ON TIME NONE AUTO OFF TIME NONE FUNC HELP ④ Picture 6.3 The Secondary Page Layout & Display Interface Description – Secondary Page Area Content Description Area①...
-
Page 29: Main Menu Introduction & Operation
6.3. Main Menu Introduction & Operation Press the “FUNC” button to enter the “Main Menu”. MAIN MENU USER SETTING MAINTENANCE SETTING PARAMETER VIEW HEAT PUMPS STATUS HEAT PUMPS CONFIG SELECT BACK HELP Picture 6.4 Main Menu Menu Description : : : : Main Menu Table Menu Description... -
Page 30: User Setting Menu
6.4. User Setting Menu USER SETTING SUMMER SETPOINT 47℃ WINTER SETPOINT 53℃ AUTO ON/OFF SETTING AUTO ON/OFF ENABLE CURRENT TIME SETTING MODIFY BACK HELP Picture 6.5 User Setting Menu Menu Description : : : : User Setting Menu Menu Item Description SUMMER SETPOINT SUMMER SETPOINT is used as tank temperature setpoint when the ambient temperature is... - Page 31 The setting process is similar as “Summer Tank Temperature Setting”. AUX HEATER AT H-AMB AUX HEATER AT H-AMB is the parameter used to enable/disable the auxillary heater’s operation under high ambient conditions. Setting Options: ON/OFF Default Option: OFF The setting process is similar as “Summer Tank Temperature Setting”. HX CLEAN RESET HX CLEAN RESET is used to reset the condenser cleaning factor when the user complete the condenser cleaning as per controller indication.
- Page 32 Summer Tank Temperature Setting Operation Display Description Move to “SUMMER U S E R S E T T I N G SETPOINT” menu by pressing S U M M E R S E T P O I N T 4 7 ℃ UP/DOWN button, then press W I N T E R S E T P O I N T 5 3 ℃...
- Page 33 Auto ON/OFF Setting Operation Display Description Move to “ ” AUTO ON/OFF SETTING U S E R S E T T I N G menu by pressing UP/DOWN S U M M E R S E T P O I N T 4 6 ℃...
- Page 34 Current Time Setting Operation Display Description Move to “CURRENT TIME U S E R S E T T I N G SETTING” by pressing the S U M M E R S E T P O I N T 4 6 ℃ Up/Down button, W I N T E R S E T P O I N T 5 3 ℃...
- Page 35 Hx Clean Reset Operation Display Description Move to “ ” by HX CLEAN RESET U S E R S E T T I N G pressing the Up/Down button, A U T O O N / O F F E N A B L E O F F then press SELECT button to start U S E R P U M P O N I N T V L...
- Page 36 Clear Heat Pump Faults Operation Display Description Move to “ CLEAR HEAT PUMP U S E R S E T T I N G ” by pressing the Up/Down FAULTS U S E R P U M P O N I N T V L 3 0 m i n button, then press SELECT button U S E R P U M P O N T I M E...
- Page 37 Clear Faults History Operation Display Description Move to “ ” CLEAR FAULTS HISTORY U S E R S E T T I N G by pressing the Up/Down button, U S E R P U M P O N T I M E 2 0 m i n then press SELECT button to start A U X H E A T A T H - A M B T...
-
Page 38: Maintenance Setting
6.5. Maintenance Setting Select the “MAINTENANCE SETTING” on the main menu interface and then an 3 digits nonpublic password is requested for entering the setting interface. MAIN MENU USER SETTING MAINTENANCE SETTING PARAMETER VIEW HEAT PUMPS STATUS HEAT PUMPS CONFIG SELECT BACK HELP... - Page 39 MAINTENANCE SETTING OVERHEAT OFF TEMP 75℃ SENSOR COMPENSATION 0℃ HP QTY SETTING CIR PUMP PRE ON CIR PUMP DELAY OFF 15min MODIFY BACK HELP Picture 6.10 Maintenance Setting Interface Menu Description : : : : Maintenance Setting Menu Menu Item Description OVERHEAT OFF TEMP-* OVERHEAT OFF TEMP is the parameter which is set to stop the heating process if the tank...
- Page 40 AUX HEATER ON TEMP-* AUX HEATER ON TEMP is the parameter which is used to determine whether the auxillary heater should be enabled. Setting Range: -5~30℃ Default Value: 15 AUX HEATER TEMP ADJ-* AUX HEATER TEMP ADJ is the parameter which is used to determine whether the auxillary heater should be enabled.
- Page 41 Manual Defrost Operation Process Operation Display Description Move to “ ” by MANUAL DEFROST M A I N T E N A N C E S E T T I N G pressing the Up/Down button, A U X H E A T E R D I F F 2 ℃...
- Page 42 Ex-Factory Rest Operation Display Description Move to “ ” by EX-FACTORY M A I N T E N A N C E S E T T I N G pressing the Up/Down button, A U X H E A T E R W I T H then press SELECT button to A U X H E A T E R T Y P E...
-
Page 43: Parameter View
6.6. Parameter View Select the PARAMETER REVIEW on the main menu to enter the parameter review interface. MAIN MENU USER SETTING MAINTENANCE SETTING PARAMETER VIEW HEAT PUMPS STATUS HEAT PUMPS CONFIG SELECT BACK HELP Picture 6.11 Main Menu PARAMETER VIEW AUX HEATER OUT TEMP 70℃... -
Page 44: Heat Pump Unit Status
6.7. Heat Pump Unit Status Select the HEAT PUMPS STATUS on the main menu to enter the heat pump status interface. MAIN MENU USER SETTING MAINTENANCE SETTING PARAMETER VIEW HEAT PUMPS STATUS HEAT PUMPS CONFIG SELECT BACK HELP Picture 6.13 Main Menu HP UNIT #1 STATUS HP STATUS HEATING... - Page 45 Menu Item Description HP STATUS HP STATUS displays the actual status of the heat pump. OFF: The hot water system is in off status. HEATING: The heat pump is in operation status to heat water. DEFROST: The heat pump is in defrosting cycle. STANDBY: The heat pump is in standby status due to there is no hot water demand or there are other conditions which do not meet the heat pump operation conditions.
-
Page 46: Heat Pump Unit Configuration
6.8. Heat Pump Unit Configuration Move to the HEAT PUMPS CONFIG from the main menu and press SELECT button to enter the heat pump configuration interface. An 3 digits nonpublic password is requested for entering the configuration interface. MAIN MENU USER SETTING MAINTENANCE SETTING PARAMETER VIEW... - Page 47 Menu Description : : : : Heat Pumps Configuration Description Menu Item Defrost DEFROST ON TEMP DEFROST ON TEMP is one of the parameters to judge whether the heat pump Setting should enter the defrosting cycle. Setting Range: -30~-2 ℃ Default Value: -7 DEFROST OFF TEMP DEFROST OFF TEMP is one of the parameters to judge whether the heat...
-
Page 48: Help Menu
6.9. HELP MENU Press the HELP button from any UIM interface, the UIM will enter the HELP interface. Press the SELECT button to enter the menu item or press the BACK button to return to the previous interface. HELP INSTRUCTION OF BUTTONS DESCRIPTION OF STATUS SETPOINT MODIFICATION EX-FACTORY RESETTING... -
Page 49: Maintenance Instructions
7 – Maintenance Instructions WARNING: This heat pump water heater system maintenance and service sould be peformed by qualified technician. The improper maintenance and service might cause serious personal injury or property lose. Please disconnect the power to both heat pump unit and centralcontroller before any maintenance or service is performed. -
Page 50: Troubleshooting Instructions
8 - Troubleshooting Instructions 12.1. Error Code Trouble Shooting Please try to do the trouble shooting based on the error code information before call the service call if the central controller reported a error code. CODE ERROR DESCRIPTION POSSIBLE REASONS TROUBLE SHOOTING STEPS Central Controller E00-01... - Page 51 pump units. each heat pump units and Loose communication cable the status of each air switch. wiring. Inspec the communication Bad controller. cable wiring and fix. Replace the control board. E0X-01 RESERVED E0X-02 OUTLET WATER TEMPERATURE SENSOR ERROR Inspect the wiring of the E0X-03 DISCHARGE TEMPERATURE Loose wiring.
-
Page 52: Other Phenomena - Normal
Replace the low pressure switch. E0X-14 RESERVED E0X-15 POWER SUPPLY PROTECTOR The wrong phase sequence or Inspect the power supply system. ERROR incorrect phase of the power supply. E0X-16 COMPRESSOR OVERLOAD Loose wiring of the overload Inspect the wiring and fix. PROTECTION protection relay. -
Page 53: Other Phenomena-Abnormal
remove the frost from the evaporator to ensure efficient system operation after a certain time operation. This is normal phenomeno. To Heat pump units does not protect the compressor from start as soon as the system is frequent cycle, the heat pump switched on. - Page 54 4. Inproper setting point. exhaust the gas in the system. 5. Insufficient water. 1. Bad fan contactor. 1. Replace the fan contactor. Fan does not start 2. Bad fan motor. 2. Replace the fan motor.
-
Page 55: 9- Appendix
9- Appendix 12.4. Heat Pump Unit Wiring Diagram Picture 9.1 Heat Pump Unit Wiring Diagram... -
Page 56: Central Controler Wiring Diagram
12.5. Central Controler Wiring Diagram Picture 9.2 Central Controller Wiring Diagram 12.6. Communication Wiring Diagram Among Mutilple Units Picture 9.3 Communication Cable Wiring Diagram Note: 1. Please use shielded cable for all the communication cables among heat pump units and central controllers and grounded the cable well. - Page 57 Picture 9.3 Incorrect Communication Cable Wiring...
-
Page 58: Packing List
10 - Packing List 22.1. Packing List of the Heat Pump Unit Description Quantity Instructions 1 Heat Pump Unit To be installed between the heat pump unit and 2 Neoprene Isolator the foundation to isolate the vibration of the unit To be installed between the tank and the inlet 3 Water Filter water connection of the heat pump unit.
Need help?
Do you have a question about the CAHP-MC-38 and is the answer not in the manual?
Questions and answers