Advertisement
Quick Links
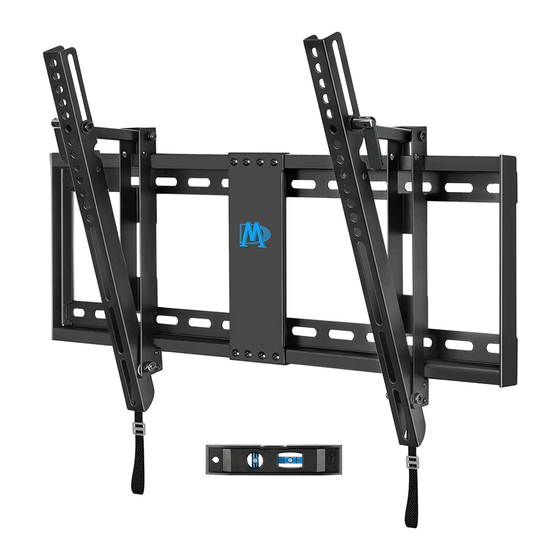
INSTALLATION INSTRUCTION
Please read this instruction carefully before installation .
Fits for most 42-70 inches Plasma, LCD and LED TVs .
Weight capacity: 60 kg (132 lbs) .
Thank you for purchase!We strive to provide products and services of exceptional quality.
We sincerely invite you to write a review with a good rating. For parts missed or installation problems,
please contact us at telephone (626) 604-9048 (USA) Mon - Fri 10am - 6pm (Pacific time) or email
us by customerservice@mountingdream.com , so that we may solve the issue for you.
Max VESA: 600 X 400 mm/24X16"
MODEL : MD2165-LK
(A6)
Advertisement

Related Manuals for Mounting Dream MD2165-LK


Summary of Contents for Mounting Dream MD2165-LK
- Page 1 INSTALLATION INSTRUCTION Max VESA: 600 X 400 mm/24X16" MODEL : MD2165-LK Please read this instruction carefully before installation . Fits for most 42-70 inches Plasma, LCD and LED TVs . Weight capacity: 60 kg (132 lbs) . Thank you for purchase!We strive to provide products and services of exceptional quality.
- Page 2 Avertissement de sécurité: bienvenue à choisir le support suspendu de téléviseur de la Vue Aérienne, pour garantir un usage sécurité du produit MD2165-LK, préserver le risque contre vous-même et des tiers et éviter ledommage des biens, veuillez lire soigneusement ce manuel avant l'usage. Si vous ne pouvez pas comprendre cette notice ou en cas de doute sur la sécurité...
- Page 3 Before getting started, let's make sure this mount is perfect for you! Is your TV VESA equal to/greater than 200x100mm and equal to/less than 600x400mm? MAX:600mm Yes --- Perfect! MAX:400mm No --- This mount is NOT compatible. Does your TV (including accessories) weigh more than 132 lbs (60kg)? NO --- Perfect! 132 lbs...
- Page 4 For parts shortage or damage, please contact us directly by customerservice@mountingdream.com. Attention: New delivery will be timely arrange d to replace missed or defective parts. Installation tools: Band tape Band tape Screwdriver Bubble level Stud finder Pencil Pencil Socket wrench 3/8"...
-
Page 5: Installation Hardware
Installation hardware : -Lag bolt --M8 Washer --M5X8 Bolt 4 pcs 4 pcs 4 pcs For concrete wall installations ONLY CAUTION: Do not use in drywall or wood Concrete Wall Anchor 4 pcs Hardware for TV installation : a--M4X12 bolt b--M5X12 bolt c--M6X12 bolt d--M8X25 bolt... - Page 6 Step 2 Wall plate installation : Option 1 Wall plate installation in wood stud To avoid potential body injury or property damage: 1. Wall mount must be installed into wood stud's center, not drywall alone. 2. Drywall covering the wood stud must not exceed 16 mm (5/8 in.). 3.
- Page 7 Option 2 Wall plate installation on concrete wall To avoid potential personal injury or property damage: 1. Make sure the logo on the wall plate is upward as the picture shows. 2. Solid concrete wall's thickness should be more than 100mm/4", and the wall must be CAUTION capable of supporting five times the weight of the TV plus the mount.
- Page 8 Step 3 Select TV hardware (diameter / length / combination) Bolt diameter: hand thread bolts into threaded inserts on the back of TV to determine correct bolt diameter (M4, M5, M6, M8). Bolt length: verify adequate thread engagement with bolts or bolts/spacers combination.We recommend thread engagement by at least 5 turns.
- Page 9 Step 4 Attach brackets to the back of the TV: ① For the TV with flat back, mount the wall plate with bolt/washer/spacer combination. Tips: Make sure the ends of TV brackets with round holes are facing upward. Round hole is for upper VESA hole, and long slot hole for lower VESA hole.
- Page 10 ② For TV with irregular back, mount the wall plate with bolt/washer/ spacer combination. (Spacers are highly recommended to be added, thus enlarge the space between TV and brackets for better functionality.) Tips: Make sure the ends of TV brackets with round holes are facing upward.
- Page 11 Step 5 Hang the TV on the wall plate: Hang the top hooks of the brackets over the top bar of the assembled wall mount. Make sure the hooks securely hang in the bar (figure 1). Then attach the lower ends of the brackets to the lower bar of the wall mount.
- Page 12 Step 6 Adjust the tilting angle with spring loaded handle: Hold the TV and adjust it to your desired position, and fasten the handle firmly. Handle -20° -20° +0° +0° figure 3 To fasten the handle: Push Pull Step A Step B Step C Step D...
-
Page 13: Product Dimensions
Product dimensions: 650mm 40mm +0/-20° MAX:600mm 430mm 400mm 222mm If you have any questions about the installation,please feel free to contact us at telephone (626) 604-9048 (USA) Mon - Fri 10am - 6pm (Pacific time) or email us by customerservice@mountingdream.com . For more information,please visit our website:www.mountingdream.com...
Need help?
Do you have a question about the MD2165-LK and is the answer not in the manual?
Questions and answers