Advertisement
Quick Links
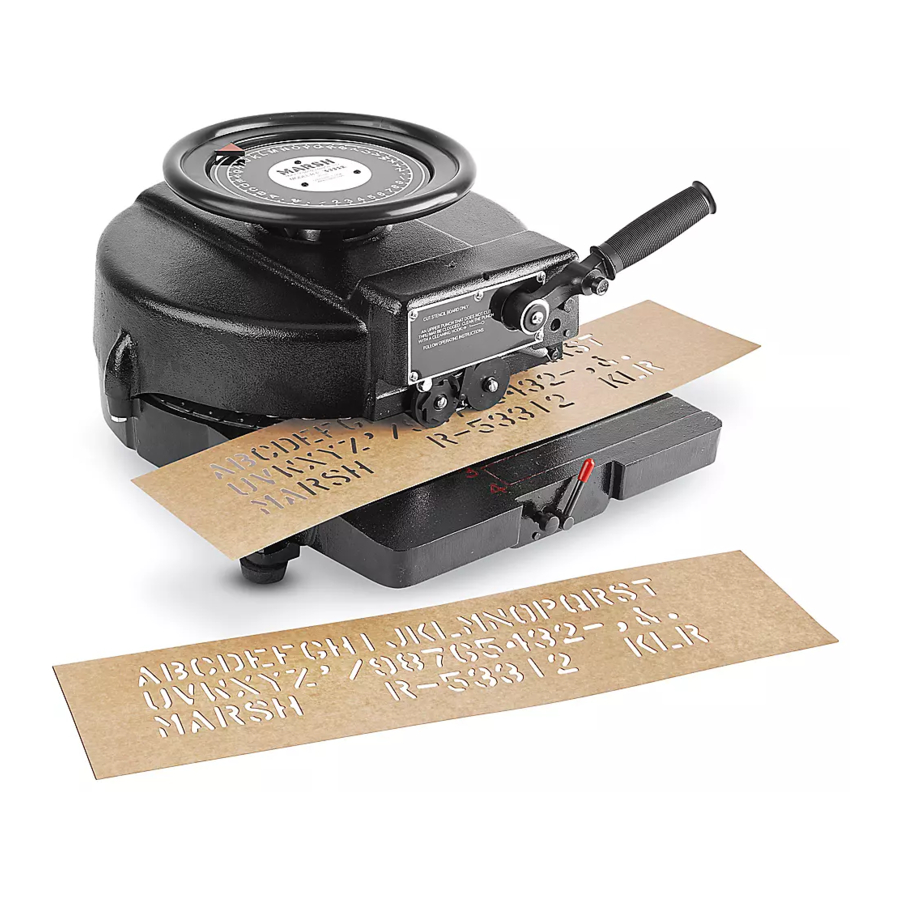
H-259, H-347
π
H-408
STENCIL MACHINE
NOTE: No assembly is necessary after you
unpack your machine.
INSERTING THE OIL BOARD
1.
Move the release lever to the right. This drops the
lower feed roller and allows space to insert the oil
board.
2. Position the oil board so the top edge covers the
punch center lines and then align the bottom edge
of the oil board with the appropriate guideline.
(See Figure 1)
NOTE: The left edge of the oil board may align
with the left side of the guideline markings. If
you need a wider left margin, you may align
the left edge of the oil board with one of the
punch center lines. (See Figure 1)
3. When the oil board is in position, push the release
button. The release lever snaps back to its original
position and raises the lower feed rollers to secure
the oil board.
Figure 1
Punch Center Lines
Lower Feed Roller
Release Lever
Release Button
Guide Lines
PAGE 1 OF 5
1-800-295-5510
uline.com
OPERATION
Oil Board
CUTTING THE OIL BOARD
To cut and space characters, follow the steps below
and refer to Figure 2.
1.
Move the hand wheel and align the indicator with
the desired character.
2. When the indicator is aligned, push the handle
down.
3. To create a space between words, press the word
space button on the handle as you push down.
(See Figure 2)
4. When a line of stenciling is complete, swing the
release lever to the right to release the lower feed
rollers.
5. Align the oil board in the starting position. Advance
the top of the oil board into the machine and align
the bottom of the oil board with an appropriate
guideline.
Figure 2
Indicator
Handle
Word Space Button
Punch
Center Lines
Release
Lever
Hand Wheel
0815 IH-259
Advertisement

Related Manuals for U-Line H-259


Summary of Contents for U-Line H-259
- Page 1 H-259, H-347 π 1-800-295-5510 H-408 uline.com STENCIL MACHINE OPERATION CUTTING THE OIL BOARD NOTE: No assembly is necessary after you unpack your machine. To cut and space characters, follow the steps below INSERTING THE OIL BOARD and refer to Figure 2.
-
Page 2: Maintenance
MAINTENANCE CLEANING THE PUNCHES Figure 4 As you use your stencil machine, the punches may become clogged with oil board particles. If these Oil moving parts particles prevent the machine from cutting complete Shown here. Hood characters, the punches need to be cleaned. Follow the steps below to clean the punches. - Page 3 4. Adjust the square head screw to the desired position. Only turn the square head screw 1/4 turn at a time. NOTE: H-259 has a fourth washer. If you want to apply more punch depth, turn the square head screw clockwise. If you want to apply 5.
- Page 4 MAINTENANCE CONTINUED Figure 8 Figure 9 Holes in Die Carrier Punch Screw Side Bolt, Nut Feed Roller and Lock Washer Assembly Base Wall Eccentric Shaft Stud Collar Set Screw Punch Die Screw Release Button 4. Insert screwdriver through the holes in the die carrier 4.
-
Page 5: Troubleshooting
TROUBLESHOOTING OPERATING ISSUE CAUSES RECOMMENDATIONS The oil board is moving erratically There is a buildup of heavy oil on the moving Be sure the machine is properly oiled and through the machine. parts under the cover plate. cleaned every one to two years. The treads on the lower feed wheel are dirty.
Need help?
Do you have a question about the H-259 and is the answer not in the manual?
Questions and answers