Table of Contents
Advertisement
Available languages
Available languages
Quick Links
π
H-7191
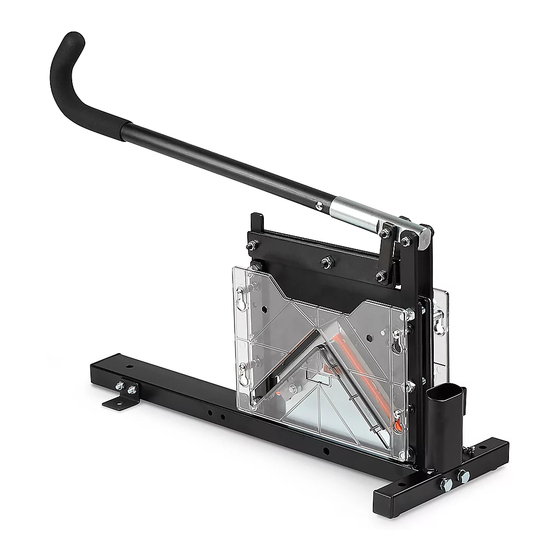
EDGE PROTECTOR
CUTTER
TOOLS NEEDED
Flathead Screwdriver
Supply Holder
Safety Pin Holder
WARNING! Cutter contains sharp blade.
Read operating instructions before using.
Use extreme caution during operation.
NOTE: This unit cuts 90º paper edge protectors
up to 3 x 3", 0.225" thick.
NOTE: Before using, turn handle to correct position.
1.
Loosen screws with flathead screwdriver and Allen
wrench. Turn handle 180° and re-tighten screws.
(See Figure 1)
Figure 1
PAGE 1 OF 15
1-800-295-5510
uline.com
Allen Wrench
Magnet
(included)
(included)
Safety Pin
180º
PARTS
Handle
Blade
Protective Shield
OPERATION
2. Press handle down and pull safety pin out. Now, tool
is ready for use. (See Figure 2)
NOTE: Keep safety pin in holder.
Figure 2
Para Español, vea páginas 6-10.
Pour le français, consulter les pages 11-15.
Spare Blade x 2
Safety Pin
Safety Pin Holder
0118 IH-7191
Advertisement
Table of Contents

Summary of Contents for U-Line H-7191
- Page 1 Para Español, vea páginas 6-10. Pour le français, consulter les pages 11-15. π H-7191 1-800-295-5510 uline.com EDGE PROTECTOR CUTTER TOOLS NEEDED Flathead Screwdriver Allen Wrench Magnet (included) (included) PARTS Handle Spare Blade x 2 Safety Pin Blade Supply Holder Safety Pin Holder...
-
Page 2: Maintenance
OPERATION CONTINUED 3. Insert edge protector into slot with handle up. 4. When done cutting, press the handle down and insert Firmly press handle down to cut to desired length. safety pin to lock handle movement. (See Figures 5-6) (See Figure 3) NOTE: Ensure pin protrudes through back side of cutter. -
Page 3: Blade Replacement
BLADE REPLACEMENT WARNING! Not following instructions may cause 4. Put tool down to horizontal position. Use Allen wrench injury to user. to free screws and washers. Remove two cutter blocks. (See Figure 11) Remove four screws and pull protective shield out. (See Figure 8) Figure 11 Cutter Block... - Page 4 BLADE REPLACEMENT CONTINUED Put cutter blocks back. Fasten two screws and 8. Press handle down, and while at this position, pull washers. Repeat previous steps for blade on safety pin out. Place safety pin into pin holder. opposite side. (See Figure 14) Replace protective shield as shown.
- Page 5 CUTTING BOARD REPLACEMENT CONTINUED 5. Two numbers are marked on cutting board: "1" on Put handle down. Re-install protective shield. one side and "2" on the other. Flip cutting board to Replace and tighten all screws. (See Figure 21) opposite side, as both sides may be used before replacement.
- Page 6 π H-7191 800-295-5510 uline.mx CORTADORA PARA ESQUINEROS DE PROTECCIÓN HERRAMIENTAS NECESARIAS Desarmador Plano Llave Allen (Incluida) Imán (incluido) PARTES 2 Navajas de Repuesto Pasador de Seguridad Navaja Soporte para Suministros Soporte para Pasadores de Seguridad Cubierta Protectora FUNCIONAMIENTO ¡PRECAUCIÓN! La cortadora tiene una navaja 2.
-
Page 7: Mantenimiento
CONTINUACIÓN DE FUNCIONAMIENTO 3. Inserte el esquinero de protección en la ranura con 4. Al terminar de cortar, presione el asa e inserte el el asa hacia arriba. Presione el asa con firmeza pasador de seguirdad para bloquear el movimiento para cortar al largo deseado. - Page 8 REEMPLAZO DE NAVAJA ¡PRECAUCIÓN! No seguir instrucciones podría 4. Baje la herramienta a la posición horizontal. Use causar lesiones al usuario. la llave Allen para soltar los tornillos y rondanas. Remueva dos bloques de cortadora. (Vea Diagrama 11) Remueva cuatro tornillos y retire la cubierta de protección.
- Page 9 CONTINUACIÓN DEL REEMPLAZO DE NAVAJA 7. Jale los bloques de la cortadora para atrás. Ajuste 8. Baje el asa, y mientras esté en esta posición, retire dos tornillos y rondanas. Repita los pasos anteriores el pasador de seguridad. Coloque el pasador de para la navaja en el lado opuesto.
- Page 10 CONTINUACIÓN DE REEMPLAZAR LA TABLA PARA CORTAR 5. Hay dos números marcados en la tabla para cortar: Baje el asa. Reinstale la cubierta protectora. "1" en un lado y "2" en el otro. Voltee la tabla para Reemplace y ajuste todos los tornillos. cortar hacia el lado contrario, ya que se pueden (Vea Diagrama 21) utilizar ambos lados antes de reemplazar.
- Page 11 π H-7191 1-800-295-5510 uline.ca OUTIL DE COUPE POUR CORNIÈRES DE PROTECTION OUTILS REQUIS Tournevis à tête plate Clé Allen Aimant (incluse) (inclus) PIÈCES Poignée Lame de rechange x 2 Goupille de sécurité Lame Porte-accessoires Support pour goupille de sécurité Écran protecteur...
-
Page 12: Entretien
FONCTIONNEMENT SUITE 3. Insérez la cornière de protection dans la fente en 4. Une fois la coupe achevée, appuyez sur la poignée gardant la poignée en haut. Appuyez fortement sur et insérez la goupille de sécurité pour verrouiller le la poignée pour couper à la longueur désirée. mouvement de la poignée. -
Page 13: Remplacement De La Lame
REMPLACEMENT DE LA LAME AVERTISSEMENT! Le non-respect des consignes 4. Couchez l'outil à l'horizontale. Dévissez les vis et les ARRÊT peut entraîner un risque de blessures chez rondelles à l'aide de la clé Allen. Retirez les deux l'utilisateur. porte-lames. (Voir Figure 11) Retirez les quatre vis et enlevez l'écran protecteur. - Page 14 REMPLACEMENT DE LA LAME SUITE Relevez l'outil de coupe. Vissez deux vis et rondelles. 8. Appuyez sur la poignée et dans cette position, retirez Répétez les étapes précédentes pour la lame sur le la goupille de sécurité. Placez la goupille de sécurité côté...
- Page 15 REMPLACEMENT DE LA PLANCHE À DÉCOUPER SUITE 5. Deux chiffres sont affichés sur la planche à 7. Abaissez la poignée. Remettez les écrans découper : « 1 » d'un côté et « 2 » de l'autre. Avant protecteurs comme illustré. Replacez et serrez toutes de la remplacer, retournez la planche à...


Need help?
Do you have a question about the H-7191 and is the answer not in the manual?
Questions and answers