
Related Manuals for A&E NEO-ROUND SHOWER STALL


Summary of Contents for A&E NEO-ROUND SHOWER STALL
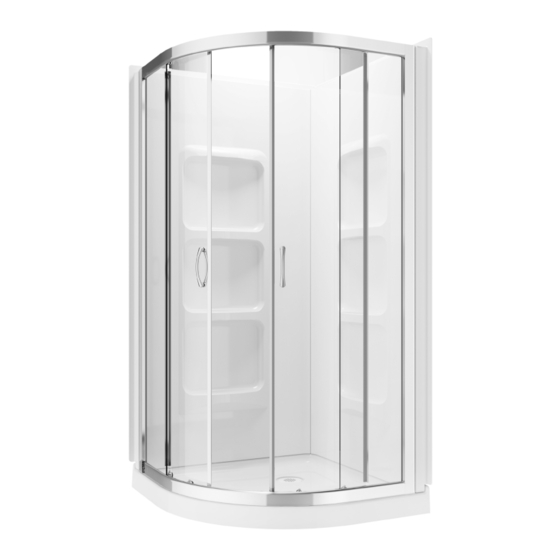
- Page 1 INSTALLATION GUIDE GUIDE D’INSTALLATION GUÍA PARA INSTALACIÓN NEO-ROUND SHOWER STALL CABINE DE DOUCHE NEO-RONDE CABINA DE DUCHA NEO-ROUND A&E Bath Shower & Bain Douche...
-
Page 2: Important Notes
TO GET STARTED POUR COMMENCER PARA COMENZAR Avant débuter travaux, Before you begin, read all instructions Leer todas instrucciones lisez attentivement les instructions carefully. cuidadosamente antes de empezar. d’installation. This manual is a graphic reference for Este manual es una referencia gráfica manuel référence installation purposes. - Page 3 TOOLS OUTILS HERRAMIENTAS NEEDED REQUIS NECESARIAS (not included) (non inclus) (no incluidas) Hacksaw | Scie à métaux | Sierra de arco Cutting pliers | Pince coupante | Alicate cortante Masonry drill bit | Mèche de maçonnerie Countersink bit | Mèche à fraiser Broca para mampostería Broca avellanadora Level | Niveau | Nivel...
- Page 4 PARTS LIST LISTE DE PIÈCES LISTA DE PIEZAS...
- Page 5 PARTS LIST LISTE DE PIÈCES LISTA DE PIEZAS 18.1 18.2 18.3 18.4 18.5 18.6 18.7 18.8...
- Page 6 PARTS LIST LISTE DE PIÈCES LISTA DE PIEZAS Item Description Code Cant. Wall jamb / montant mural / Batiente para pared 91021000-101 Fixed panel extrusion / Extrusion de panneau fixe / Extrusión de panel fijo 91031000-101 Fixed panel water proof strip / Moulure de scellement du panneau fixe / Tira impermeable para panel fijo 95011000 Fixed panel / Panneau fixe / Panel fijo 92021000-901...
- Page 7 PREPARATION PRÉPARATION PREPARACIÓN If the base has a plastic cover, remove it. Si votre base est recouverte d’une Retirar la cubierta plástica de la base, si pellicule de plastique, veuillez la retirer. la tiene. Cut a piece of cardboard to cover the base in order to protect the it during Afin de protéger votre base lors de Cortar un pedazo de cartón para cubrir la...
-
Page 8: Base Installation
BASE INSTALLATION DE INSTALACIÓN DE LA INSTALLATION LA BASE BASE Place the base in the accompanying Placez la base de douche dans son Colocar la base en la estructura structure. Make sure that it is level. emplacement et assurez-vous qu’elle acompañante. - Page 9 Remove the cap (18.1). Retirez le couvercle (18.1). Retirar la tapa (18.1). Unscrew the tightening ring (18.3) using Dévissez la bague de serrage (18.3) Desenroscar el anillo de ajuste manual the tightening tool (18.2) and unscrew à laide de l’outil de serrage (18.2) et (18.3) usando la herramienta para the drain nut (18.8).
- Page 10 Place a sheet of plastic on the floor which Déposez une pellicule de plastique Colocar una película de plástico sobre will cover the mortar completely. Spread au sol pour envelopper le mortier piso, esta debe de cubrir completamente the mortar approximately 1 1/2” thick complètement.
- Page 11 Place the base in its final position. Déposez la base de douche dans son Colocar la base en su posición final. emplacement final. Make sure the base is uniformly Asegurarse de que la base quede supported by the mortar and that the Assurez-vous que la base soit soutenue uniformemente soportada...
- Page 12 Apply a drop of silicone in the holes for Appliquez une goutte de silicone dans Aplicar una gota de silicona en los the screws. les trous de vissage. orificios para los tornillos. Screw the base into place using No. 8 Fixez la base en place à...
-
Page 13: Wall Installation
WALL INSTALLATION INSTALACIÓN INSTALLATION DES MURS Wait 24h for the mortar to set before Veuillez attendre 24h pour laisser figer le Esperar 24 horas para que la argamasa proceeding with the shower walls. mortier avant de procéder à l’installation se endurezca antes de continuar con las des murs. - Page 14 Remove the plastic film on the Retirez la pellicule de plastique sur la Retirar la película de plástico de la unión wall junction. jonction des deux murs. de la pared. Before attaching the walls together apply Appliquez un filet de silicone sur la Antes de fijar las paredes juntas, aplicar a silicone bead on the corner junction.
- Page 15 Remove the plastic film at the junction of Retirez la pellicule de plastique à la Retirar la película plástica de la unión de the walls and the base. Before attaching jonction des murs et de la base. Avant las paredes y la base. Antes de fijar el the wall assembly apply a silicone bead l’installation des murs, appliquez un filet conjunto de la pared, aplicar una gota...
- Page 16 Drill holes on the lip on the periphery Percez des trous sur la lèvre en périphérie Taladrar orificios en el borde de la of the walls using the drill with a drillbit des murs avec la perceuse munie d’une periferia de las paredes usando un smaller than the screws (25).
- Page 17 INSTALLATION INSTALLATION INSTALACIÓN OF THE DOORS DES PORTES DE LAS PUERTAS 14.1 Assemble the door frame. 14.1 Assemblez le cadre de porte. 14.1 Montaje del bastidor de la puerta. 14.2 Install the sealing moldings (3) on 14.2 Installez les moulures de scellement 14.2 Instalar la moldura de sellado (3) en the end of the fixed panels.
- Page 18 15.1 Insert the wall posts (1) into the 15.1 Insérez les montants muraux (1) 15.1 Introducir los postes de la pared (1) extrusions of the fixed panels (2). Place dans les extrusions de panneaux fixes dentro de las extrusiones de los paneles the assembly on the shower base so that (2).
- Page 19 Return the door frame to its final position Remettez le cadre de porte à sa position Regresar el bastidor de la puerta a su one side at a time. finale un côté à la fois. posición final, un lado a la vez. 16.1 Level and ensure that the rail is 16.1 Mettez à...
- Page 20 17.1 Install the roller stoppers (7) on the 17.1 Installez les butoirs (7) de roulettes 17.1 Instalar los topes del rodillo (7) sobre top and bottom rails (6 and 14) (Fig.3). sur les rails supérieur et inférieur (6 et los rieles superior e inferior (6 y 14) (Fig. Fix the bumpers in place with screws 14) (Fig.3).
- Page 21 18.1 Install the upper (8) and lower (13) 18.1 Installez les roulettes de portes 18.1 Instalar los rodillos superior (8) door rollers on each of the door panels. supérieures (8) et inférieures (13) sur e inferior (13) sobre cada uno de los chacun des panneaux de porte.
- Page 22 19.1 Insert the top rollers (8) into the top 19.1 Insérez les roulettes supérieures 19.1 Insertar los rodillos superiores (8) rail (6). (8) dans le rail du haut (6). dentro del riel superior (6). 19.2 Press the spring buttons on the 19.2 Appuyez sur les boutons ressort 19.2 Presionar sobre los botones de lower rollers (13) to insert them into the...
- Page 23 20.1 Once the doors are installed, if the 20.1 Une fois les portes installées, si 20.1 Una vez que se instalen las magnets do not close the door perfectly, les aimants ne ferment pas la porte puertas, si los imanes no cierran la adjust the upper rollers (8) by screwing parfaitement, ajustez les roulettes puerta perfectamente, ajustar los rodillos...
- Page 24 NOTES: NOTES: NOTAS:...
-
Page 25: Maintenance
MAINTENANCE ENTRETIEN MANTENIMIENTO Daily care Entretien quotidien Cuidado diario After each use, remove water on the Après chaque utilisation, utilisez une Eliminar el agua después de cada uso glass with a squeegee. raclette pour enlever les gouttes et l’eau con un escurridor. sur le verre. -
Page 26: Warranty
WARRANTY GARANTIE GARANTÍA A&E Shower and Baths Inc. (hereafter “A&E”) A&E Shower & Bath inc. (˝A&E˝) offre la A&E Shower and Baths inc. (de ahora en offers the following limited warranty on garantie limitée suivante sur ses produits. Cette adelante, «A&E») ofrece la siguiente garantía each of its products.
Need help?
Do you have a question about the NEO-ROUND SHOWER STALL and is the answer not in the manual?
Questions and answers