Table of Contents
Advertisement
Playback Position
DO NOT ASSEMBLE OR USE THIS TABLE WITHOUT READING THIS MANUAL.
THIS TABLE IS FOR HOME RECREATIONAL USE ONLY, NOT FOR COMMERCIAL USE.
NOT SUITABLE FOR CHILDREN UNDER 6 YEARS OF AGE. ADULT SUPERVISION IS
REQUIRED WHEN CHILDREN ARE PLAYING.
PLEASE CALL THIS NUMBER AND WE WILL DO OUR
BEST TO TAKE CARE OF ANY PROBLEMS FOR YOU
GMT-1183-PP
TABLE TENNIS TABLE
CUSTOMER SERVICE NUMBER
1800-333-061
DO NOT RETURN TO THE STORE
Storage Position
Advertisement
Table of Contents

Summary of Contents for KMART GMT-1183-PP
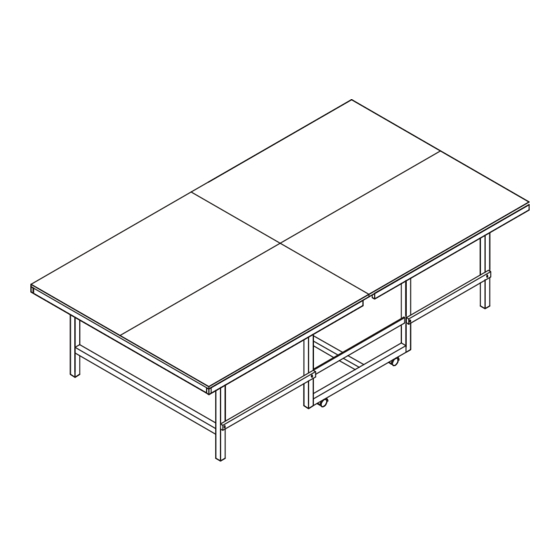
- Page 1 GMT-1183-PP TABLE TENNIS TABLE ASSEMBLY INSTRUCTIONS Playback Position Storage Position DO NOT ASSEMBLE OR USE THIS TABLE WITHOUT READING THIS MANUAL. THIS TABLE IS FOR HOME RECREATIONAL USE ONLY, NOT FOR COMMERCIAL USE. NOT SUITABLE FOR CHILDREN UNDER 6 YEARS OF AGE. ADULT SUPERVISION IS REQUIRED WHEN CHILDREN ARE PLAYING.
- Page 3 REQUIRED 10-13(2.0T)
- Page 4 ASSEMBLY INSTRUCTIONS BEFORE YOU BEGIN: Review all steps before assembly and read all precautions before using the product. Three adults are required to assemble this table. Check the pack and make sure you have all of the parts listed in the Parts List section of this user manual.
- Page 5 ASSEMBLY INSTRUCTION: 1. READ AND FOLLOW ALL ASSEMBLY, OPERATION, AND SAFETY INSTRUCTIONS CAREFULLY BEFORE YOU BEGIN TO ASSEMBLE AND USE THE PRODUCT. 2. THREE (3) ADULTS ARE REQUIRED TO ASSEMBLE THIS TABLE. 3. DURING THE ASSEMBLY PROCESS, SECURE THE SCREWS TO THE POINT THAT THE PARTS ARE HELD IN POSITION, BUT NOT FULLY TIGHTENED.
- Page 6 See FIGURE 2. FIGURE 2...
- Page 7 Attach two tabletop support tubes P4B on the two sides of the midline with screw H8. See FIGURE 3. FIGURE 3...
- Page 8 Attach four table top connection plates P5 with screw H7 as shown in FIGURE 4. Note: Be sure to evenly space out the table top connection plate P5 along the center line of the table top. FIGURE 4...
- Page 9 Attach H leg tube P4A to support tube bracket P4E with bolt H5 and nut H4. See FIGURE 5. FIGURE 5...
- Page 10 Connect square tube P3C to U leg tube P1 with bolt H12 and washer H13. Turn both U legs to upright position. See FIGURE 6. FIGURE 6...
- Page 11 With one adult holding each side of the table, lift and place the assembled tabletop over U-Leg tubes P1. See FIGURE 8. Please have one other adult to help hold the ends of U-Leg tubes steady during assembly. FIGURE 7...
- Page 12 Attach the end of U leg tube underneath the table to support tube bracket P4E with bolt H5 and nut H4. See FIGURE 8. Repeat the same process on the opposite side of table. FIGURE 8...
- Page 13 Attach flat connection tube P3 to the legs on the side of the assembled table with bolt H1, washer H3, bushing H2, washer H3 and nut H4 as shown in FIGURE 9. Repeat the same process on the opposite side of table . FIGURE 9...
- Page 14 Place the other set of assembled table top over the U Leg tubes and attach the legs to the support tube bracket P4E underneath the table with bolt H5 and nut H4. See FIGURE 10. Repeat the same process for the other leg. FIGURE 10...
- Page 15 Attach flat connection tube P3 to the legs on the side of the assembled table with bolt H1, washer H3, bushing H2, washer H3 and nut H4 as shown in FIGURE 11. Repeat the same process on the opposite side of table . FIGURE 11...
- Page 16 LOCK THE WHEEL TIGHTLY FOR STORAGE AND UNLOCK IT WHEN MOVING. FOLD DOWN THE H-LEG TUBE...
- Page 17 FRAME...
- Page 18 CARE AND MAINTENANCE DO NOT SIT, STAND, LEAN, WALK OR JUMP ON THE TABLE! FAILURE TO COMPLY WITH THIS WARNING COULD RESULT IN PERSONAL INJURY AND/OR PROPERTY DAMAGE! THIS TABLE MUST BE KEPT INDOORS TO PREVENT DAMAGE TO THE PLAYING SURFACE. DAMPNESS AND EXTREME TEMPERATURE CHANGES WHICH OCCUR ON PATIOS, IN GARAGES OR SIMILAR AREAS CAN CAUSE THE WOOD TO WARP, SWELL, CRACK OR BLISTER.
- Page 19 TABLE TENNIS RULES DEFINITIONS: -A “rally” is the period during which the ball is in play. -A ball is “in play” once the ball is intentionally projected in service. -A “let” is a rally, the hand which is not scored. -A “point”...
- Page 20 BALL IS IN PLAY-UNTIL: The ball is in play from the last moment at which it is stationary on the palm of the server’s free hand before being projected in service until: -A point is scored. -It touches the same court twice consecutively. -It has been volleyed.
- Page 21 -Choose to serve or receive first and then the loser has the choice ends. -Choose an end and then the loser has the choice to serve or receive first. -Require the loser to make first choice. In doubles: the pair having the right to serve first in any game decides which partner will do so. In the first game of a match, the opposing pair then decides which partner will receive first, in subsequent games of a match.
- Page 22 Please contact our customer service for parts or assembly instructions. Stores are not equipped to provide customer service for this product. TASMAN SPORTS SHEEHAN ROAD, WESTHEIDELBERG, VICTORIA SERVICE PHONE NUMBER 1800-333-061 MODEL NUMBER # GMT-1183-PP SP-LS-GMT-1183-PP-14001...


Need help?
Do you have a question about the GMT-1183-PP and is the answer not in the manual?
Questions and answers