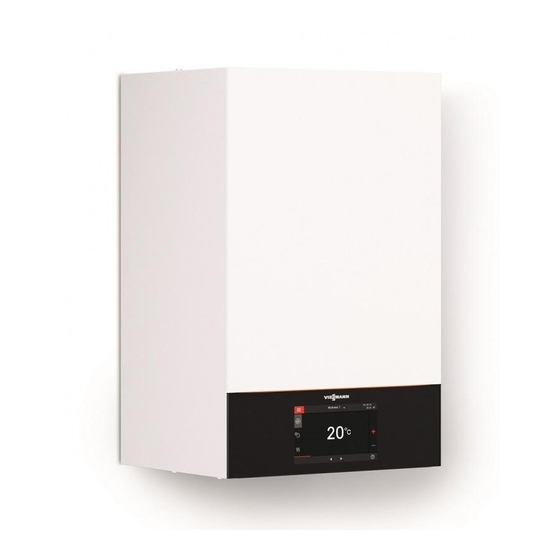
Viessmann VITODENS 200-W Installation And Service Instructions For Contractors

Viessmann VITODENS 200-W Installation And Service Instructions For Contractors

1.9 to 32 kw, wall mounted gas condensing boiler with 7 inch colour touchscreen, natural gas and lpg version
Table of Contents

Advertisement

VIESMANN
Installation and service instructions
for contractors
Vitodens 200-W
Type B2HF, B2KF, 1.9 to 32 kW
Wall mounted gas condensing boiler with 7 inch colour touchscreen
Natural gas and LPG version
VITODENS 200-W
Please keep safe.
5593201 GB
1/2020

Advertisement

Table of Contents
loading

Summary of Contents for Viessmann VITODENS 200-W

  • Page 1 VIESMANN Installation and service instructions for contractors Vitodens 200-W Type B2HF, B2KF, 1.9 to 32 kW Wall mounted gas condensing boiler with 7 inch colour touchscreen Natural gas and LPG version VITODENS 200-W Please keep safe. 5593201 GB 1/2020...
  • Page 2 Safety instructions Safety instructions Please follow these safety instruc- tions closely to prevent accidents and material losses. Safety instructions explained Danger Note This symbol warns against the risk Details identified by the word "Note" of injury. contain additional information. Please note This symbol warns against the risk of material losses and environmen- tal pollution.
  • Page 3 Viessmann. water pipes to discharge static loads. Repair work Please note Repairing components that fulfil a safety function can compromise the safe operation of the system. Replace faulty components only with genuine Viessmann spare parts.
  • Page 4 Safety instructions Safety instructions (cont.) Safety instructions for operating the system If you smell gas Condensate Danger Danger Escaping gas can lead to explo- Contact with condensate can be sions which may result in serious harmful to health. injury. Never let condensate touch your Do not smoke.
  • Page 5 Safety instructions Safety instructions (cont.) Danger The simultaneous operation of the boiler and appliances that exhausts air to the outside can result in life threatening poisoning due to a reverse flow of flue gas. Fit an interlock circuit or take suita- ble steps to ensure an adequate supply of combustion air.
  • Page 6: Table Of Contents

    Index 1. Information Disposal of packaging ................Symbols ....................Intended use ..................Product information ................Vitodens 200-W, type B2HF, B2KF ............. ■ System examples .................. 10 Spare parts lists ..................10 2. Preparing for installation ........................ 11 3. Installation sequence Mounting the boiler and making connections ........
  • Page 7 Index Index (cont.) Checking operating data ..............81 ■ Calling up messages (message history) ..........82 Checking outputs (actuator test) ............82 7. Troubleshooting Fault display on the programming unit ........... 85 Overview of electronics modules ............86 Fault messages ..................87 Repairs ....................
  • Page 8: Disposal Of Packaging

    Information Disposal of packaging Please dispose of packaging waste in line with statu- tory regulations. Symbols The steps in connection with commissioning, inspec- Symbol Meaning tion and maintenance are found in the "Commission- Reference to other document containing ing, inspection and maintenance" section and identified further information as follows: Step in a diagram:...
  • Page 9: Product Information

    The type plate also shows the other gas types and pressures with which the boiler The Vitodens 200-W may only be delivered to coun- can be operated. A conversion within the stated natu- tries listed on the type plate. For deliveries to other ral gas groups is not required.
  • Page 10: System Examples

    Detailed information on system examples can be found tion diagrams and function descriptions are available at: www.viessmann-schemes.com to help setting up the heating system. Spare parts lists Information about spare parts can be found at www.viessmann.com/etapp or in the Viessmann spare part app.
  • Page 11 Preparing for installation Preparing for installation Ø 96 -0.5 Ø 60.5 +0.8 Fig. 2 Illustration shows a gas condensing combi boiler Condensate drain Heating return Heating flow Filling/draining DHW (gas condensing combi boiler) Dimension for installation with DHW cylinder below Cylinder flow (gas condensing system boiler) the boiler Gas connection...
  • Page 12 Preparing for installation Preparing for installation (cont.) Note 3. Prepare the gas connection according to TRGI or This boiler (IP rating: IP X4) is approved for installation TRF [or local regulations]. in wet rooms inside safety zone 1, to DIN VDE 0100. Exposure to jets of water must be prevented.
  • Page 13 Preparing for installation Preparing for installation (cont.) Connection on the DHW side for gas condensing combi boiler Cold water installation Safety assembly to DIN 1988 and EN 806 is required if it is possible that the mains water supply pressure will exceed 10 bar (1.0 MPa), and no DHW pressure reducing valve is installed (to DIN 4753).
  • Page 14: Mounting The Boiler And Making Connections

    Installation sequence Mounting the boiler and making connections Removing the front panel Fig. 4 1. Unlock the front panel on the underside (push in), 2. Swivel the front panel forwards slightly and lift using a screwdriver or similar tool. away upwards. Note Do not remove protective caps from connections on the heating water side and from the gas con-...
  • Page 15 Installation sequence Mounting the boiler and making connections (cont.) Fig. 5 Note 2. Replace gaskets. The diagram shows installation on a pre-plumbing jig for a gas condensing combi boiler. Internal gasket diameter: ■ Gas connection Ø 18.5 mm The boiler can be installed on the following accesso- Connections on the heating water side Ø...
  • Page 16: Fitting The Boiler To The Wall Mounting Bracket

    Installation sequence Mounting the boiler and making connections (cont.) 4. Note 6. Tighten locking ring fittings so that they form a tight Only remove the clip under the gas pipe union nut seal: once the appliance has been installed. Clip is no One turn beyond finger-tight.
  • Page 17 Installation sequence Mounting the boiler and making connections (cont.) Fig. 6 1. Pull off the protective caps. 4. Note Only remove the clip under the gas pipe union nut 2. Replace gaskets. Fit valves and gas shut-off valve. once the appliance has been installed. Clip is no longer required.
  • Page 18: Fitting The Programming Unit Mounting Bracket On The Top Of The Boiler

    Installation sequence Mounting the boiler and making connections (cont.) Fitting the programming unit mounting bracket on the top of the boiler In the delivered condition, the programming unit is located on the underside of the boiler. If required for ease of operation, the programming unit can be loca- ted on the top of the boiler.
  • Page 19: Connections On The Heating Water And Dhw Sides

    Installation sequence Mounting the boiler and making connections (cont.) 1. Remove the hinges and store them in case they 6. Turn the bracket over and insert the plug on the need to be reinstalled at a later date. right-hand side again. 4.
  • Page 20: Condensate Connection

    Flue gas connection Note Connecting the balanced flue pipe The "System certification" and "Skoberne GmbH flue Flue system installation instructions system" labels enclosed with the technical documenta- tion may only be used in conjunction with the Viessmann flue system made by Skoberne.
  • Page 21 Installation sequence Flue gas connection (cont.) Connecting several Vitodens to a shared flue sys- Inspection port covers checked for secure and tight ■ seating. ■ Apertures for ensuring sufficient combustion air sup- If several Vitodens are connected to a common flue ply are open and cannot be closed off.
  • Page 22: Gas Connection

    Installation sequence Gas connection Fig. 12 1. If the gas connection has not been fitted previ- 2. Check for leaks. ously, seal gas shut-off valve to the gas con- nection. Danger When carrying out any work on gas connection fit- Escaping gas leads to a risk of explosion.
  • Page 23: Electrical Connections

    Installation sequence Electrical connections Opening the wiring chamber Note If only PlusBus, the outside temperature sensor and the cylinder temperature sensor are connected to the heat generator, the wiring chamber does not need to be opened. 5. 2x Fig. 13 Note Please note Steps 1 to 3 are required only if the programming unit...
  • Page 24: Layout Of The Electrical Connections

    Installation sequence Electrical connections (cont.) Layout of the electrical connections Note For further information on the connections, see the fol- lowing chapters. 6 5 4 3 2 1 6 5 4 3 2 1 Fig. 14 Connections to 230 V~ plugs Connections to extra low voltage (ELV) plugs Power supply Outside temperature sensor...
  • Page 25: On-Site Connections On Hmu Heat Management Unit

    Installation sequence Electrical connections (cont.) On-site connections on HMU heat management unit Fig. 15 Diaphragm grommets, 230 V cables Plug-in connection on underside of appliance Diaphragm grommets, extra low voltage (ELV) Plug for connecting sensors and PlusBus Remove plug from the pack of installation compo- nents.
  • Page 26: Connecting The Low Loss Header Sensor )

    Installation sequence Electrical connections (cont.) Connecting the low loss header sensor The sensor of the low loss header is connected to the See installation instructions for extension EM-P1 accessory extension EM-P1 or EM-M1/MX (ADIO elec- or EM-M1/MX tronics module) respectively. Connecting the cylinder temperature sensor Connect the cylinder temperature sensor to terminals 3 and 4 on external plug...
  • Page 27: Information On Connecting Plusbus Subscribers

    Installation sequence Electrical connections (cont.) Assigning functions in the commissioning assis- tant See commissioning assistant in "Commissioning". Information on connecting PlusBus subscribers Only the following PlusBus subscribers can be connec- ■ 1 x EM-S1 extension (ADIO or SDIO/SM1A electron- ted to the control: ics module) 2 x EM-M1 or EM-MX extensions (ADIO electronics 1 x EM-P1 extension (ADIO electronics module)
  • Page 28 Installation sequence Electrical connections (cont.) Power supply and PlusBus connection of accessories Power supply of all accessories at the HMU heat management unit Fig. 21 Some accessories with direct power supply Fig. 22 HMU heat management unit, heat generator ON/OFF switch Mixer extension kit (ADIO electronics module) Mains input fÖ...
  • Page 29: Power Supply Fö

    Installation sequence Electrical connections (cont.) Power supply fÖ Danger If the power supply to the appliance is connected ■ Incorrectly executed electrical installations can with a flexible cable, ensure that the live conductors result in injuries from electrical current and dam- are pulled taut before the earth conductor in the age to the appliance.
  • Page 30: Routing Connecting Cables/Leads

    Installation sequence Electrical connections (cont.) Routing connecting cables/leads Please note If closures or diaphragm grommets are dam- aged, splashproofing is no longer ensured. Never open or damage closures or unused dia- phragm grommets on the underside of the appli- ance. Seal cable entries with fitted diaphragm grommets.
  • Page 31: Wifi Operational Reliability And System Requirements

    Installation sequence WiFi operational reliability and system requirements WiFi router system requirement Dynamic IP addressing (DHCP, delivered condition) ■ ■ WiFi router with activated WiFi: in the network (WiFi): The WiFi router must be protected by a sufficiently Have this checked on site, and if required set up, by secure WPA2 password.
  • Page 32 Installation sequence WiFi operational reliability and system… (cont.) Ideal angle of penetration Fig. 25 WiFi router Heat generator Wall...
  • Page 33: Closing The Wiring Chamber

    Installation sequence Closing the wiring chamber 2. 2x Fig. 26...
  • Page 34: Fitting The Programming Unit And Front Panel

    Installation sequence Fitting the programming unit and front panel Programming unit located at the bottom Fig. 27 Lightguide at the top...
  • Page 35: Programming Unit Located At The Top

    Installation sequence Fitting the programming unit and front panel (cont.) Programming unit located at the top Fig. 28 1. Install the mounting panel for the programming unit 3. Turn Lightguide around and clip it into place at at the top. See page 18. the bottom of the programming unit.
  • Page 36: Steps - Commissioning, Inspection And Maintenance

    Commissioning, inspection, maintenance Steps - commissioning, inspection and maintenance Commissioning steps Inspection steps Maintenance steps Page • 1. Commissioning the system with the commissioning assistant........37 • • 2. Filling the heating system....................41 • 3. Topping up the heating water................... 43 •...
  • Page 37: Commissioning The System With The Commissioning Assistant

    Commissioning, inspection, maintenance Commissioning the system with the commissioning assistant Please note Only commission the appliance with a fully filled trap. Check that the trap has been filled with water. Commissioning assistant 1. Open the gas shut-off valve. 3. Commission the heat generator and follow the commissioning assistant.
  • Page 38 Commissioning, inspection, maintenance Commissioning the system with the commissioning… (cont.) Commissioning assistant Explanations and references sequence Commissioning Language By programming unit If commissioning is to be carried out at the programming unit of the heat gen- erator. By software tool The appliance automatically switches on the WiFi Access Point.
  • Page 39 Commissioning, inspection, maintenance Commissioning the system with the commissioning… (cont.) Commissioning assistant Explanations and references sequence Settings for DHW heating according to the system components Not installed System without DHW heating ■ Cylinder with one sensor System with DHW cylinder with 1 cylinder temperature sensor ■...
  • Page 40 Commissioning, inspection, maintenance Commissioning the system with the commissioning… (cont.) Commissioning assistant Explanations and references sequence Floating contact: Function If a contact has been connected to plug 96 of the HMU heat management selection plug 96 unit. No function ■ External demand, DHW Pushbutton function, DHW circulation pump runs for 5 min.
  • Page 41: Filling The Heating System

    Commissioning, inspection, maintenance Commissioning the system with the commissioning… (cont.) Tap the following buttons: 2. "Service" 3. Enter password "viservice". 4. Use to confirm. Fig. 29 5. "Commissioning" Affix a label in the operating instructions. Calling up the commissioning assistant at a later point If you need to continue commissioning later, the com- missioning assistant can be reactivated at any time.
  • Page 42 Commissioning, inspection, maintenance Filling the heating system (cont.) Fig. 30 ON/OFF switch 1. Check the pre-charge pressure of the expansion 5. Fit hose to air vent valve . Route the hose into a vessel. suitable container or drain outlet. 2. Close gas shut-off valve 6.
  • Page 43: Topping Up The Heating Water

    Commissioning, inspection, maintenance Topping up the heating water Fig. 31 If required, top up the heating water at top-up valve Checking all connections on the heating water and DHW sides for leaks Danger Risk of electric shock from escaping heating water or DHW.
  • Page 44: Naming The Heating Circuits

    Commissioning, inspection, maintenance Venting the heating system (cont.) 6. "Air vent valve" 7. Activate the venting function with The display shows the system pressure. The venting function ends automatically after 20 min or when you tap Naming the heating circuits In the delivered condition, the heating circuits are des- To enter names for heating circuits: ignated "Heating circuit 1", "Heating circuit 2", "Heating...
  • Page 45: Removing The Front Panel

    Commissioning, inspection, maintenance Removing the front panel Fig. 32...
  • Page 46: Moving The Programming Unit To The Maintenance Position

    Commissioning, inspection, maintenance Moving the programming unit to the maintenance position To facilitate certain maintenance tasks, move the pro- gramming unit up or down, depending where it is loca- ted. 2. 2. Fig. 33 Do not disconnect the plug from the mounting panel. Do not alter where and how the cable is secured (fixing point of the cable tie).
  • Page 47 Commissioning, inspection, maintenance Checking the static pressure and supply pressure (cont.) 01. Turn off the ON/OFF switch. 02. Close the gas shut-off valve. 03. Undo screw inside test connector on the gas train, but do not remove it. Connect the pressure gauge.
  • Page 48: Function Sequence And Possible Faults

    Commissioning, inspection, maintenance Checking the static pressure and supply pressure (cont.) Supply pressure (flow pressure) Measures For natural gas For LPG E, E+, M L, LL, S, K Below 13 mbar Below Below Below Below Do not start the boiler. Notify (1.3 kPa) 17 mbar 18 mbar...
  • Page 49: Setting The Max. Heating Output

    Commissioning, inspection, maintenance Function sequence and possible faults (cont.) Burner in operation Shuts down below the set Check the flue system for boiler water temperature and tightness (flue gas recircula- restarts immediately. tion). Check gas flow pres- sure. Automatic calibration of Fault F.62, F.373 Ensure adequate heat trans- the combustion controller...
  • Page 50: Adjusting The Pump Rate Of The Integral Circulation Pump

    Commissioning, inspection, maintenance Adjusting the pump rate of the integral circulation pump Operation of the integral circulation pump as heating circuit pump for heating circuit 1 The pump speed and consequently the pump rate are In the delivered condition, the minimum pump rate ■...
  • Page 51: Activating Screed Drying

    Commissioning, inspection, maintenance Adjusting the pump rate of the integral… (cont.) Residual head of integral circulation pump 550 55 500 50 450 45 350 35 250 25 150 15 1000 1100 1200 1300 1400 Flow rate in l/h Fig. 36 Upper operational limit Curve Pump rate, circulation pump...
  • Page 52: Leak Test On Balanced Flue System (Annular Gap Check)

    Commissioning, inspection, maintenance Leak test on balanced flue system (annular gap check) Fig. 37 Combustion air aperture For balanced flue systems tested together with the If actual CO values are greater or O values are lower, heat generator, there is no requirement for a tightness then pressure test the flue pipe with a static pressure test (overpressure test) during commissioning by the of 200 Pa.
  • Page 53 Commissioning, inspection, maintenance Removing the burner (cont.) Fig. 38 1. Turn off the ON/OFF switch. 4. Undo gas supply pipe fitting 2. Close the gas shut-off valve and safeguard against 5. Undo four screws and remove the burner. reopening. Note 3.
  • Page 54: Checking The Burner Gasket And Burner Gauze Assembly

    Commissioning, inspection, maintenance Checking the burner gasket and burner gauze assembly Fig. 39 Check burner gauze assembly , electrodes 6. Insert thermal insulation ring and burner gauze gasket for damage. Only remove and replace com- assembly with gasket . Observe correct ponents if they are damaged or worn.
  • Page 55: Checking And Adjusting The Ignition And Ionisation Electrodes

    Commissioning, inspection, maintenance Checking and adjusting the ignition and ionisation electrodes ±0.5 Fig. 40 Ignition electrodes Ionisation electrode 1. Check the electrodes for wear and contamination. 3. Check the electrode gaps. If the gaps are not as specified or the electrodes are damaged, replace 2.
  • Page 56: Cleaning The Heating Surfaces

    Commissioning, inspection, maintenance Checking the back draught safety devices (cont.) 1. Remove the balanced flue system. 3. Refit the balanced flue system. Note 4. Pour a small amount of water through the inspec- If the balanced flue system cannot be removed, tion port to ensure the back draught safety device clean and check the back draught safety device via is working.
  • Page 57 Commissioning, inspection, maintenance Checking the condensate drain and cleaning the… (cont.) Fig. 44 1. Move the bracket together with the programming 8. Refit supply hose. unit upwards. See "Moving the programming unit to the maintenance position". Danger Risk of electric shock from escaping conden- 2.
  • Page 58: Installing The Burner

    Commissioning, inspection, maintenance Installing the burner Fig. 45 1. If necessary, move the programming unit. 5. Connect the cables/leads: ■ Fan motor (2 plugs) 2. Insert the burner. Tighten screws diagonally. ■ Ionisation electrode Torque: 6.5 Nm Ignition unit ■ ■...
  • Page 59: Checking The Flow Limiter (Only For Gas Condensing Combi Boiler)

    Commissioning, inspection, maintenance Checking the flow limiter (only for gas condensing combi boiler) 1. Drain the boiler on the DHW side. 2. Remove the spring clip. 3. Remove the DHW flow sensor. 4. Check flow limiter . Replace in case of exces- sive scaling or damage.
  • Page 60: Checking The Safety Valve Function

    Commissioning, inspection, maintenance Checking the expansion vessel and system… (cont.) 3. Top up with water until the charge pressure of the cooled system is at least 1.0 bar (0.1 MPa), and is 0.1 to 0.2 bar (10 to 20 kPa) higher than the pre- charge pressure of the expansion vessel.
  • Page 61 Commissioning, inspection, maintenance Checking the combustion quality (cont.) Permissible CO or O content Operation with natural gas Rated heating out- content (%) content (%) put (kW) Upper heating out- Lower heating out- Upper heating out- Lower heating out- 7.3 - 10.5 7.5 - 10.5 2.1 - 7.9 2.1 - 7.6...
  • Page 62: Checking The Flue System For Unrestricted Flow And Leaks 34. Checking The External Lpg Safety Valve (If Installed) 35. Matching The Control Unit To The Heating System

    Commissioning, inspection, maintenance Checking the combustion quality (cont.) 09. Set the lower heating output: 11. End output selection: Select "Minimum heating output". The burner now operates at the lower heating out- put. 10. Set the upper heating output: Select "Maximum heating output". The burner now operates at the upper heating out- put.
  • Page 63: Instructing The System User

    Commissioning, inspection, maintenance Calling up and resetting the maintenance display (cont.) 5. "System configuration" 7. Select parameter 1411.0 "Clear maintenance messages" and "ON". 6. "Boiler" Note The selected service parameters for hours run and time intervals restart at 0. Instructing the system user The system installer should hand the operating instruc- This includes all components installed as accessories, tions to the system user and instruct the user in oper-...
  • Page 64: Calling Up Parameters

    System configuration (parameters) Calling up parameters Parameters are split into the following groups: 02. "Service" ■ – "General" – "Boiler" 03. Enter password "viservice". – "DHW" – "Heating circuit ..." 04. Use to confirm. "Solar" – Heating systems with one heating circuit without 05.
  • Page 65 System configuration (parameters) General (cont.) 897.0 "Screed drying" Setting Explanations Not active Screed drying can be set in accordance with selecta- ble temperature/time profiles. For individual profile curves, see chapter "Function description". Diagram 1 Diagram 2 Diagram 3 Diagram 4 Diagram 5 Diagram 6 912.0 "Automatic summer/wintertime changeover"...
  • Page 66: Boiler

    System configuration (parameters) General (cont.) 1098.5 "Calorific value" Setting Explanations Value is provided on the gas supplier's bill. Used for gas consumption data. 10.0000 5.0000 to Calorific value adjustable from 5.0000 to 40.0000 40.0000 kWh/m in increments of 0.0001 1139.0 "Outside temperature limit for cancelling reduced set room temperature" Setting Explanations Temperature limit for cancelling reduced set room...
  • Page 67 System configuration (parameters) Boiler (cont.) 522.3 "Interval until the next service" Setting Explanations Interval until the next service No interval selected 3 months 6 months 12 months 18 months 24 months 596.0 "Maximum heating output" Setting Explanations A limit can be set on the maximum heating output for heating mode.
  • Page 68: Dhw

    System configuration (parameters) Boiler (cont.) 1503.0 "Minimum heating output" Setting Explanations A limit can be set on the minimum heating output for heating mode. Delivered condition specified by settings specific to the appliance 5 to 100 Adjustable from 5 to 100 % 1606.0 "Minimum burner pause time"...
  • Page 69 System configuration (parameters) (cont.) 497.2 "DHW circulation pump for DHW heating" Setting Explanations DHW circulation pump: Switched off during DHW heating ON during DHW heating to standard set value 497.3 "Number of cycles DHW circulation pump" Setting Explanations Number of cycles per hour for 5 minutes each during the selected time phase: 1 cycle 2 cycles...
  • Page 70 System configuration (parameters) (cont.) 1085.0 "Cylinder heating: Set start point" Setting Explanations Start point for DHW heating below set DHW tempera- ture Delivered condition start point 2.5 K below set DHW temperature 10 to 100 Adjustable start points: 1.0 K ... 100: 10.0 K Irrespective of this, the stop point is 2.5 K above the set DHW temperature.
  • Page 71 System configuration (parameters) Heating circuit 1, Heating circuit 2, Heating circuit 3, Heating circuit 4 Note Parameter values in bold are factory settings. 424.3 "Set flow temperature increased when switching from operation with reduced room temperature to operation with standard/comfort room temperature, heating circuit 1" Setting Explanations Set flow temperature increased when changing from...
  • Page 72 System configuration (parameters) Heating circuit 1, Heating circuit 2, Heating… (cont.) 428.4 "Duration for set flow temperature increase, heating circuit 3" Setting Explanations Duration for set flow temperature increase See also chapter "Function description" 60 min Delivered condition 60 min 0 to 120 Temperature rise adjustable from 0 to 120 min 933.3 "Priority, DHW heating, heating circuit 1"...
  • Page 73 System configuration (parameters) Heating circuit 1, Heating circuit 2, Heating… (cont.) 934.5 "Differential temperature, heating circuit 2" Setting Explanations The flow temperature of the heat generator is higher than the flow temperature of the heating circuit with mixer by an adjustable differential temperature. See also chapter "Function description".
  • Page 74 System configuration (parameters) Heating circuit 1, Heating circuit 2, Heating… (cont.) 935.6 "Operating mode of heating circuit 3" Setting Explanations Heating mode: Weather-compensated without room tem- Weather-compensated without room temperature in- perature hook-up fluence Weather-compensated with room tempera- Weather-compensated with room temperature influ- ture hook-up ence See also parameter 935.7...
  • Page 75 System configuration (parameters) Heating circuit 1, Heating circuit 2, Heating… (cont.) 1193.0 "Minimum flow temperature limit, heating circuit 2" Setting Explanations Minimum flow temperature limit for the heating circuit 20 °C Minimum limit in the delivered condition 20 °C 1 to 90 Setting range limited by heat generator-specific pa- rameters 1193.1 "Maximum flow temperature limit, heating circuit 2"...
  • Page 76: Heating Circuit 1, Heating Circuit 2, Heating Circuit 3, Heating Circuit 4

    System configuration (parameters) Heating circuit 1, Heating circuit 2, Heating… (cont.) 1397.1 "Heating limit: Economy function, outside temperature, heating circuit 3" Setting Explanations Heating circuit pump logic function (summer economy control): Heating circuit pump switches off when out- side temperature 1 K above selected value. Heating circuit pump switches back on when outside tempera- ture 1 K below selected value.
  • Page 77 Setting Explanations Setting is required for calculating the solar yield Calculation of solar yield with water as heat transfer medium Calculation of solar yield with Viessmann heat transfer medium 1394.0 "DHW set temperature for reheating suppression" Setting Explanations 40 °C DHW set temperature for reheating suppression.
  • Page 78 System configuration (parameters) Solar (cont.) 1505.0 "Stagnation time reduction" Setting Explanations Temperature hysteresis for set cylinder temperature Reduction in the speed of the solar circuit pump to protect system components and heat transfer medium Factory setting: 5 K Stagnation time reduction not active 1 to 40 Temperature differential adjustable from 1 to 40 K 1598.0 "Start temperature for thermostat function"...
  • Page 79: Subscriber Numbers Of Connected Extensions

    System configuration (parameters) Subscriber numbers of connected extensions All extensions connected to the heat generator (except Rotary switch S1 settings: the SDIO/SM1A electronics module) must have a sub- ■ EM-S1 extension (system with solar collectors): 0 scriber number. The subscriber number is set on rotary ■...
  • Page 80: Service Menu

    Service functions System pressure setting Reset service Filling Air vent valve System log WLAN Information Energy statement reset Change passwords Commissioning Appliances detected Exit service Access point ON/OFF (only Vitodens 3xx and Vitodens 200-W, type B2HF with 7 inch touchscreen)
  • Page 81: Exiting The Service Menu

    04. Use to confirm. Resetting all passwords to delivered condition Tap the following buttons: 5. Use to confirm. 1. Request master password from the Viessmann 6. "Change passwords" Technical Service. 7. "Reset all passwords" 2. " " 8. Enter master password.
  • Page 82: Calling Up Messages (Message History)

    Diagnosis and service checks Calling up messages (message history) The messages are sorted by date. "Faults" to call up saved fault messages. For ■ further details, see the following chapter "Fault Tap the following buttons: messages". ■ "Service messages" to call up saved service 1.
  • Page 83 Current position is maintained Close Output for "Mixer close" enabled Mixer HC4 Open Output for "Mixer open" enabled (mixer extension kit) Stop Current position is maintained Close Output for "Mixer close" enabled DHW group (only Vitodens 200-W, type B2HF with 7 inch screen)
  • Page 84 Diagnosis and service checks Checking outputs (actuator test) (cont.) Display Explanation Primary circuit pump, Set value Internal circulation pump in % set speed 3-way valve target posi- Heating 3-way diverter valve set to heating mode tion Middle 3-way diverter valve in central position (filling/draining) 3-way diverter valve set to DHW heating Circulation pump for cyl- inder heating...
  • Page 85: Troubleshooting Fault Display On The Programming Unit

    Troubleshooting Fault display on the programming unit If there is a fault, the display shows the fault message The following is displayed: plus ■ Date and time of the occurrence of the fault ■ Fault code Note ■ Description of the fault If a central fault message facility is connected, this is ■...
  • Page 86: Overview Of Electronics Modules

    Troubleshooting Overview of electronics modules Fig. 49 BCU burner control unit HMU heat management unit HMI programming unit with RF module...
  • Page 87: Fault Messages

    Troubleshooting Fault messages Note For diagnosis and troubleshooting, see chapter "Repairs". Fault messages are dependent on appliance equip- ment level. Displayed fault System characteristics Cause Measures code Flow rate not being moni- Lead break or short cir- Check plug 33/X6 and cable be- tored.
  • Page 88 Troubleshooting Fault messages (cont.) Displayed fault System characteristics Cause Measures code F.15 No solar DHW heating or Lead break, cylinder tem- Check cylinder temperature sen- central heating backup perature sensor sor. Measure voltage at sensor input on electronics module. Set value: 3.3 V with sensor disconnected.
  • Page 89 Troubleshooting Fault messages (cont.) Displayed fault System characteristics Cause Measures code F.62 Burner in a fault state High limit safety cut-out Check heating system fill level. ■ has responded. Check pre-charge pressure in di- ■ aphragm expansion vessel. Ad- just to required system pressure. Check whether flow rate is suffi- ■...
  • Page 90 Troubleshooting Fault messages (cont.) Displayed fault System characteristics Cause Measures code F.69 Burner in a fault state Ionisation current lies out- Check ionisation electrode for the side the permissible range following: Check whether insulation block is ■ touching electrode ceramic. Check gas train: Activate "Mini- ■...
  • Page 91 Troubleshooting Fault messages (cont.) Displayed fault System characteristics Cause Measures code F.92 Function of the relevant elec- ADIO electronics module Check setting in the commission- ■ tronics module in emergency communication error ing assistant and correct if re- mode quired. Check connections and leads to ■...
  • Page 92 Troubleshooting Fault messages (cont.) Displayed fault System characteristics Cause Measures code F.163 Burner in a fault state Memory access checksum Reset the appliance. error BCU If fault occurs repeatedly, replace BCU burner control unit (see page 109). F.182 No DHW heating Short circuit, outlet tem- Check the outlet temperature sen- perature sensor (if instal-...
  • Page 93 Troubleshooting Fault messages (cont.) Displayed fault System characteristics Cause Measures code F.346 Burner in a fault state Ionisation current calibra- Check the gas supply pressure. ■ tion error Check gas solenoid valve strain- ■ er on the inlet side for contami- nation.
  • Page 94 Troubleshooting Fault messages (cont.) Displayed fault System characteristics Cause Measures code F.357 Burner in a fault state Insufficient gas supply Check that the gas shut-off valve ■ is open. Optically check input-side screen ■ in the gas solenoid valve for con- tamination.
  • Page 95 Troubleshooting Fault messages (cont.) Displayed fault System characteristics Cause Measures code F.365 Burner in a fault state Relay contact gas valve Replace BCU burner control unit feedback implausible. Re- (see page 109). lay contact is sticking. F.366, F.367 Burner in a fault state Gas valve electricity sup- Replace BCU burner control unit ply does not turn off.
  • Page 96 Troubleshooting Fault messages (cont.) Displayed fault System characteristics Cause Measures code F.373 Burner in a fault state Heat transfer too low dur- Ensure adequate heat transfer. ■ ing calibration Check circulation pump for faults, ■ Temperature limiter has scale or blockages. shut down.
  • Page 97 Troubleshooting Fault messages (cont.) Displayed fault System characteristics Cause Measures code F.384 Burner in a fault state Possible contamination of Check gas line for contamination. ■ gas line Check the gas supply pressure. ■ Replace gas fan if required. ■ Reset the appliance.
  • Page 98 Troubleshooting Fault messages (cont.) Displayed fault System characteristics Cause Measures code F.405 Burner in a fault state Ionisation electrode earth Check IO electrode for earth fault. fault, BCU burner control If fault continues to persist, replace unit faulty BCU burner control unit (see page 109).
  • Page 99 Troubleshooting Fault messages (cont.) Displayed fault System characteristics Cause Measures code F.463 Burner in a fault state Contaminated combustion Heat generator installation air, flue gas recirculation and service instructions Check flue system for contamina- tion and flue gas recirculation. Clean flue system if required. Reset the burner.
  • Page 100 Troubleshooting Fault messages (cont.) Displayed fault System characteristics Cause Measures code F.464 Burner in a fault state Ionisation current too low Check ionisation electrode and ■ during calibration. Differ- connecting cable. Check plug-in ential compared to previ- connections for loose contacts. ous value not plausible.
  • Page 101 Troubleshooting Fault messages (cont.) Displayed fault System characteristics Cause Measures code F.468 Burner in a fault state Ionisation current too high Check gap between ionisation during calibration electrode and burner gauze as- sembly. Heat generator installation and service instructions Check whether there is a lot of dust in the ventilation air (e.g.
  • Page 102 Troubleshooting Fault messages (cont.) Displayed fault System characteristics Cause Measures code F.540 Burner in a fault state Condensate backup in the Check system for condensate ■ heat cell backup. Check the condensate drain and ■ trap. Replace insulation blocks, elec- ■...
  • Page 103: Repairs

    Troubleshooting Fault messages (cont.) Displayed fault System characteristics Cause Measures code F.548 Mixer closes. Heating circuit Short circuit, flow temper- Check flow temperature sensor, ■ pump is operational. ature sensor for heating mixer 4. circuit 4 with mixer Measure voltage at sensor input ■...
  • Page 104: Removing The Boiler From The Pre-Plumbing Jig Or Mounting Frame

    Troubleshooting Repairs (cont.) Removing the boiler from the pre-plumbing jig or mounting frame Fig. 50 Note Note Use new gaskets and, if required, new locking ring When carrying out any work on gas connection fittings, connections when assembling. counterhold with a suitable tool. Never transfer any forces to the internal components.
  • Page 105: Checking The Temperature Sensors

    Troubleshooting Repairs (cont.) Checking the temperature sensors 6 5 4 3 2 1 6 5 4 3 2 1 Fig. 51 Heat generator circuit flow temperature sensor 3. Check the sensor resistance. Note position of (dual sensor) guide lug ■ Sensor 1: Connections 1 and 3 1.
  • Page 106 Troubleshooting Repairs (cont.) Cylinder temperature sensor/outlet temperature Flue gas temperature sensor sensor 1. Check the lead and plug of flue gas temperature 1. Check lead and plug of cylinder temperature sen- sensor or outlet temperature sensor 2. Disconnect leads, flue gas temperature sensor 2.
  • Page 107 Troubleshooting Repairs (cont.) Flue gas temperature sensor Outside temperature sensor ■ ■ Flow temperature sensor ■ Cylinder temperature sensor ■ Outlet temperature sensor ■ Temperature sensor, low loss header ■ -20 -10 0 10 20 10 30 50 70 90 110 Temperature in °C Temperature in °C Sensor type: NTC 10 k...
  • Page 108 Troubleshooting Repairs (cont.) [{] [{] [{] & Fig. 52 Check cylinder temperature sensor 10 30 50 70 90 110 Temperature in °C Fig. 53 Sensor type: NTC 10 k Ω 1. Disconnect plug TS1 from the electronics mod- 3. In the event of severe deviation (> 10 %), replace ule.
  • Page 109: Information On Replacing The Hmu Heat Management Unit And Bcu Burner Control Unit

    "service assistant". Replacing the power cable When replacing the power cable, only use the power cable available as a spare part from Viessmann. Replacing the HMI connecting cable Please note Incorrect routing of the cable can lead to heat damage and impairment of the EMC properties.
  • Page 110: Removing The Hydraulic Unit

    Troubleshooting Repairs (cont.) 3. Remove plate heat exchanger. 7. Install plate heat exchanger in reverse order using new gaskets. Note Screw torque: 3.2 Nm ± During and after removal, small amounts of water may trickle from the plate heat exchanger. Note During installation, ensure the connections are 4.
  • Page 111 Troubleshooting Repairs (cont.) Fig. 56...
  • Page 112: Checking The Fuse

    Troubleshooting Repairs (cont.) Checking the fuse Fig. 57 1. Turn off the ON/OFF switch. 5. Check fuse F1 (see connection and wiring dia- gram). 2. Depending on the configuration: Move program- ming unit together with bracket to service position. Danger Incorrect or improperly fitted fuses can lead 3.
  • Page 113: Function Description Appliance Functions

    Function description Appliance functions Heating mode Weather-compensated operation: Heating circuit pump connection for heating circuit ■ The rooms are heated in accordance with the room without mixer temperature and time program settings. The control unit determines a set flow temperature Only for systems with several heating circuits.
  • Page 114 Function description Appliance functions (cont.) Note If heating circuits with mixer are present in the heating system: The flow temperature of the heat generator is one differential temperature higher than the flow tem- perature for the heating circuits with mixer. Differential temperature in delivered condition set to 8 K.
  • Page 115: Screed Drying

    After completion (30 days), the heating circuits with mixer are automatically controlled with the set parameters. (only Vitodens 200-W, type B2HF with 7 inch screen)
  • Page 116 Function description Appliance functions (cont.) Note Note During screed drying, DHW heating is not available. Temperature profile 6 ends after 21 days. Observe EN 1264. The report to be provided by the The function continues after a power failure or after the heating contractor must contain the following details control unit has been switched off.
  • Page 117: Raising The Reduced Room Temperature

    Function description Appliance functions (cont.) Temperature profile 5 Days Fig. 66 Temperature profile 6 Days Fig. 67 Ends after 21 days. Raising the reduced room temperature During operation at reduced room temperature, the The outside temperature limits for the start and end of reduced set room temperature can be automatically temperature raising can be set in parameters 1139.0 raised subject to the outside temperature.
  • Page 118 Function description Appliance functions (cont.) Example using the settings in the delivered condition Outside temperature in °C Fig. 68 Heating curve for operation at standard room tem- perature or comfort room temperature Heating curve for operation at reduced room tem- perature Reducing the heat-up time The value and duration of the additional increase in the...
  • Page 119: Dhw Heating

    Function description Appliance functions (cont.) Example Time Fig. 69 Start of operation at standard room temperature or Set flow temperature in accordance with parame- comfort room temperature ter 424.3 Set flow temperature in accordance with the set Duration of operation with higher set flow tempera- heating curve ture in accordance with parameter 424.4: 60 min...
  • Page 120: Interval Function, Solar Circuit Pump

    Function description Interval function, solar circuit pump For correct capture of the collector temperature, the See parameter 1719.0 interval function cyclically switches on the collector cir- cuit pump briefly. External heating circuit hook-up (if installed) Note ■ Function: Only in conjunction with weather-compensated opera- If the external demand is active (plug 96 or digital –...
  • Page 121: Connection And Wiring Dia-Hmu Heat Management Unit

    Connection and wiring diagram HMU heat management unit Fig. 70 A1 HMU heat management unit Outside temperature sensor (for weather-com- A2 HMI programming unit with RF module (wireless pensated operation) module) Cylinder temperature sensor (gas condensing A3 Switching mode power supply system boiler) X...
  • Page 122 Connection and wiring diagram HMU heat management unit (cont.) PlusBus P2 Output 230 V for: CAN bus ■ Circulation pump for heating circuit without Floating input 230 V, output 230 V mixer Mains voltage output ■ DHW circulation pump To BCU burner control unit P1 Output 230 V for: To BCU burner control unit ■...
  • Page 123: Gram Bcu Burner Control Unit

    Connection and wiring diagram BCU burner control unit Fig. 71 PWM Control signal Power supply fÖ X... Electrical interfaces Ignition unit § A/B Flow temperature sensors 1 and 2 Fan motor a-Ö Outlet temperature sensor (gas condensing A Fan motor control a-Ö...
  • Page 124: Commissioning/Service

    Commissioning/service reports Commissioning/service reports Settings and test values Set value Commission- Maintenance/ Maintenance/ service service Date Signature Static pressure mbar 57.5 ≤ 5.75 ≤ Supply pressure (flow pres- sure) For natural gas ..mbar See table "Supply pressure" For LPG ..mbar (Commis- sioning ...)
  • Page 125: Specification Specification

    Specification Specification Gas condensing system boiler (type B2HF) Rated heating output range (details to EN 15502) = 50/30 °C (P(50/30)) Natural gas 1.9 - 11 1.9 - 19 1.9 - 25 1.9 - 32 2.5 - 11 2.5 - 19 2.5 - 25 2.5 - 32 = 80/60 °C (Pn(80/60))
  • Page 126 Specification Specification (cont.) Rated heating output range (details to EN 15502) = 50/30 °C (P(50/30)) Natural gas 1.9 - 11 1.9 - 19 1.9 - 25 1.9 - 32 2.5 - 11 2.5 - 19 2.5 - 25 2.5 - 32 = 80/60 °C (Pn(80/60)) Natural gas 1.7 - 10.1 1.7 - 17.5...
  • Page 127 Specification Specification (cont.) Rated heating output range (details to EN 15502) = 50/30 °C (P(50/30)) Natural gas 1.9 - 19 1.9 - 25 1.9 - 32 2.5 - 19 2.5 - 25 2.5 - 32 = 80/60 °C (Pn(80/60)) Natural gas 1.7 - 17.5 1.7 - 23 1.7 - 29.3...
  • Page 128 Specification Specification (cont.) Rated heating output range (details to EN 15502) = 50/30 °C (P(50/30)) Natural gas 1.9 - 19 1.9 - 25 1.9 - 32 2.5 - 19 2.5 - 25 2.5 - 32 = 80/60 °C (Pn(80/60)) Natural gas 1.7 - 17.5 1.7 - 23 1.7 - 29.3...
  • Page 129: Electronic Combustion Control Unit

    Specification Electronic combustion control unit The electronic combustion controller utilises the physi- To achieve optimum combustion control, the system cal correlation between the level of the ionisation cur- regularly carries out an automatic self-calibration; also rent and the air ratio .
  • Page 130: Disposal Final Decommissioning And Disposal

    Disposal Final decommissioning and disposal Viessmann products can be recycled. Components For decommissioning the system, isolate the system and substances from the system are not part of ordi- from the power supply and allow components to cool nary household waste.
  • Page 131: Certificates Declaration Of Conformity

    Directive 2014/53/EU. Manufacturer's certificate according to the 1st BImSchV [Germany] We, Viessmann Werke GmbH & Co. KG, D-35107 Allendorf, confirm that the product Vitodens 200-W complies with the NO limits specified by the 1st BImSchV, paragraph 6 [Germany].
  • Page 132: Keyword Index

    Keyword index Keyword index Flow pressure.............48 Angle of penetration........... 31 Flow temperature sensor......... 105 Flue gas temperature sensor........106 Front panel removal........... 14 Back draught safety device........55 Function descriptions..........113 Boiler water temperature sensor......105 Function sequence.............48 Burner control unit............123 Fuse................112 –...
  • Page 133 Keyword index Keyword index (cont.) Port 123..............31 Parameter Port 443..............31 – Automatic summer/wintertime changeover..... 65 Port 80................31 – Burner hours until next service........66 Port 8883..............31 – Calculation of solar yield......... 77 – Calorific value, gas..........66 – Clear maintenance messages.........67 Raising flow temperature –...
  • Page 134 Keyword index Keyword index (cont.) WiFi router..............31 Wiring diagram............121...
  • Page 136 Viessmann Werke GmbH & Co. KG Viessmann Limited D-35107 Allendorf Hortonwood 30, Telford Telephone: +49 6452 70-0 Shropshire, TF1 7YP, GB Fax: +49 6452 70-2780 Telephone: +44 1952 675000 www.viessmann.com Fax: +44 1952 675040 E-mail: info-uk@viessmann.com...

This manual is also suitable for:

B2hfB2kf

Table of Contents