
Related Manuals for Dahua Technology ASI1212D


Summary of Contents for Dahua Technology ASI1212D
- Page 1 Offi cial UK distribution partner ACCESS CONTROL QUICK INSTALL GUIDE Please read this document before installation tel: +44 (0)1457 874 999 | fax: +44 (0)1457 829 201 | email: sales@cop-eu.com | web: www.cop-eu.com...
- Page 2 WIRING CONFIGURATION - ACS CONTROLLERS Dahua access controllers can be used in multiple installations scenarios with options for one door, two door or four door controllers and one way or two way access. The example below is based on a one door one way system. One Way Access Example Controller Lock...
- Page 3 Connections The number of connections available varies between controller models but all controllers have the same basic confi guration. Each controller can support at least one reader per door. Each door can also support push to exit, door sensor, lock output or an additional reader for two way systems.
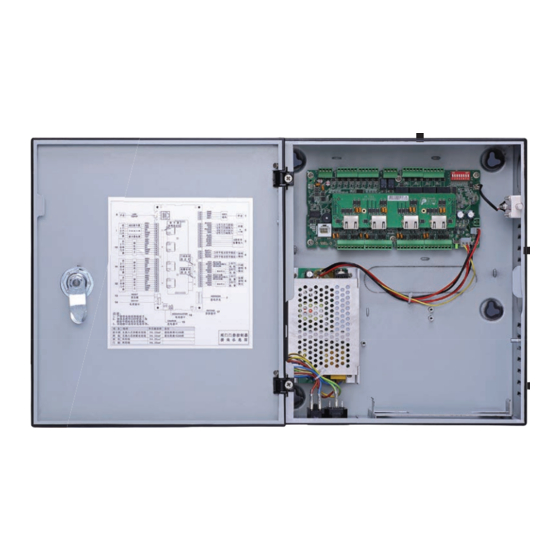
- Page 4 WIRING CONFIGURATION - ASI1212D The ASI1212D is a standalone two way controller with built in keypad, card & fi ngerprint readers. This unit supports a single door with the option to add an external reader for use as a two way system.
- Page 5 Connections Connector 1 Purple Cable Push to Exit Yellow Cable Ground (Push to Exit / Door Sensor) Brown Cable Door Sensor Green Cable Lock Output Normally Open White Cable Lock Output Normally Closed Blue Cable Lock Output Common Black Cable 12v - Power Input Red Cable 12v + Power Input...
- Page 6 ACS NETWORK CONFIGURATION Confi guring the access control system requires a computer with the ACS tool installed. Default Settings To install the ACS tool on a PC follow the steps listed below. Username: admin Password: 123456 1. Go to www.cop-eu.com IP Address: 192.168.0.2 2.
- Page 7 ASI1212D NETWORK CONFIGURATION The ASI1212D features a screen interface that can be used to confi gure basic settings including network confi guration. Default Settings Username: admin To adjust the network confi guration of the unit, follow the steps below. Password: 88888888 IP Address: 192.168.1.108...
- Page 8 CONFIGURATION VIA SMART PSS Smart PSS Initialisation Both ACS controllers and the ASI1212D can be programmed via the Smart PSS software. If Smart PSS is not currently installed on the PC then this can be installed using Dahua Toolbox. When fi rst opening SmartPSS, the software will prompt for a password to be created, this password is used for logging into the software only and is not the password of the controller.
-
Page 9: Adding A Controller
Adding a Controller To add a controller, click the Add button. Enter the connection details for the controller such as IP address, Username & Password, the default port number is 37777, click Save to store the connection details. The added controller should now show in the device list with the current status as online. Note: If the device is not found, please refer to page 6. -
Page 10: Access Menu
Access Menu All access control features are located within the Access section of the Smart PSS software. To enter this section, select the Access icon from the Smart PSS home screen. Once the access section has been opened the following screen will be shown. The number of doors displayed depends on the controller type, if a four door controller has been added then four doors will be displayed. -
Page 11: Adding Users
Adding Users Users can be added to the system and access levels assigned with the Access section of the SmartPSS software. To add a new user follow the steps below. Enter the user menu by clicking on the User Menu icon . Users can be organised by department, to add a new department right click the area in the left window pane and select Add Department. - Page 12 Select the card type from the dropdown box, there are multiple types available: General Standard User VIP User Guest Temporary User, when used a limit can be set to how many times the card can be used Patrol Used for patrol logging without unlocking doors Blacklist Used to alert when a specifi...
- Page 13 4. Remove fi nger 5. Place fi nger on fi ngerprint sensor The fi ngerprint should have now been recorded successfully, if the fi ngerprint recording fails, run through the process again making sure that the user places their fi nger tip over the sensor fl at & central to the sensor. Select the details tab to enter additional user information such as Gender, Title, DOB &...
-
Page 14: Access Levels
Access Levels Before assigning user access, all doors must be added to a door list. The door list groups doors together so users can be granted access to a single door list or multiple lists. Select the access menu icon. From the dropdown menu, select Access Level. - Page 15 Now that the doors have been assigned to a list, it is possible to assign user access. Select the access menu icon. From the dropdown menu, select User Right. Select a department from the left window pane to display the users from that department, click on the Select a department from the left window pane to display the users from that department, click on the icon to adjust the icon to adjust the...
-
Page 16: Door Confi Guration
Door Confi guration There are multiple parameters that can be adjusted when confi guring the operating mode of each door. Select the console icon. From the left window pane, right click the door to confi gure and select Door Confi guration Door Door name. -
Page 17: Anti-Passback
Anti-Passback Anti-passback can be used to prevent users from passing their card back to a second user or tailgating behing another user when exiting an area (if tailgating, the user will be unable to regain access through the entrance as they will still be logged as in the area by the system). - Page 18 INTEGRATION WITH CCTV It is possible to integrate Dahua access control with Dahua CCTV products, enabling the ability to monitor both systems from a single platform. Cameras can be monitored by selecting the View button from the access console page and selecting the cameras to view from the left window pane.
- Page 19 From the middle window pane select the event group such as Alarm Event, Normal Event or Abnormal Event. In the list that appears select the event type such as Unlock event, Intrusion event etc. After selecting the event type, select the enable option at the top of the window and from the notify tab select whether SmartPSS should play a sound or not when the event occurs.
- Page 20 C O P U K , D e l p h N e w R o a d , D o b c r o s s , O L 3 5 B G E n g l a n d...
Need help?
Do you have a question about the ASI1212D and is the answer not in the manual?
Questions and answers