Kohler K-T15601 Installation Manual
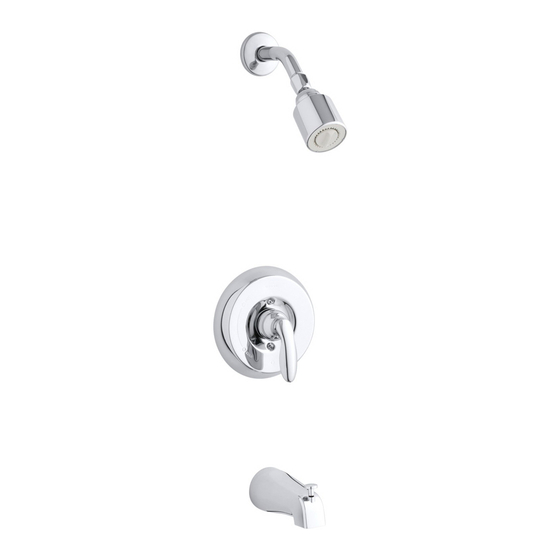
Single-control bath and shower trim
Hide thumbs
Also See for K-T15601:
- Installation and care manual (25 pages) ,
- Installation manual (28 pages)
Table of Contents
Advertisement
Available languages
Available languages
Quick Links
Advertisement
Table of Contents

Related Manuals for Kohler K-T15601


Summary of Contents for Kohler K-T15601
- Page 1 Installation Guide Single-Control Bath and Shower Trim K-T15601 K-T15603 K-T15611 K-T15613 K-T15621 M product numbers are for Mexico (i.e. K-12345M) Los números de productos seguidos de M corresponden a México (Ej. K-12345M) Français, page ″Français-1” Español, página ″Español-1” 1006260-2-D...
-
Page 2: Important Instructions
If you do not understand any of the installation or temperature adjustment instructions in this document, in the United States please contact our Customer Service Department at 1-800-4-KOHLER. Outside the U.S., please contact your distributor. IMPORTANT NOTICE TO INSTALLERS! Please fill in the blanks in the information box in the Homeowners Guide and on the valve label. -
Page 3: Tools And Materials
To turn the valve off, gently turn it to the ″Off″ position. Shut off the main water supply. Kohler Co. reserves the right to make revisions in the design of products without notice, as specified in the Price Book. Kohler Co. - Page 4 Apply a bead of plumbers putty or other sealant around the inlet end of the spout according to the manufacturer’s instructions. Install the spout and carefully retighten the setscrew. Do not overtighten the setscrew. Remove all excess putty. Threaded Spout Remove the temporary nipple from the bath elbow. 1006260-2-D Kohler Co.
- Page 5 Apply a bead of plumbers putty or other sealant to the back of the spout according to the manufacturer’s instructions. Apply thread sealant to the nipple and install the spout to the nipple. Carefully tighten with a clean strap wrench. Remove all excess putty. Kohler Co. 1006260-2-D...
- Page 6 Run hot and cold water through the shower arm to flush out dirt and debris. Apply thread sealant tape to the shower arm. Install the screen washer (if required for your model) and thread the showerhead to the shower arm. 1006260-2-D Kohler Co.
-
Page 7: Water Temperature Adjustment
Reinstall the collar on the valve stem with the setscrew against the side of the tab. Reinstall the O-ring, rotate the valve stem counterclockwise to shut the water off. Recheck the water temperature. Complete the information on the valve label (if supplied). Kohler Co. 1006260-2-D... - Page 8 Slide the O-ring into position and attach the handle. Make sure the handle is aligned identically to the insert. Secure the handle in place with the washer and screw. Push the plug button firmly into place in the handle. 1006260-2-D Kohler Co.
-
Page 9: Guide D'installation
S’il ne vous est pas possible de comprendre les instructions d’installation ou de réglage de la température données par ce document, veuillez contacter notre département du service clientèle aux États-Unis.1-800-4-KOHLER. Hors des États-Unis, veuillez contacter votre distributeur. Kohler Co. Français-1... -
Page 10: Outils Et Matériels
Merci d’avoir choisi la compagnie Kohler Nous apprécions votre engagement envers la qualité Kohler. Veuillez prendre s’il vous plaît quelques minutes pour lire ce manuel avant de commencer l’installation. Ne pas hésiter à nous contacter en cas de problème d’installation ou de fonctionnement. - Page 11 Avant de commencer (cont.) Kohler Co. se réserve le droit d’apporter toutes modifications sur le design des produits et ceci sans préavis, tel que spécifié dans le catalogue des prix. Kohler Co. Français-3 1006260-2-D...
- Page 12 Installer le bec et resserrer doucement la vis de retenue. Ne pas trop serrer la vis de retenue. Retirer tout excédent de mastic. 1006260-2-D Français-4 Kohler Co.
- Page 13 à l’arrière du bec selon les instructions du fabricant du mastic. Appliquer un ruban d’étanchéité sur le mamelon et installer le bec sur ce dernier. Serrer doucement à l’aide d’une clé à sangle propre. Retirer tout excédent de mastic. Kohler Co. Français-5 1006260-2-D...
- Page 14 Faire couler l’eau chaude et l’eau froide dans le bras de douche pour évacuer tout débris. Appliquer du ruban d’étanchéité sur le bras de douche. Installer la rondelle à grille (si requise pour le modèle) et visser la pomme de douche sur le bras. 1006260-2-D Français-6 Kohler Co.
- Page 15 Réinstaller le joint torique, tourner la tige de la valve vers la gauche pour arrêter l’eau. Vérifier de nouveau la température de l’eau. Compléter l’information sur l’étiquette de la valve (si fournie). Kohler Co. Français-7 1006260-2-D...
- Page 16 Attacher l’insertion et l’aligner de manière à ce que le point du rebord avant soit vers le bas en position 6 heures. Glisser le joint torique en position et attacher la poignée. S’assurer que la poignée soit alignée de manière identique à l’insertion. 1006260-2-D Français-8 Kohler Co.
- Page 17 Installer le couvercle et la poignée (cont.) Sécuriser la poignée avec la rondelle et la vis. Pousser le bouchon fermement en place sur la poignée. Kohler Co. Français-9 1006260-2-D...
-
Page 18: Guía De Instalación
Si usted no entiende las instrucciones de instalación o de ajuste de temperatura contenidas en este documento, desde los Estados Unidos llame a nuestro Departamento de Atención al Cliente, al1-800-4- KOHLER. Fuera de los Estados Unidos, comuníquese con su distribuidor. Kohler Co. -
Page 19: Herramientas Y Materiales
Gracias por elegir los productos de Kohler Le agradecemos que haya elegido la calidad de Kohler. Dedique unos minutos para leer este manual antes de comenzar la instalación. En caso de problemas de instalación o de funcionamiento, no dude en contactarnos. - Page 20 Para cerrar la válvula, gire suavemente a la posición cerrada. Cierre el suministro principal de agua. La empresa Kohler se reserva el derecho de modificar el diseño de los productos sin previo aviso, tal como se especifica en la lista de precios.
- Page 21 Instale el surtidor y vuelva a apretar con cuidado el tornillo de fijación. No apriete demasiado el tornillo de fijación. Limpie el exceso de masilla de plomería. Kohler Co. Español-4 1006260-2-D...
- Page 22 Aplique cinta selladora de roscas en el niple e instale el surtidor en el niple. Apriete cuidadosamente con una llave de correa limpia. Limpie el exceso de masilla de plomería. 1006260-2-D Español-5 Kohler Co.
- Page 23 Abra el agua caliente y fría para limpiar partículas y residuos del brazo de ducha. Aplique cinta selladora de roscas al brazo de ducha. Instale la arandela de rejilla (si lo requiere su modelo) y enrosque la cabeza de ducha en el brazo de ducha. Kohler Co. Español-6 1006260-2-D...
- Page 24 Vuelva a instalar el empaque de anillo (O-ring) y gire la espiga a la izquierda para cerrar el suministro de agua. Vuelva a verificar la temperatura del agua. Llene la información en la etiqueta de la válvula (si se ha suministrado). 1006260-2-D Español-7 Kohler Co.
- Page 25 Fije la manija en su lugar con el tornillo y la arandela. Presione con firmeza el tapón sobre la manija. Manija acrílica Instale la pieza de inserción de manera que el punto en el borde frontal esté orientado directamente hacia abajo. Kohler Co. Español-8 1006260-2-D...
- Page 26 Verifique que la manija esté alineada de manera idéntica con la pieza de inserción. Fije la manija en su lugar con el tornillo y la arandela. Presione con firmeza el tapón en posición sobre la manija. 1006260-2-D Español-9 Kohler Co.
- Page 27 1006260-2-...
- Page 28 USA: 1-800-4-KOHLER Canada: 1-800-964-5590 México: 001-877-680-1310 kohler.com ©2005 Kohler Co. 1006260-2-D...
Need help?
Do you have a question about the K-T15601 and is the answer not in the manual?
Questions and answers